这篇文章主要是总结一下我在制作页面的时候用到的一些技术以及经验总结,博主也是第一次写网页,代码也是在不断地“进化”,哪里写的不好大家可以随意指出。
下面就是一些经验总结,如果想看具体效果我这里也不好展示,需要的可以看b站上的视频:
HTML+CSS+JS试做原神5.1前端网页_哔哩哔哩_bilibili,不想看我唠嗑的直接看最后我会放网盘链接。
1.布局(开头)
我们很多人刚学完HTML+CSS就非常手痒想要做一下自己的网页,但刚开始发现不知道该怎么上手,也就是最开始的布局不知道怎么写比较好。这里我主要讲一下两种情况:
记得最开始放一段代码(可以有效删除元素的内外边距,有助于后面布局):
* { margin: 0; padding: 0;}1.普通页面,也就是会出现滚轮条,可以直接上下拉动
这种界面没什么好说的,直接无脑往上放div即可,如果你还是不放心,我们可以指定
overflow-x: hidden;意思就是说我们的横向如果有内容超出了,就不会显示,然后指定一个具体的宽度,一般屏幕的默认大小是1912×954,高度可以不用管。然后就可以div盒子往里面加采用一般的流式布局即可。
2.整块滑动的界面(没有滚动条,上下滑动时一整块界面一起动)
例如这样:
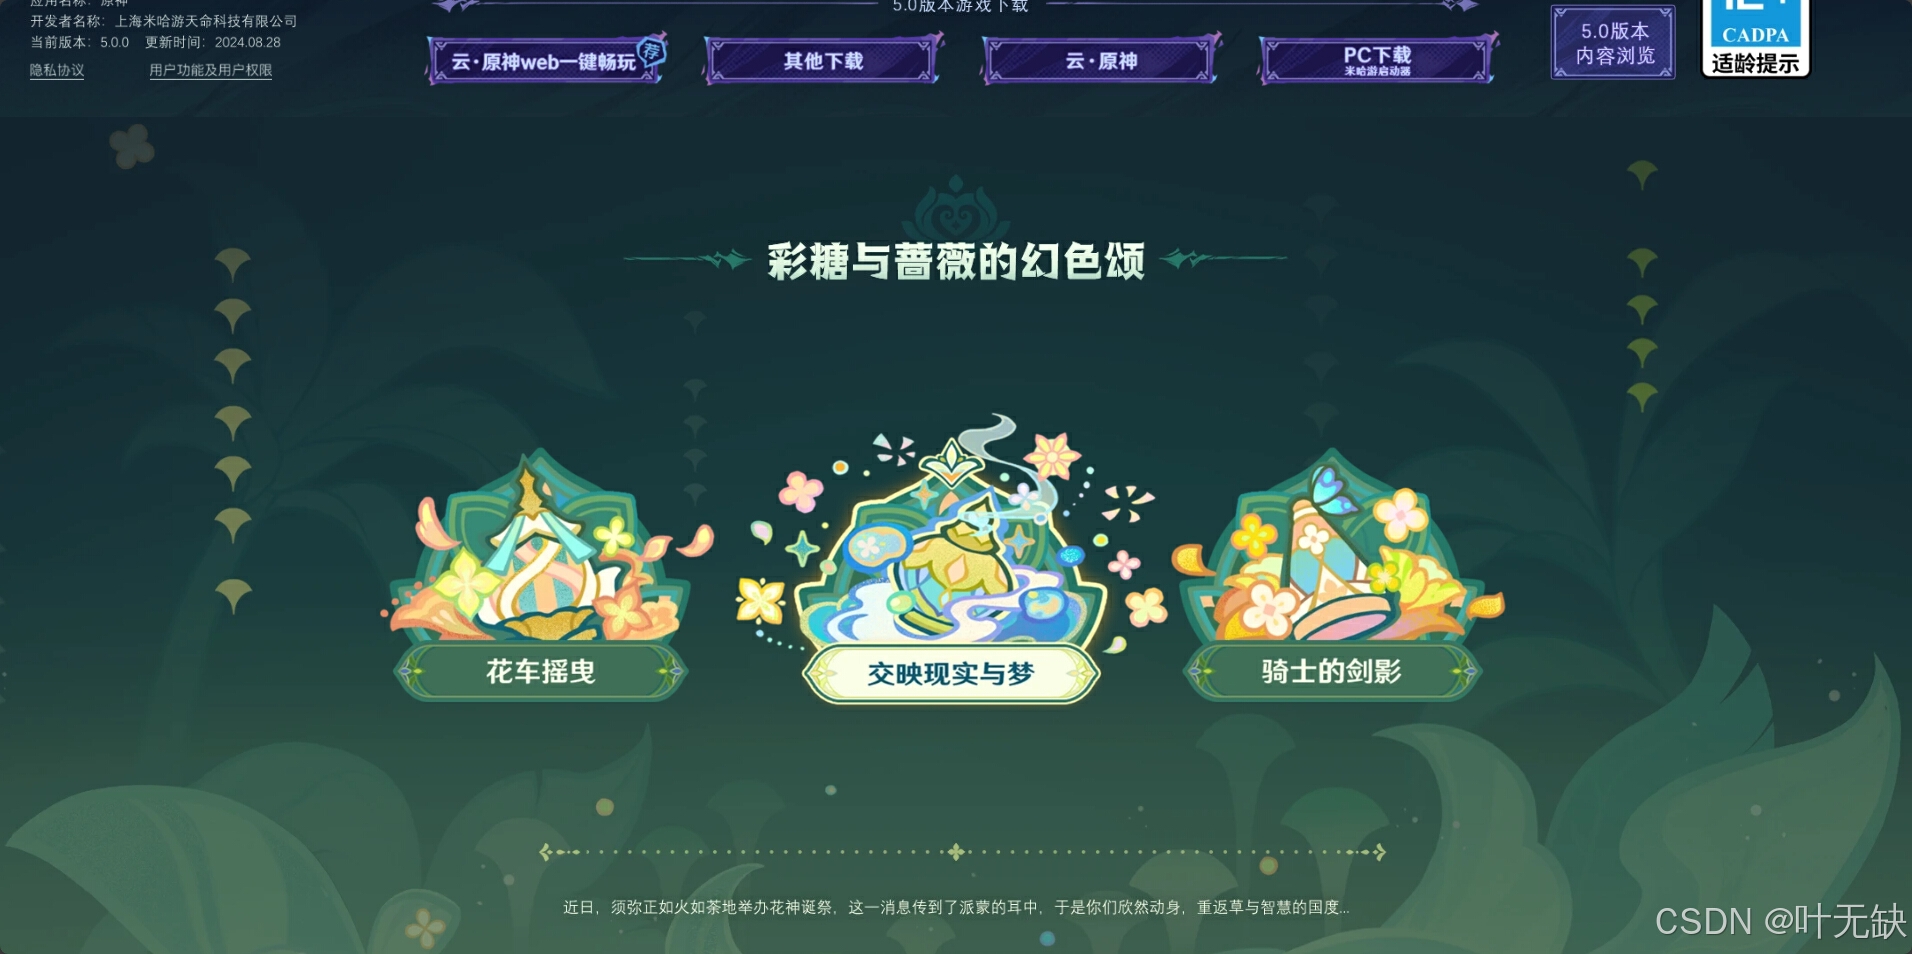
这边我的思路是这样的:我们对整个界面分块处理,用一个大盒子包裹
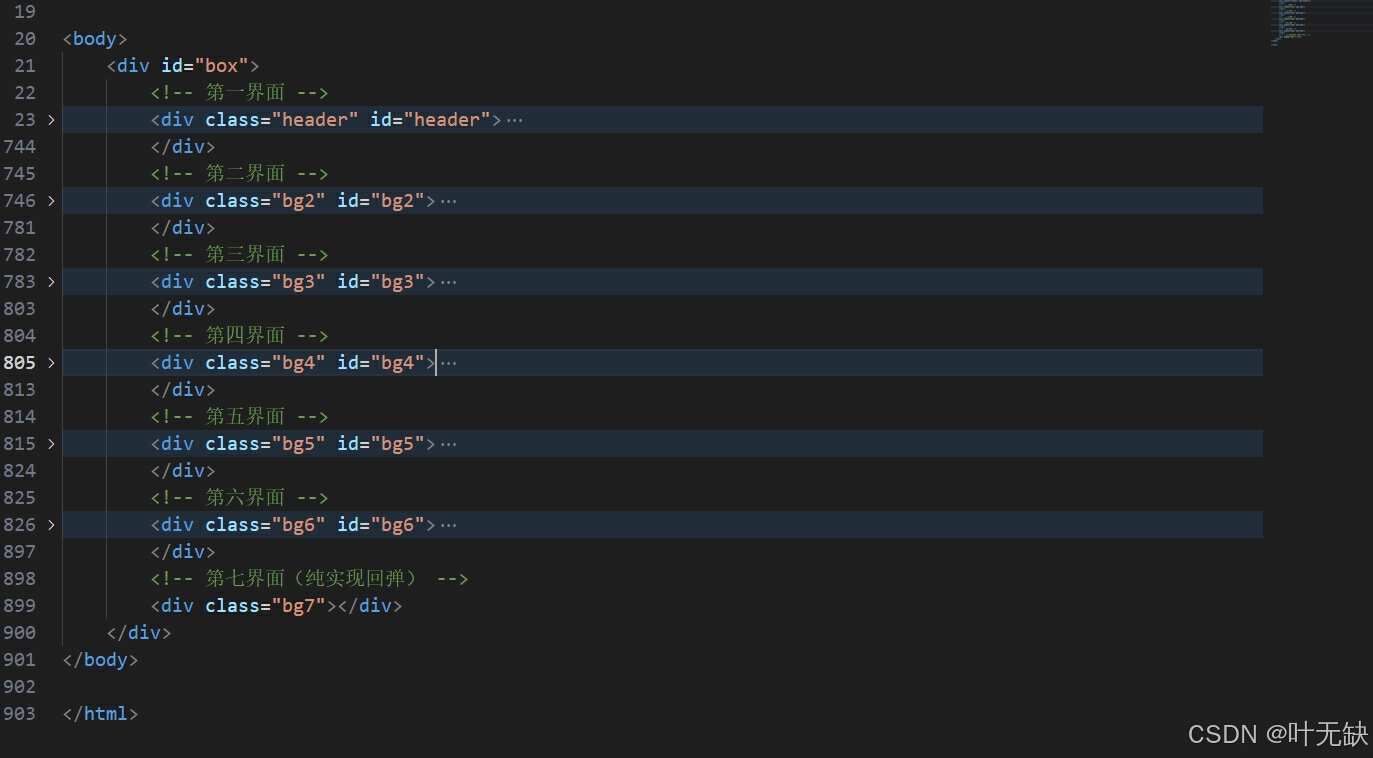
也就是直接设置上图box的高度,里面的盒子全部采用定位的布局方式,然后我们直接指定盒子的宽高,最后只需要使用js在每次滑动界面的时候,修改每个和盒子的top即可(大概就是这样)
elements.forEach(function (elementId) { document.getElementById(elementId).addEventListener('mousewheel', function (e) { e = e || window.event; if (!canScroll) return; canScroll = false; setTimeout(function () { canScroll = true; }, 500); // 设置响应时间间隔,这里是1秒 if (e.wheelDelta > 0) { //当滑轮向上滚动时 console.log("滑轮向上滚动" + num); if (num == 5 || yunxugundong == false) { return; } else { num = num + 1; $(".header").animate({ top: '+=954px', }); $(".bg2").animate({ top: '+=954px', }); $(".bg3").animate({ top: '+=954px', }); $(".bg4").animate({ top: '+=954px', }); $(".bg5").animate({ top: '+=954px', }); $(".bg6").animate({ top: '+=954px', }); } } if (e.wheelDelta < 0) { //当滑轮向下滚动时 console.log("滑轮向下滚动" + num); if (num <= 0 || yunxugundong == false) { if (yunxugundong == false) return; else if (num <= 0) { const element = document.querySelector('.bg6'); element.style.animation = 'bounce 0.5s ease alternate'; setTimeout(function () { element.style.animation = ''; }, 500); } } else { num = num - 1; $(".header").animate({ top: '-=954px', }); $(".bg2").animate({ top: '-=954px', }); $(".bg3").animate({ top: '-=954px', }); $(".bg4").animate({ top: '-=954px', }); $(".bg5").animate({ top: '-=954px', }); $(".bg6").animate({ top: '-=954px', }); } } }); });,如果是横向的也可以这么做,只需要指定宽度变化即可,虽然代码比较史但是胜在好理解,改起来也比较方便。
2.背景以及图片布置
界面中有很多地方都是图片,我的建议是没有特殊的要求全都布置成div容器的backgrou-image,这样子比较方便管理也比较简单,直接加入图片然后指定图片的宽高全部都是100%,也就是铺满整个容器,这样子直接通过div容器就可以修改图片大小,除非是有特殊的需求,再将img容器放到div容器里面,但是这样子就需要设置img容器的布局方式以及具体位置,还是比较麻烦的,比较适合处理相对复杂的情况。
3.一些动画效果的实现原理
1.出现黑色背景里面放一张图片
such as:
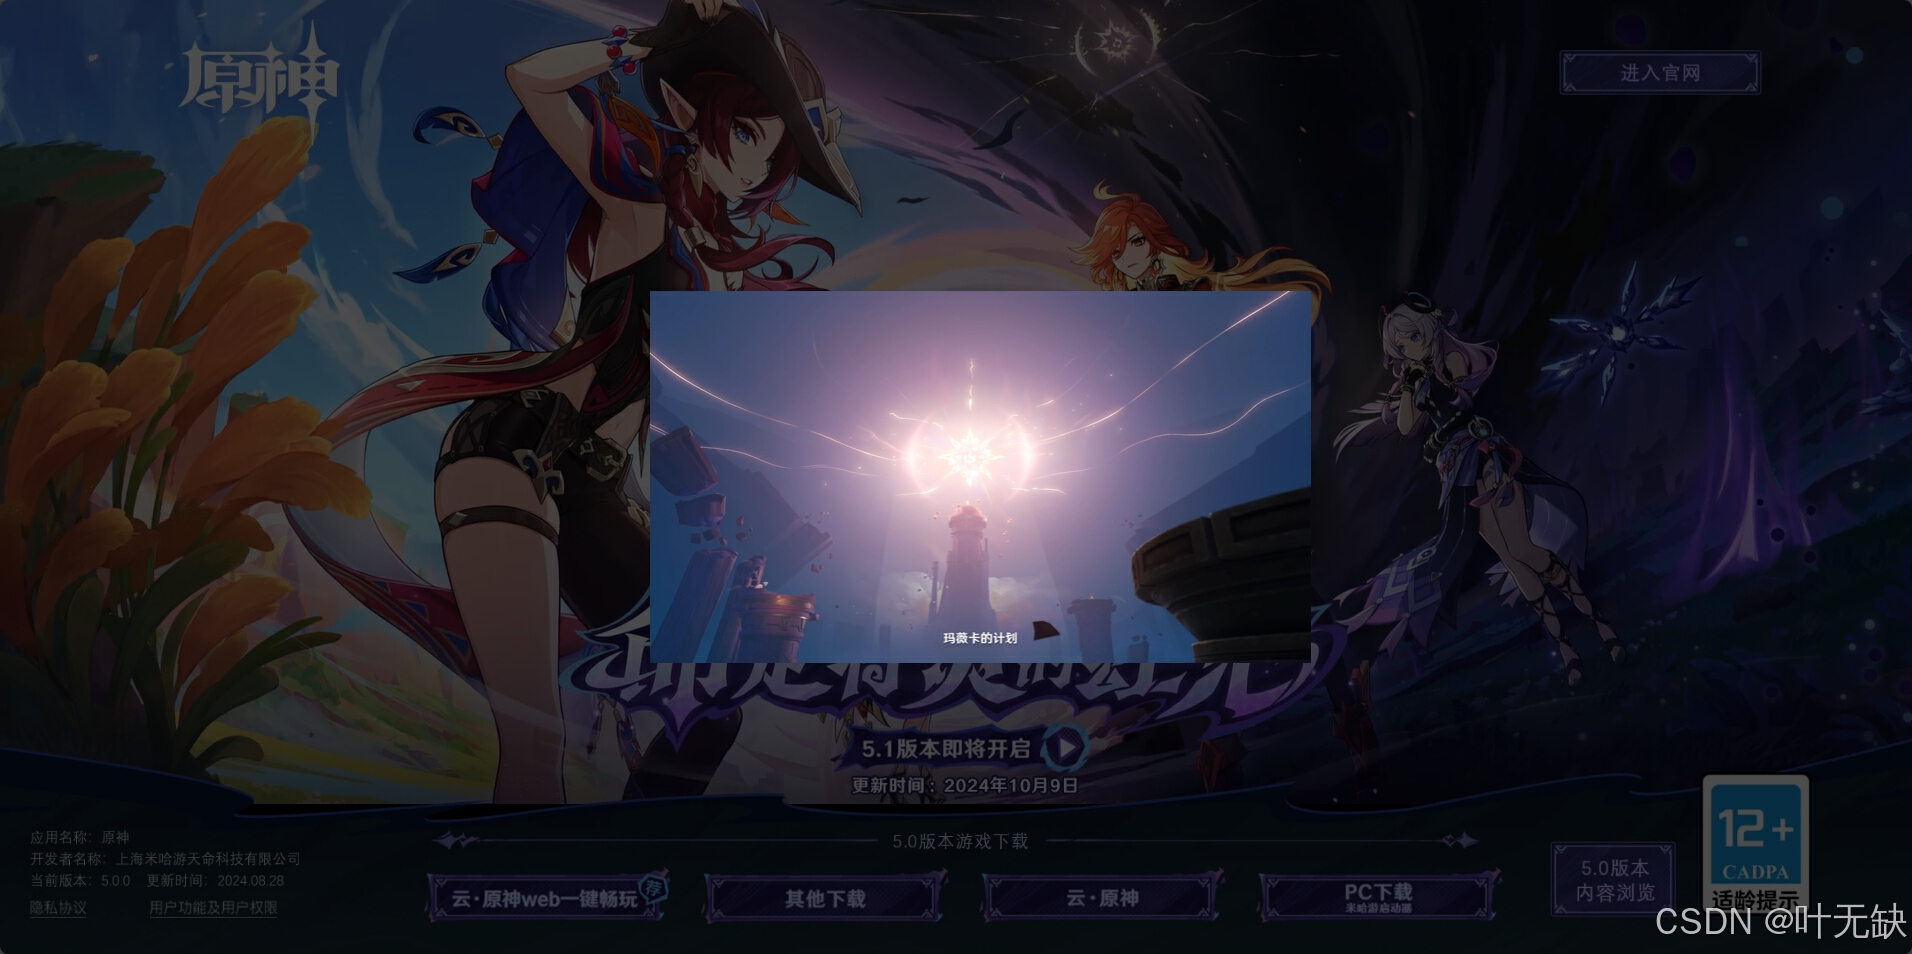
这个实际上非常简单,就是你提前先布置好一个黑色背景并且设置好透明度,然后往里面提前写好东西,再把它隐藏了,当你点击某个按钮的时候就会直接修改display: none;就会直接显现。同时我们可以再js里面设置点击整个黑色背景的时候就消失,这样同时解决了我们打开这个额外的界面的时候点击除了视频以外的部分就会直接关闭的效果。
这里有几点需要注意:
1.我们在打开界面的时候滚轮是不能动的,因此我多设置了一个变量来约束滚轮是否会执行上下滚动(js代码里面有).
2.重新打开视频的时候视频会重新播放,这就需要我们在关闭或者开启的时候将视频重新归0,值得注意的是我们在关闭界面的时候一定要暂停视频,否则视频依旧会继续播放.
3.这个额外的界面我的建议是写在bg2盒子的第一个子级位置,such as:
<div class="bg2" id="bg2"> <div class="bg2-box"> <div class="img1" id="bg2-bg2-box-img1" onmouseover="changeImage2()" onmouseout="resetImage2()"><img src="../image/huache1.webp" id="bg2-img1" style="width: 335.47px;height: 255.77px;"></div> <div class="img2" id="bg2-bg2-box-img2" onmouseover="changeImage3()" onmouseout="resetImage3()"><img src="../image/mengyuxianshi.webp" id="bg2-img2" style="width: 335.47px;height: 255.77px;"></div> <div class="img3" id="bg2-bg2-box-img3" onmouseover="changeImage4()" onmouseout="resetImage4()"><img src="../image/qishi.webp" id="bg2-img3" style="width: 335.47px;height: 255.77px;"></div> </div> <div class="bg2-blackground1"> <div class="huache-video"></div> <div class="huache-video-border"></div> <div class="huache-video-footer"></div> <div class="video1"> <video src="../image/huache-video.mp4" autoplay muted loop style="width: 100%; height: 100%;"></video> </div> </div> <div class="bg2-blackground2"> <div class="mengyuxianshi-video-header"></div> <div class="huache-video-border"></div> <div class="mengyuxianshi-video-footer"></div> <div class="video1"> <video src="../image/mengyuxianshi.mp4" autoplay muted loop style="width: 100%; height: 100%;"></video> </div> </div> <div class="bg2-blackground3"> <div class="qishi-video-header"></div> <div class="huache-video-border"></div> <div class="qishi-video-footer"></div> <div class="video1"> <video src="../image/qishi.mp4" autoplay muted loop style="width: 100%; height: 100%;"></video> </div> </div> </div>跟其它盒子平级,这样做的优点是什么呢,就是我们可以随时修改z-index来保证这个界面一定是在所有子级的上面.
(下面是举例代码)
<div class="bg2-blackground3"> <div class="qishi-video-header"></div> <div class="huache-video-border"></div> <div class="qishi-video-footer"></div> <div class="video1"> <video src="../image/qishi.mp4" autoplay muted loop style="width: 100%; height: 100%;"></video> </div> </div>css代码:
.bg2 .bg2-blackground3 { z-index: 100; position: absolute; top: 0; left: 0px; width: 2208px; height: 954px; background-color: rgba(0, 0, 0, 0.7); display: none;}js代码:
$(".bg2 .img3").click(function () { $(".bg2 .bg2-blackground3 .video1 video").get(0).currentTime = 0; $(".bg2 .bg2-blackground3 .video1 video").trigger("play"); $(".bg2 .bg2-blackground3").show(); yunxugundong = false; }) $(".bg2 .bg2-blackground3").click(function () { $(".bg2 .bg2-blackground3 .video1 video").trigger("pause"); $(".bg2 .bg2-blackground3").hide(); yunxugundong = true; })2.模块化设计
举个例子,当出现这一类情况:
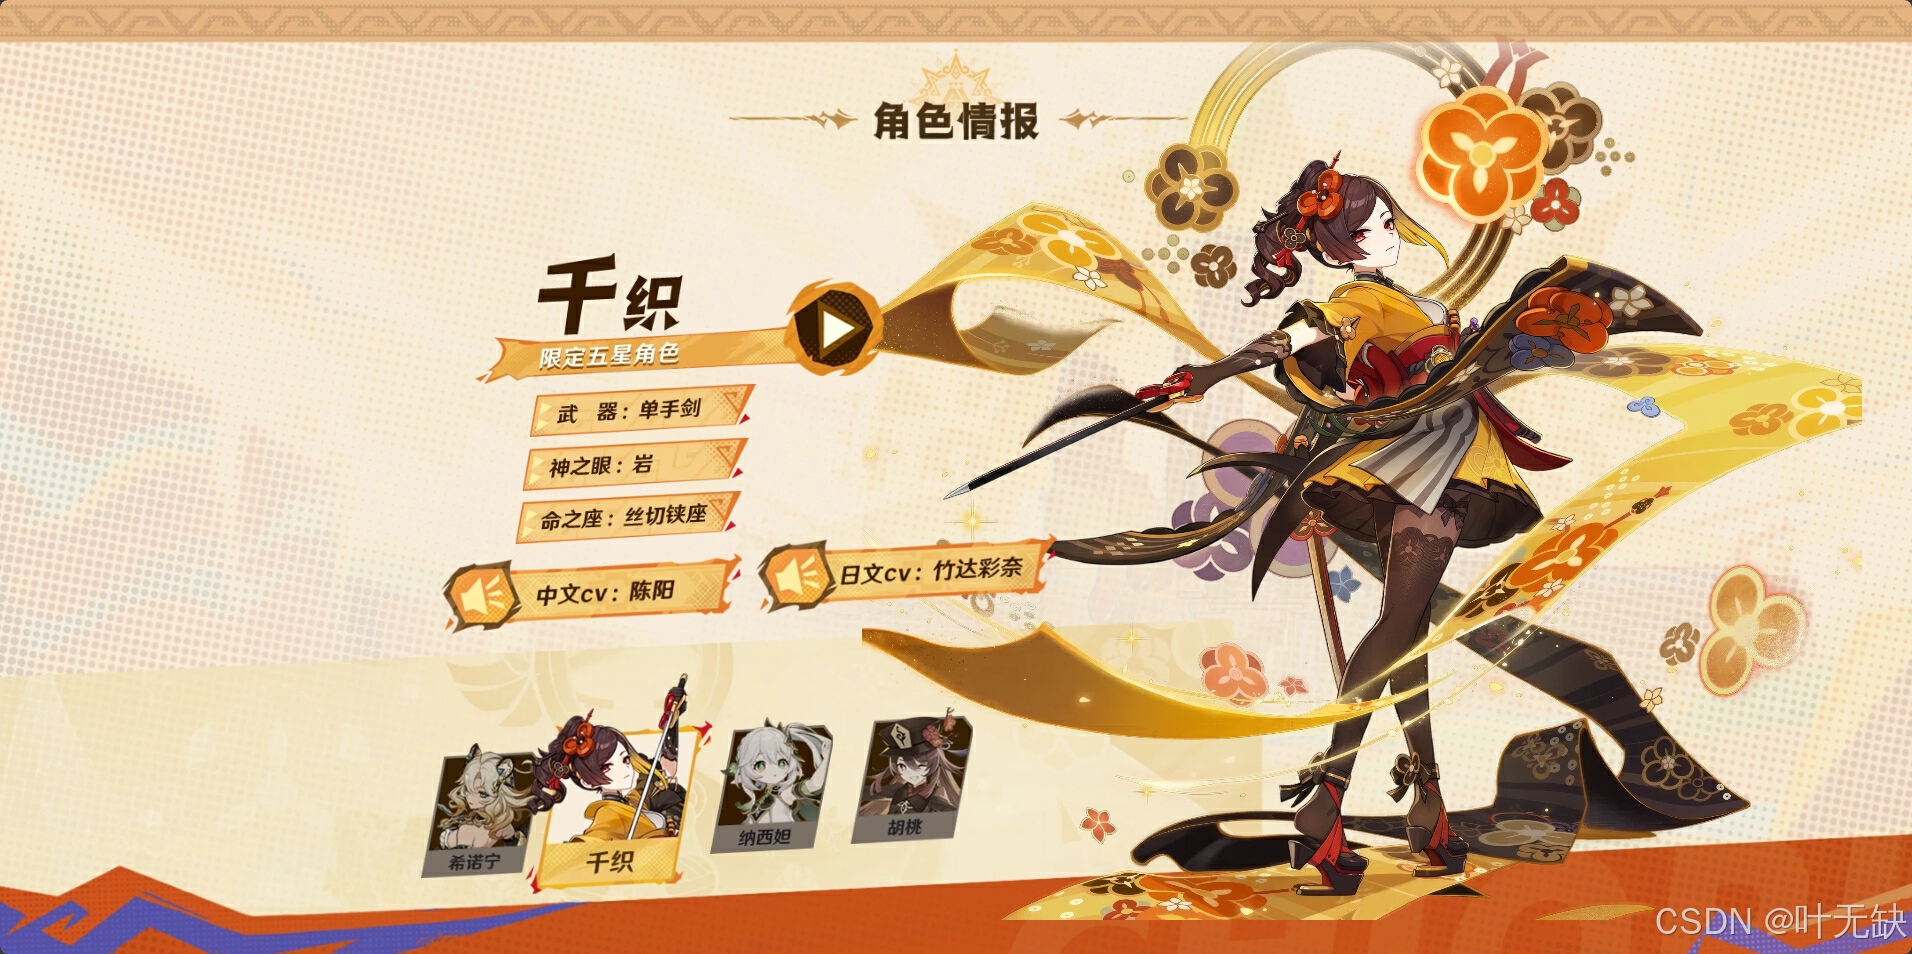
除了下面的按钮以及上面的角色情报这个标题不用变化,是不是其它都需要变化,那么我们就可以把上面的人物简介以及右边的人物立绘设置成一个容器,通过js点击不同按钮的时候直接修改其中的图片即可,可以直接去看我里面的代码实现.
3.轮播图
虽然网上有很多控件都可以实现轮播图,但是我们也必须要学会怎么手写轮播图,这样以便我们可以实现更加复杂的效果:
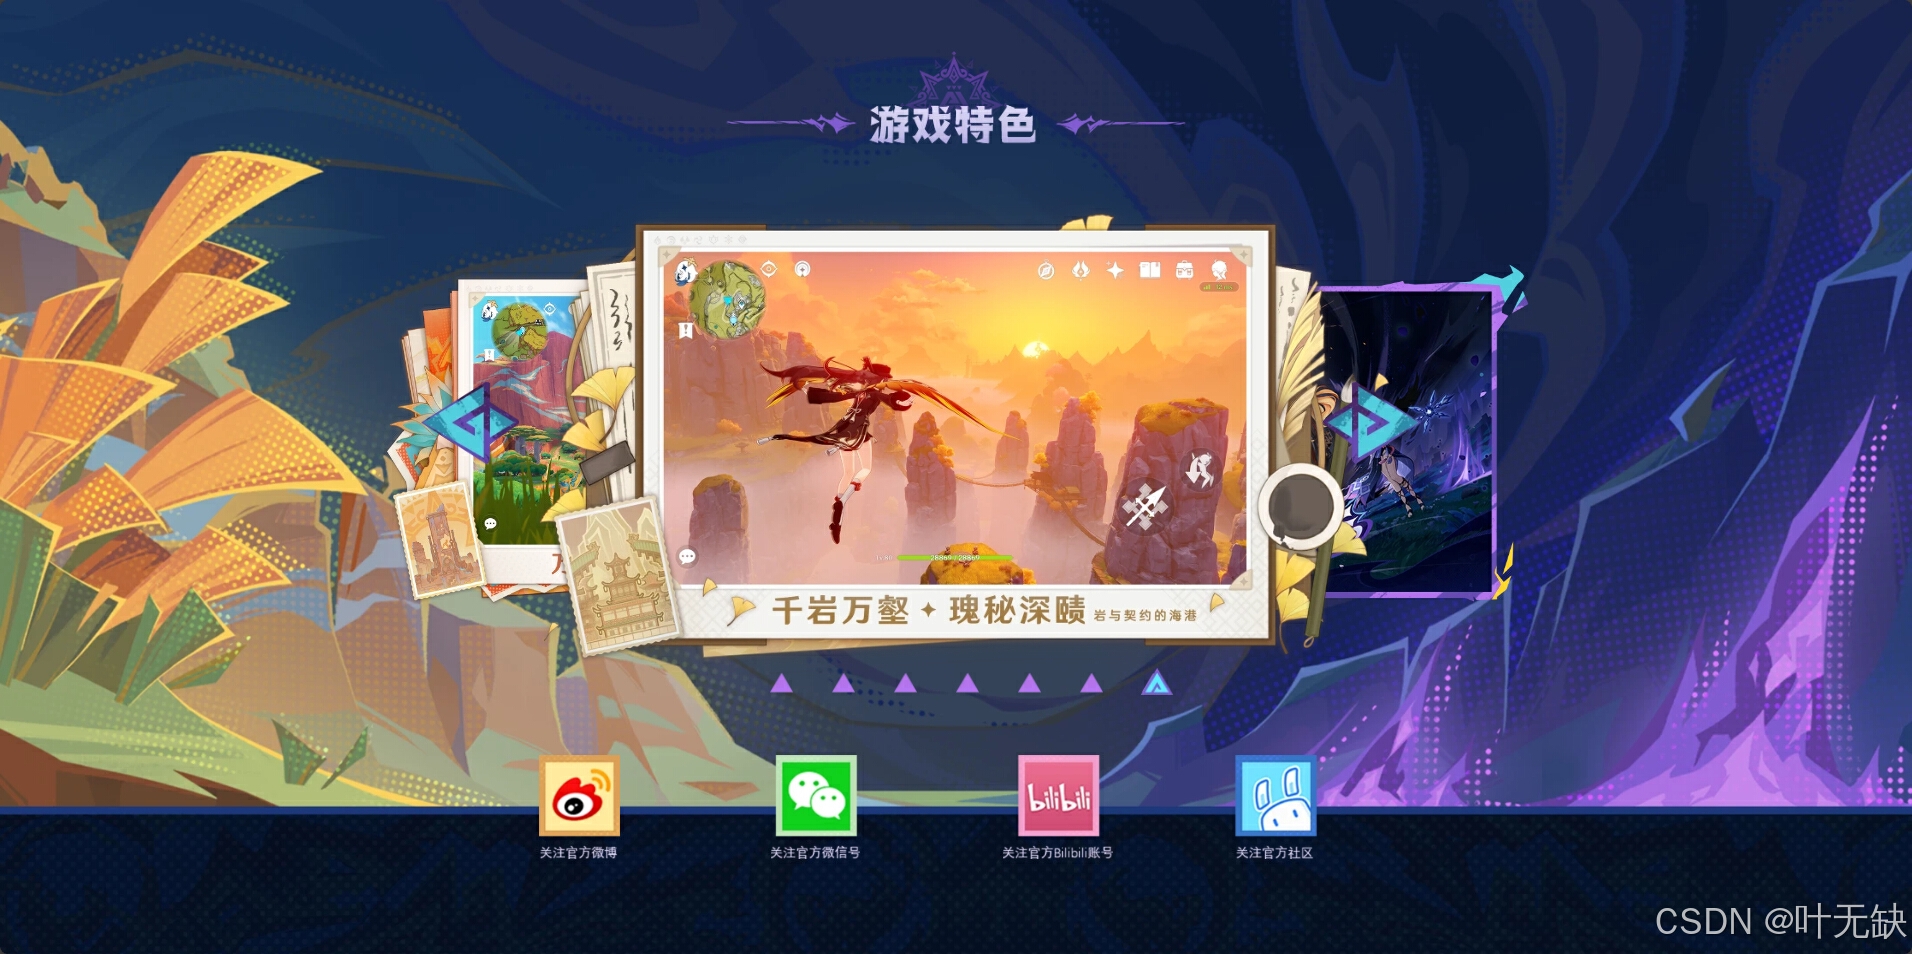
原理也很简单,就是提前设置好所需要的容器,然后设置好图片的样式,最后通过js实现(我靠我这说了跟没说一样,其中的核心是css样式的设计)
献上代码(可以直接作为模板套用):
html
<div class="bg6" id="bg6"> <div class="bg6-header"></div> <div class="bg6-wrap"> <div class=" swipe1"></div> <div class=" swipe2"></div> <div class=" swipe3"></div> <div class=" swipe4"></div> <div class=" swipe5"></div> <div class=" swipe6"></div> <div class=" swipe7"></div> </div> <div class="turn"> <div class="prev"> <img src="../image/bg6-left.png" alt=""> <img src="../image/bg6-left2.png" alt=""> </div> <div class="next"> <img src="../image/bg6-right.png" alt=""> <img src="../image/bg6-right2.png" alt=""> </div> </div> <ul class="swipe-index"> <li> <img src="../image/button2.png" alt=""> <img src="../image/button1.png" alt=""> </li> <li> <img src="../image/button2.png" alt=""> <img src="../image/button1.png" alt=""> </li> <li> <img src="../image/button2.png" alt=""> <img src="../image/button1.png" alt=""> </li> <li> <img src="../image/button2.png" alt=""> <img src="../image/button1.png" alt=""> </li> <li> <img src="../image/button2.png" alt=""> <img src="../image/button1.png" alt=""> </li> <li> <img src="../image/button2.png" alt=""> <img src="../image/button1.png" alt=""> </li> <li> <img src="../image/button2.png" alt=""> <img src="../image/button1.png" alt=""> </li> </ul> <ul class="img-index"> <li> <img src="../image/weibo.png" alt=""> </li> <li> <img src="../image/weixin.png" alt=""> </li> <li> <img src="../image/bili.png" alt=""> </li> <li> <img src="../image/mhy.png" alt=""> </li> </ul> <div class="bg6-blackground"> <div class="weixinjietu"> <img src="../image/weixin-erweima.webp" alt=""> </div> <div class="bg6-text">- 官方微信号 -</div> </div> </div>css:
.bg6-wrap { position: absolute; top: 20%; width: 100%; height: 466px; font-size: 89.7222px;}.bg6-wrap div { position: absolute; left: calc(50% - 4.845em); width: 9.69em; height: 5.46em; transition: all .4s; background-size: 100% 100%;}.bg6-wrap div:nth-child(1) { background-image: url(../image/bg6-1.png);}.bg6-wrap div:nth-child(2) { background-image: url(../image/bg6-2.png);}.bg6-wrap div:nth-child(3) { background-image: url(../image/bg6-3.png);}.bg6-wrap div:nth-child(4) { background-image: url(../image/bg6-4.png);}.bg6-wrap div:nth-child(5) { background-image: url(../image/bg6-5.png);}.bg6-wrap div:nth-child(6) { background-image: url(../image/bg6-6.png);}.bg6-wrap div:nth-child(7) { background-image: url(../image/bg6-7.png);}.swipe1 { z-index: 2; transform: translateX(0) scale(1); opacity: 1;}.swipe2 { z-index: 1; transform: translateX(3em) scale(0.7); opacity: 1;}.swipe3 { z-index: 0; transform: translateX(3em) scale(0.4); opacity: 0;}.swipe4 { z-index: 0; transform: translateX(0) scale(1); opacity: 0;}.swipe5 { z-index: 0; transform: translateX(-3em) scale(0.4); opacity: 0;}.swipe6 { z-index: 0; transform: translateX(-3em) scale(0.4); opacity: 0;}.swipe7 { z-index: 1; transform: translateX(-3em) scale(0.7); opacity: 1;}.turn { z-index: 3; position: absolute; left: 22%; top: 40%; width: 1000px; height: 82.14px; display: flex; justify-content: space-between;}.prev,.next { position: relative; width: 98.05px; height: 82.14px; cursor: pointer;}.prev img,.next img { position: absolute; left: 0; top: 0; width: 100%; height: 100%;}.prev img:nth-child(2),.next img:nth-child(2) { display: none;}.swipe-index { position: absolute; top: 70%; width: 100%; height: 28.7px; display: flex; justify-content: center;}ul { list-style: none;}.swipe-index li { position: relative; width: 32px; height: 28.7px; margin-left: 30px;}.swipe-index li img { position: absolute; top: 0; left: 0; width: auto; height: 28.7px; cursor: pointer;}.swipe-index li img:nth-of-type(2) { display: none;}.swipe-index li:first-child img:nth-of-type(2) { display: block;}.img-index { position: absolute; left: -8%; bottom: 10%; width: 100%; height: 103.6px; display: flex; justify-content: center;}.img-index li { position: relative; width: 32px; height: 28.7px; margin-left: 200px;}.img-index li img { position: absolute; top: 0; left: 0; width: auto; height: 103.6px; cursor: pointer;}js:
let swipeStyle = ["swipe1", "swipe2", "swipe3", "swipe4", "swipe5", "swipe6", "swipe7"]; //游戏特色模块 $(".turn").children().mouseenter(function () { $(this).children().eq(1).show() $(this).children().eq(0).hide() }); $(".turn").children().mouseleave(function () { $(this).children().eq(1).hide() $(this).children().eq(0).show() }); let featureAnimation = setInterval(next, 5000); $(".turn").children().click(function () { clearInterval(featureAnimation); if ($(this).attr("class") == "next") { next(); } else if ($(this).attr("class") == "prev") { prev(); } featureAnimation = setInterval(next, 5000); }); function next() { swipeStyle.unshift(swipeStyle.pop()); feature = swipeStyle.indexOf("swipe1"); for (let i = 0; i < 7; i++) { $(".bg6-wrap div").eq(i).attr("class", swipeStyle[i]); if (i == feature) { $(".swipe-index li").eq(i).children().eq(1).show(); } else { $(".swipe-index li").eq(i).children().eq(1).hide(); } } } function prev() { swipeStyle.push(swipeStyle.shift()); feature = swipeStyle.indexOf("swipe1"); for (let i = 0; i < 7; i++) { $(".bg6-wrap div").eq(i).attr("class", swipeStyle[i]); if (i == feature) { $(".swipe-index li").eq(i).children().eq(1).show(); } else { $(".swipe-index li").eq(i).children().eq(1).hide(); } } } $(".swipe-index li").mouseenter(function () { if (feature == $(this).index()) { return; } else { $(this).children().eq(1).show(); } }); $(".swipe-index li").mouseleave(function () { if (feature == $(this).index()) { return; } else { $(this).children().eq(1).hide(); } }); $(".swipe-index li").click(function () { clearInterval(featureAnimation); if (feature == $(this).index()) { featureAnimation = setInterval(next, 5000); return; } else { let count = feature - $(this).index() console.log(count) if (count > 0) { for (let i = 0; i < count; i++) { prev(); } } else { for (let i = 0; i < -count; i++) { next(); } } } featureAnimation = setInterval(next, 5000); });4.总结
反正就是说,如果想要写好一个界面就必须要上手去写,初学者可以不需要一定要遵守某些原则:例如代码写的多规范,网页布局一定要怎么样等等。网页制作本来就是一个发挥创造和想象的过程,如果说为了遵循条条框框导致自己网页布局千疮百孔那不如不要,网页制作我们又不需要看源码,只需要看到效果即可。
最后给出一点经验总结:
1.图片和装它的容器尽可能一样大。
2.别惦记着你那float了,现在是flex和position的天下,反正布局不了解遇事不决直接定位,直接上绝对定位,top、left、righ、bottom四个位置总有适合你的,大不了就一点一点量过去反正效果到位就行了。
3.多看别人的优秀代码,汲取一下别人的设计思路,前期我们初学者不需要写的有多好,例如像别人的代码就一定会有css样式复用,用到了层叠性和继承性,我们可能分析不出那么多东西。唉那我就不分析了,每写一个div我就设置一个class,这样谁也影响不了谁,注意命名别重复了就行,这边建议采取xxx-xxxx-xxx的命名方式,不容易搞混。
ok最后献上源码:链接:https://pan.baidu.com/s/1zs28JNV-nMSSov4qrfX39g
提取码:1gl4
后续我会继续改进界面,加入官网的界面以及一些后端知识的运用,如果有什么地方不明白或者哪里做的不好误人子弟了大家可以随意指出,尽情地鞭策我吧!!如果觉得还行可以点个关注吗??