写在前面
?个人主页:微枫Micromaple
在企业开发环境中,局域网内的设备通常需要通过正向代理服务器访问互联网。正向代理服务器充当中介,帮助客户端请求外部资源并返回结果。局域网内也就是我们俗称的内网,局域网外的互联网就是外网,在一些特殊场景内,例如:医院。而局域网中的客户端要访问这些资源时,就需要通过代理服务器。这种通过代理服务器访问外部网络资源的方式,就是正向代理。
正向代理不仅用于提升访问速度,还能提高网络安全性、管理访问权限和优化网络流量。在本文中,我们将详细介绍如何在Nginx中配置正向代理,以及整合ngx_http_proxy_connect_module 插件。
本次涉及到的所有文件都已经打包好(包括已经整合ngx_http_proxy_connect_module的Nginx),文末自取,如有需要更高版本,去官网下载编译即可。
文章目录
写在前面一、概述二、正向代理配置2.1、配置2.2、验证 三、使用插件实现HTTP/HTTPS正向代理四、在CentOS 7上整合Proxy插件4.1、环境准备4.2、配置Nginx4.3、编译Nginx4.4、测试1)、配置2)、启动 五、在Windows上编译Nginx并整合Proxy插件5.1、环境准备5.2、配置Nginx5.3、编译Nginx5.4、创建完整Nginx5.5、测试 六、整合Proxy插件并创建Nginx Docker镜像6.1、编写Dockerfile6.2、构建镜像6.3、docker-compose.yml配置6.4、测试6.5、镜像导入导出
一、概述

正向代理是一种网络服务,它充当客户端与目标服务器之间的中介。其主要功能是代表客户端向目标服务器发出请求并将响应结果返回给客户端。正向代理服务器位于客户端和目标服务器之间,用于处理客户端的请求并代为访问目标服务器。
在正向代理中,客户端必须明确指定要使用的代理服务器,并且代理服务器能够访问目标服务器。这样,所有请求都会先发送到代理服务器,再由代理服务器进行处理和转发。
二、正向代理配置
2.1、配置
在nginx.conf配置文件中,使用 proxy_pass 指令将请求转发到代理服务器。
server { listen 90; resolver 114.114.114.114; location / { proxy_pass $scheme://$host$request_uri; proxy_set_header Host $host; proxy_set_header X-Real-IP $remote_addr; proxy_set_header X-Forwarded-For $proxy_add_x_forwarded_for; proxy_set_header X-Forwarded-Proto $scheme; }}listen: 指定了监听的端口,可以根据你的实际情况进行修改。resolver: 指定DNS服务器IP地址。location / { ... } :定义了请求的匹配规则,这里表示匹配所有请求。proxy_pass: 将请求转发到具体的服务。proxy_set_header :用于设置转发请求时的头部信息,以便将客户端的真实 IP 和协议信息传递给代理服务器。 2.2、验证
curl http://www.baidu.com -v -x 127.0.0.1:90测试结果
$ curl http://www.baidu.com -v -x 127.0.0.1:90* Rebuilt URL to: http://www.baidu.com/* Trying 127.0.0.1...* TCP_NODELAY set* Connected to 127.0.0.1 (127.0.0.1) port 90 (#0)> GET http://www.baidu.com/ HTTP/1.1> Host: www.baidu.com> User-Agent: curl/7.55.1> Accept: */*> Proxy-Connection: Keep-Alive>< HTTP/1.1 200 OK< Server: nginx/1.20.1< Date: Sat, 27 Jan 2024 01:47:22 GMT< Content-TypeControl: private, no-cache, no-store, proxy-revalidate, no-transform< Etag: "588604dc-94d"< Last-Modified: Mon, 23 Jan 2017 13:27:56 GMT< Pragma: no-cache< Set-Cookie: BDORZ=27315; max-age=86400; domain=.baidu.com; path=/注意:这种代理方式只能使用http去访问目标网站
三、使用插件实现HTTP/HTTPS正向代理
使用到的插件是ngx_http_proxy_connect_module ,它允许 Nginx 作为代理服务器处理 CONNECT 方法。CONNECT 方法通常用于建立到远程服务器的端到端的加密连接,通常在代理服务器后面的客户端需要通过代理服务器与目标服务器建立安全连接,比如 HTTPS 连接。
GitHub地址:
https://github.com/chobits/ngx_http_proxy_connect_module.git使用这个插件,意味着需要重新编译nginx,在编译的过程中,将插件添加进去。
本次编译以目前最新稳定版1.24.0为例。
四、在CentOS 7上整合Proxy插件
4.1、环境准备
1)、创建编译目录
mkdir -p /usr/local/apps/nginx2)、准备所需的构建工具和依赖项
openssl-1.1.1mpcre2-10.39zlib-1.2.11将文件上传至/usr/local/apps/nginx/目录下并解压
cd /usr/local/apps/nginxtar -zxvf openssl-1.1.1m.tar.gztar -zxvf pcre2-10.39.tar.gztar -zxvf zlib-1.2.11.tar.gz3)、上传 Nginx 源代码
下载地址:
https://nginx.org/download/nginx-1.24.0.tar.gz上传至/usr/local/apps/nginx目录下,解压
cd /usr/local/apps/nginxtar -zxvf nginx-1.24.0.tar.gz4)、下载ngx_http_proxy_connect_module源码
上传至/usr/local/apps/nginx目录下,解压
unzip ngx_http_proxy_connect_module-master.zipmv ngx_http_proxy_connect_module-master ngx_http_proxy_connect_module4.2、配置Nginx
1)、设置补丁
选择正确的补丁进行构建
| nginx 版本 | 启用重写阶段 | patch |
|---|---|---|
| 1.4.x ~ 1.12.x | NO | proxy_connect.patch |
| 1.4.x ~ 1.12.x | YES | proxy_connect_rewrite.patch |
| 1.13.x ~ 1.14.x | NO | proxy_connect_1014.patch |
| 1.13.x ~ 1.14.x | YES | proxy_connect_rewrite_1014.patch |
| 1.15.2 | YES | proxy_connect_rewrite_1015.patch |
| 1.15.4 ~ 1.16.x | YES | proxy_connect_rewrite_101504.patch |
| 1.17.x ~ 1.18.x | YES | proxy_connect_rewrite_1018.patch |
| 1.19.x ~ 1.21.0 | YES | proxy_connect_rewrite_1018.patch |
| 1.21.1 ~ 1.22.x | YES | proxy_connect_rewrite_102101.patch |
| 1.23.x ~ 1.24.0 | YES | proxy_connect_rewrite_102101.patch |
| 1.25.0 ~ 1.25.x | YES | proxy_connect_rewrite_102101.patch |
本次版本为1.24.0,则使用如下命令:
cd /usr/local/apps/nginx/nginx-1.24.0patch -p1 < /usr/local/apps/nginx/ngx_http_proxy_connect_module/patch/proxy_connect_rewrite_102101.patch2)、配置编译参数
cd /usr/local/apps/nginx/nginx-1.24.0./configure \ --prefix=/usr/local/nginx \ --with-openssl=../openssl-1.1.1m \ --with-pcre=../pcre2-10.39 \ --with-pcre-jit \ --with-zlib=../zlib-1.2.11 \ --with-http_ssl_module \ --with-http_v2_module \ --with-http_gzip_static_module \ --with-http_flv_module \ --with-http_stub_status_module \ --with-stream \ --add-module=/usr/local/apps/nginx/ngx_http_proxy_connect_module--prefix:指定需要安装的目录。
4.3、编译Nginx
编译并安装 Nginx
make && make install4.4、测试
1)、配置
编辑配置文件:
vi /usr/local/nginx/conf/nginx.conf增加如下配置:
server { listen 91; resolver 114.114.114.114 ipv6=off; proxy_connect; proxy_connect_allow 443 563; proxy_connect_connect_timeout 10s; proxy_connect_read_timeout 10s; proxy_connect_send_timeout 10s; location / { proxy_pass $scheme://$host$request_uri; proxy_set_header Host $host:$server_port; }}2)、启动
cd /usr/local/nginx/sbin./nginx测试:
curl https://www.baidu.com -v -x 127.0.0.1:91五、在Windows上编译Nginx并整合Proxy插件
在Windows中编译nginx是比较麻烦的,需要安装一系列的环境。
nginx官网也有具体的文档说明:
http://nginx.org/en/docs/howto_build_on_win32.html5.1、环境准备
1)、所需安装包及环境
Microsoft Visual Studio 2017MSYS2PerlPCREzlibOpenSSL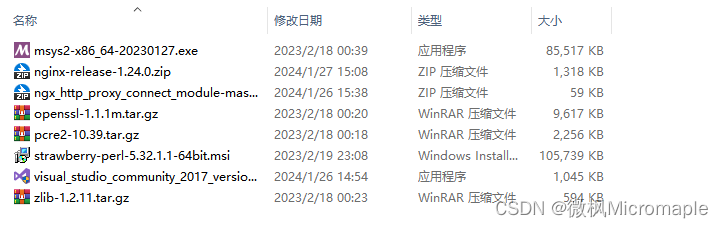
2)、Nginx源码下载
下载地址:
http://hg.nginx.org/nginx在右侧tags中找到对应的版本,例如:1.24.0
点开后,点击右侧zip即可下载。附上完整下载地址:
http://hg.nginx.org/nginx/archive/release-1.24.0.zip3)、Microsoft Visual Studio 2017 安装
提供安装包visual_studio_community_2017_version_15.3.exe,自行安装
4)、MSYS2 安装
提供安装包msys2-x86_64-20230127.exe,自行安装
官网:
https://www.msys2.org/5)、Perl 安装
提供安装包strawberry-perl-5.32.1.1-64bit.msi,自行安装
5.2、配置Nginx
需使用MSYS2进行配置
将文件解压至E:\nginx\nginx-release-1.24.0
将下列四个文件拷贝至E:\nginx\nginx-release-1.24.0目录下
openssl-1.1.1m.tar.gzpcre2-10.39.tar.gzzlib-1.2.11.tar.gzngx_http_proxy_connect_module-master.zip 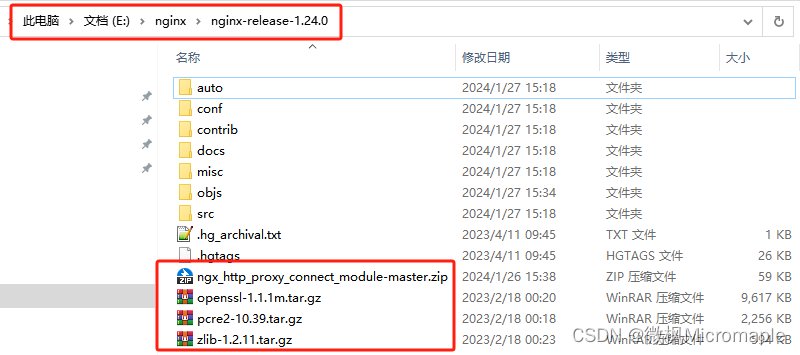
使用MSYS2进入此文件夹
cd /e/nginx/nginx-release-1.24.0/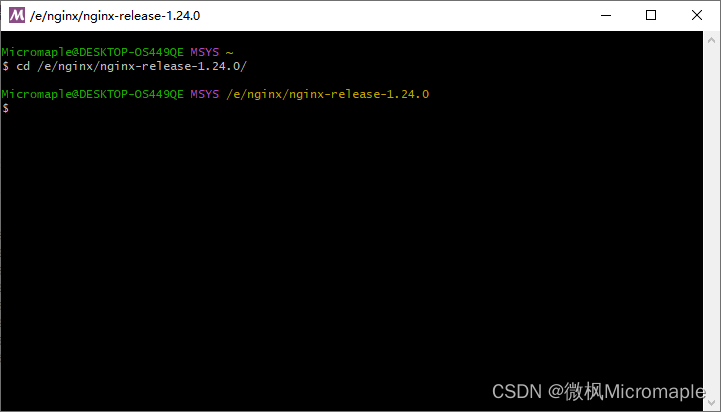
在MSYS2窗口执行如下命令
mkdir -p objs/libcd objs/libtar -zxf ../../pcre2-10.39.tar.gztar -zxf ../../zlib-1.2.11.tar.gztar -zxf ../../openssl-1.1.1m.tar.gz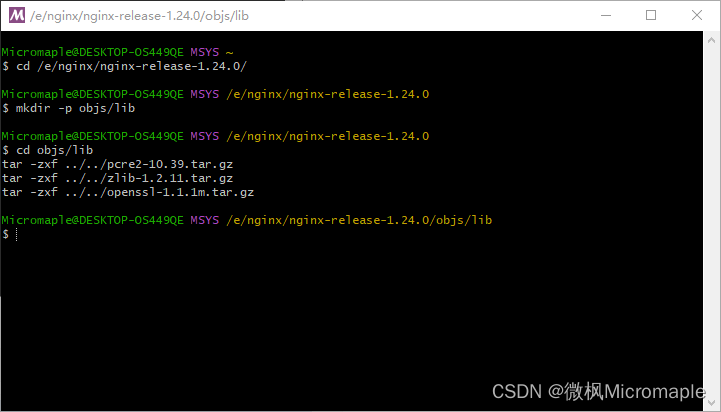
解压ngx_http_proxy_connect_module-master.zip
unzip ../../ngx_http_proxy_connect_module-master.zipmv ngx_http_proxy_connect_module-master ngx_http_proxy_connect_module如果提示-bash: unzip: command not found,则使用pacman -S unzip安装unzip命令
执行如下配置命令,开始配置
回到nginx-release-1.24.0目录
cd /e/nginx/nginx-release-1.24.0/设置补丁
patch -p1 < objs/lib/ngx_http_proxy_connect_module/patch/proxy_connect_rewrite_102101.patch如果提示-bash: patch: command not found,则使用pacman -S patch安装patch命令
开始配置
auto/configure \ --with-cc=cl \ --with-debug \ --prefix= \ --conf-path=conf/nginx.conf \ --pid-path=logs/nginx.pid \ --http-log-path=logs/access.log \ --error-log-path=logs/error.log \ --sbin-path=nginx.exe \ --http-client-body-temp-path=temp/client_body_temp \ --http-proxy-temp-path=temp/proxy_temp \ --http-fastcgi-temp-path=temp/fastcgi_temp \ --http-scgi-temp-path=temp/scgi_temp \ --http-uwsgi-temp-path=temp/uwsgi_temp \ --with-cc-opt=-DFD_SETSIZE=1024 \ --with-pcre=objs/lib/pcre2-10.39 \ --with-zlib=objs/lib/zlib-1.2.11 \ --with-openssl=objs/lib/openssl-1.1.1m \ --with-openssl-opt=no-asm \ --with-http_ssl_module \ --with-stream \ --add-module=objs/lib/ngx_http_proxy_connect_module配置过程中,可能会提示错误auto/cc/msvs: line 117: [: : integer expression expected]
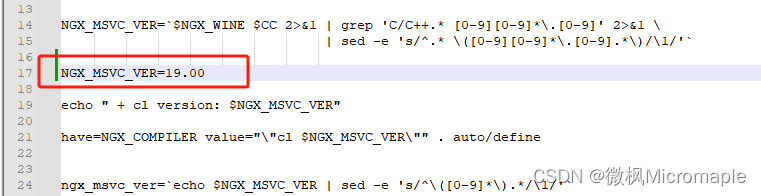
这个是MSVC版本识别错误导致,直接打开auto/cc/msvc文件
注释说明和本地实际安装的MSVC编译器情况,设置版本号,如下(添加NGX_MSVC_VER=19.00)
5.3、编译Nginx
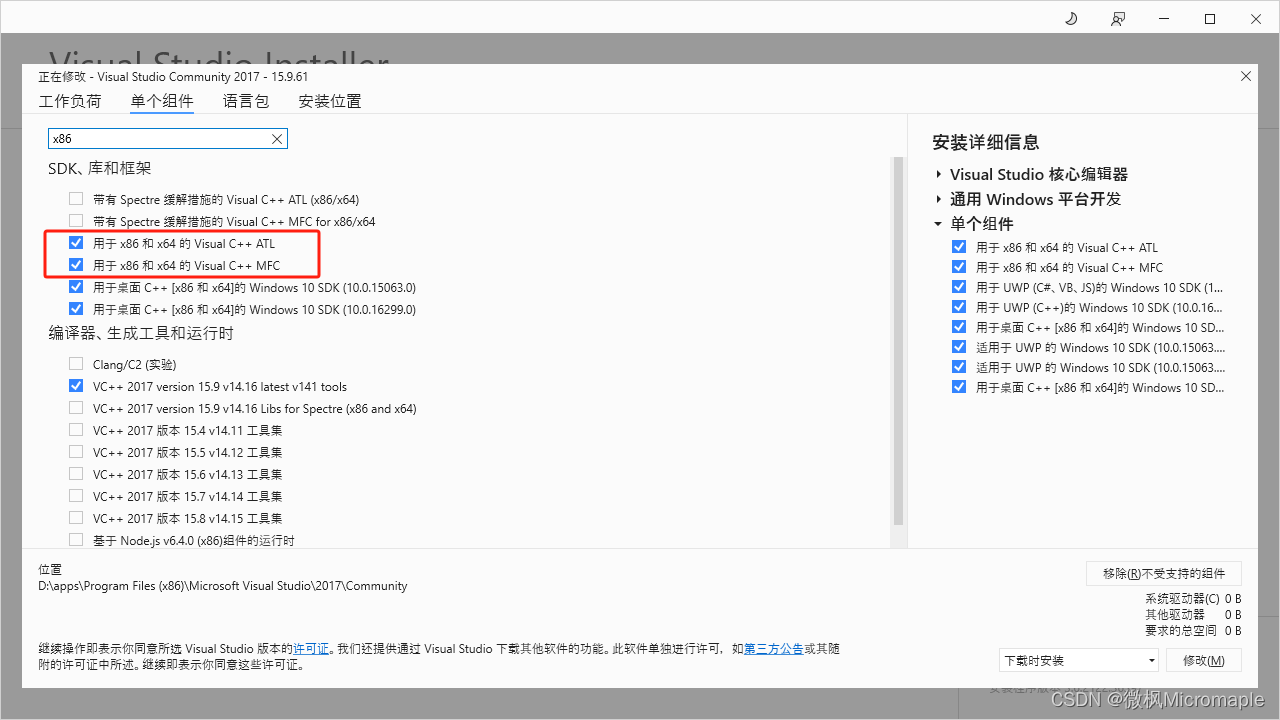
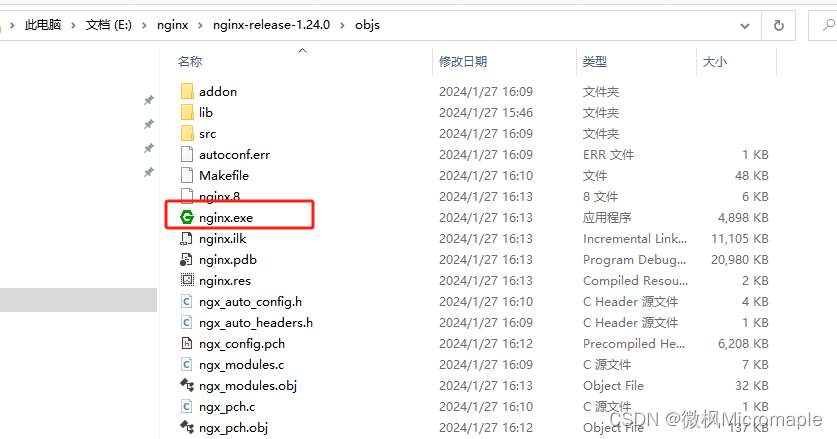
使用Microsoft Visual Studio的编译工具中的适用于 VS 2017 的 x86_x64 兼容工具命令提示工具进行编译。编译成功后,会在objs文件夹生成nginx.exe文件。

如果没有,则安装下列组件即可。
进入nginx-release-1.24.0目录
cd E:\nginx\nginx-release-1.24.0执行命令
nmake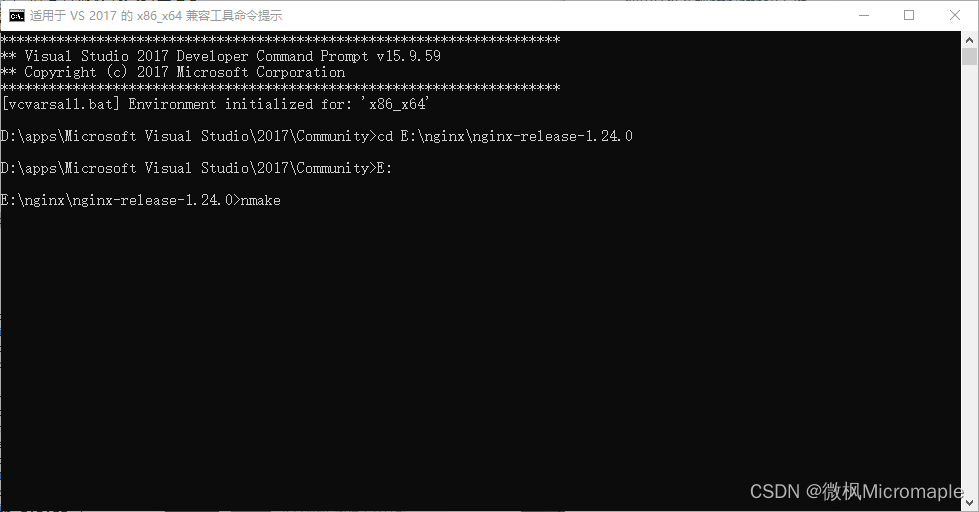
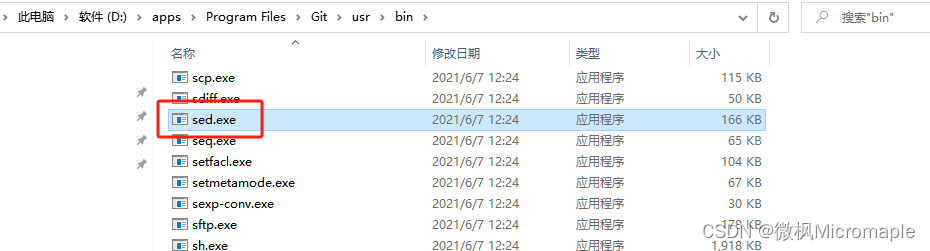
提示sed错误NMAKE : fatal error U1077: “sed”: 返回代码“0x1”,这个错误可以忽略。
可以添加Git下的 \usr\bin 路径添加到系统环境变量的Path中解决。
可以看到在objs文件夹下生成了nginx.exe文件
5.4、创建完整Nginx
创建完整Nginx,在MSYS2窗口中执行如下命令
# 进入nginx目录cd /e/nginx# 创建nginx-1.24.0-proxy目录mkdir nginx-1.24.0-proxycd nginx-1.24.0-proxy# 拷贝cp -r ../nginx-release-1.24.0/conf .cp -r ../nginx-release-1.24.0/contrib .cp -r ../nginx-release-1.24.0/docs .cp ../nginx-release-1.24.0/objs/nginx.exe .# 创建logs、temp目录mkdir logsmkdir temp5.5、测试
配置nginx.conf,增加如下配置:
server { listen 91; resolver 114.114.114.114 ipv6=off; proxy_connect; proxy_connect_allow 443 563; proxy_connect_connect_timeout 10s; proxy_connect_read_timeout 10s; proxy_connect_send_timeout 10s; location / { proxy_pass $scheme://$host$request_uri; proxy_set_header Host $host:$server_port; }}启动nginx
start nginx测试:
curl https://www.baidu.com -v -x 127.0.0.1:91六、整合Proxy插件并创建Nginx Docker镜像
6.1、编写Dockerfile
FROM alpine:3.17.4RUN mkdir /data && cd /dataWORKDIR /dataRUN wget http://nginx.org/download/nginx-1.24.0.tar.gzRUN apk add git && git clone https://github.com/chobits/ngx_http_proxy_connect_module.git nginx_proxyRUN tar -zxvf nginx-1.24.0.tar.gz && rm -f nginx-1.24.0.tar.gzWORKDIR /data/nginx-1.24.0RUN apk add patch && patch -p1 < /data/nginx_proxy/patch/proxy_connect_rewrite_102101.patch \ && apk add gcc g++ linux-headers pcre-dev openssl-dev zlib-dev make \ && mkdir -p /var/cache/nginx && ./configure --prefix=/etc/nginx --sbin-path=/usr/sbin/nginx --modules-path=/usr/lib/nginx/modules \ --conf-path=/etc/nginx/nginx.conf --error-log-path=/var/log/nginx/error.log \ --http-log-path=/var/log/nginx/access.log --pid-path=/var/run/nginx.pid \ --lock-path=/var/run/nginx.lock --http-client-body-temp-path=/var/cache/nginx/client_temp \ --http-proxy-temp-path=/var/cache/nginx/proxy_temp --http-fastcgi-temp-path=/var/cache/nginx/fastcgi_temp \ --http-uwsgi-temp-path=/var/cache/nginx/uwsgi_temp --http-scgi-temp-path=/var/cache/nginx/scgi_temp \ --with-compat --with-file-aio --with-threads --with-http_addition_module \ --with-http_auth_request_module --with-http_dav_module --with-http_flv_module --with-http_gunzip_module \ --with-http_gzip_static_module --with-http_mp4_module --with-http_random_index_module --with-http_realip_module \ --with-http_secure_link_module --with-http_slice_module --with-http_ssl_module --with-http_stub_status_module \ --with-http_sub_module --with-http_v2_module --with-mail --with-mail_ssl_module --with-stream \ --with-stream_realip_module --with-stream_ssl_module --with-stream_ssl_preread_module \ --with-cc-opt='-g -O2 -fstack-protector-strong -Wformat -Werror=format-security -Wp,-D_FORTIFY_SOURCE=2 -fPIC' \ --with-ld-opt='-Wl,-z,relro -Wl,-z,now -Wl,--as-needed -pie' --add-module=/data/nginx_proxy \ && make -j2 && make install && rm -rf /data/nginx_proxyCMD ["nginx", "-g", "daemon off;"]6.2、构建镜像
执行命令
docker build -t nginx:1.24.0-proxy .6.3、docker-compose.yml配置
version: '3.1'services: # nginx nginx: image: nginx:1.24.0-proxy container_name: nginx restart: always volumes: - ./conf/nginx.conf:/etc/nginx/nginx.conf - ./html:/usr/share/nginx/html - ./logs:/var/log/nginx environment: TZ: Asia/Shanghai network_mode: host6.4、测试
vi conf/nginx.confnginx.conf配置如下:
#user nobody;worker_processes 1;#error_log logs/error.log;#error_log logs/error.log notice;#error_log logs/error.log info;#pid logs/nginx.pid;events {worker_connections 1024;}http { include mime.types; default_type application/octet-stream; #log_format main '$remote_addr - $remote_user [$time_local] "$request" ' # '$status $body_bytes_sent "$http_referer" ' # '"$http_user_agent" "$http_x_forwarded_for"'; #access_log logs/access.log main; sendfile on; #tcp_nopush on; #keepalive_timeout 0; keepalive_timeout 65; #gzip on; server { listen 80; server_name localhost; location / { root html; index index.html index.htm; } error_page 500 502 503 504 /50x.html; location = /50x.html { root html; } } server { listen 91; resolver 114.114.114.114 ipv6=off; proxy_connect; proxy_connect_allow 443 563; proxy_connect_connect_timeout 10s; proxy_connect_read_timeout 10s; proxy_connect_send_timeout 10s; location / { proxy_pass $scheme://$host$request_uri; proxy_set_header Host $host:$server_port; } }}启动
docker-compose up -d测试:
curl https://www.baidu.com -v -x 127.0.0.1:916.5、镜像导入导出
导出
docker save -o nginx-1.24.0-proxy.tar nginx:1.24.0-proxy导入
docker load < nginx-1.24.0-proxy.tar