一.介绍背景
公司项目开发需求:将海康摄像头的rtsp流在web端及微信小程序端进行播放。之前我写过一篇关于web端使用webtrc+videojs播放rtsp流的文章,确实能够解决web端播放rtsp流的需求,但是这次多加了一个微信小程序....所以要考虑小程序的播放问题。本着探索实践的精神在网上找了一些资料,问了问GPT,最终选择自己搭建一个流媒体服务器来拉流推流。
二.准备工作
这里需要了解一下微信小程序直播播放的方案(参考微信开发文档:live-player | 微信开放文档):

用到的是微信小程序的live-player组件,值得注意的是:
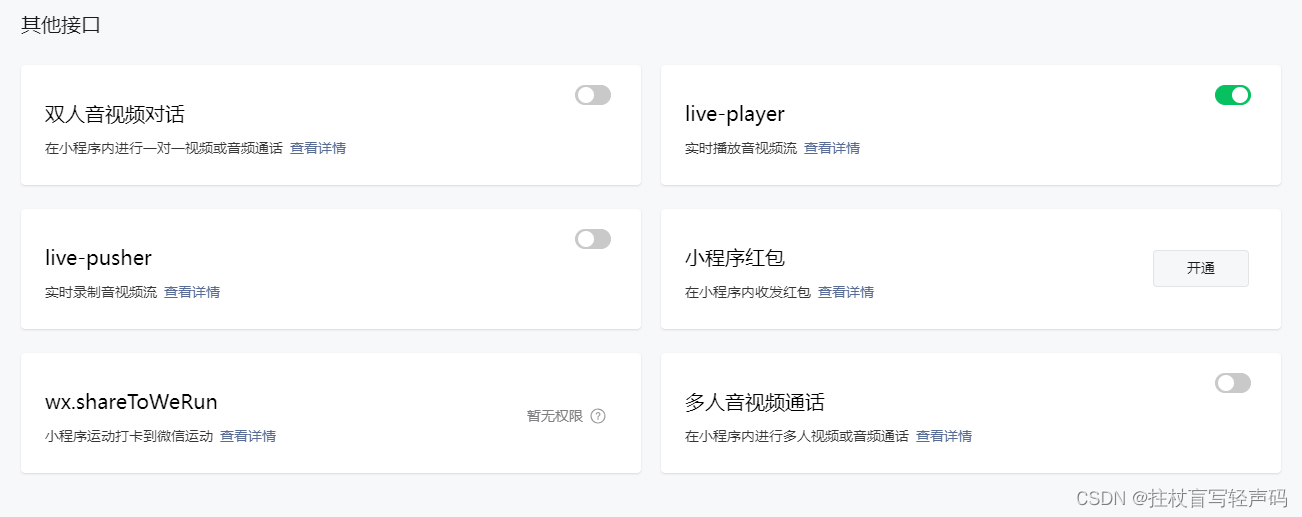
①使用这个组件需要自助开通,在微信公众平台-开发-接口设置这里(开放的类目下图所示)


②live-player组件目前只支持:flv和rtmp格式的视频(这就是为啥我要把rtsp流转成flv的原因...rtmp流虽然小程序端能够播放,但是据我所知web端chrome浏览器自从取消了flash后rtmp播放不了或者说播放起来有点麻烦...不然直接转成rtmp直接兼容两边还能省很多事呢)。
③需要准备Linux服务器一台(ps:nginx-rtmp有win版的而且还是编译好的,github上找一找就能找到,但是项目的服务器是国产的麒麟,所以我这里使用麒麟kylinserver来部署)。
④需要对Linux,ffmpeg,nginx有基础的了解,如果不是很了解也没关系,可以直接请chatgpt出山或者百度查查资料,但是我认为作为程序员需要对新技术新事物有探究的精神。
三.安装相关软件
①首先使用服务器远程连接工具(这里给大家推荐一个比较好用的软件:WindTerm github上直接搜就能找到,直接可以拖拽文件上传下载,很方便)进入服务器先更新一下yum源(麒麟和centOS的包管理工具是yum其它系统有apt-get等等其它的自行更换一下就好了)
sudo yum update
②准备nginx源文件(nginx: download),nginx-http-flv-module(https://github.com/winshining/nginx-http-flv-module/blob/master/README.CN.md)
cd /root/下载wget http://nginx.org/download/nginx-1.22.1.tar.gz //这是nginx的git clone https://github.com/winshining/nginx-http-flv-module.git //这是http-flv的

③解压并编译安装
tar -zxvf nginx-1.21.1.tar.gz //解压nginxcd /nginx-1.22.1 //进入nginx源码目录./configure --add-module=../nginx-http-flv-module //将上级目录的http-flv模块添加到nginxmakesudo make install //编译安装④验证是否安装成功
cd /usr/local/nginx/sbin/ //先cd到nginx的默认安装路径./nginx -V //输出版本信息
有addmodule说明添加成功http-flv模块
⑤安装ffmpeg
yum install ffmpeg //安装ffmpegffmpeg //输出版本信息 验证是否安装
四.配置nginx流媒体服务器
进入nginx配置文件目录编辑nginx.conf(如果你用WindTerm的话可以直接在右边文件目录打开直接用win的文本编辑,如果没有就用vim编辑器咯)
cd /usr/local/nginx/conf/
worker_processes 1;events { worker_connections 1024;}http { include mime.types; default_type application/octet-stream; sendfile on; keepalive_timeout 65; # SSL 配置 ssl_certificate /usr/local/nginx/ssl/xxx.xxxx.org.cn.crt; #这里填你域名证书crt的位置 ssl_certificate_key /usr/local/nginx/ssl/xxx.xxxx.org.cn.key; #证书key ssl_protocols TLSv1.2; # 设置支持的 SSL/TLS 协议版本 server { listen 9527 ssl; # 使用 HTTPS 监听端口 server_name localhost; location / { root html; index index.html index.htm; } location /live { flv_live on; chunked_transfer_encoding on; add_header 'Access-Control-Allow-Credentials' 'true'; add_header 'Access-Control-Allow-Origin' '*'; add_header Access-Control-Allow-Headers X-Requested-With; add_header Access-Control-Allow-Methods GET,POST,OPTIONS; add_header 'Cache-Control' 'no-cache'; } location /stat { rtmp_stat all; rtmp_stat_stylesheet stat.xsl; } location /stat.xsl { root /home/flv/nginx-http-flv-module-1.2.11; } error_page 500 502 503 504 /50x.html; location = /50x.html { root html; } }}rtmp { server { listen 1935; chunk_size 8192; # 设置块大小 application mlive { live on; meta off; gop_cache on; allow play all; } application live { live on; record all; record_unique off; record_path /usr/local/nginx/video; record_suffix .flv; } }}注意:我上面这个nginx是开启了https的因为微信小程序需要https才能访问,如果不需要https就换成
http { include mime.types; default_type application/octet-stream; sendfile on; keepalive_timeout 65; server { listen 9527; # 使用 HTTP 监听端口 server_name localhost; location / { root html; index index.html index.htm; } location /live { flv_live on; chunked_transfer_encoding on; add_header 'Access-Control-Allow-Credentials' 'true'; add_header 'Access-Control-Allow-Origin' '*'; add_header Access-Control-Allow-Headers X-Requested-With; add_header Access-Control-Allow-Methods GET,POST,OPTIONS; add_header 'Cache-Control' 'no-cache'; } location /stat { rtmp_stat all; rtmp_stat_stylesheet stat.xsl; } location /stat.xsl { root /home/flv/nginx-http-flv-module-1.2.11; } error_page 500 502 503 504 /50x.html; location = /50x.html { root html; } }}
这个是http-flv的监控面板,这里的路径指向你刚刚使用git clone http-flv的目录下面
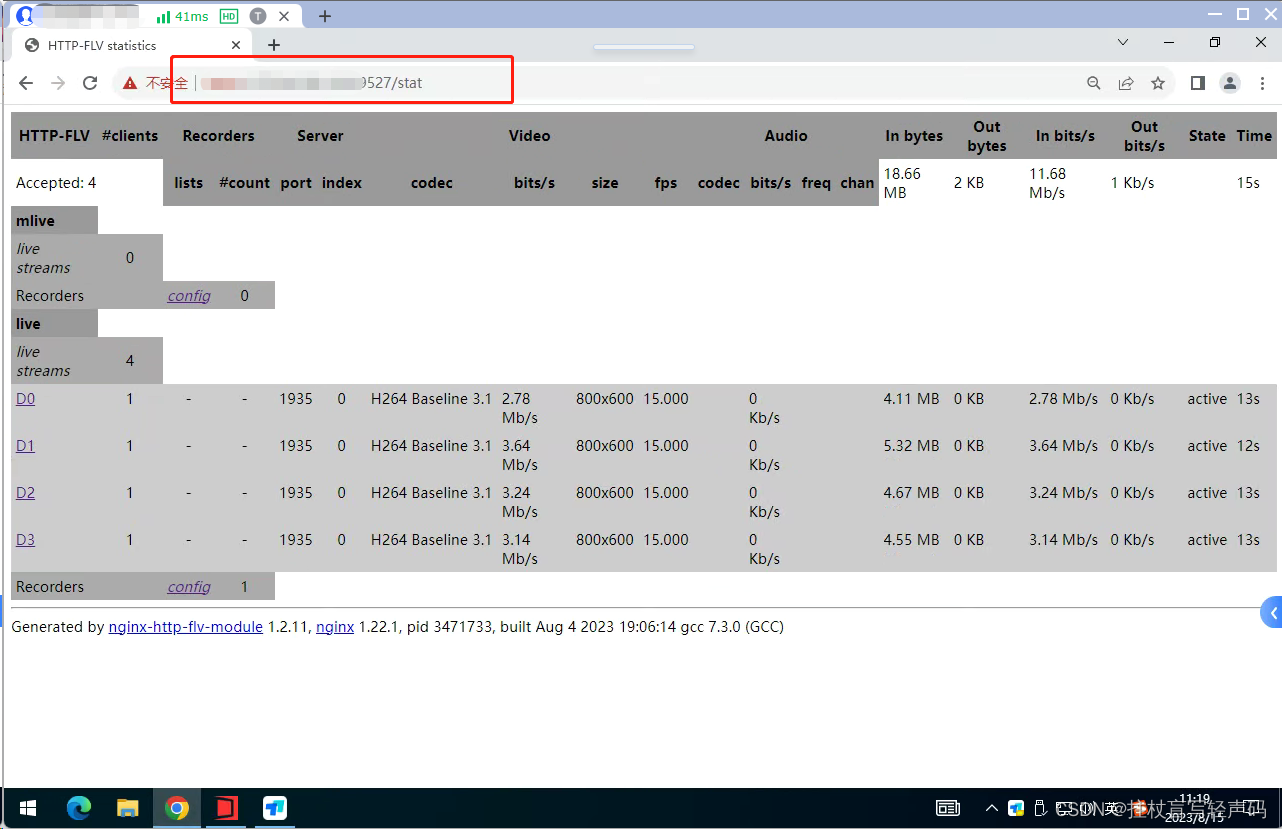
location /stat.xsl { root /home/flv/nginx-http-flv-module-1.2.11; #后面启动了nginx后可以通过 http://ip:9527/stat 查看流媒体服务器的拉流推流情况 }编辑完了保存退出然后重启nginx
./nginx -s reload五.开始转码取流
使用ffmpeg拉海康摄像头的rtsp流然后推到我们nginx rtmp模块下监听的1935端口的/live下面,推到我们在nginx装的http-flv模块,就会将ffmpeg转换过来的flv流转换成flv格式视频,等用户访问我们的nginx就能拿到flv的视频在web端或者小程序端播放了
下面这个指令直接在Linux上执行
ffmpeg -re -rtsp_transport tcp -i "这里填rtsp流地址" -f flv -r 15 -vcodec libx264 -preset ultrafast -vprofile baseline -an -s 800x600 -q 10 "rtmp://你的ip:1935/live/别名" &取流的话我们可以用这个vlc来测试是否转换成功
http://ip:9527/live?port=1935&app=live&stream=别名
这里可以看到我们已经转换成功了
可以通过 http://ip:9527/stat 查看流媒体服务器的拉流推流情况 运行了多长时间 速度多少等等...
具体的ffmpeg指令大家可以去学习一下,很多参数可以选择,根据需求选择参数可以事半功倍
六.web端播放
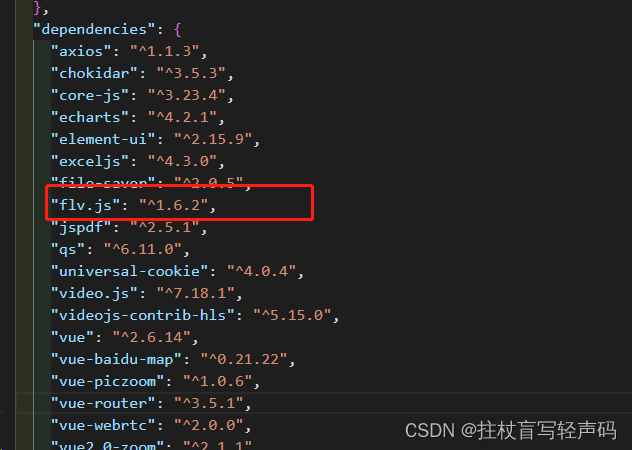
web端播放需要用到flvjs才能播放,直接npm install flvjs
然后项目中应用:
<template> <div class="container"> <video ref="player" controls></video> </div></template><script>import flvjs from 'flv.js';export default { data() { return { flvPlayer: null, }; }, mounted() { this.initPlayer(); }, beforeDestroy() { this.destroyPlayer(); }, methods: { initPlayer() { if (flvjs.isSupported()) { const videoElement = this.$refs.player; this.flvPlayer = flvjs.createPlayer({ type: 'flv', isLive: true, url: 'http:/ip/live?port=1935&app=live&stream=别名' }); this.flvPlayer.attachMediaElement(videoElement); this.flvPlayer.load(); } }, destroyPlayer() { if (this.flvPlayer) { this.flvPlayer.destroy(); this.flvPlayer = null; } } },};</script><style></style>
七.小程序中播放
注意小程序上线需要https访问,开发环境下需要不校验合法域名,使用live-player需要公众平台开发设置-接口设置-开启live-player
我这里使用的是uniapp
<template><view class="page"><live-player :src="web_url" autoplay mode="live" style="width: 100%;height: 100%" @statechange="statechange"@error="error" /></view></template><script>import {isEmpty} from '../../utils/common';export default {data() {return {web_url: '填入你的取流地址',player: {}}},onLoad(opthions) {console.log("webviewopthions", opthions)this.web_url = decodeURIComponent(opthions.rtmpurl)this.player = uni.createLivePlayerContext('liveplayer', this);uni.showLoading({title: '加载中请稍等'});},onUnload: () => {uni.$off('update-video-url');},methods: {statechange(e) {console.log("拉流code", e.detail.code)if (e.detail.code == 2003) {uni.hideLoading()}const codeArr = [{"code": "2001","text": "已经连接服务器"},{"code": "2002","text": "已经连接服务器,开始拉流"},{"code": "2003","text": "网络接收到首个视频数据包(IDR)"},{"code": "2004","text": "视频播放开始"},{"code": "2005","text": "视频播放进度"},{"code": "2006","text": "视频播放结束"},{"code": "2007","text": "视频播放Loading"},{"code": "2008","text": "解码器启动"},{"code": "2009","text": "视频分辨率改变"},{"code": "-2301","text": "网络断连,且经多次重连抢救无效,更多重试请自行重启播放"},{"code": "-2302","text": "获取加速拉流地址失败"},{"code": "2101","text": "当前视频帧解码失败"},{"code": "2102","text": "当前音频帧解码失败"},{"code": "2103","text": "网络断连, 已启动自动重连"},{"code": "2104","text": "网络来包不稳:可能是下行带宽不足,或由于主播端出流不均匀"},{"code": "2105","text": "当前视频播放出现卡顿"},{"code": "2106","text": "硬解启动失败,采用软解"},{"code": "2107","text": "当前视频帧不连续,可能丢帧"},{"code": "2108","text": "当前流硬解第一个I帧失败,SDK自动切软解"},{"code": "3001","text": "RTMP -DNS解析失败"},{"code": "3002","text": "RTMP服务器连接失败"},{"code": "3003","text": "RTMP服务器握手失败"},{"code": "3005","text": "RTMP 读/写失败"}]let find = codeArr.find((el) => el.code == e.detail.code);if (!this.isEmpty(find)) {console.log("播放状态:", find.text)}},error(e) {console.error('live-player error:', e.detail.errMsg)}}}</script><style lang="scss" scoped>.page {height: 100%;}</style> 
八.总结问题
①ffmpeg拉流推流有的时候会断开,断开自动重连需要自己处理
我的想法是:1.简单粗暴直接写一个脚本批量拉流推流每隔30分钟重启一次,杀死系统中的ffmpeg进程,重新执行ffmpeg指令
#处理ffmpeg指令脚本 ffmpeg_allpush.sh#!/bin/bash# 定义 RTSP 源和 RTMP 目标declare -A streamsstreams=( ["rtsp://xxxx:xxxx@xxxx:554/h264/ch1/main/av_stream"]="rtmp://xxxxx:1935/live/D0" ["rtsp://xxxx:xxxx@xxxx:554/h264/ch1/main/av_stream"]="rtmp://xxxxx:1935/live/D1" ["rtsp://xxxx:xxxx@xxxx:554/h264/ch1/main/av_stream"]="rtmp://xxxxx:1935/live/D2" ["rtsp://xxxx:xxxx@xxxx:554/h264/ch1/main/av_stream"]="rtmp://xxxxx:1935/live/D3" ["rtsp://xxxx:xxxx@xxxx:554/h264/ch1/main/av_stream"]="rtmp://xxxxx:1935/live/D4")# 遍历每个 RTSP 源for src in "${!streams[@]}"; do # 使用 ffmpeg 将 RTSP 拉流并推送到对应的 RTMP 地址 ffmpeg -re -rtsp_transport tcp -i "$src" -f flv -r 15 -vcodec libx264 -preset ultrafast -vprofile baseline -an -s 800x600 -q 10 "${streams[$src]}" &done#定时重启脚本 restartffmpeg.sh#!/bin/bashset -xlogfile="script_output.log"while true; do echo "$(date) - Executing: pkill -f ffmpeg" >> "$logfile" pgrep -x ffmpeg | while read -r pid; do kill "$pid"done echo "$(date) - Executing: ./nginx -s reload" >> "$logfile" ./nginx -s reload echo "$(date) - Executing: nohup ./ffmpeg_allpush.sh > ./pushrtmp_logs.log 2>&1" >> "$logfile" nohup ./ffmpeg_allpush.sh > ./pushrtmp_logs.log 2>&1 echo "$(date) - Waiting for 30 minutes before next iteration" >> "$logfile" sleep 600done②起n个docker容器,写一个脚本放到容器里面执行,监听系统进程中是否存在ffmpeg,如果不存在就重新执行ffmpeg指令
③我们http-flv提供了一个监控面板,写一个python监听这个面板,当某个活动消失的时候就重新执行ffmpeg
④第一次弄这个流媒体服务器,主要就是写个文章备份一下(写得可能有点粗糙),如果有啥问题或者优化可以在评论区留言,大家一起交流一下。就这样吧...