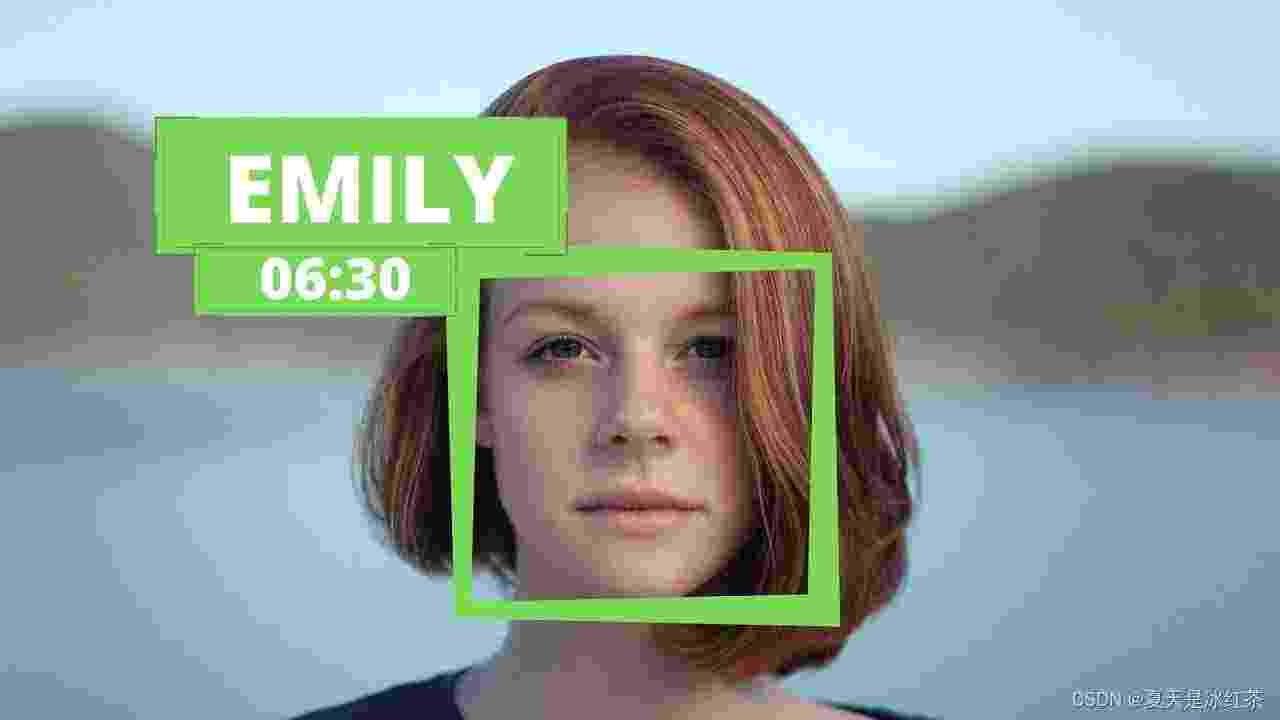
1、效果展示
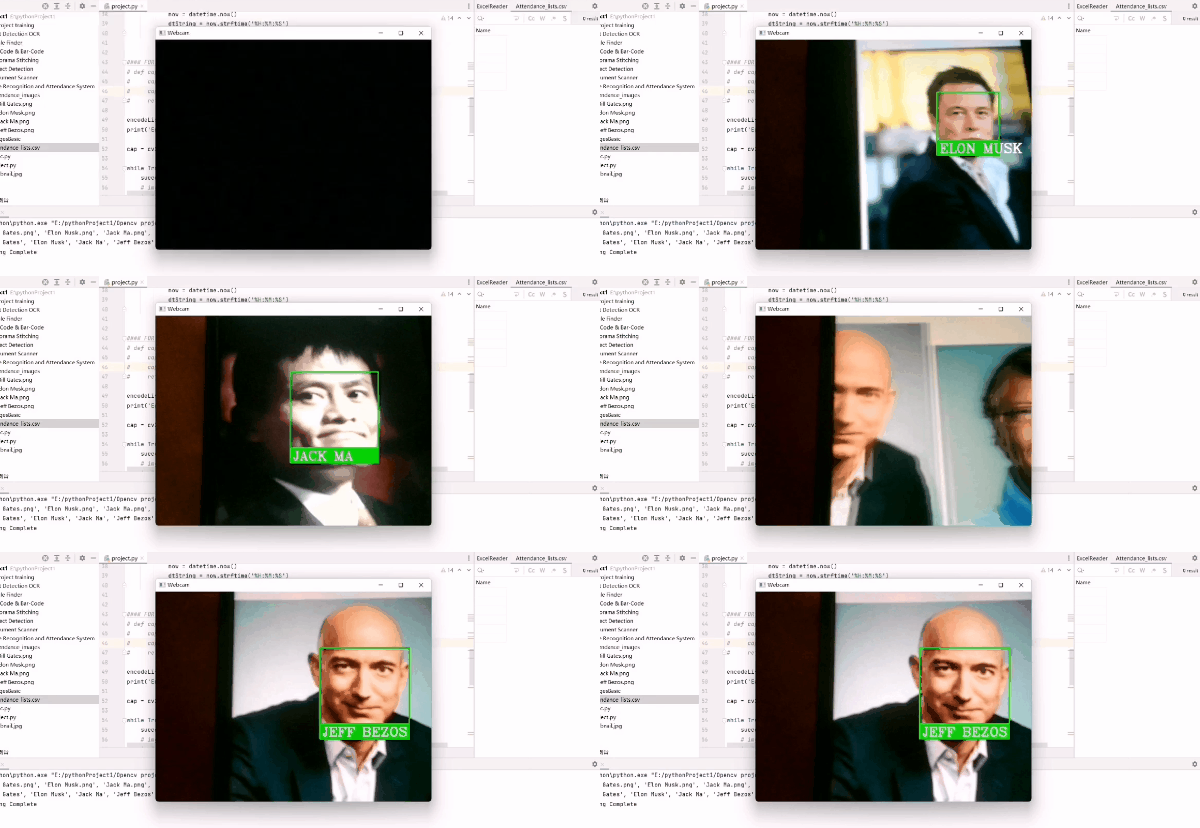
人脸识别:
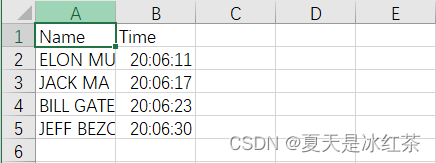
考勤效果:
2、项目介绍
接下来,我们将学习如何以高精度执行面部识别,首先简要介绍理论并学习基本实现。然后我们将创建一个考勤项目,该项目将使用网络摄像头检测人脸并在 Excel 表中实时记录考勤情况。
3、项目基础理论
(1)项目包的搭建
在此之前,你应该看过此篇,完成了对项目包的搭建(37条消息) Python3.7最简便的方式解决下载dlib和face_recognition的问题_夏天是冰红茶的博客-CSDN博客
此外,我们还需要安装一个包,按照步骤来就好了:
pip install face_recognition_models(2)文件搭建
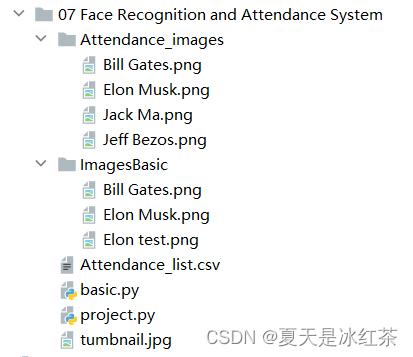
按照图示配置,Attendance.csv文件当中的内容只有(Name,Time),在Attendance_images文件当中,你可以添加你想添加的图片,最好是单个人物的图片,且以他们的英文名命名图片。
(3)basic.py代码展示与讲解
import cv2import face_recognitionimgElon = face_recognition.load_image_file('ImagesBasic/Elon Musk.png')imgElon = cv2.cvtColor(imgElon, cv2.COLOR_BGR2RGB)imgTest = face_recognition.load_image_file('ImagesBasic/Elon test.png')imgTest = cv2.cvtColor(imgTest, cv2.COLOR_BGR2RGB)faceLoc = face_recognition.face_locations(imgElon)[0]encodeElon = face_recognition.face_encodings(imgElon)[0]cv2.rectangle(imgElon, (faceLoc[3], faceLoc[0]), (faceLoc[1], faceLoc[2]), (255, 0, 255), 2)faceLocTest = face_recognition.face_locations(imgTest)[0]encodeTest = face_recognition.face_encodings(imgTest)[0]cv2.rectangle(imgTest, (faceLocTest[3], faceLocTest[0]), (faceLocTest[1], faceLocTest[2]), (255, 0, 255), 2)results = face_recognition.compare_faces([encodeElon], encodeTest)faceDis = face_recognition.face_distance([encodeElon], encodeTest)print(results, faceDis)cv2.putText(imgTest, f'{results} {round(faceDis[0], 2)}', (50, 50), cv2.FONT_HERSHEY_COMPLEX, 1, (0, 0, 255), 2)cv2.imshow('Elon Musk', imgElon)cv2.imshow('Elon Test', imgTest)cv2.waitKey(0)我们将会以马斯克先生的图片,作为标准测试,即'Elon Musk.png'。另外两张图片分别是比尔盖茨先生和马斯克先生。
今天的讲解会分为两部分,这是基础部分的讲解。
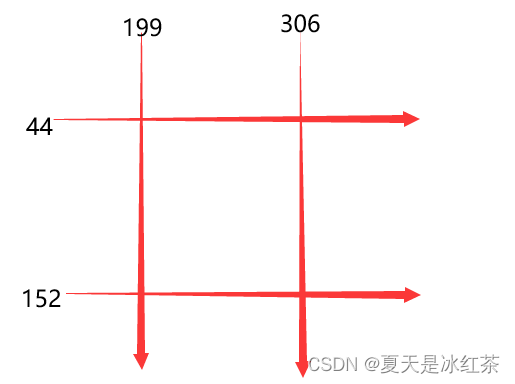
首先,导入这两张代码中的图片,我们用的是face_recognition中的load_image_file函数,它会将图像文件(.jpg、.png等)加载到numpy数组中,且默认的mode='RGB'格式,故在此有一步转化。其次,faceLoc接受face_locations()函数返回的图像中人脸的边界框数组,请看注1,取第一个数,则会等到一个元组,我们要以按css(上、右、下、左)顺序找到的面位置的元组列表。encodeElon()函数是返回128维人脸编码列表(图像中每个人脸一个),为什么是128维?请看注2。在这之后,又是画框操作,我相信如果看过我前期的文章的人肯定是太熟悉了,按照注3,将坐标输入。之后,compare_faces()将面部编码列表与候选编码进行比较,以查看它们是否匹配,记住,只有第一个是列表,其将会返回真/假值列表;face_distance()需要给定人脸编码列表,将其与已知人脸编码进行比较,并获得每个比较人脸的欧几里德距离。距离会告诉您这些面有多相似。再说一次,只有第一个是列表。前看注4。最后,放置图框的信息在合适的位置,展示图片。注1:[(44, 306, 152, 199)]
注2:机器学习很有趣!第4部分:现代人脸识别与深度学习 - 金融科技排名 (fintechranking.com),作者是Adam Geitgey 。
注3:坐标图
注4:[True] [0.4559636]
(5)效果展示
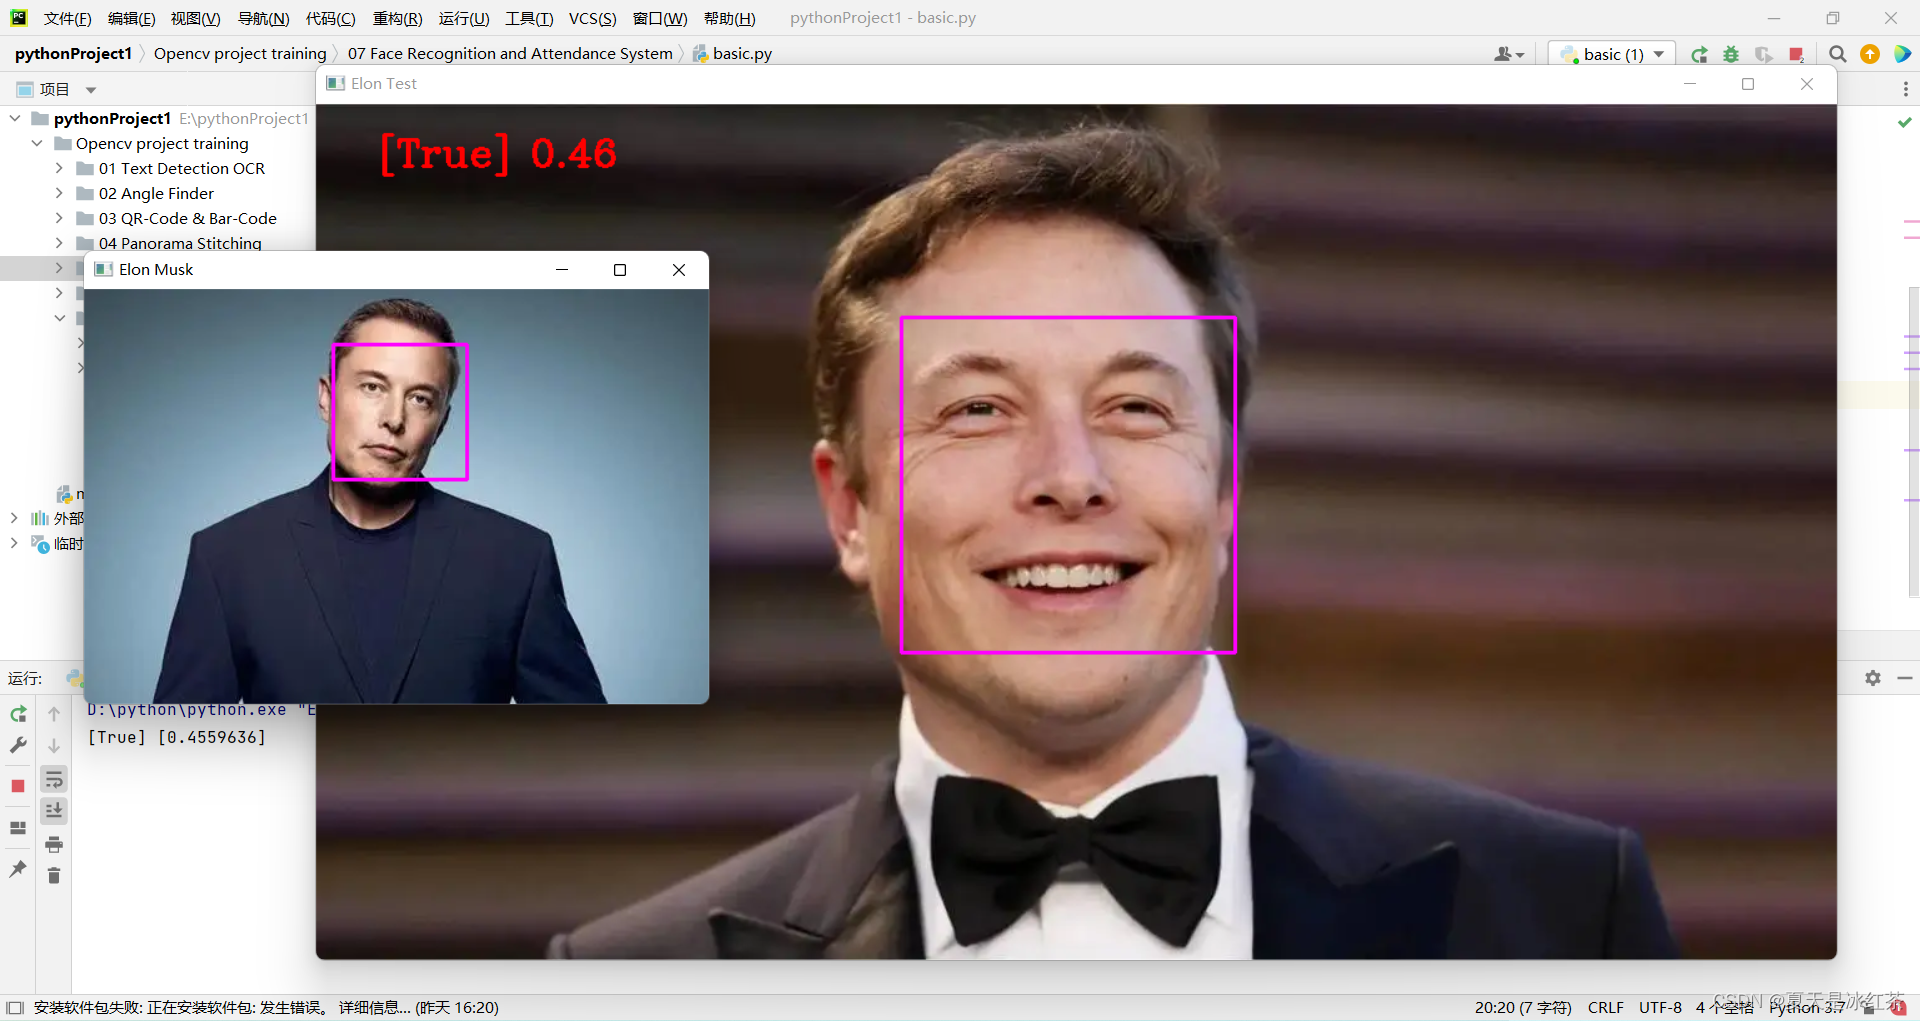
修改此处代码,我们初步实现了人脸识别。
imgTest = face_recognition.load_image_file('ImagesBasic/Bill Gates.png')imgTest = cv2.cvtColor(imgTest, cv2.COLOR_BGR2RGB)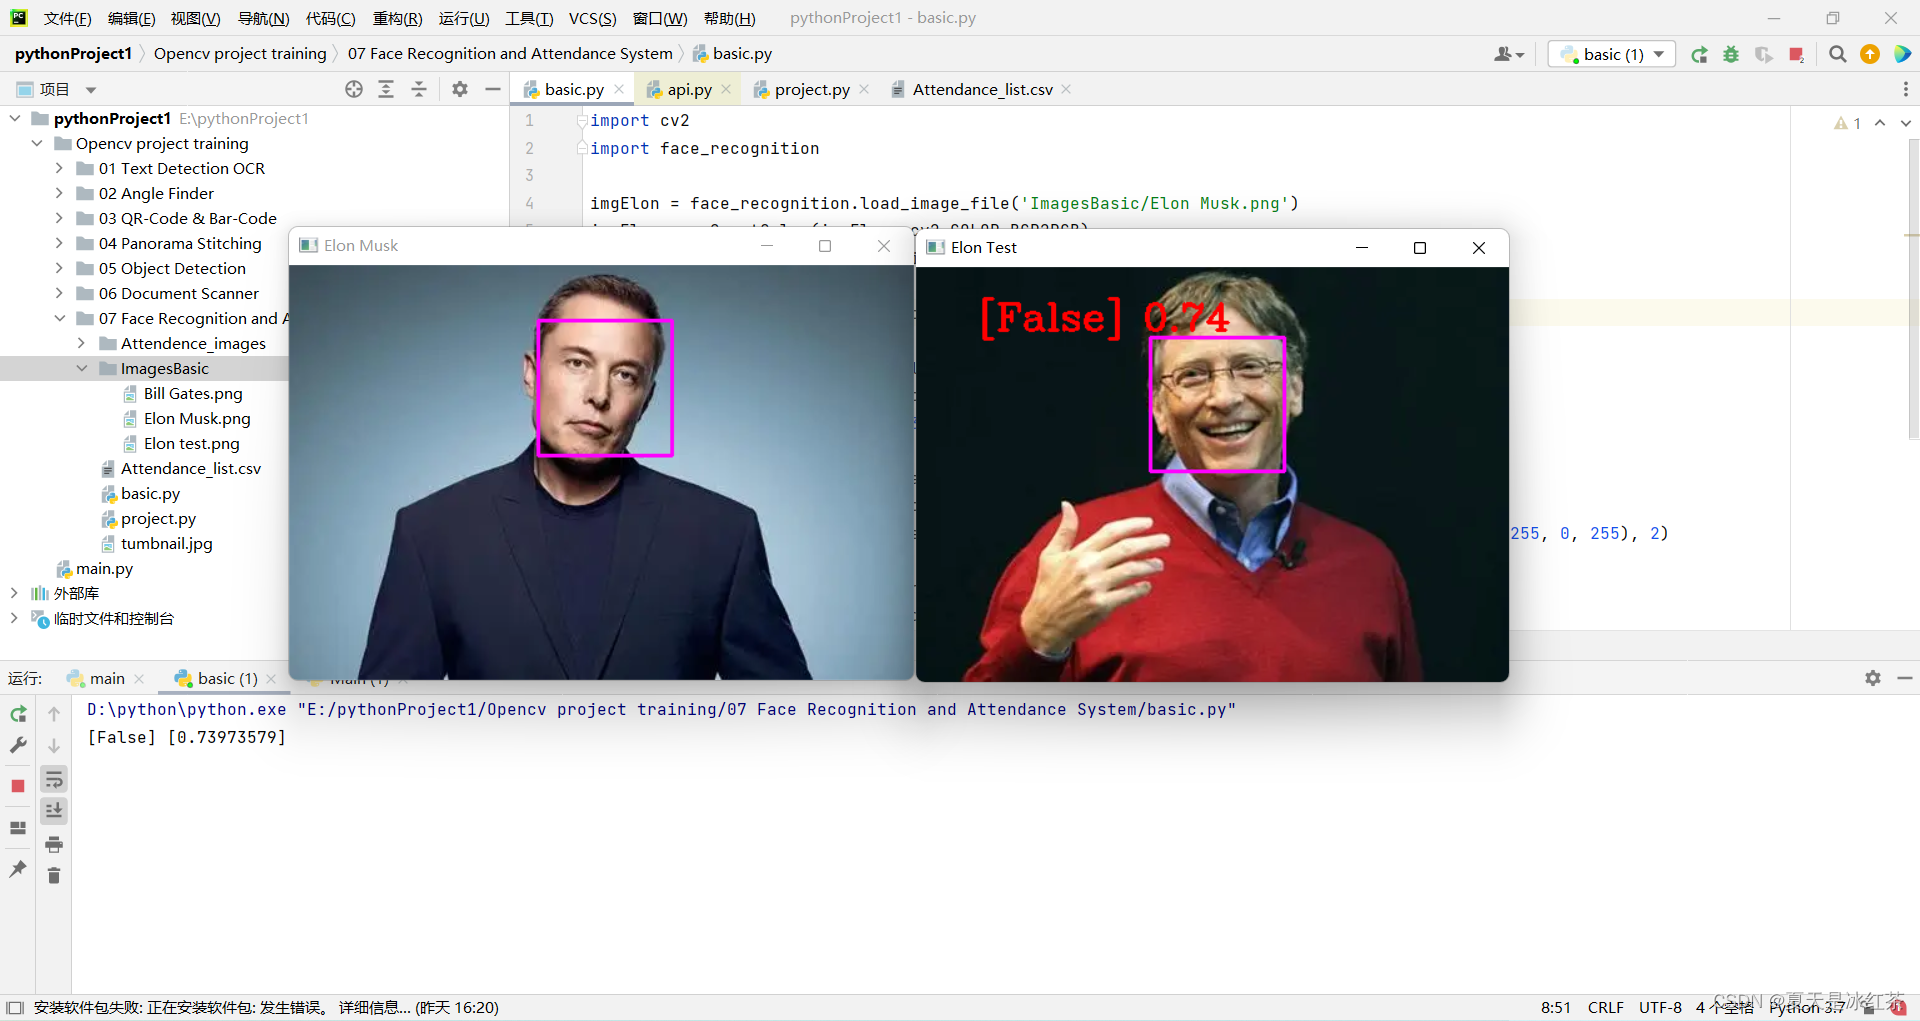
4、项目的代码展示与讲解
import cv2import numpy as npimport face_recognitionimport osfrom datetime import datetime# from PIL import ImageGrabpath = 'Attendance_images'images = []classNames = []myList = os.listdir(path)print(myList)for cl in myList: curImg = cv2.imread(f'{path}/{cl}') images.append(curImg) classNames.append(os.path.splitext(cl)[0])print(classNames)def findEncodings(images): encodeList = [] for img in images: img = cv2.cvtColor(img, cv2.COLOR_BGR2RGB) encode = face_recognition.face_encodings(img)[0] encodeList.append(encode) return encodeListdef markAttendance(name): with open('Attendance_lists.csv', 'r+') as f: myDataList = f.readlines() nameList = [] for line in myDataList: entry = line.split(',') nameList.append(entry[0]) if name not in nameList: now = datetime.now() dtString = now.strftime('%H:%M:%S') f.writelines(f'\n{name},{dtString}')#### FOR CAPTURING SCREEN RATHER THAN WEBCAM# def captureScreen(bbox=(300,300,690+300,530+300)):# capScr = np.array(ImageGrab.grab(bbox))# capScr = cv2.cvtColor(capScr, cv2.COLOR_RGB2BGR)# return capScrencodeListKnown = findEncodings(images)print('Encoding Complete')cap = cv2.VideoCapture(1)while True: success, img = cap.read() # img = captureScreen() imgS = cv2.resize(img, (0, 0), None, 0.25, 0.25) imgS = cv2.cvtColor(imgS, cv2.COLOR_BGR2RGB) facesCurFrame = face_recognition.face_locations(imgS) encodesCurFrame = face_recognition.face_encodings(imgS, facesCurFrame) for encodeFace, faceLoc in zip(encodesCurFrame, facesCurFrame): matches = face_recognition.compare_faces(encodeListKnown, encodeFace) faceDis = face_recognition.face_distance(encodeListKnown, encodeFace) # print(faceDis) matchIndex = np.argmin(faceDis) if matches[matchIndex]: name = classNames[matchIndex].upper() # print(name) y1, x2, y2, x1 = faceLoc y1, x2, y2, x1 = y1 * 4, x2 * 4, y2 * 4, x1 * 4 cv2.rectangle(img, (x1, y1), (x2, y2), (0, 255, 0), 2) cv2.rectangle(img, (x1, y2 - 35), (x2, y2), (0, 255, 0), cv2.FILLED) cv2.putText(img, name, (x1 + 6, y2 - 6), cv2.FONT_HERSHEY_COMPLEX, 1, (255, 255, 255), 2) markAttendance(name) cv2.imshow('Webcam', img) cv2.waitKey(1)这里面的一些操作,在我之前的博客中有讲过,且前面也讲的很清楚了,所以我会略讲。
首先,读取Attendance_images文件当中图片的名字,注意它是带有.png,而我们的命名并不需要它,所以取了一个[0]。其次,编写findEncodings()用于储存标准图像的编码,按照列表的形式。markAttendance()函数用于读取Attendance_lists.csv的文件信息,并写入Excel,其中还可写入时间。然后,剩余的一些,我相信参照上面的讲解应该没什么问题了。再说一下 y1, x2, y2, x1 = y1 * 4, x2 * 4, y2 * 4, x1 * 4,为什么要乘以4,还记得上面的resize吗,它并没有要求像素的改变,而是缩小的比例,正是0.25。
5、项目素材
Github:Opencv-project-training/Opencv project training/07 Face Recognition and Attendance System at main · Auorui/Opencv-project-training · GitHub
6、项目总结
今天的项目比起之前的物体检测还有一定的难度,对于我来说现在的效率实在不是很高,昨天的dlib和face_recognition包的下载实在没有弄好,临时换了个项目,今天也是弄了好久。
那么希望你在这个项目中玩的开心!!
