stack,queue,priority_queue的模拟实现
stack的模拟实现
栈是一种先入后出的数据结构,主要具有以下接口
上面就是stack(栈)的主要功能了,而这次我们要利用自己写的栈来实现这些结果
在上面的例子中我们利用系统提供的stack实现了对栈的push,pop,top,size,empty等接口,下面我们就要利用自己所写的栈模拟实现这些功能,具体的功能我会在下面代码中详细解答
namespace hello
{
    //该种写法为容器适配器的写法:借助deque容器来实现对stack的模拟实现
        template<class T, class Container = deque<T>>
        class stack
        {
        public:
            stack()
            {
            }
			//直接借助deque的尾插实现对栈的插入
            void push(const T& x)
            {
                _c.push_back(x);
            }
            //直接进行尾删
            void pop()
            {
                _c.pop_back();
            }
			//返回最后一个元素
            T& top()
            {
                return _c.back();
            }
			//被const的stack的返回
            const T& top()const
            {
                return _c.back();
            }
			//返回栈的大小
            size_t size()const
            {
                return _c.size();
            }
			//判断栈是否为空
            bool empty()const
            {
                return _c.empty();
            }

        private:
            Container _c;
        };
}
栈的实现主要是借助其它容器进行实现的,内容非常简单,下面我们来看一下自己写的栈的功能:

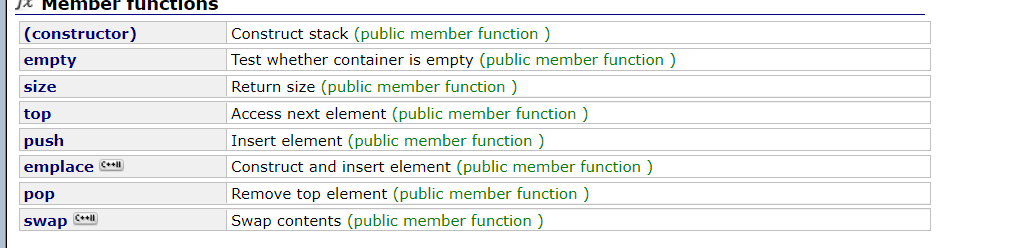
队列的模拟实现
队列是一种先入先出的数据结构,主要有以下接口:

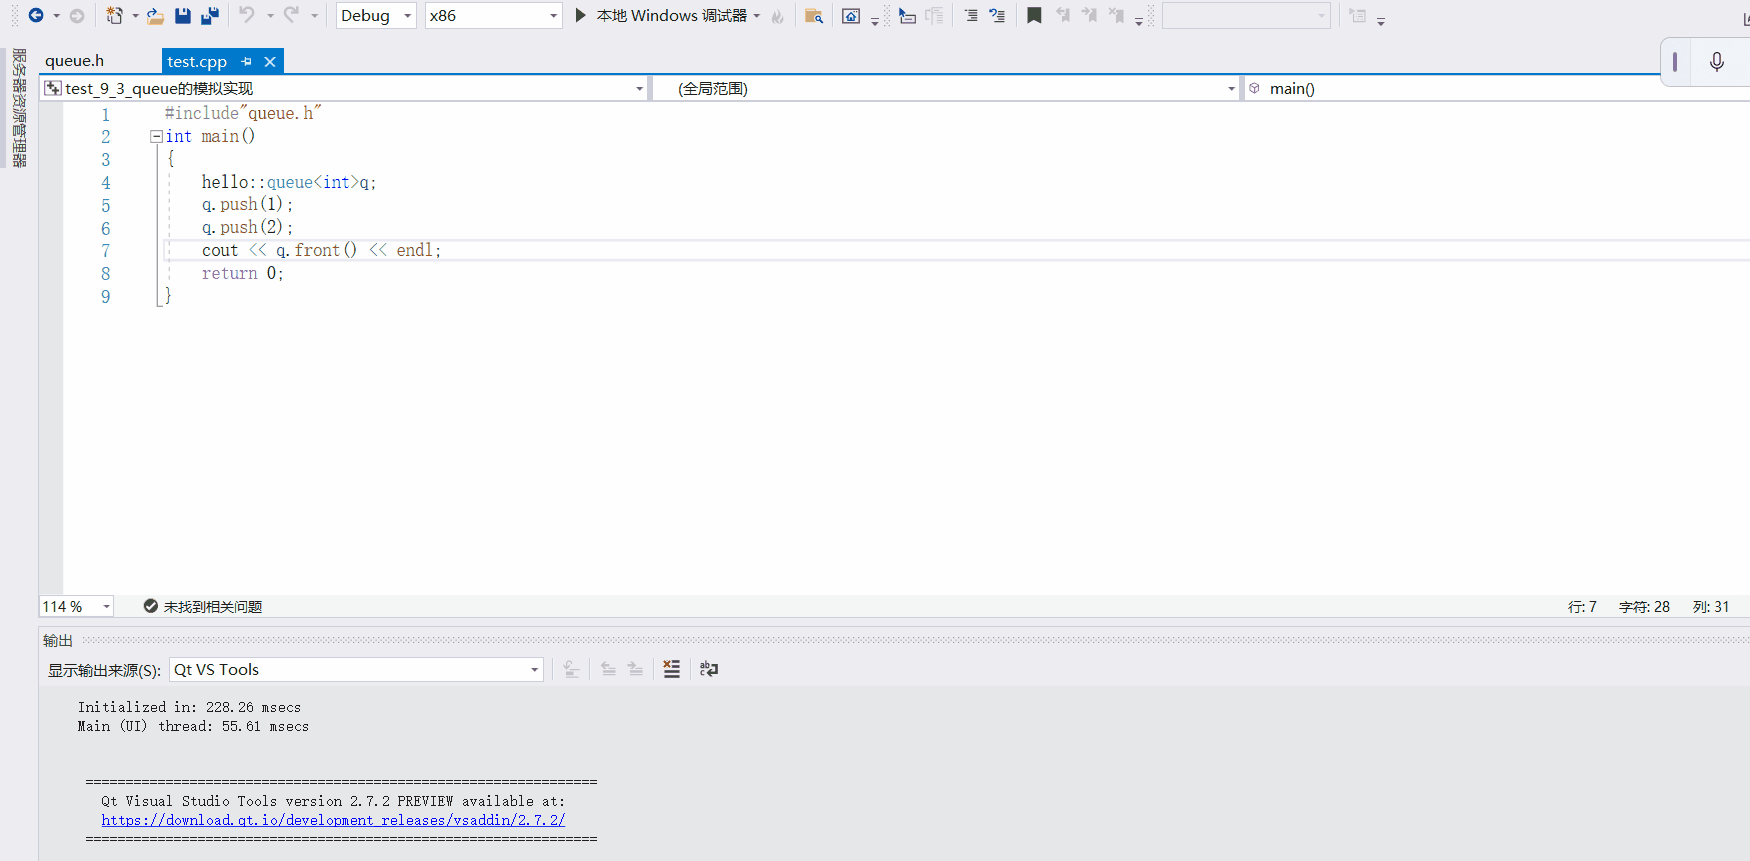
这就是我们模拟实现的效果,它的实现和我们上面实现栈几乎是一样的,都是借助deque实现的
namespace hello
{
    //适配器模式
	template<class T, class Container=deque<T>>
	class queue
	{
	public:
		queue()
		{

		}
        //尾部插入数据
		void push(const T& x)
		{
			_con.push_back(x);
		}
		//删除队头数据
		void pop()
		{
			_con.pop_front();
		}
		//返回队尾数据
		T& back()
		{
			return _con.back();
		}
		//const修饰的queue,返回队尾元素
		const T& back()const
		{
			return _con.back();
		}
		//返回队头元素
		T& front()
		{
			return _con.front();
		}
		const T& front()const
		{
			return _con.front();
		}
		//返回队伍中的元素个数
		size_t size()const
		{
			return _con.size();
		}
		//判断queue是否为空
		bool empty()const
		{
			return _con.empty();
		}

	private:
		Container _con;
	};
}
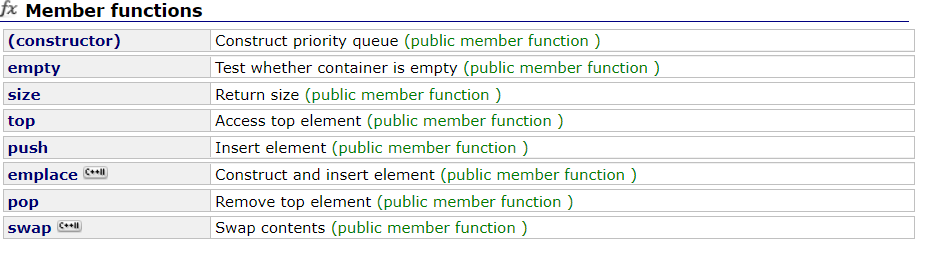
priority_queue的模拟实现
优先级队列是队列的一种特殊情况,它入队列顺序随意,出队列顺序按照数据的优先出队列
它底层的数据结构是数组,里面包含了一些堆的算法
在模拟实现时不论建大堆还是小堆都是可以的
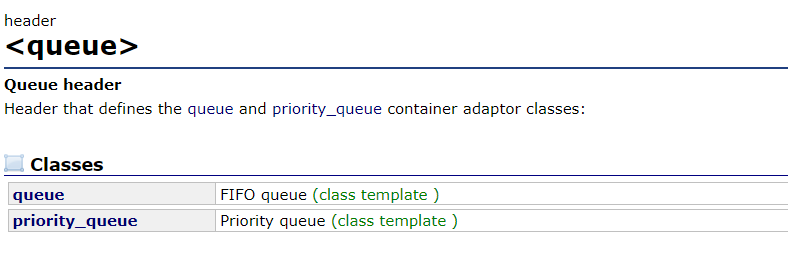
它包含于头文件,主要有以下接口:
在优先级队列中有仿函数:less(降序排列),greater(升序排列),默认的话是less降序排列
仿函数:
仿函数(functor),就是使一个类的使用看上去像一个函数。其实现就是类中实现一个operator(),这个类就有了类似函数的行为,就是一个仿函数类了。
int main()
{
	std::priority_queue<int>q;
	//hello::priority_queue<int, vector<int>, hello::less<int> > q;
	q.push(5);
	q.push(6);
	q.push(1);
	q.push(3);
	q.push(4);
	q.push(10);
	q.push(-15);
	while (!q.empty())
	{
		cout << q.top() << endl;
		q.pop();
	}
	return 0;
}

如上所示,我们在系统默认提供的优先级队列中添加一群无序的数据,在我们不指定排列方式的时候他会默认以降序的方式排列,要想以升序方式排列也很简单,只需定义优先级队列时加入排列方式即可
s t d : : p r i o r i t y q u e u e < i n t , v e c t o r < i n t > , s t d : : g r e a t e r < i n t > > q ; std::priority_queue<int,vector<int>,std::greater<int>>q; std::priorityqueue<int,vector<int>,std::greater<int>>q;
int main()
{
	std::priority_queue<int,vector<int>,std::greater<int>>q;
	//hello::priority_queue<int, vector<int>, hello::less<int> > q;
	q.push(5);
	q.push(6);
	q.push(1);
	q.push(3);
	q.push(4);
	q.push(10);
	q.push(-15);
	while (!q.empty())
	{
		cout << q.top() << endl;
		q.pop();
	}
	return 0;
}

如上图所示,即为升序排列结果,下面就来模拟实现一下,重点内容我都注释在代码中了
namespace hello
{
	template<class T>
	class less//建大堆,逆序输出
	{
	public:
		bool operator()(T& l, T& r)
		{
			return l < r;
		}
	};

	template<class T>
	class greater
	{
	public:
		bool operator()(T&l,T&r)
		{
			return l > r;
		}
	};

	template<class T,class Container =vector<T>,class Compare =less<T>>
	class priority_queue
	{
	public:
		//1.push
        //向上调整算法
		void AdjustUp(size_t child)
		{
			Compare com;
			size_t parent = (child - 1) / 2;
			while (child > 0)
			{
				//if (_con[child]>_con[parent])
				if(com(_con[parent],_con[child]))
				{
					swap(_con[parent], _con[child]);
					child = parent;
					parent = (child - 1) / 2;
				}
				else
				{
					break;
				}
			}
		}
		void push(const T&val)
		{
            //首先push元素,然后利用向上调整算法将其调整到合适的位置
			_con.push_back(val);
			//向上调整算法
			AdjustUp(_con.size() - 1);
		}

		//2.pop
        //向下调整算法:用来删除堆顶元素后将其调整到合适的位置
		void AdjustDown(size_t parent)
		{
			Compare com;
			size_t child = 2 * parent + 1;
			while (child < _con.size())
			{
				if (child + 1 < _con.size() && com(_con[child],_con[child+1]))
				{
					child++;
				}
				//if (_con[child] < _con[parent])
				if(com(_con[parent],_con[child]))
				{
					swap(_con[child], _con[parent]);
					parent = child;
					child = 2 * parent + 1;
				}
				else
				{
					break;
				}
			}
		}
		void pop()
		{
			//在堆的删除算法中,首先交换堆顶和堆尾的数据,然后删除堆尾元素,最后使用向下调整算法将其调整到合适的位置
			swap(_con[0], _con[_con.size() - 1]);
			_con.pop_back();
			//使用向下查找算法将其调整到合适的位置
			AdjustDown(0);
		}

		//3.top:返回堆顶元素
		T& top()
		{
			return _con[0];
		}

		//4.size:返回大小
		size_t size()
		{
			return _con.size();
		}

		//5.empty:判断是否为空
		bool empty()
		{
			return _con.empty();
		}


	private:
		Container _con;
	};
}
下面我们来看一下效果:

如上图所示,我们利用自己模拟实现的priority_queue实现了其基本功能,下面再看一下升序排列吧:

好了,以上就是本片文章所有内容了,欢迎大家一键三联,也欢迎大家斧正,感谢大家的支持