一、配置vue-i18
1. 进入src/locales/index.js
import { createI18n } from 'vue-i18n'import zhCN from 'ant-design-vue/es/locale/zh_CN'import enGB from 'ant-design-vue/es/locale/en_GB'import zh_cn from './lang/zh-cn.js'import en from './lang/en.js'import tool from '@/utils/tool'import sysConfig from '@/config/index'export const messages = {'zh-cn': {lang: zhCN,...zh_cn},en: {lang: enGB,...en}}const i18n = createI18n({locale: tool.data.get('APP_LANG') || sysConfig.LANG,fallbackLocale: 'zh-cn',globalInjection: true,messages})export default i18n2. 查看 src/utils/tool.js文件
import { notification } from 'ant-design-vue';const tool = {}// 以下使用中英翻译用到该方法!!!// localStoragetool.data = {set(table, settings) {const _set = JSON.stringify(settings)return localStorage.setItem(table, _set)},get(table) {let data = localStorage.getItem(table)try {data = JSON.parse(data)} catch (err) {return null}return data},remove(table) {return localStorage.removeItem(table)},clear() {return localStorage.clear()}}// sessionStoragetool.session = {set(table, settings) {const _set = JSON.stringify(settings)return sessionStorage.setItem(table, _set)},get(table) {let data = sessionStorage.getItem(table)try {data = JSON.parse(data)} catch (err) {return null}return data},remove(table) {return sessionStorage.removeItem(table)},clear() {return sessionStorage.clear()}}// 千分符tool.groupSeparator = (num) => {num = `${num}`if (!num.includes('.')) num += '.'return num.replace(/(\d)(?=(\d{3})+\.)/g, ($0, $1) => {return `${$1},`}).replace(/\.$/, '')}// 获取所有字典数组tool.dictDataAll = () => {return tool.data.get('DICT_TYPE_TREE_DATA')}// 字典翻译方法,界面插槽使用方法 {{ $TOOL.dictType('sex', record.sex) }}tool.dictTypeData = (dictValue, value) => {const dictTypeTree = tool.dictDataAll()if (!dictTypeTree) {return '需重新登录'}const tree = dictTypeTree.find((item) => item.dictValue === dictValue)if (!tree) {return '无此字典'}const children = tree.childrenconst dict = children.find((item) => item.dictValue === value)return dict?.name || '无此字典'}// 获取某个code下字典的列表,多用于字典下拉框tool.dictTypeList = (dictValue) => {const dictTypeTree = tool.dictDataAll()if (!dictTypeTree) {return []}const tree = dictTypeTree.find((item) => item.dictValue === dictValue)if (tree && tree.children) {return tree.children}return []}// 获取某个code下字典的列表,基于dictTypeList 改进,保留老的,逐步替换tool.dictList = (dictValue) => {const dictTypeTree = tool.dictDataAll()if (!dictTypeTree) {return []}const tree = dictTypeTree.find((item) => item.dictValue === dictValue)if (tree) {return tree.children.map((item) => {return {value: item['dictValue'],label: item['name']}})}return []}// 生成UUIDtool.snowyUuid = () => {let uuid = 'xxxxxxxx-xxxx-4xxx-yxxx-xxxxxxxxxxxx'.replace(/[xy]/g, (c) => {let r = (Math.random() * 16) | 0,v = c === 'x' ? r : (r & 0x3) | 0x8return v.toString(16)})// 首字符转换成字母return 'xn' + uuid.slice(2)}tool.sortBy = (property) => {return function (value1, value2) {let a = value1[property]let b = value2[property]return a < b ? 1 : a > b ? -1 : 0}}tool.sortBy = (property, asc) => {//默认升序,不能写在闭包里面,写在闭包里面是无效的……asc没反应就if (asc === undefined) {asc = -1} else {asc = asc ? -1 : 1}return function (value1, value2) {let a = value1[property]let b = value2[property]return a < b ? asc : a > b ? asc * -1 : 0}}/** * 打开消息面板 * @param type 类型,success,info,warning,error * @param message 标题 * @param description 备注 * @param duration 弹出时间,默认3s */export const showNotification = (type, message, description = '', duration = 3) => {notification[type]({message,description,duration})}// 文件处理工具endexport default tool3. 查看 src/locales/lang/zh-cn.js、src/locales/lang/en.js
import 'dayjs/locale/zh-cn'export default {common: {searchButton: '查询',resetButton: '重置',addButton: '增加',editButton: '编辑',removeButton: '删除',batchRemoveButton: '批量删除',detailButton: '详情',searchKey: '关键词',imports: '导入',more: '更多',export: '导出',},model: {user: '用户',org: '机构',pos: '职位',role: '角色',bizUser: '人员'},login: {signInTitle: '用户登录',forgetPassword: '忘记密码',signIn: '登录',signInOther: '其他登录方式',accountPlaceholder: '请输入账号',accountError: '请输入账号',PWPlaceholder: '请输入密码',PWError: '请输入密码',validLaceholder: '请输入验证码',validError: '请输入验证码',accountPassword: '账号密码',phoneSms: '手机号登录',phonePlaceholder: '请输入手机号',smsCodePlaceholder: '请输入短信验证码',getSmsCode: '获取验证码',machineValidation: '机器验证',sendingSmsMessage: '短信发送中',newPwdPlaceholder: '请输入新密码',backLogin: '返回登录',restPassword: '重置密码',emailPlaceholder: '请输入邮箱号',emailCodePlaceholder: '请输入邮件验证码',restPhoneType: '手机号找回',restEmailType: '邮箱找回', sysName: '管理'},user: {userStatus: '用户状态',resetPassword: '重置密码',role: '角色',batchExportButton: '批量导出',grantRole: '授权角色',grantResource: '授权资源',grantPermission: '授权权限',exportUserInfo: '导出信息',placeholderNameAndSearchKey: '请输入姓名或关键词',placeholderUserStatus: '请选择状态',popconfirmDeleteUser: '确定要删除吗?',popconfirmResatUserPwd: '确定要重置吗?'}}export default {common: {searchButton: 'search',resetButton: 'reset',addButton: 'add',editButton: 'edit',removeButton: 'delete',batchRemoveButton: 'batch Remove',detailButton: 'detail',searchKey: 'Search Key',imports: 'Import',more: 'More',export: 'Export',},model: {user: 'user',org: 'org',pos: 'pos',role: 'role',bizUser: 'bizUser'},login: {signInTitle: 'Sign in',forgetPassword: 'Forget password',signIn: 'Sign in',signInOther: 'Sign in with',accountPlaceholder: 'Please input a user account',accountError: 'Please input a user account',PWPlaceholder: 'Please input a password',PWError: 'Please input a password',validLaceholder: 'Please input a valid',validError: 'Please input a valid',accountPassword: 'Account Password',phoneSms: 'Phone SMS',phonePlaceholder: 'Please input a phone',smsCodePlaceholder: 'Please input a SMS code',getSmsCode: 'SMS code',machineValidation: 'Machine Validation',sendingSmsMessage: 'Sending SMS Message',newPwdPlaceholder: 'Please input a new password',backLogin: 'Back Login',restPassword: 'Rest Password',emailPlaceholder: 'Please input a email',emailCodePlaceholder: 'Please input a Email code',restPhoneType: 'For phone rest',restEmailType: 'For email rest',sysName: 'management'},user: {userStatus: 'User Status',resetPassword: 'Reset Password',role: 'Role',batchExportButton: 'Batch Export',grantRole: 'Grant Role',grantResource: 'Grant Resource',grantPermission: 'Grant Permission',exportUserInfo: 'Export UserInfo',placeholderNameAndSearchKey: 'Please enter your name or keyword',placeholderUserStatus: 'Please select status',popconfirmDeleteUser: 'Are you sure you want to delete it?',popconfirmResatUserPwd: 'Are you sure you want to reset?'}}二、配置页面
进入需要有翻译功能的页面进行配置,如 login.vue
1. HTML内容
<template><div class="login_background"><div class="login_main"> <!-- 配置小地球显示选择中英文翻译 --><div class="login_config"><a-dropdown><global-outlined /><template #overlay><a-menu><a-menu-itemv-for="item in lang":key="item.value":command="item":class="{ selected: config.lang === item.value }"@click="configLang(item.value)">{{ item.name }}</a-menu-item></a-menu></template></a-dropdown></div> <!-- 配置登录表单 --><div class="login-form"><a-card><div class="login-header"><div class="logo"> <!-- 以下是通过sysBaseConfig动态获取图片和名称,此时名称是写死的并且需要中英翻译 --><img :alt="sysBaseConfig.SNOWY_SYS_NAME" :src="sysBaseConfig.SNOWY_SYS_LOGO" /><!--<label>{{ sysBaseConfig.SNOWY_SYS_NAME }}</label>--> <!-- 因为配置文件的login中写了sysNme属性,使用{{ $t('login.sysName') }}进行显示 --><label>{{ $t('login.sysName') }}</label></div></div><a-tabs v-model:activeKey="activeKey"> <!-- 以下使用到配置文件的login中accountPassword、accountPlaceholder、PWPlaceholder、validLaceholder、signIn字段实现中英文翻译 --><a-tab-pane key="userAccount" :tab="$t('login.accountPassword')"><a-form ref="loginForm" :model="ruleForm" :rules="rules"><a-form-item name="account"><a-inputv-model:value="ruleForm.account":placeholder="$t('login.accountPlaceholder')"size="large"@keyup.enter="login"><template #prefix><UserOutlined class="login-icon-gray" /></template></a-input></a-form-item><a-form-item name="password"><a-input-passwordv-model:value="ruleForm.password":placeholder="$t('login.PWPlaceholder')"size="large"autocomplete="off"@keyup.enter="login"><template #prefix><LockOutlined class="login-icon-gray" /></template></a-input-password></a-form-item><a-form-item name="validCode" v-if="captchaOpen === 'true'"><a-row :gutter="8"><a-col :span="17"><a-inputv-model:value="ruleForm.validCode":placeholder="$t('login.validLaceholder')"size="large"@keyup.enter="login"><template #prefix><verified-outlined class="login-icon-gray" /></template></a-input></a-col><a-col :span="7"><img :src="validCodeBase64" class="login-validCode-img" @click="loginCaptcha" /></a-col></a-row></a-form-item><a-form-item><a href="/findpwd" style="color: #0d84ff">{{ $t('login.forgetPassword') }}?</a></a-form-item><a-form-item><a-button type="primary" class="w-full" :loading="loading" round size="large" @click="login">{{ $t('login.signIn') }}</a-button></a-form-item></a-form></a-tab-pane><!--<a-tab-pane key="userSms" :tab="$t('login.phoneSms')" force-render>--><!--<phone-login-form />--><!--</a-tab-pane>--></a-tabs></a-card></div></div></div></template>2. JS内容
<script>import loginApi from '@/api/auth/loginApi'import phoneLoginForm from './phoneLoginForm.vue'import threeLogin from './threeLogin.vue'import smCrypto from '@/utils/smCrypto'import { required } from '@/utils/formRules'import { afterLogin } from './util'import config from '@/config'import configApi from '@/api/dev/configApi'import tool from '@/utils/tool'import { globalStore, iframeStore, keepAliveStore, viewTagsStore } from '@/store'import { mapActions, mapState } from 'pinia'export default {name: 'Login',components: {},data() {return {activeKey: 'userAccount',captchaOpen: config.SYS_BASE_CONFIG.SNOWY_SYS_DEFAULT_CAPTCHA_OPEN,validCodeBase64: '',ruleForm: {account: '',password: '',validCode: '',validCodeReqNo: '',autologin: false},rules: {account: [required(this.$t('login.accountError'), 'blur')],password: [required(this.$t('login.PWError'), 'blur')]},loading: false, // 添加中英文切换功能(实现小地球图标的显示与切换)config: {lang: tool.data.get('APP_LANG') || this.$CONFIG.LANG,theme: tool.data.get('APP_THEME') || 'default'}, // 小地球图标切换语言功能选择lang: [{name: '简体中文',value: 'zh-cn'},{name: 'English',value: 'en'}]}},computed: {...mapState(globalStore, ['sysBaseConfig']),},watch: {'config.theme': function (val) {document.body.setAttribute('data-theme', val)}, // 添加中英文切换功能的配置实现(html中config.lang === item.value)'config.lang': function (val) {this.$i18n.locale = valtool.data.set('APP_LANG', val)}},created() {this.clearViewTags()this.clearKeepLive()this.clearIframeList()},mounted() {let formData = ref(config.SYS_BASE_CONFIG)configApi.configSysBaseList().then((data) => {if (data) {data.forEach((item) => {formData.value[item.configKey] = item.configValue})this.captchaOpen = formData.value.SNOWY_SYS_DEFAULT_CAPTCHA_OPENtool.data.set('SNOWY_SYS_BASE_CONFIG', formData.value)this.setSysBaseConfig(formData.value)this.refreshSwitch()}})},methods: {...mapActions(keepAliveStore, ['clearKeepLive']),...mapActions(viewTagsStore, ['clearViewTags']),...mapActions(iframeStore, ['clearIframeList']),...mapActions(globalStore, ['setSysBaseConfig']), // 点击语言后实现切换的方法,在HTML中@click="configLang(item.value)"configLang(key) {this.config.lang = key},// 通过开关加载内容refreshSwitch() {// 判断是否开启验证码if (this.captchaOpen === 'true') {// 加载验证码this.loginCaptcha()// 加入校验this.rules.validCode = [required(this.$t('login.validError'), 'blur')]}},// 获取验证码loginCaptcha() {loginApi.getPicCaptcha().then((data) => {this.validCodeBase64 = data.validCodeBase64this.ruleForm.validCodeReqNo = data.validCodeReqNo})},// 用户名密码登录async login() {this.$refs.loginForm.validate().then(async () => {this.loading = trueconst loginData = {account: this.ruleForm.account,// 密码进行SM2加密,传输过程中看到的只有密文,后端存储使用hashpassword: smCrypto.doSm2Encrypt(this.ruleForm.password),validCode: this.ruleForm.validCode,validCodeReqNo: this.ruleForm.validCodeReqNo}// 获取tokentry {const loginToken = await loginApi.login(loginData)await afterLogin(loginToken)} catch (err) {this.loading = falsethis.loginCaptcha()}})},}}</script><!-- 引入该login页面的样式配置 --><style lang="less">@import 'login';</style>三、主要步骤
方法一
① 页面上添加小地球选择语言显示选项
<a-dropdown> <global-outlined /> <template #overlay> <a-menu><a-menu-itemv-for="item in lang" :key="item.value":command="item":class="{ selected: config.lang === item.value }"@click="configLang(item.value)">{{ item.name }}</a-menu-item></a-menu> </template></a-dropdown>② 实现添加的小地球功能
export default {data() {return {lang: [],config: { // lang 属性的值是通过 tool.data.get('APP_LANG') || this.$CONFIG.LANG 表达式获取的 // 如果 tool.data.get('APP_LANG') 返回一个真值(非空、非undefined、非false等),则使用该值作为 lang 的值;否则,使用 this.$CONFIG.LANG 作为默认值。lang: tool.data.get('APP_LANG') || this.$CONFIG.LANG,}}}, watch: { // 当 config.lang 发生变化时,即语言设置发生变化时,触发绑定的回调函数'config.lang': function (val) { // 将新的语言设置应用到 $i18n 实例中,以改变应用程序的语言this.$i18n.locale = val // 将新的语言设置存储到 tool.data 中,以便在后续访问或导航到新页面时可以获取并应用语言设置tool.data.set('APP_LANG', val)}}, methods: { // 更新 config.lang 的值configLang(key) {this.config.lang = key}, }}③ 实现语言的切换选项显示
在上述 return {} 中的 lang: [] 填入数据
lang: [{name: '简体中文',value: 'zh-cn'},{name: 'English',value: 'en'}]方法二
① 页面上添加小地球选择语言显示选项
<a-dropdown v-if="!ismobile" class="panel-item"><global-outlined /><template #overlay><a-menu :selected-keys="lang"><a-menu-item key="zh-cn" @click="handleIn18('zh-cn')"><span>简体中文</span></a-menu-item><a-menu-item key="en" @click="handleIn18('en')"><span>English</span></a-menu-item></a-menu></template></a-dropdown>② 在methods中添加点击选项后的切换功能
data() {return {lang: [],}},methods: {// 设置多语言语种handleIn18(key) { // 将 this.lang 数据初始化为空数组this.lang = [] // 将传入的 key 值添加到 this.lang 数组中,用于保存语言数据this.lang.push(key) // 将语言设置应用到 $i18n 实例中,以改变应用程序的语言this.$i18n.locale = key // 将语言设置存储到 this.$TOOL.data 中,使用键名 'APP_LANG' 来标识。这样可以将语言设置持久化,以便在后续访问或导航到新页面时可以获取并应用语言设置this.$TOOL.data.set('APP_LANG', key)},}四、多页面使用相同语言
在以上方法中都将使得所有的页面用同一种语言,因为:
方法一中
'config.lang': function (val) { // 将新的语言设置应用到 $i18n 实例中,以改变应用程序的语言 this.$i18n.locale = val // 将新的语言设置存储到 tool.data 中,以便在后续访问或导航到新页面时可以获取并应用语言设置 tool.data.set('APP_LANG', val) }方法二中
// 将语言设置应用到 $i18n 实例中,以改变应用程序的语言 this.$i18n.locale = key // 将语言设置存储到 this.$TOOL.data 中,使用键名 'APP_LANG' 来标识。这样可以将语言设置持久化,以便在后续访问或导航到新页面时可以获取并应用语言设置 this.$TOOL.data.set('APP_LANG', key)lang 语言选择列表:
注意:如果想要获取的 lang 语言数据列表一致,而不需要自己重新定义的话,可以在此基础上添加如下代码:
created() {// 获取默认语言,根据之前存储的语言设置或默认的语言设置来确定数组的内容 // this.$TOOL.data.get('APP_LANG') 从 this.$TOOL.data 中获取键名为 'APP_LANG' 的值,即之前存储的语言设置。如果之前没有存储语言设置,这个表达式的结果将为 undefined // this.$CONFIG.LANG 是一个变量,表示默认的语言设置 // this.lang 的初始化通过 new Array() 创建一个新的数组。数组内容是通过三元运算符 || 进行判断 // 如果 this.$TOOL.data.get('APP_LANG') 有值,则使用它作为数组的唯一元素;否则,使用 this.$CONFIG.LANG 作为数组的唯一元素。this.lang = new Array(this.$TOOL.data.get('APP_LANG') || this.$CONFIG.LANG)},五、$t('') 无效
在一般情况下,只要在全局定义了 vue-i18(即配置了vue-i8),那么一般情况下是有用的,不管是哪种使用方式,如下两种示例:
<label>{{ $t('login.sysName') }}</label>只是用label举例并不表示只有label有用以下是 :tab、:placeholder 的举例<a-tab-pane key="userAccount" :tab="$t('login.accountPassword')"><a-form ref="loginForm" :model="ruleForm" :rules="rules"><a-form-item name="account"><a-inputv-model:value="ruleForm.account":placeholder="$t('login.accountPlaceholder')"size="large"@keyup.enter="login"><template #prefix><UserOutlined class="login-icon-gray" /></template></a-input></a-form-item><a-form-item name="password"><a-input-passwordv-model:value="ruleForm.password":placeholder="$t('login.PWPlaceholder')"size="large"autocomplete="off"@keyup.enter="login"><template #prefix><LockOutlined class="login-icon-gray" /></template></a-input-password></a-form-item></a-form>以上都属于正确演示,都是有效的,但是如果使用第二种方式,且直接用tab、:placeholder而没有加冒号 : 则失效,包括其他的比如 :title 等都要加 : 才有效。
原因:冒号“:”其实是v-bind的缩写,冒号后面绑定为变量,会动态变化的值;一般属性后面为常量。由于当前需要切换语言所以是动态的值绑定,需要冒号:或v-bind:才可变。
六、遍历List进行中英文切换
以下假设List集合中的字段为中文,英文的话更简单,就不举例了。
zh-cn.js
menu: {'系统首页': '系统首页','个人中心' : '个人中心','其他': '其他'}如果集合中的数据是中文就写中文的字段并使用单引号,如果是英文就不要单引号en.js
menu: {'系统首页': 'System Home','个人中心' : 'Personal Center','其他': 'Other'}如果集合中的数据是中文就写中文的字段并使用单引号,如果是英文就不要单引号HTML中
<!-- v-for="shortcut in shortcutList" 遍历集合shortcutList中的每一个数据并将其对象命名为shortcut --><a-col :span="6" :key="shortcut.id" v-for="shortcut in shortcutList"><shortcutCard:icon="shortcut.icon ? shortcut.icon : 'menu-outlined'":label="$t('menu.'+shortcut.title)"@click="leaveFor(shortcut.path)"/></a-col>其中 :label="$t('menu.'+shortcut.title)" 即引入menu中变量shortcut.title的值的数据显示效果如下(List中没有的数据不会显示,比如像上面说些的'其他'字段):

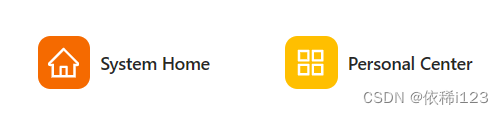
所以应用主要是:
{{ $t('menu.' + shortcut.title) }}或者:title="$t('menu.' + shortcut.title)"七、在HTML、JS中使用$t()
1、HTML中使用$t()
{{ $t('menu.title'}}或者:title="$t('menu.title')"2、JS中使用$t()
使用 this 引用 $t() 即 this.$t() ,注意JS中的 属性 :this.$t() 中属性是不需要冒号“:”的!!!
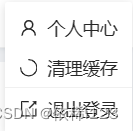
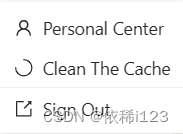
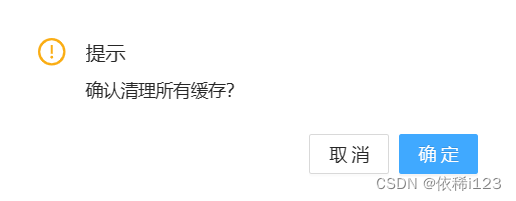
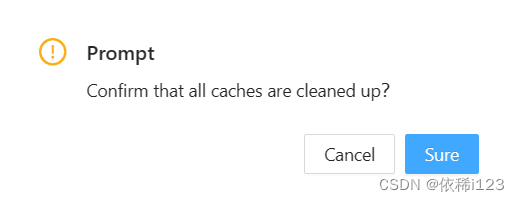
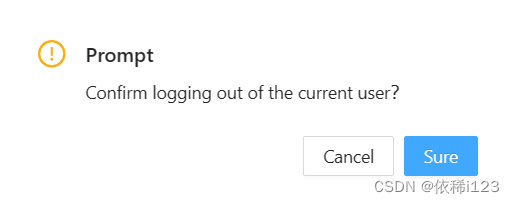
handleUser(key) { // 个人中心页面跳转if (key === 'uc') {router.push({ path: '/usercenter' })} // 点击清理缓存if (key === 'clearCache') {this.$confirm({ // 提示title: this.$t('login.info'), // 提示内容content: this.$t('login.delCache'),icon: createVNode(ExclamationCircleOutlined),maskClosable: false, // 确认按钮okText: this.$t('button.sure'), // 取消按钮cancelText: this.$t('button.cancel'),onOk() {message.loading('正在清理中...', 1)tool.data.clear()setTimeout(() => {router.replace({ path: '/login' })location.reload()}, 100)},onCancel() {}})} // 退出登录if (key === 'outLogin') {this.$confirm({ // 提示title: this.$t('login.info'), // 提示内容content: this.$t('login.logoutMessage'),icon: createVNode(ExclamationCircleOutlined),maskClosable: false, // 确认按钮okText: this.$t('button.sure'), // 取消按钮cancelText: this.$t('button.cancel'),onOk() {// 取得缓存中的tokenconst token = tool.data.get('TOKEN')const param = {token: token}message.loading('退出中...', 1)loginApi.logout(param).then(() => {// message.c// 清理掉个人的一些信息tool.data.remove('TOKEN')tool.data.remove('USER_INFO')tool.data.remove('MENU')tool.data.remove('PERMISSIONS')router.replace({ path: '/login' })}).catch(() => {tool.data.clear()router.replace({ path: '/login' })location.reload()})},onCancel() {}})}},以下是调用 handleUser 方法的HTML:
<a-menu><a-menu-item key="uc" @click="handleUser('uc')"><UserOutlined style="margin-right: 8px" /><span>{{ $t('index.userCenter') }}</span></a-menu-item><a-menu-item key="clearCache" @click="handleUser('clearCache')"><loading3-quarters-outlined style="margin-right: 8px" /><span>{{ $t('index.cleanCache') }}</span></a-menu-item><a-menu-divider /><a-menu-item key="outLogin" @click="handleUser('outLogin')"><export-outlined style="margin-right: 8px" /><span>{{ $t('index.logout') }}</span></a-menu-item></a-menu>效果如图:

3、JS里的HTML部分中使用$t()
renderAlert() {// 绘制统计列数据// eslint-disable-next-line no-unused-varsconst needTotalItems = this.needTotalList.map((item) => {return (<span className="mr-3">{item.title} 总计{' '}<a className="font-6">{!item.customRender ? item.total : item.customRender(item.total)}</a></span>)})// 绘制 清空 按钮// eslint-disable-next-line no-unused-varsconst clearItem =typeof this.alert === 'boolean' && this.alert? this.renderClear(this.clearSelected): typeof this.alert.clear === 'function'? this.renderClear(this.alert.clear): null// 绘制 alert 组件if (alert) {const message = (<div><span className="mr-3">已选择 : <a className="font-6">{this.selectedRows.length}</a></span>{needTotalItems}{clearItem}</div>)return <a-alert showIcon class="mb-4" message={message} />}},renderClear(callback) {if (this.selectedRowKeys.length <= 0) return nullreturn (<aclassName="ml-6"onClick={() => {callback()this.clearSelected()}}>{' '}清空{' '}</a>)},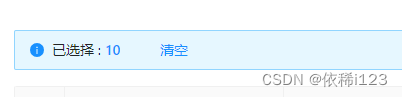
切换多语言,修改代码:
renderClear(callback) {if (this.selectedRowKeys.length <= 0) return nullreturn (<aclassName="ml-6"onClick={() => {callback()this.clearSelected()}}>{' '} <!-- 修改了此处 -->{ this.$t('button.clean') }{' '}</a>)},renderAlert() {// 绘制统计列数据// eslint-disable-next-line no-unused-varsconst needTotalItems = this.needTotalList.map((item) => {return (<span className="mr-3">{item.title} 总计{' '}<a className="font-6">{!item.customRender ? item.total : item.customRender(item.total)}</a></span>)})// 绘制 清空 按钮// eslint-disable-next-line no-unused-varsconst clearItem =typeof this.alert === 'boolean' && this.alert? this.renderClear(this.clearSelected): typeof this.alert.clear === 'function'? this.renderClear(this.alert.clear): null// 绘制 alert 组件if (alert) {const message = (<div><span className="mr-3"> <!-- 修改了此处 -->{ this.$t('table.selected') } : <a className="font-6">{this.selectedRows.length}</a></span>{needTotalItems}{clearItem}</div>)return <a-alert showIcon class="mb-4" message={message} />}},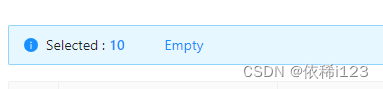
4、对antd的<s-table>表头国际化i18n使用$t()
原始表格HTML:
<s-table ref="table" :columns="columns" :data="loadData" :alert="options.alert.show" bordered :row-key="(record) => record.id" :tool-config="toolConfig" :row-selection="options.rowSelection"><template #operator class="table-operator"> <a-space> <a-button type="primary" @click="formRef.onOpen()" v-if="hasPerm('sysSeriesAdd')"> <template #icon><plus-outlined /></template> {{ $t('button.add') }} </a-button> <xn-batch-delete v-if="hasPerm('sysSeriesBatchDelete')" :selectedRowKeys="selectedRowKeys" @batchDelete="deleteBatchSysSeries" /> </a-space></template><template #bodyCell="{ column, record }"> <template v-if="column.dataIndex === 'picUrl'"> <img :src="record.picUrl" alt="图片" style="width: 80px; height: 100px"> </template> <template v-if="column.dataIndex === 'isOver'"> {{ $TOOL.dictTypeData('COMMON_YES_OR_NO', record.isOver) }} </template> <template v-if="column.dataIndex === 'online'"> {{ $TOOL.dictTypeData('COMMON_YES_OR_NO', record.online) }} </template> <template v-if="column.dataIndex === 'action'"> <a-space> <a @click="batchBind(record)" v-if="hasPerm('sysSeriesBind')">{{ $t('button.bind') }}</a> <a-divider type="vertical" v-if="hasPerm(['sysSeriesBind'], 'and')" /> <a @click="formRef.onOpen(record)" v-if="hasPerm('sysSeriesEdit')">{{ $t('common.editButton') }}</a> <a-divider type="vertical" v-if="hasPerm(['sysSeriesEdit', 'sysSeriesDelete'], 'and')" /> <a-popconfirm :title="$t('user.popconfirmDeleteUser')" @confirm="deleteSysSeries(record)"> <a-button type="link" danger size="small" v-if="hasPerm('sysSeriesDelete')">{{ $t('button.delete') }}</a-button> </a-popconfirm> </a-space> </template></template></s-table>对表头以数组形式定义:
const columns = [{title: '剧名',dataIndex: 'name'},{title: '总集数',dataIndex: 'totalVideo'},{title: '是否完结',dataIndex: 'isOver'},{title: '封面图',dataIndex: 'picUrl',},{title: '扩展信息',dataIndex: 'extJson',ellipsis: true},{title: '是否上架',dataIndex: 'online'},{title: '创建时间',dataIndex: 'createTime'},{title: '创建用户',dataIndex: 'createrName'}]因为JS部分使用的是setup,并不是export default,在其中引用 $t 或者 this.$t 都报错,找不到 $t,所以国际化之后需要引入i18n,不是内部下载的vue-i18n:import { useI18n } from "vue-i18n";,而是自己编写的配置:import i18n from '@/locales';,
如图: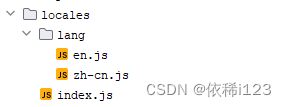 再:const { t } = i18n.global;,
代码如下:
<script setup name="xxx"> // 从 @/locales 中导入一个名为 i18n 的对象(locales 文件用于处理国际化(i18n)相关的配置和逻辑) import i18n from '@/locales' // 从 i18n.global 对象中解构赋值一个名为 t 的变量 // t 是一个函数或方法,用于国际化文本的翻译 // i18n.global 是一个全局的 i18n 实例,包含了初始化和配置的信息。 const { t } = i18n.global // 测试,刷新是识别到语言并进行打印 console.log("打印出:", t('model.user'))</script>切换后刷新如下图:
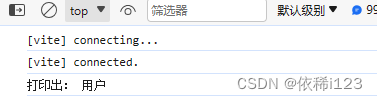
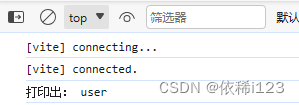
由于以上方法只能在页面刷新是获取到当前语言,所以需要在切换语言是进行页面刷新:
<a-dropdown> <global-outlined /> <template #overlay> <a-menu :selected-keys="lang"> <a-menu-item key="zh-cn" @click="handleIn18('zh-cn')"> <span>简体中文</span> </a-menu-item> <a-menu-item key="en" @click="handleIn18('en')"> <span>English</span> </a-menu-item> </a-menu> </template></a-dropdown> // 设置多语言语种 handleIn18(key) { this.lang = [] this.lang.push(key) this.$i18n.locale = key this.$TOOL.data.set('APP_LANG', key) // 页面刷新 window.location.reload() },之后的使用直接 t('xxx.xxx') 即可:
const columns = [ { title: t('table.seriesName'), dataIndex: 'name', }, { title: t('table.allPlay'), dataIndex: 'totalVideo' }, { title: t('table.isOver'), dataIndex: 'isOver' }, { title: t('table.image'), dataIndex: 'picUrl', }, { title: t('form.expand'), dataIndex: 'extJson', ellipsis: true }, { title: t('table.isOn'), dataIndex: 'online' }, { title: t('table.createTime'), dataIndex: 'createTime' }, { title: t('table.createUser'), dataIndex: 'createrName' } ]将判断部分也进行修改:
<template #bodyCell="{ column, record }"> <template v-if="column.dataIndex === 'picUrl'"> <img :src="record.picUrl" alt="图片" style="width: 80px; height: 100px"> </template> <template v-if="column.dataIndex === 'isOver'"> <div v-if="record.isOver === 'YES'">{{ $t('table.yes') }}</div> <div v-else>{{ $t('table.no') }}</div> </template> <template v-if="column.dataIndex === 'online'"> <div v-if="record.online === 'YES'">{{ $t('table.yes') }}</div> <div v-else>{{ $t('table.no') }}</div> </template></template>5、关于setup函数中的i18n的使用
即第4点antd中描述的那样:
// 引入自己配置的关于i18n的文件夹import i18n from "@/locales";const { t } = i18n.global之后所有的需要 $t 或者 this.$t 的地方都使用 t 即可。