文章目录
初始化DefaultBootstrapContext开启Headless模式获取监听器并启动封装命令行参数准备环境打印Banner创建上下文容器预初始化上下文容器刷新Spring容器打印启动时间发布事件执行特定的run方法
上一篇《【SpringBoot3.0源码】启动流程源码解析 • 上》,主要讲解了new SpringApplication()设置了一些初始化器和监听器,接下来我们讲解下run方法的调用。
步入run方法:
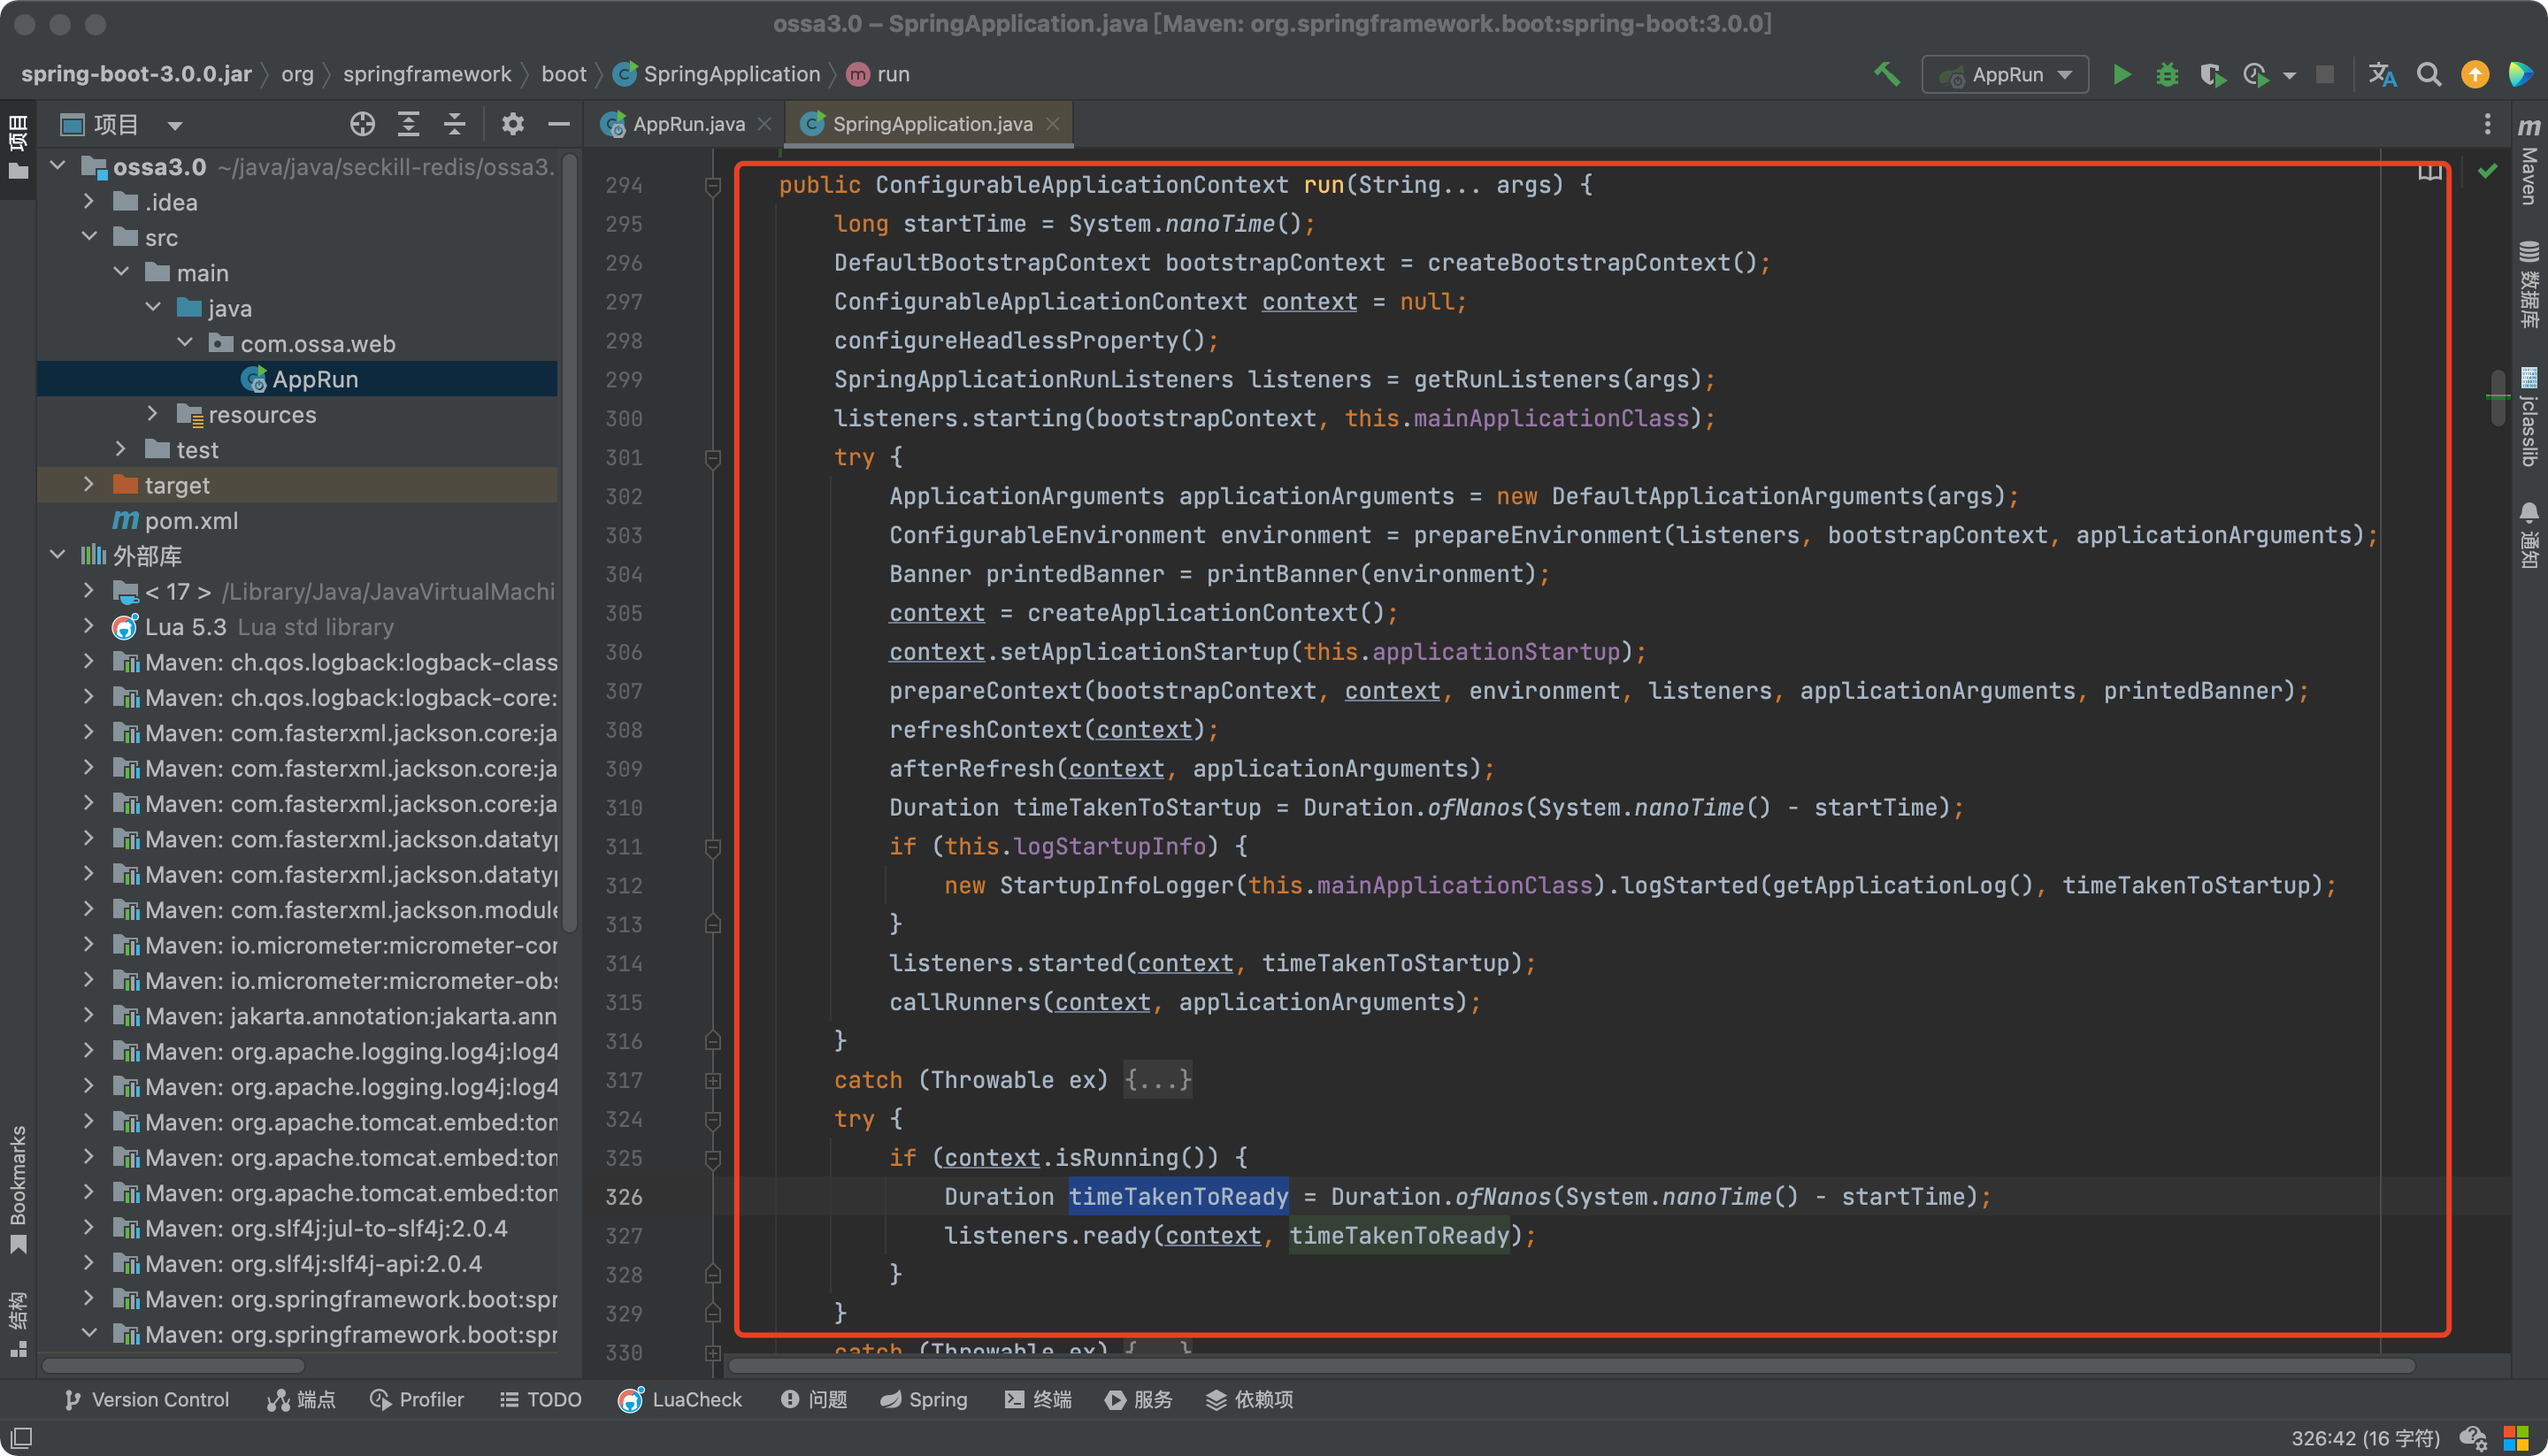
public ConfigurableApplicationContext run(String... args) {// 记录时间long startTime = System.nanoTime();// 利用BootstrapRegistryInitializer初始化DefaultBootstrapContext对象DefaultBootstrapContext bootstrapContext = createBootstrapContext();ConfigurableApplicationContext context = null;// 开启了Headless模式configureHeadlessProperty();// 获取监听器SpringApplicationRunListeners listeners = getRunListeners(args);// 发布ApplicationStartingEvent事件listeners.starting(bootstrapContext, this.mainApplicationClass);try {// 根据命令行参数,实例化一个ApplicationArgumentsApplicationArguments applicationArguments = new DefaultApplicationArguments(args);// 准备环境ConfigurableEnvironment environment = prepareEnvironment(listeners, bootstrapContext, applicationArguments);// 打印BannerBanner printedBanner = printBanner(environment);// 据webApplicationType创建不同的Spring上下文容器(有三种)context = createApplicationContext();context.setApplicationStartup(this.applicationStartup);// 预初始化spring上下文prepareContext(bootstrapContext, context, environment, listeners, applicationArguments, printedBanner);// 刷新Spring容器refreshContext(context);afterRefresh(context, applicationArguments);// 打印启动时间Duration timeTakenToStartup = Duration.ofNanos(System.nanoTime() - startTime);if (this.logStartupInfo) {new StartupInfoLogger(this.mainApplicationClass).logStarted(getApplicationLog(), timeTakenToStartup);}// 发布ApplicationStartedEvent事件和AvailabilityChangeEvent事件listeners.started(context, timeTakenToStartup);// 获取Spring容器中的ApplicationRunner/CommandLineRunner类型的Bean,并执行run方法callRunners(context, applicationArguments);}catch (Throwable ex) {if (ex instanceof AbandonedRunException) {throw ex;}// 发布ApplicationFailedEvent事件handleRunFailure(context, ex, listeners);throw new IllegalStateException(ex);}try {if (context.isRunning()) {Duration timeTakenToReady = Duration.ofNanos(System.nanoTime() - startTime);// 发布ApplicationReadyEvent事件和AvailabilityChangeEvent事件listeners.ready(context, timeTakenToReady);}}catch (Throwable ex) {if (ex instanceof AbandonedRunException) {throw ex;}// 发布ApplicationFailedEvent事件handleRunFailure(context, ex, null);throw new IllegalStateException(ex);}return context;}初始化DefaultBootstrapContext
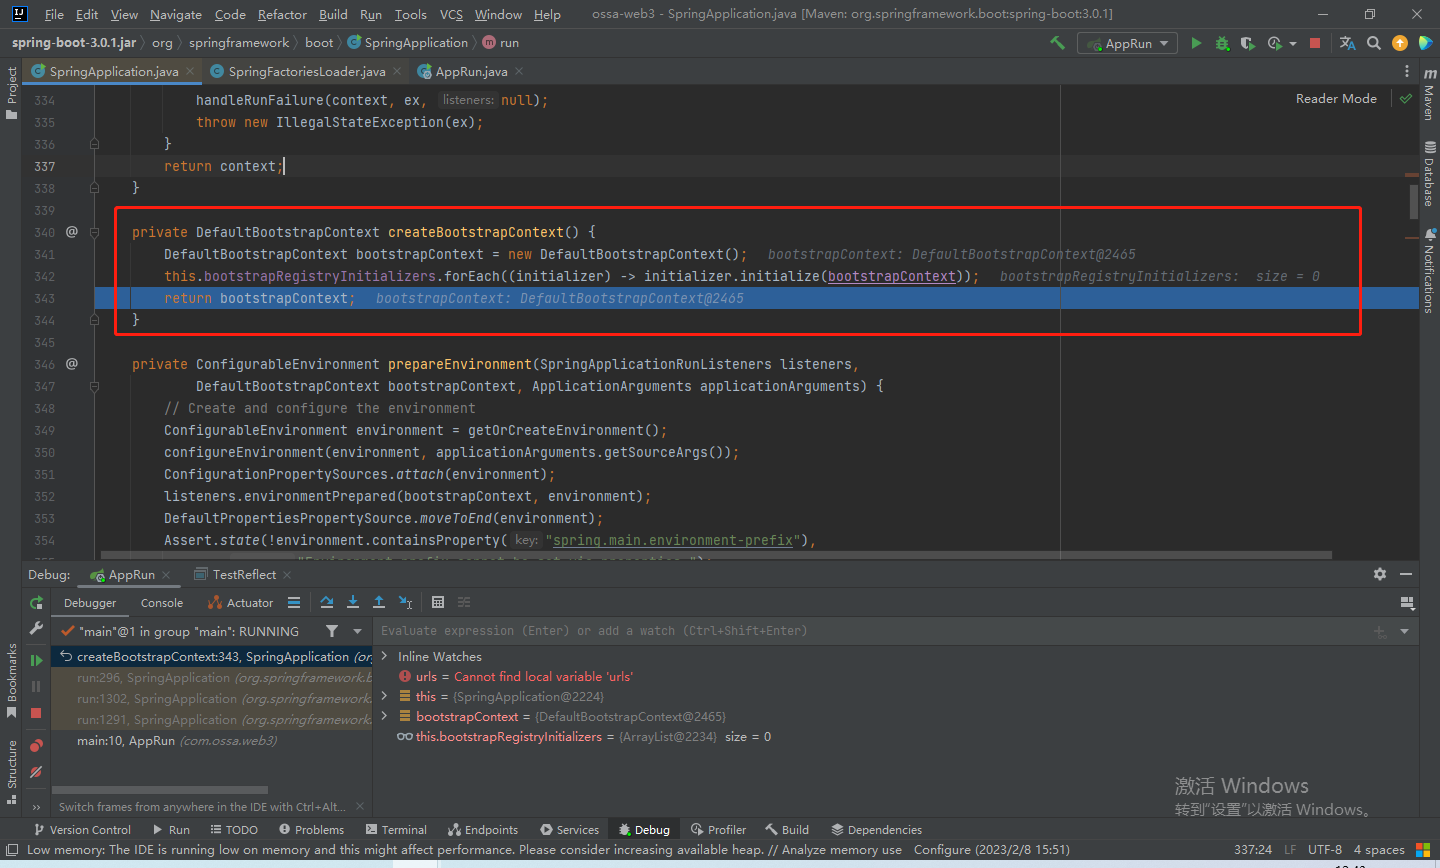
步入createBootstrapContext方法:
开启Headless模式
Headless模式是在缺少显示屏、键盘或者鼠标的系统配置。
步入configureHeadlessProperty方法:
private void configureHeadlessProperty() {System.setProperty(SYSTEM_PROPERTY_JAVA_AWT_HEADLESS,System.getProperty(SYSTEM_PROPERTY_JAVA_AWT_HEADLESS, Boolean.toString(this.headless)));}启用headless模式,需要使用setProperty方法去设置相应的系统属性。
System.setProperty(“java.awt.headless”,”true”)如果想在一个相同的程序 中使用headless和传统环境,你可以使用下面的命令行来完成:
java -Djava.awt.headless=true获取监听器并启动
SpringApplicationRunListeners listeners = getRunListeners(args);listeners.starting(bootstrapContext, this.mainApplicationClass);获取SpringApplicationRunListeners,SpringBoot提供了一个EventPublishingRunListener,它实现了SpringApplicationRunListener接口
Spring会利用这个类,发布一个ApplicationContextInitializedEvent事件,可以通过定义ApplicationListener来监听这个事件。
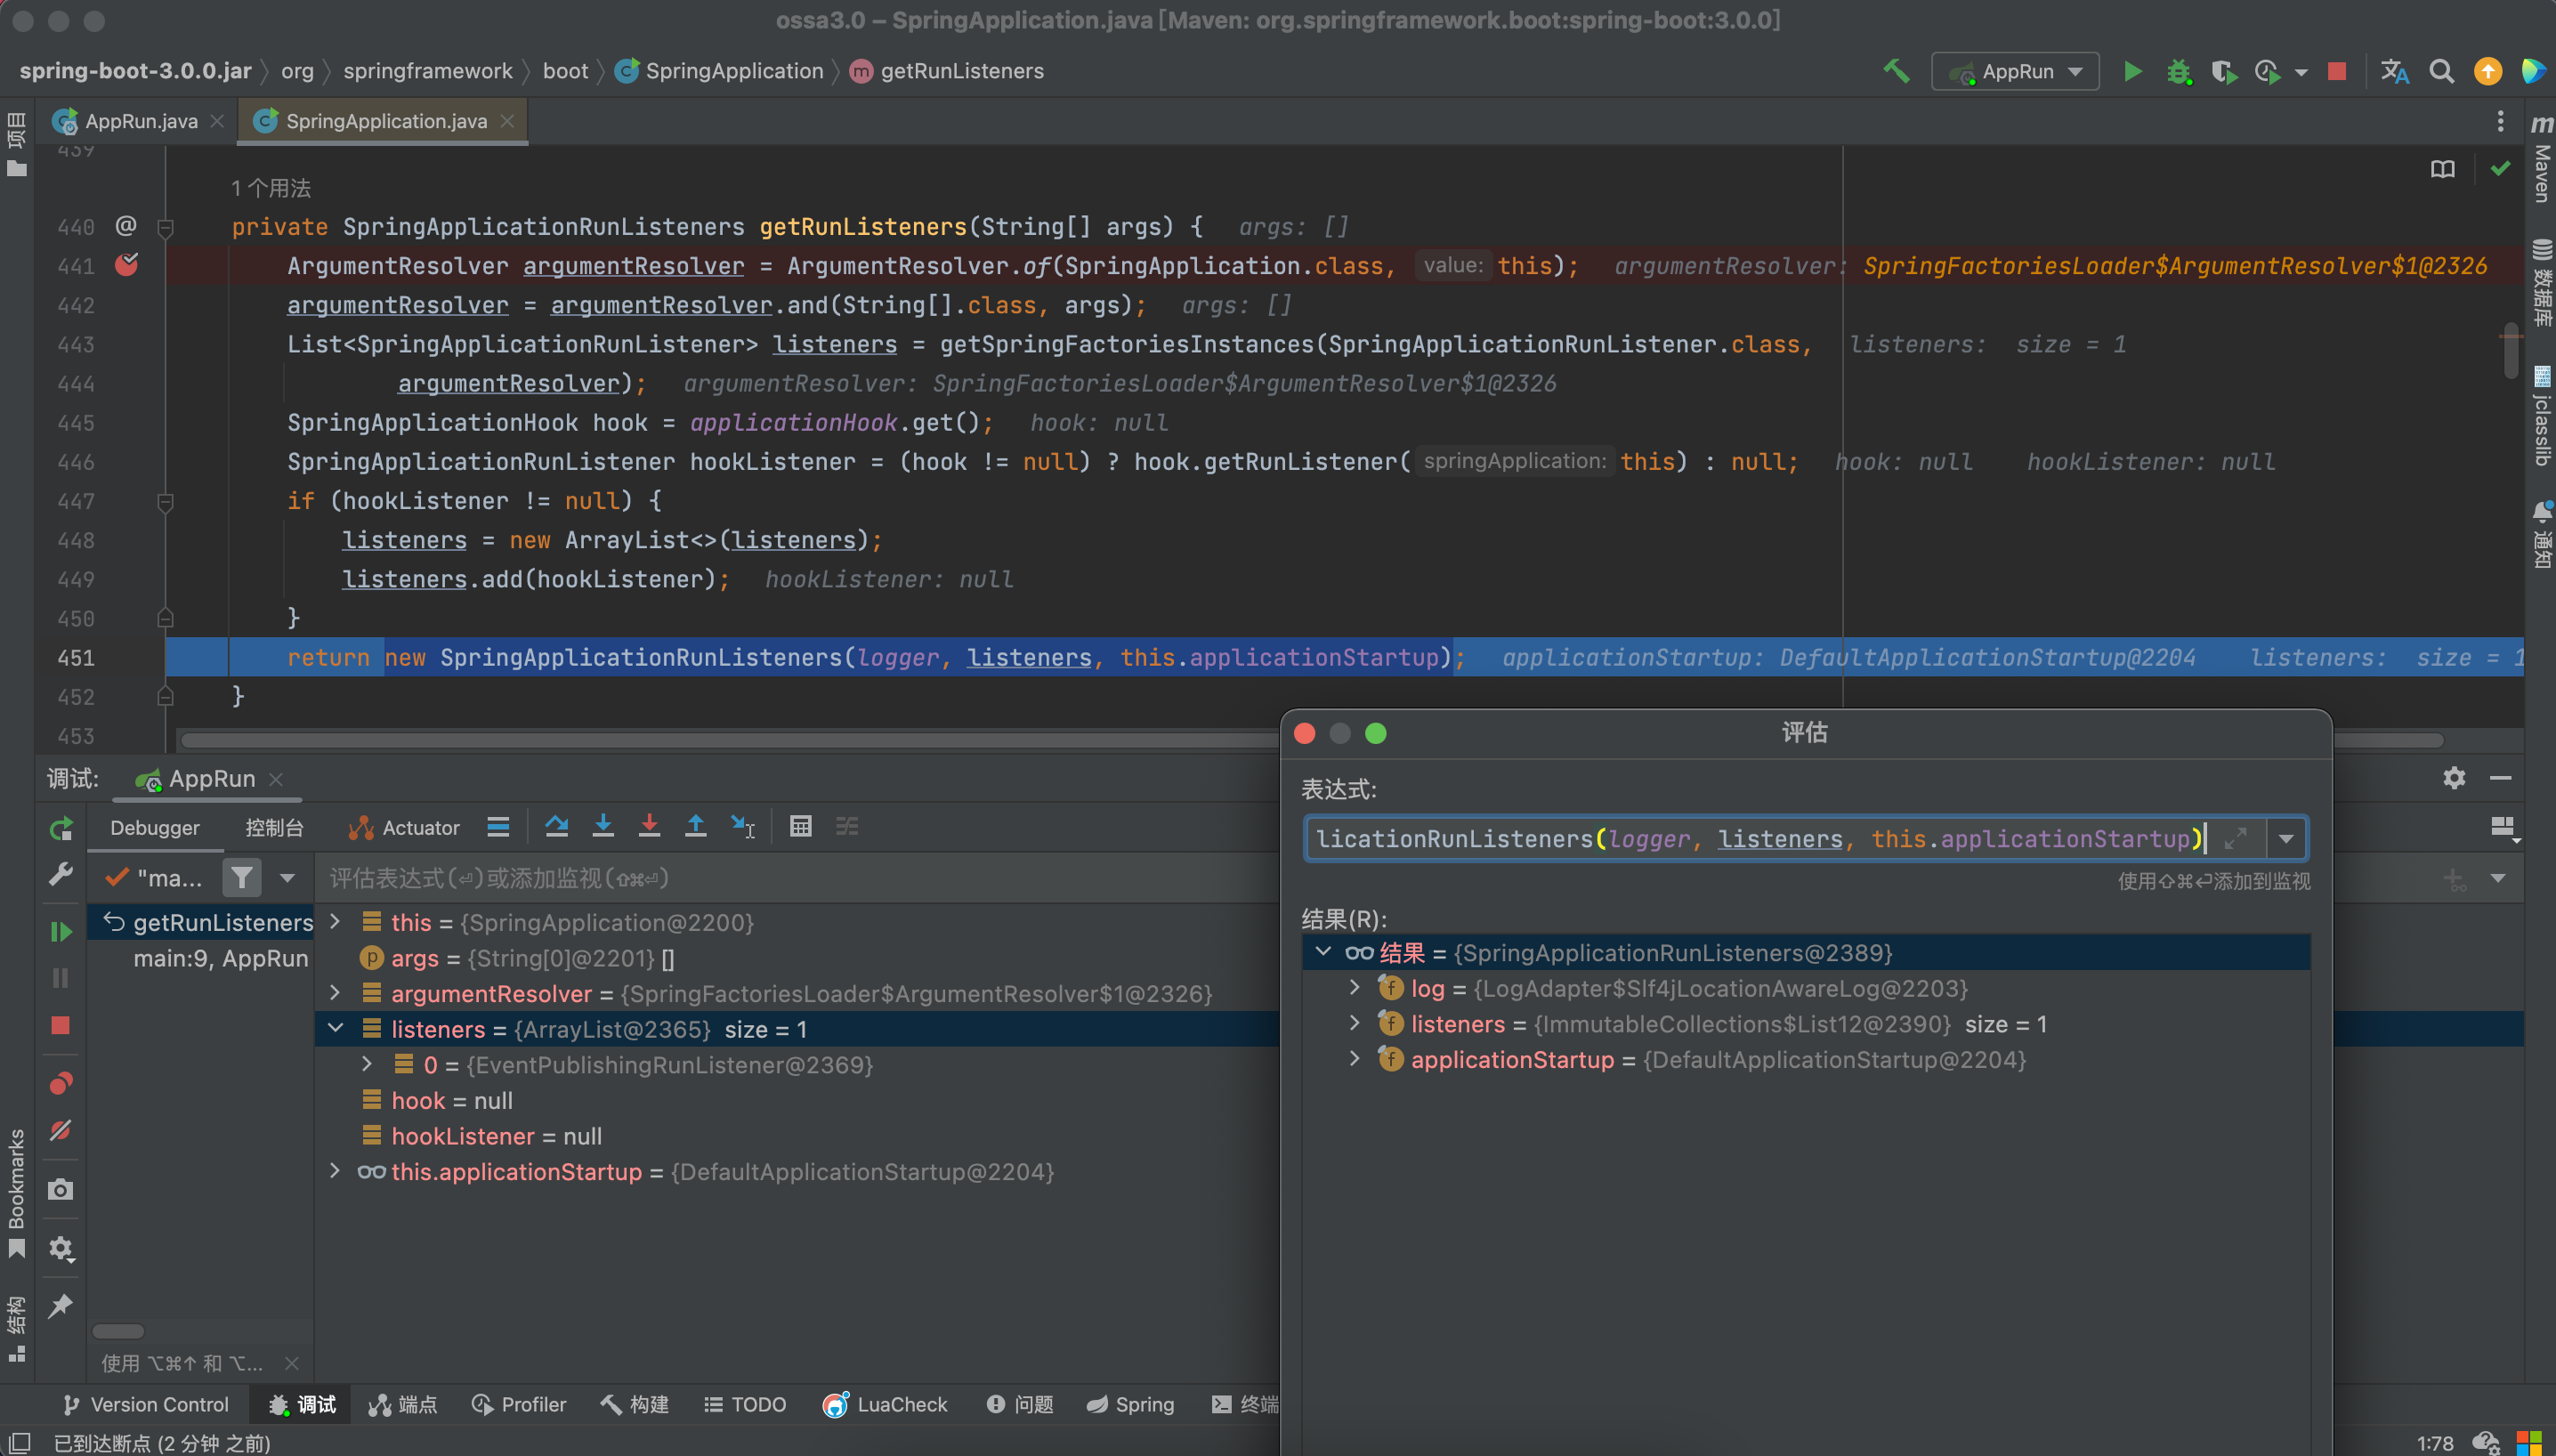
步入getRunListeners方法:调用getSpringFactoriesInstances方法获取监听器,这个方法前面前面讲过,因为在前面已经put进m缓存中,所以这里可以根据参数获取value值。
最后返回一个SpringApplicationRunListener实例。
接下来回去调用:
listeners.starting(bootstrapContext, this.mainApplicationClass);步入starting方法:
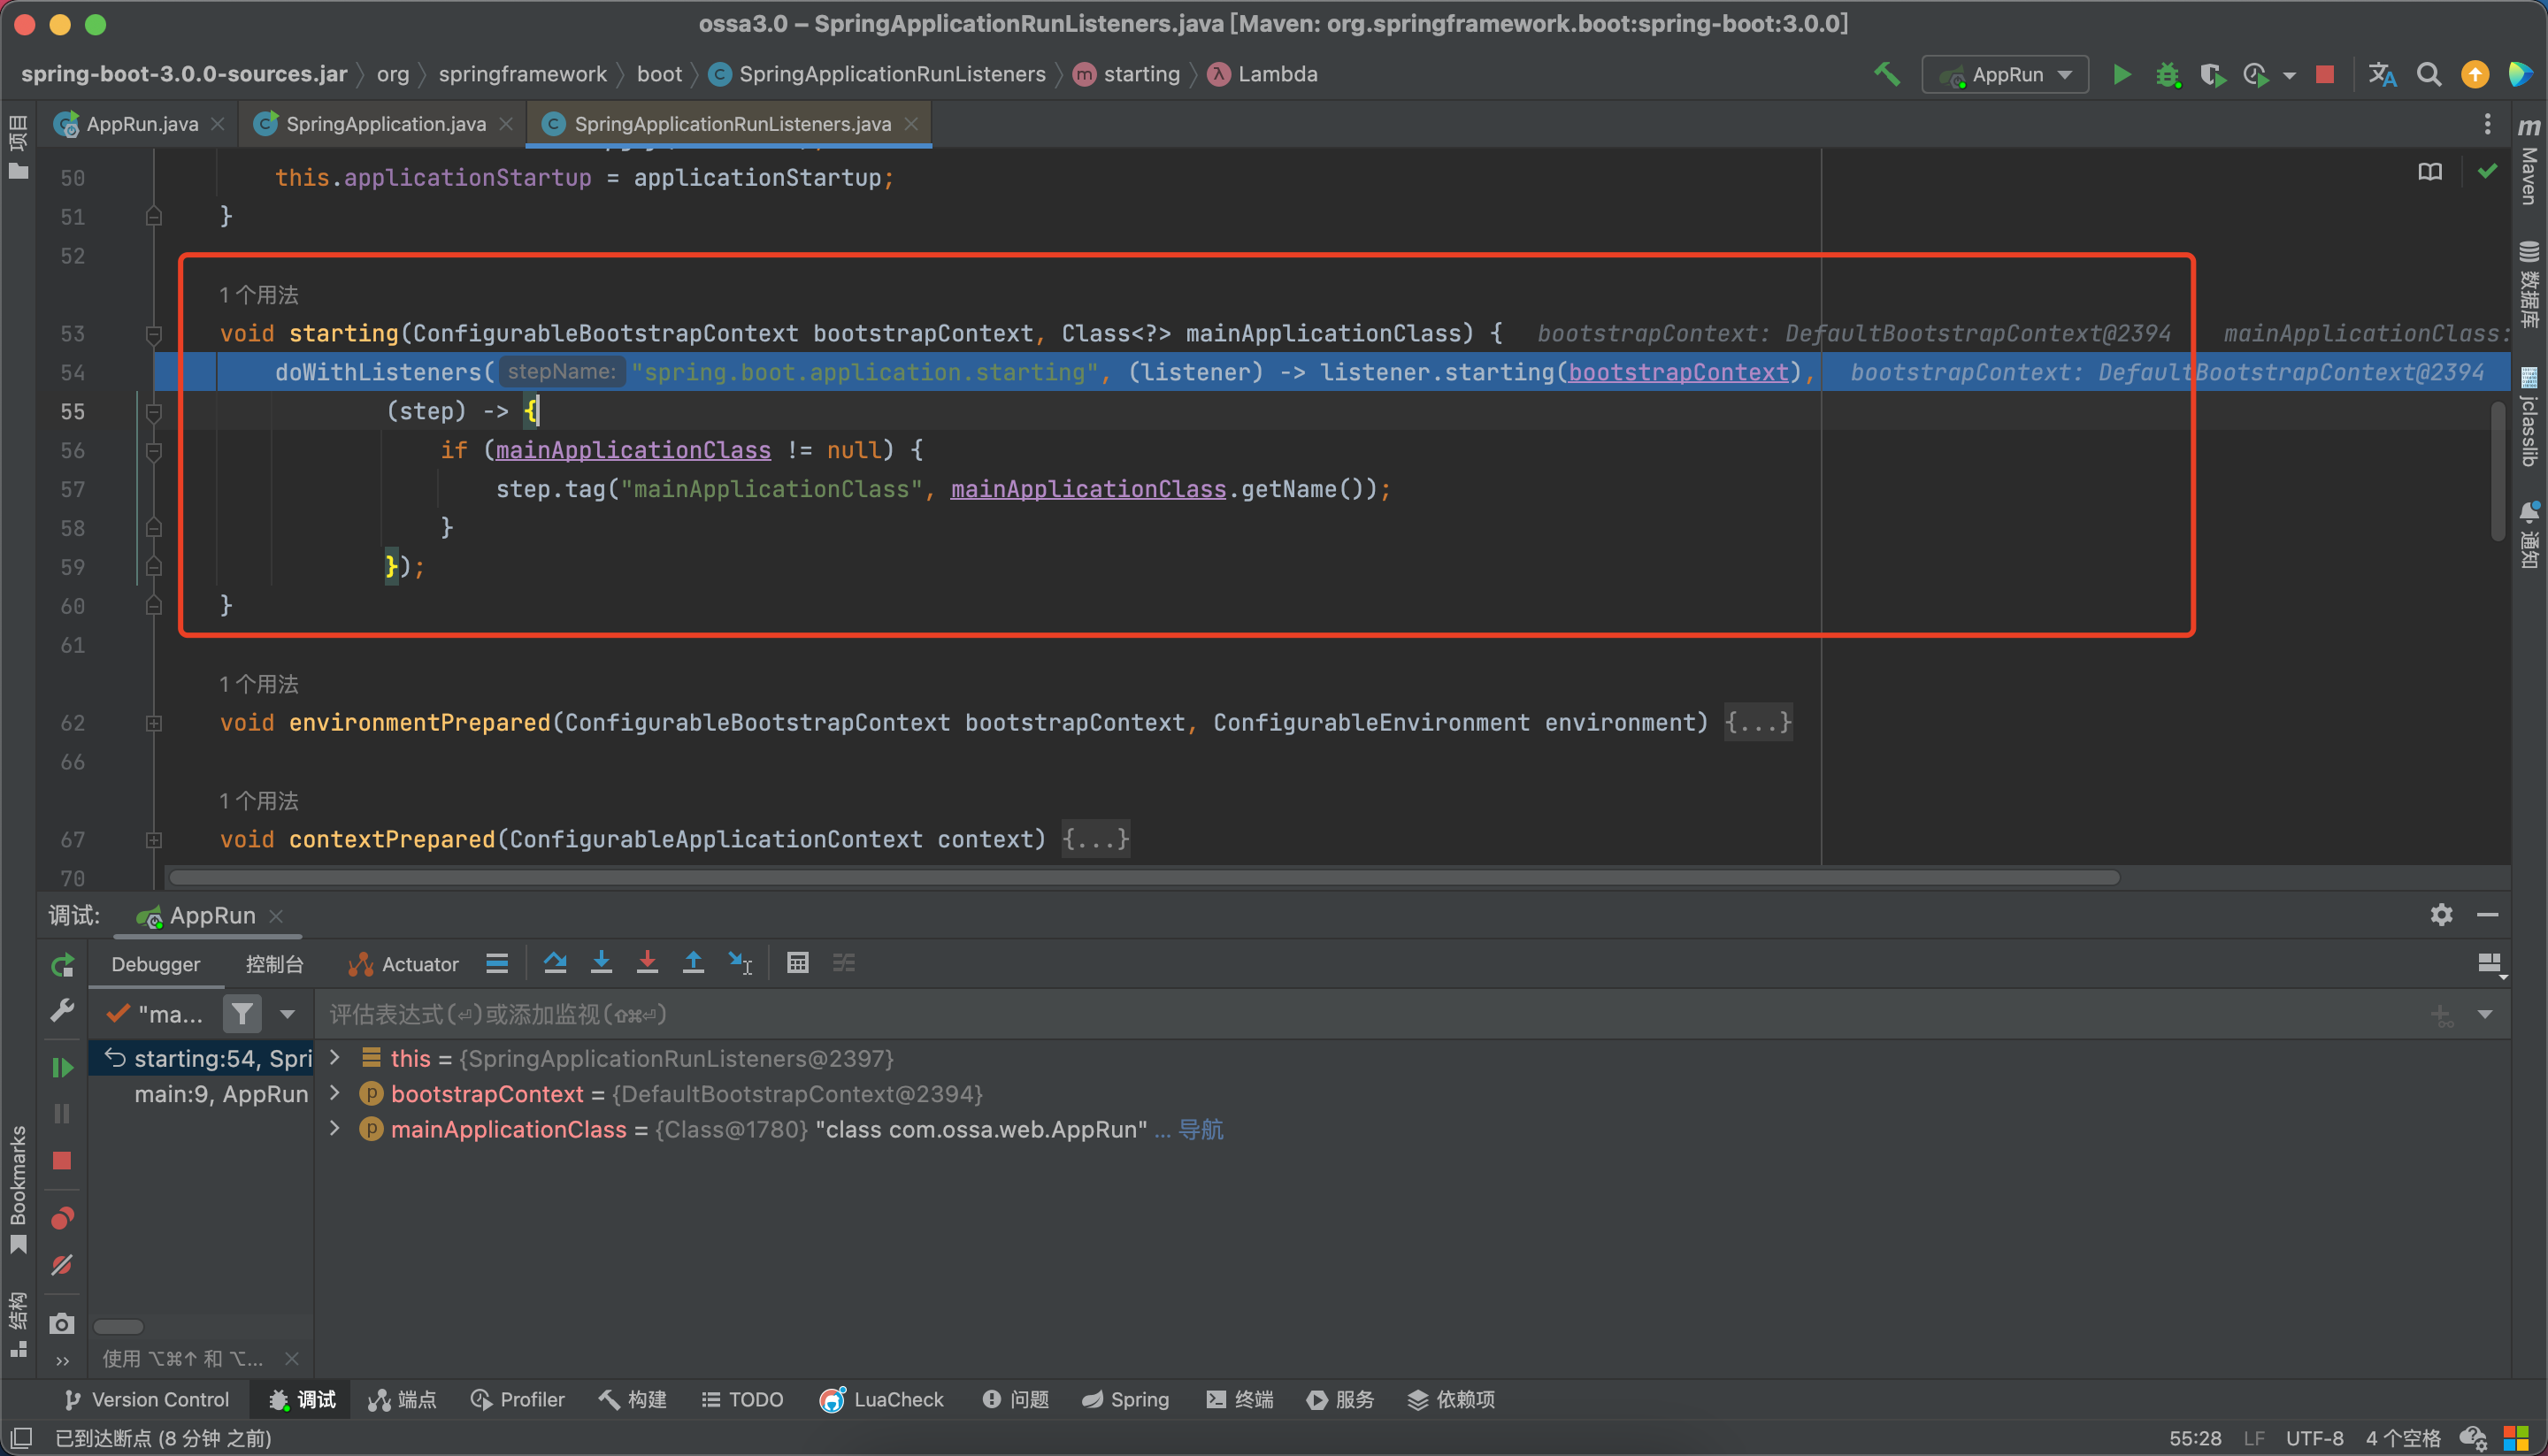
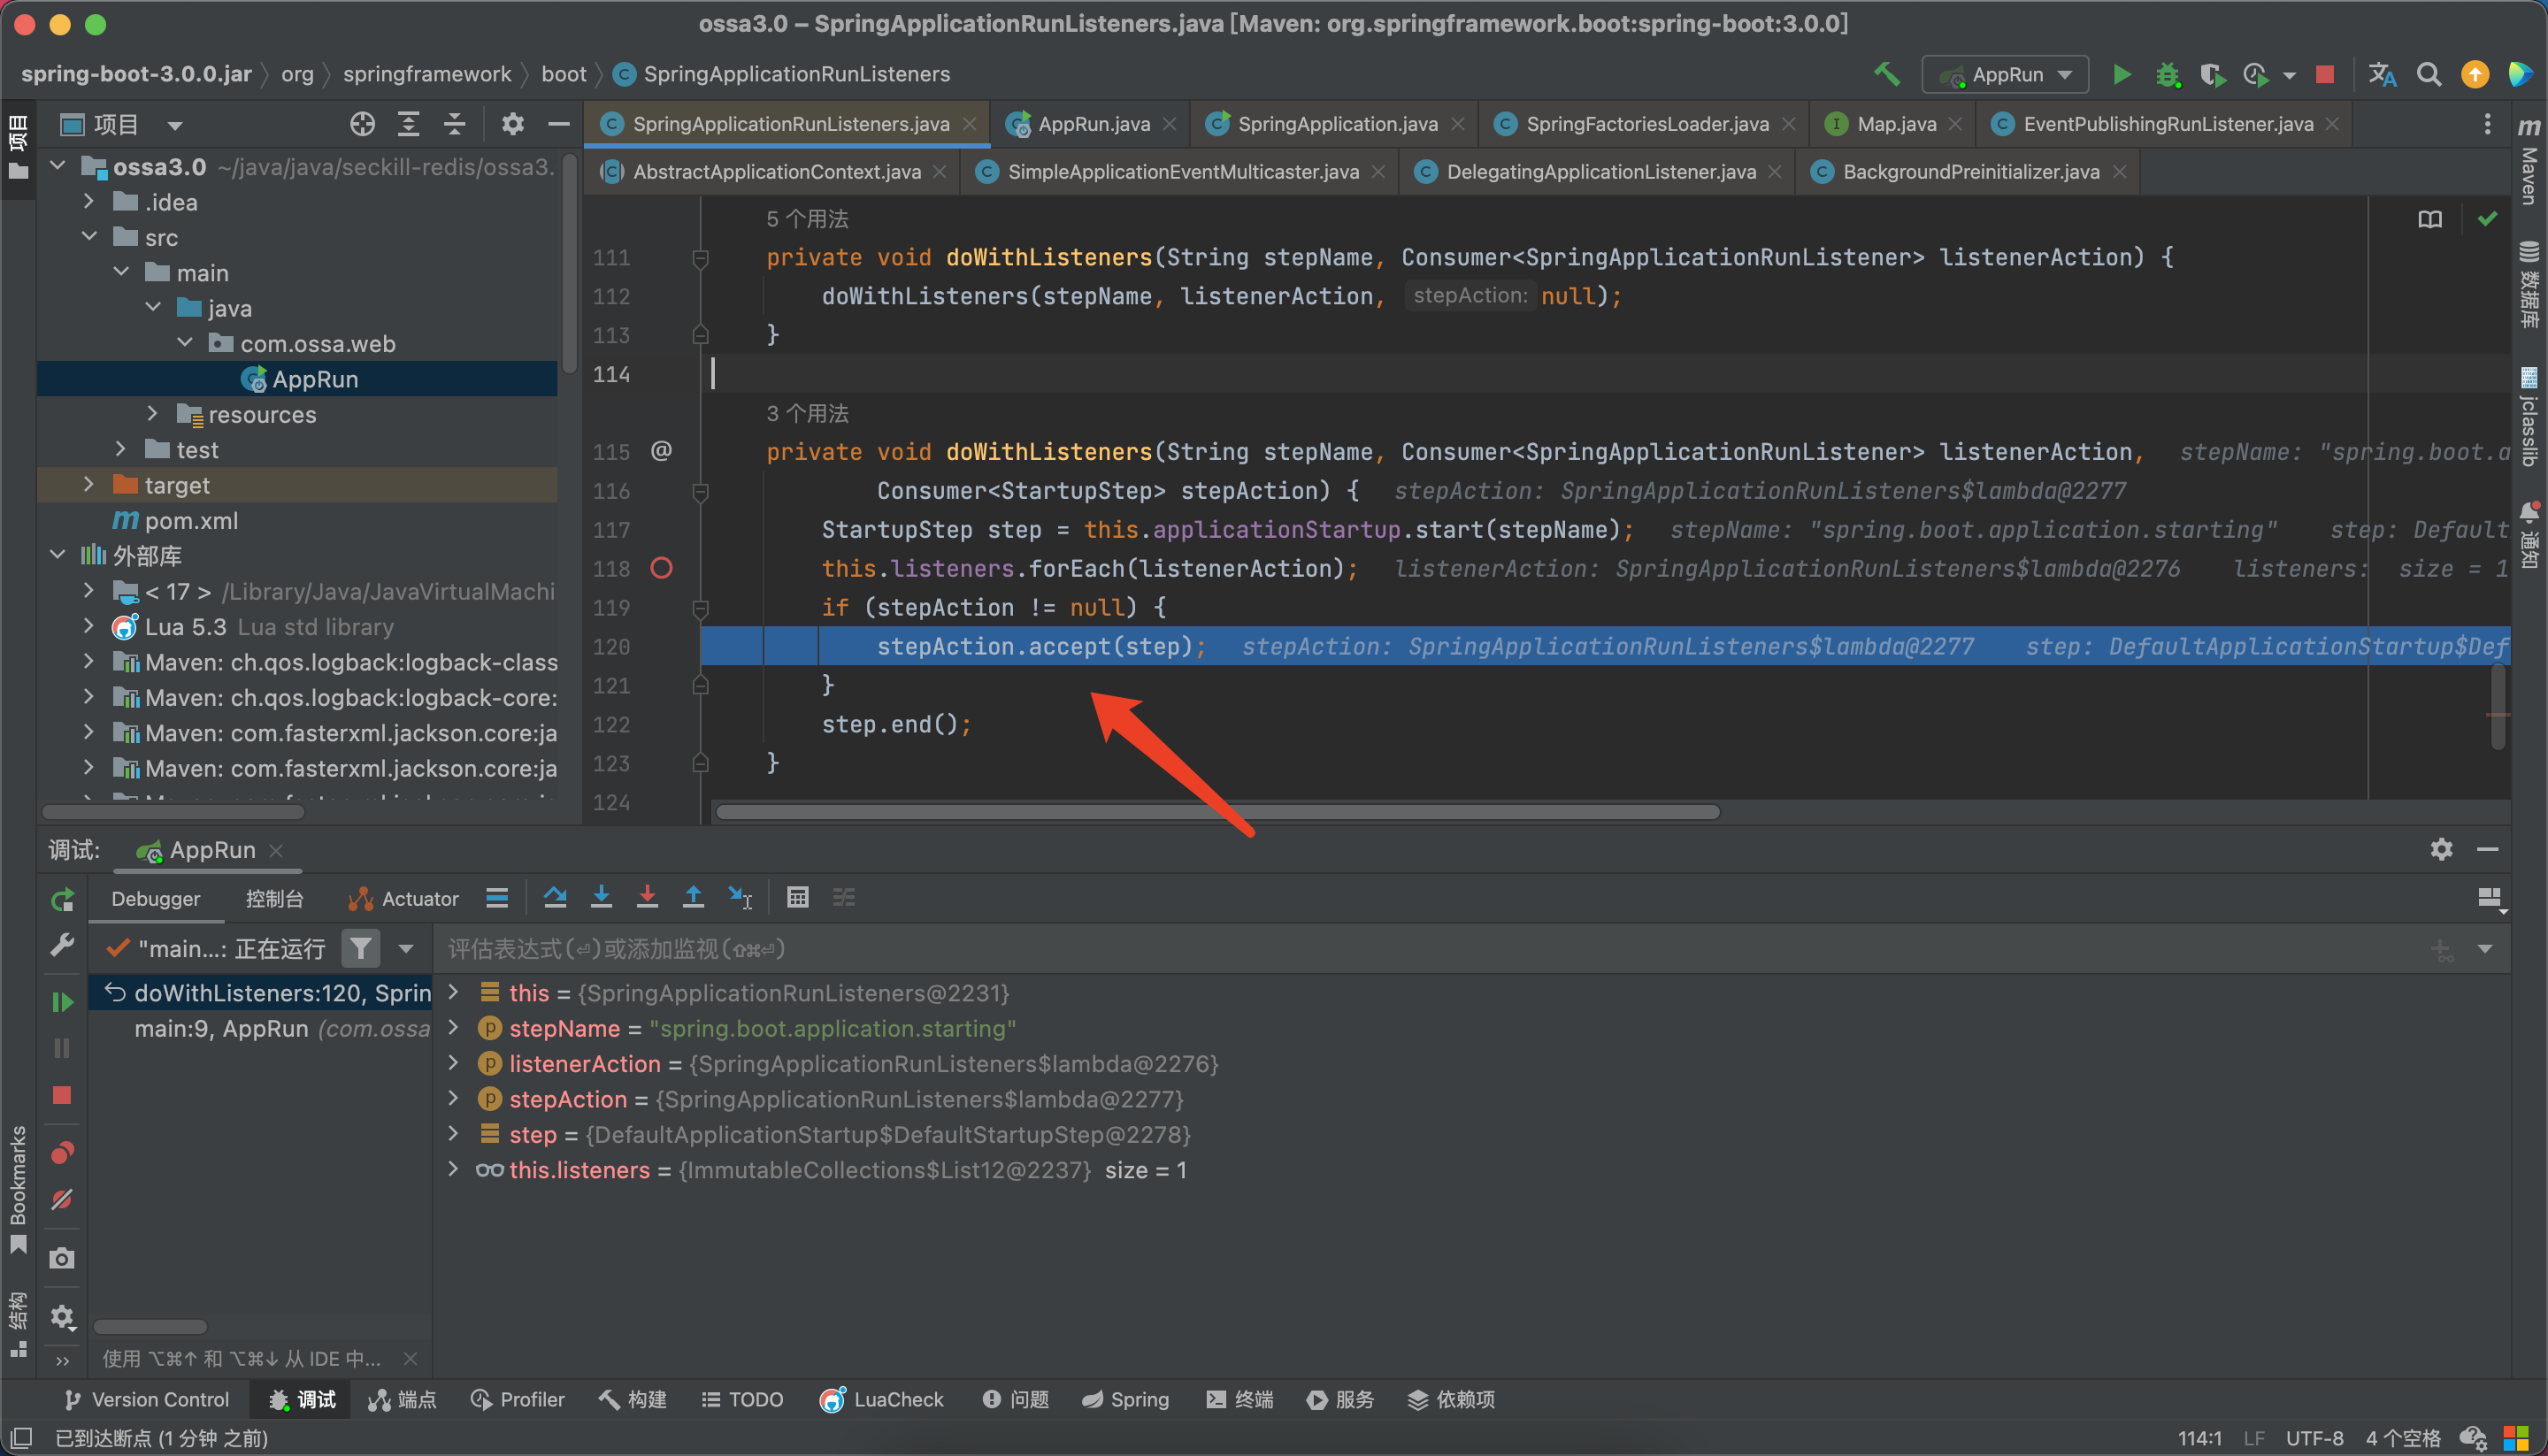
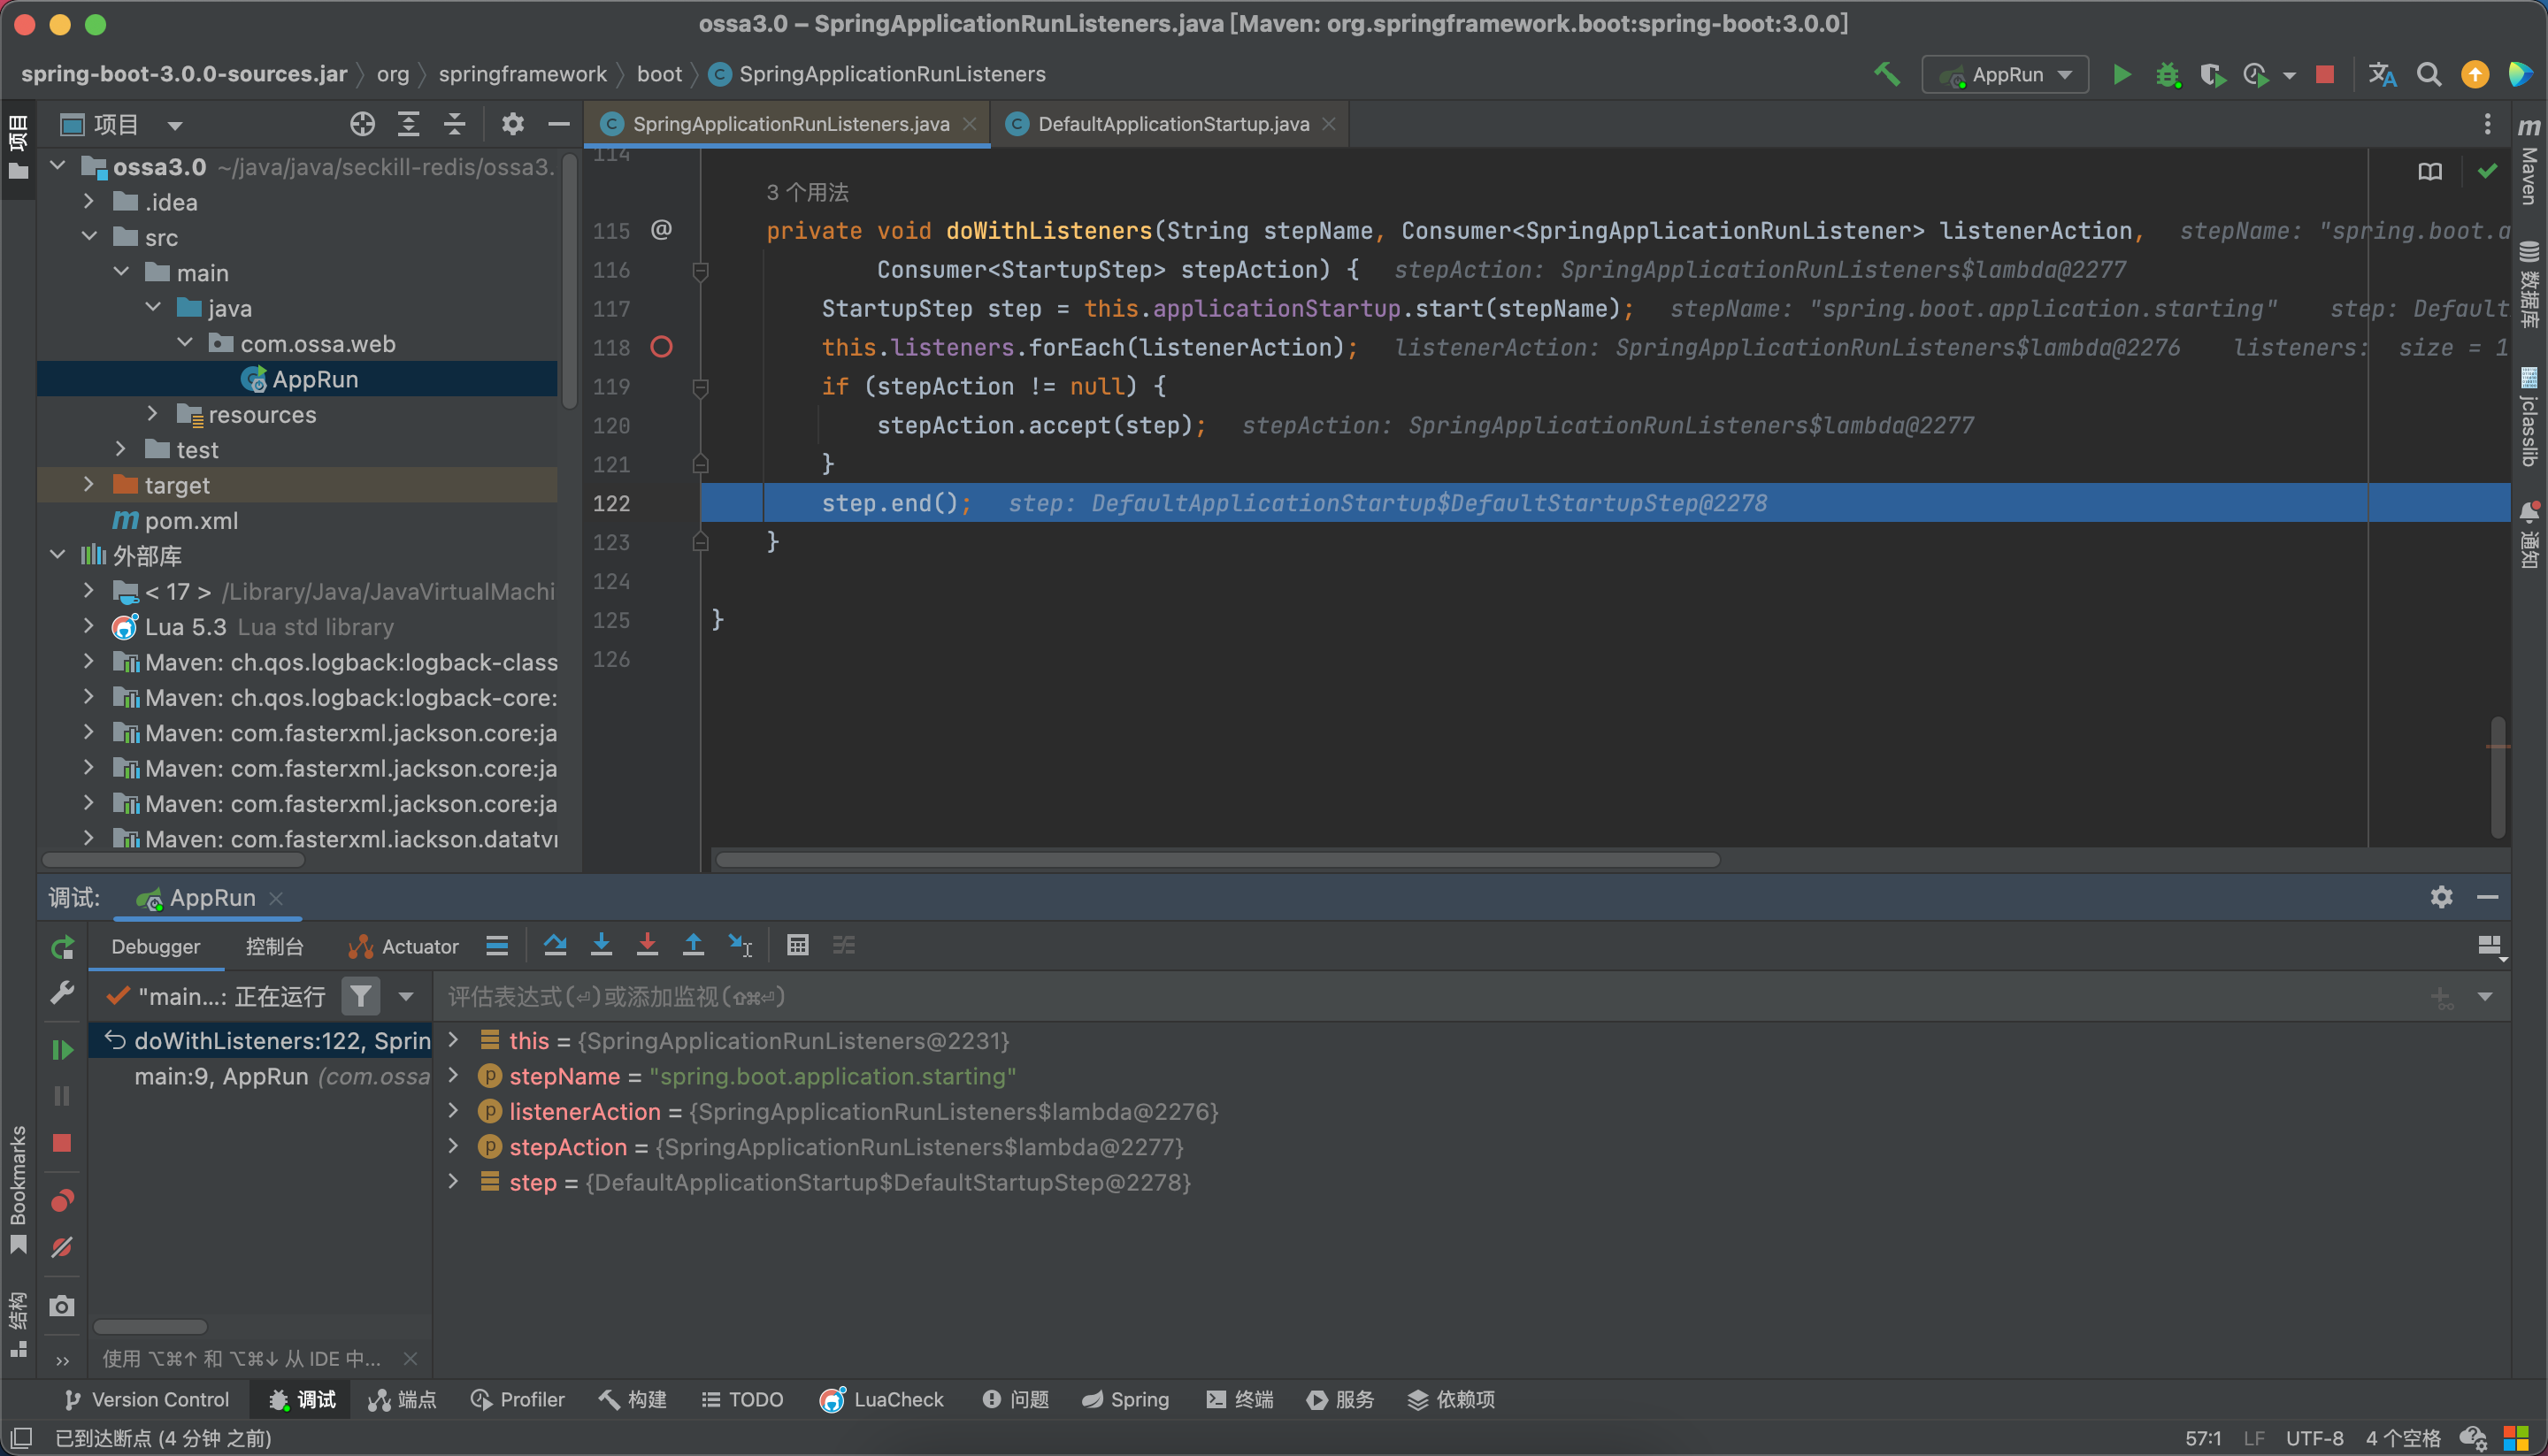
步入doWithListeners方法:
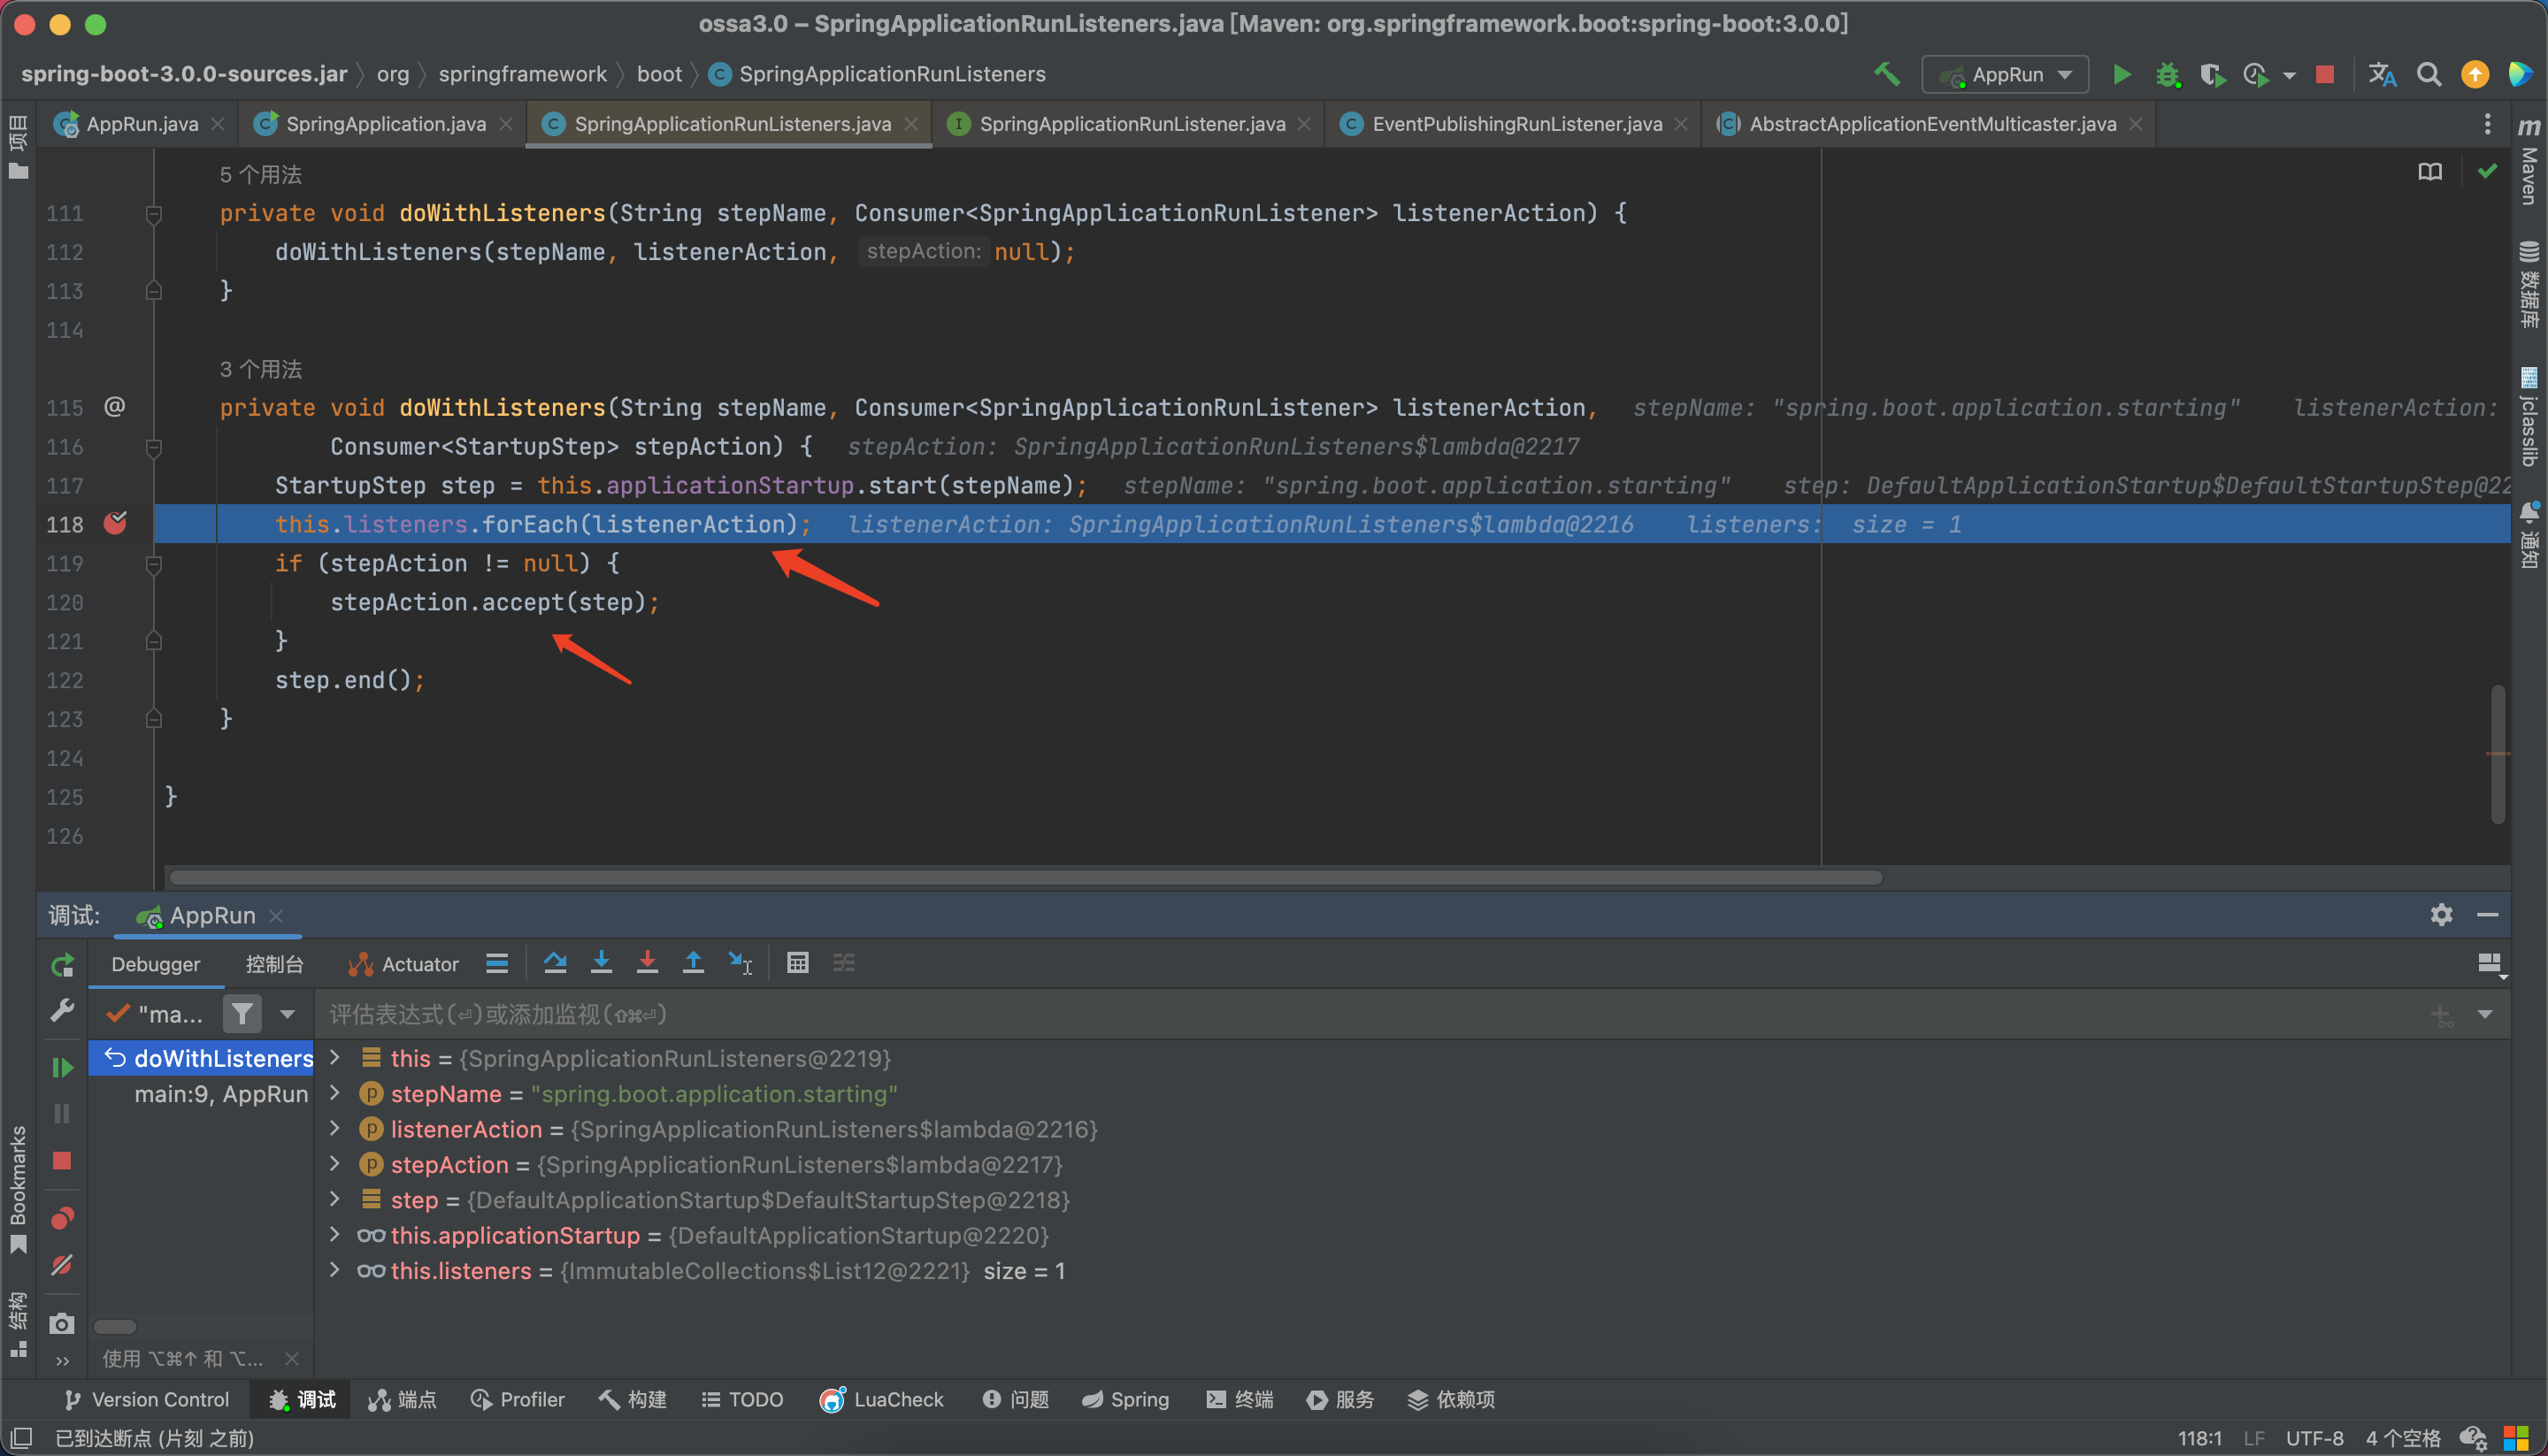
首先会调用listenerAction: (listener) -> listener.starting(bootstrapContext)
步入starting方法:
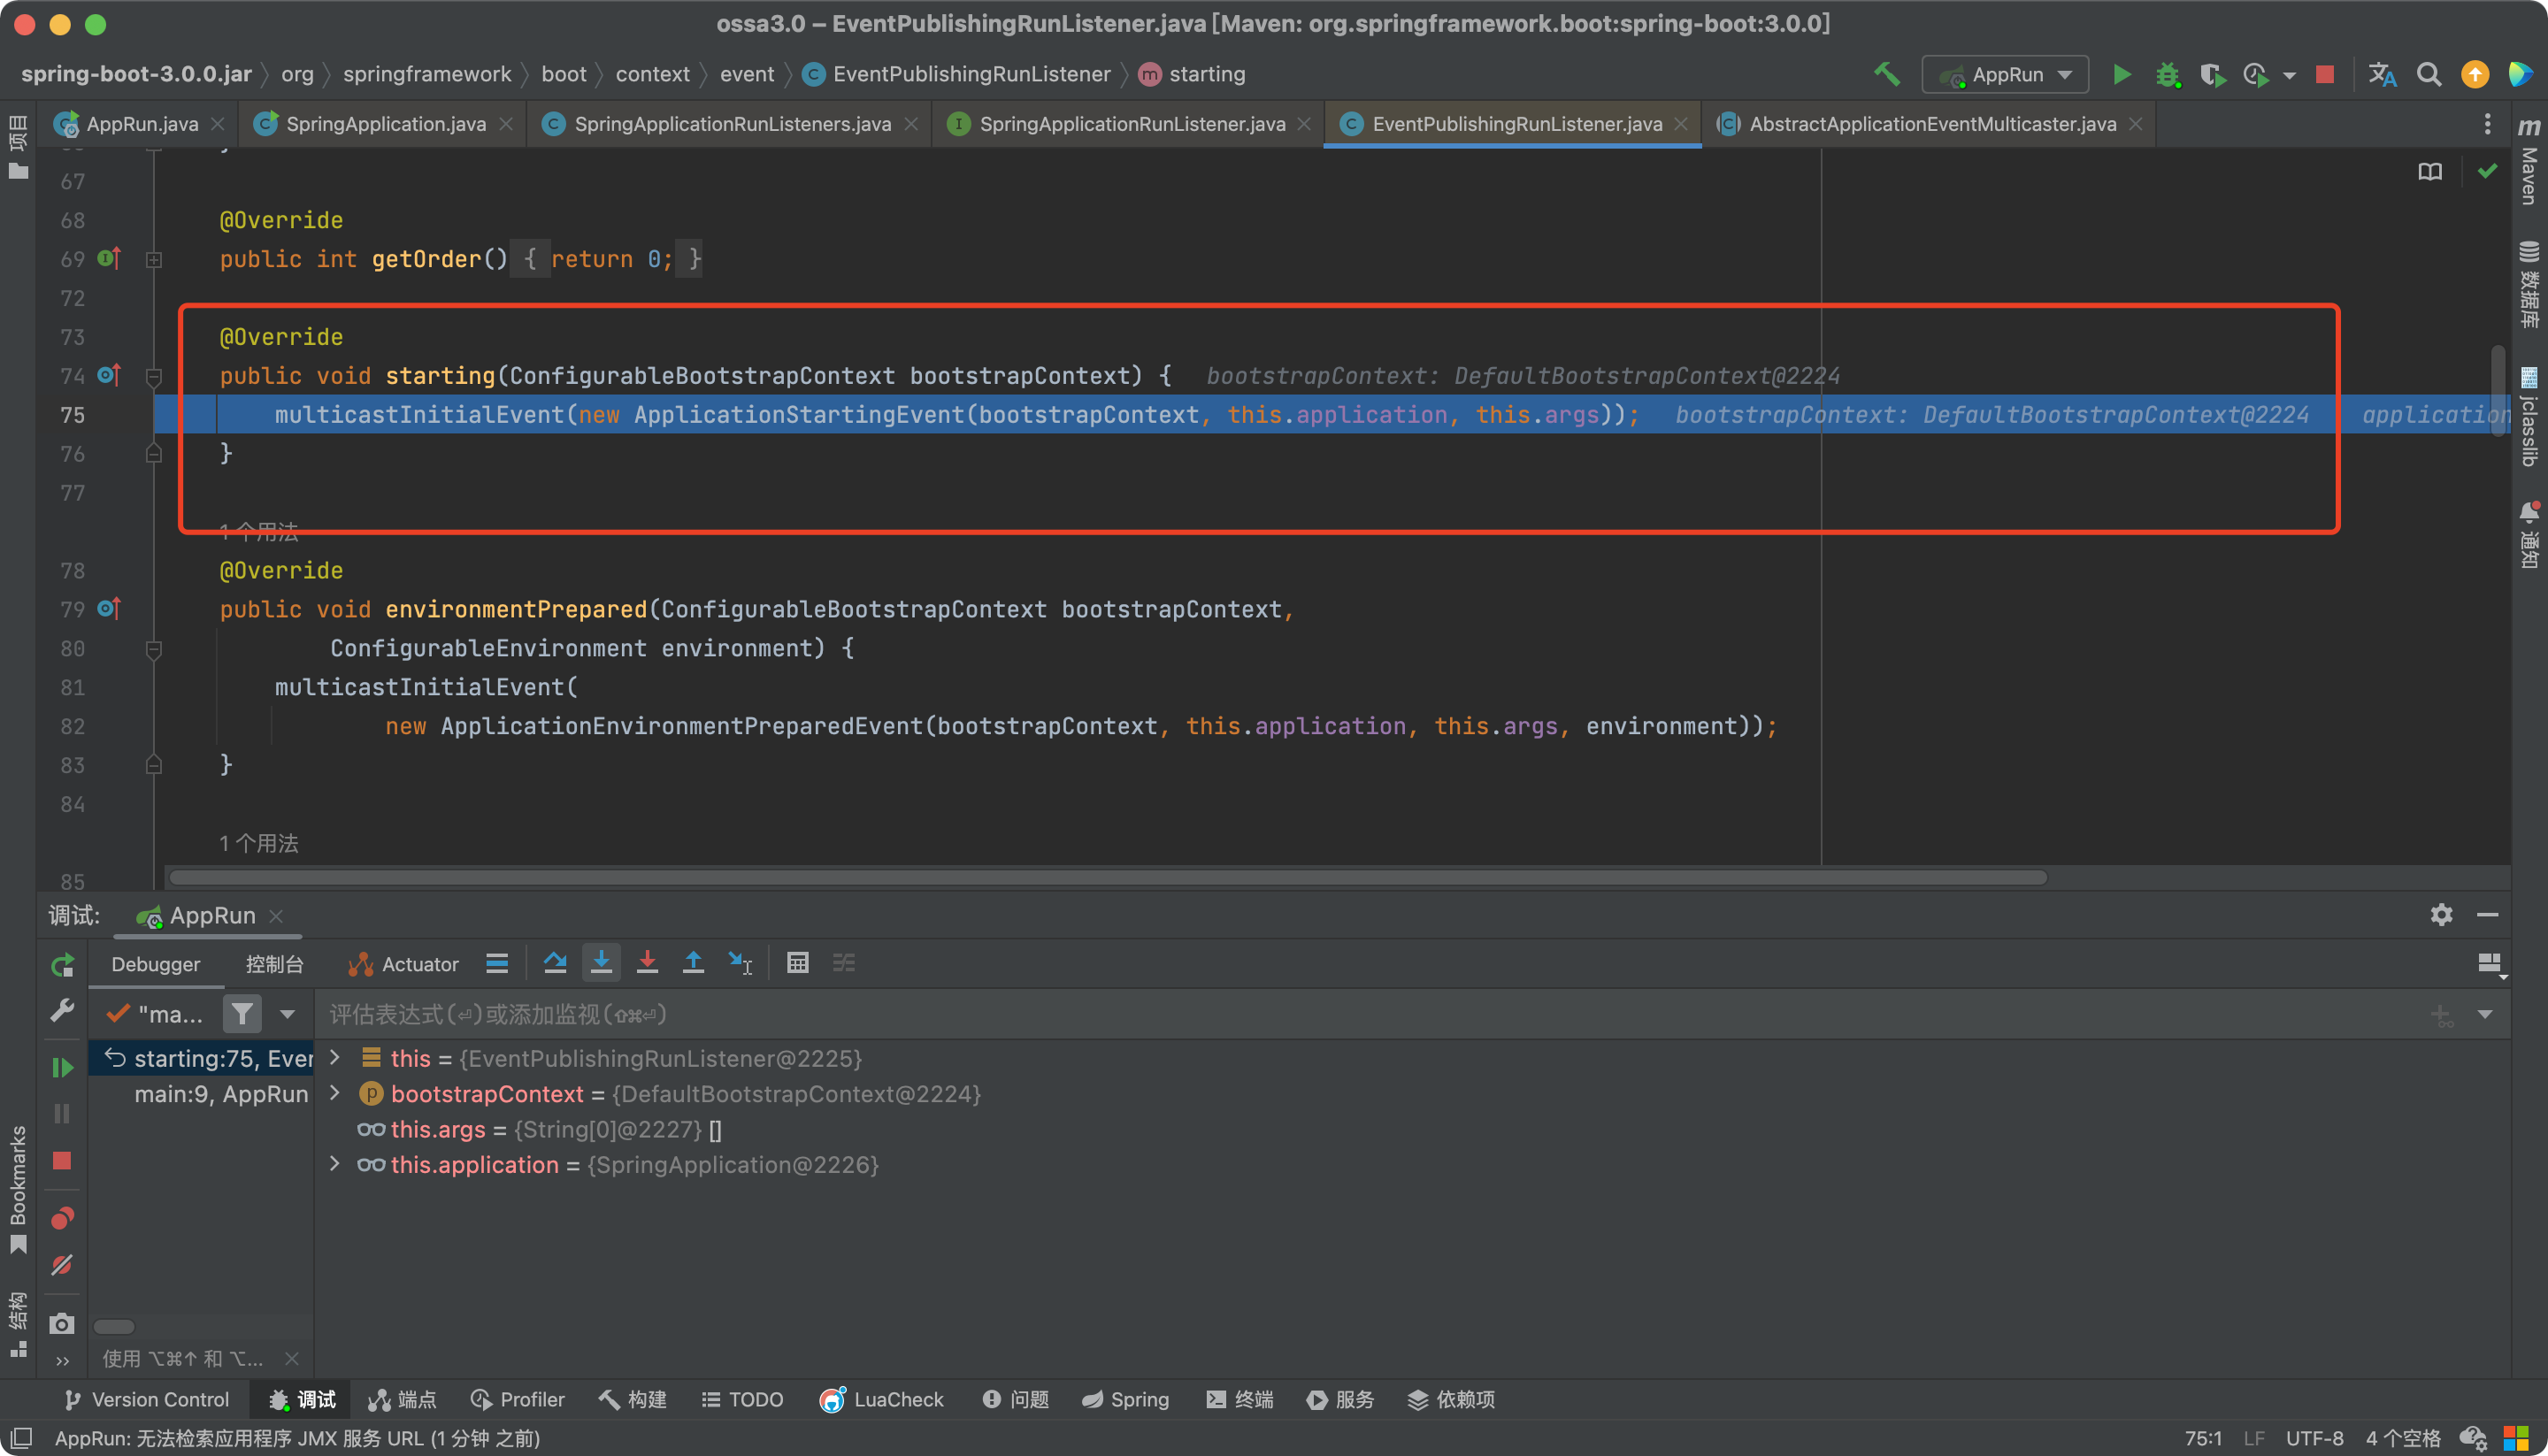
步入multicastInitialEvent方法:
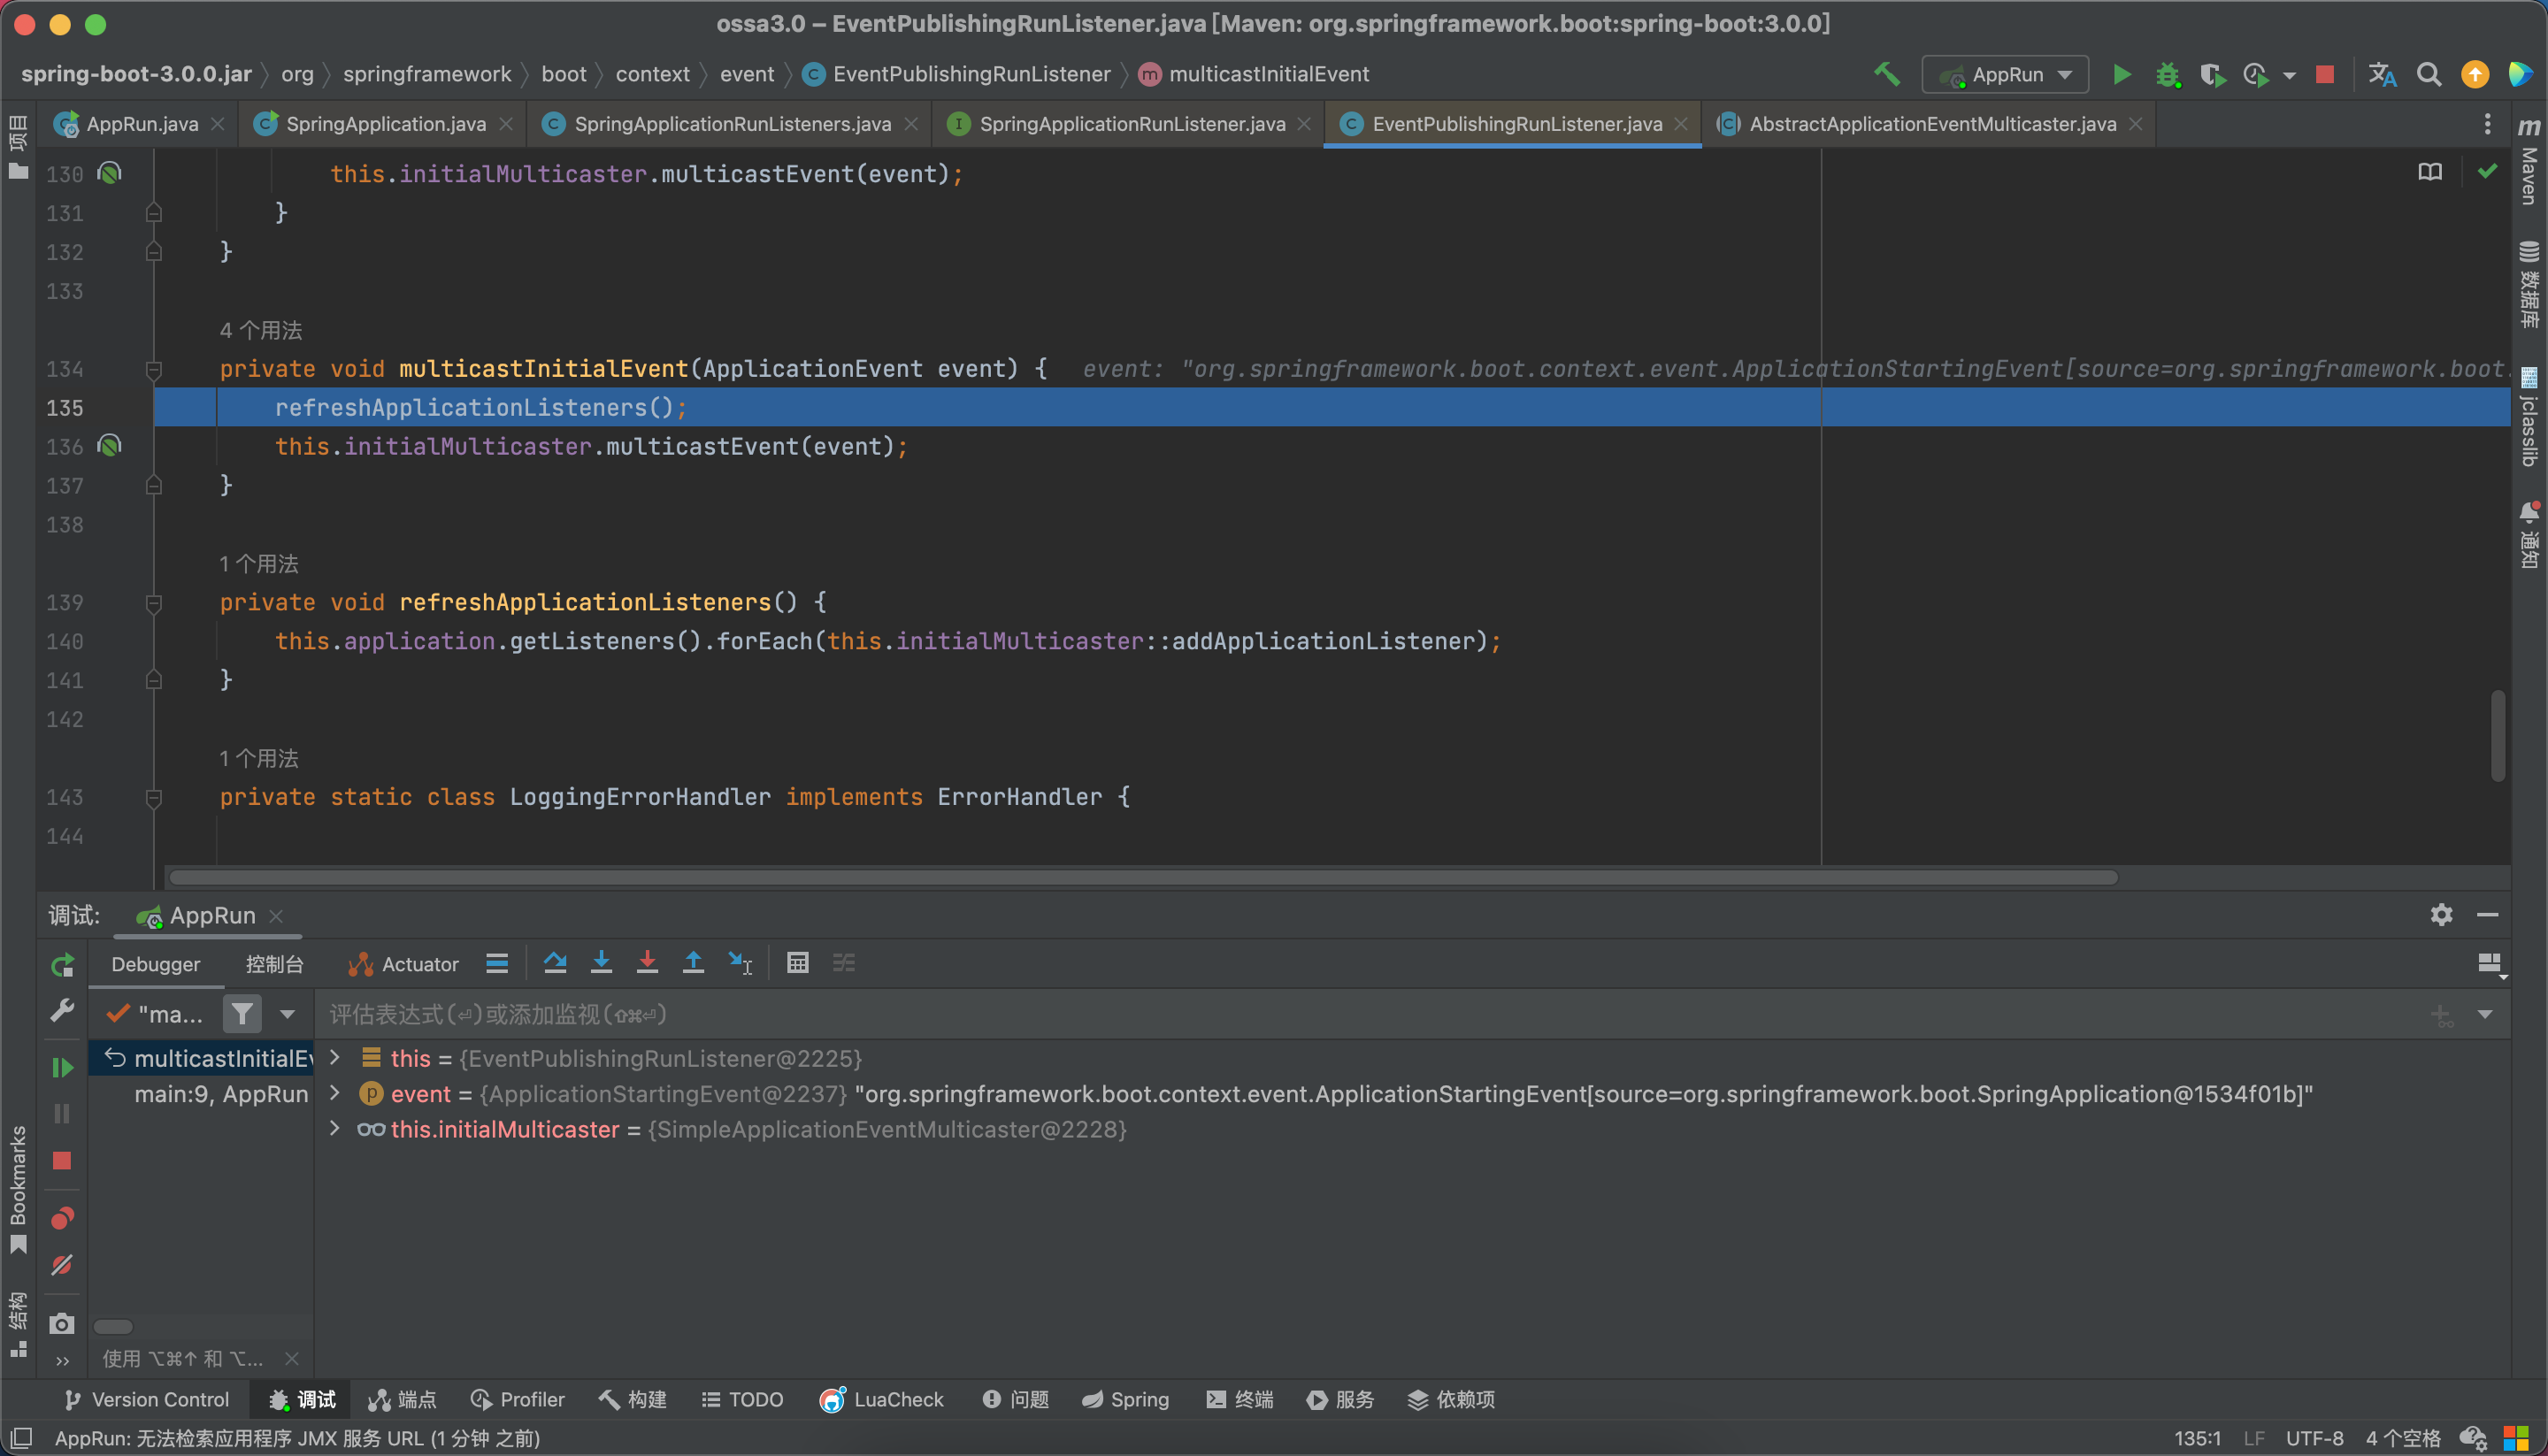
步入refreshApplicationListeners方法:
这7个监听器是我们之前加载到的: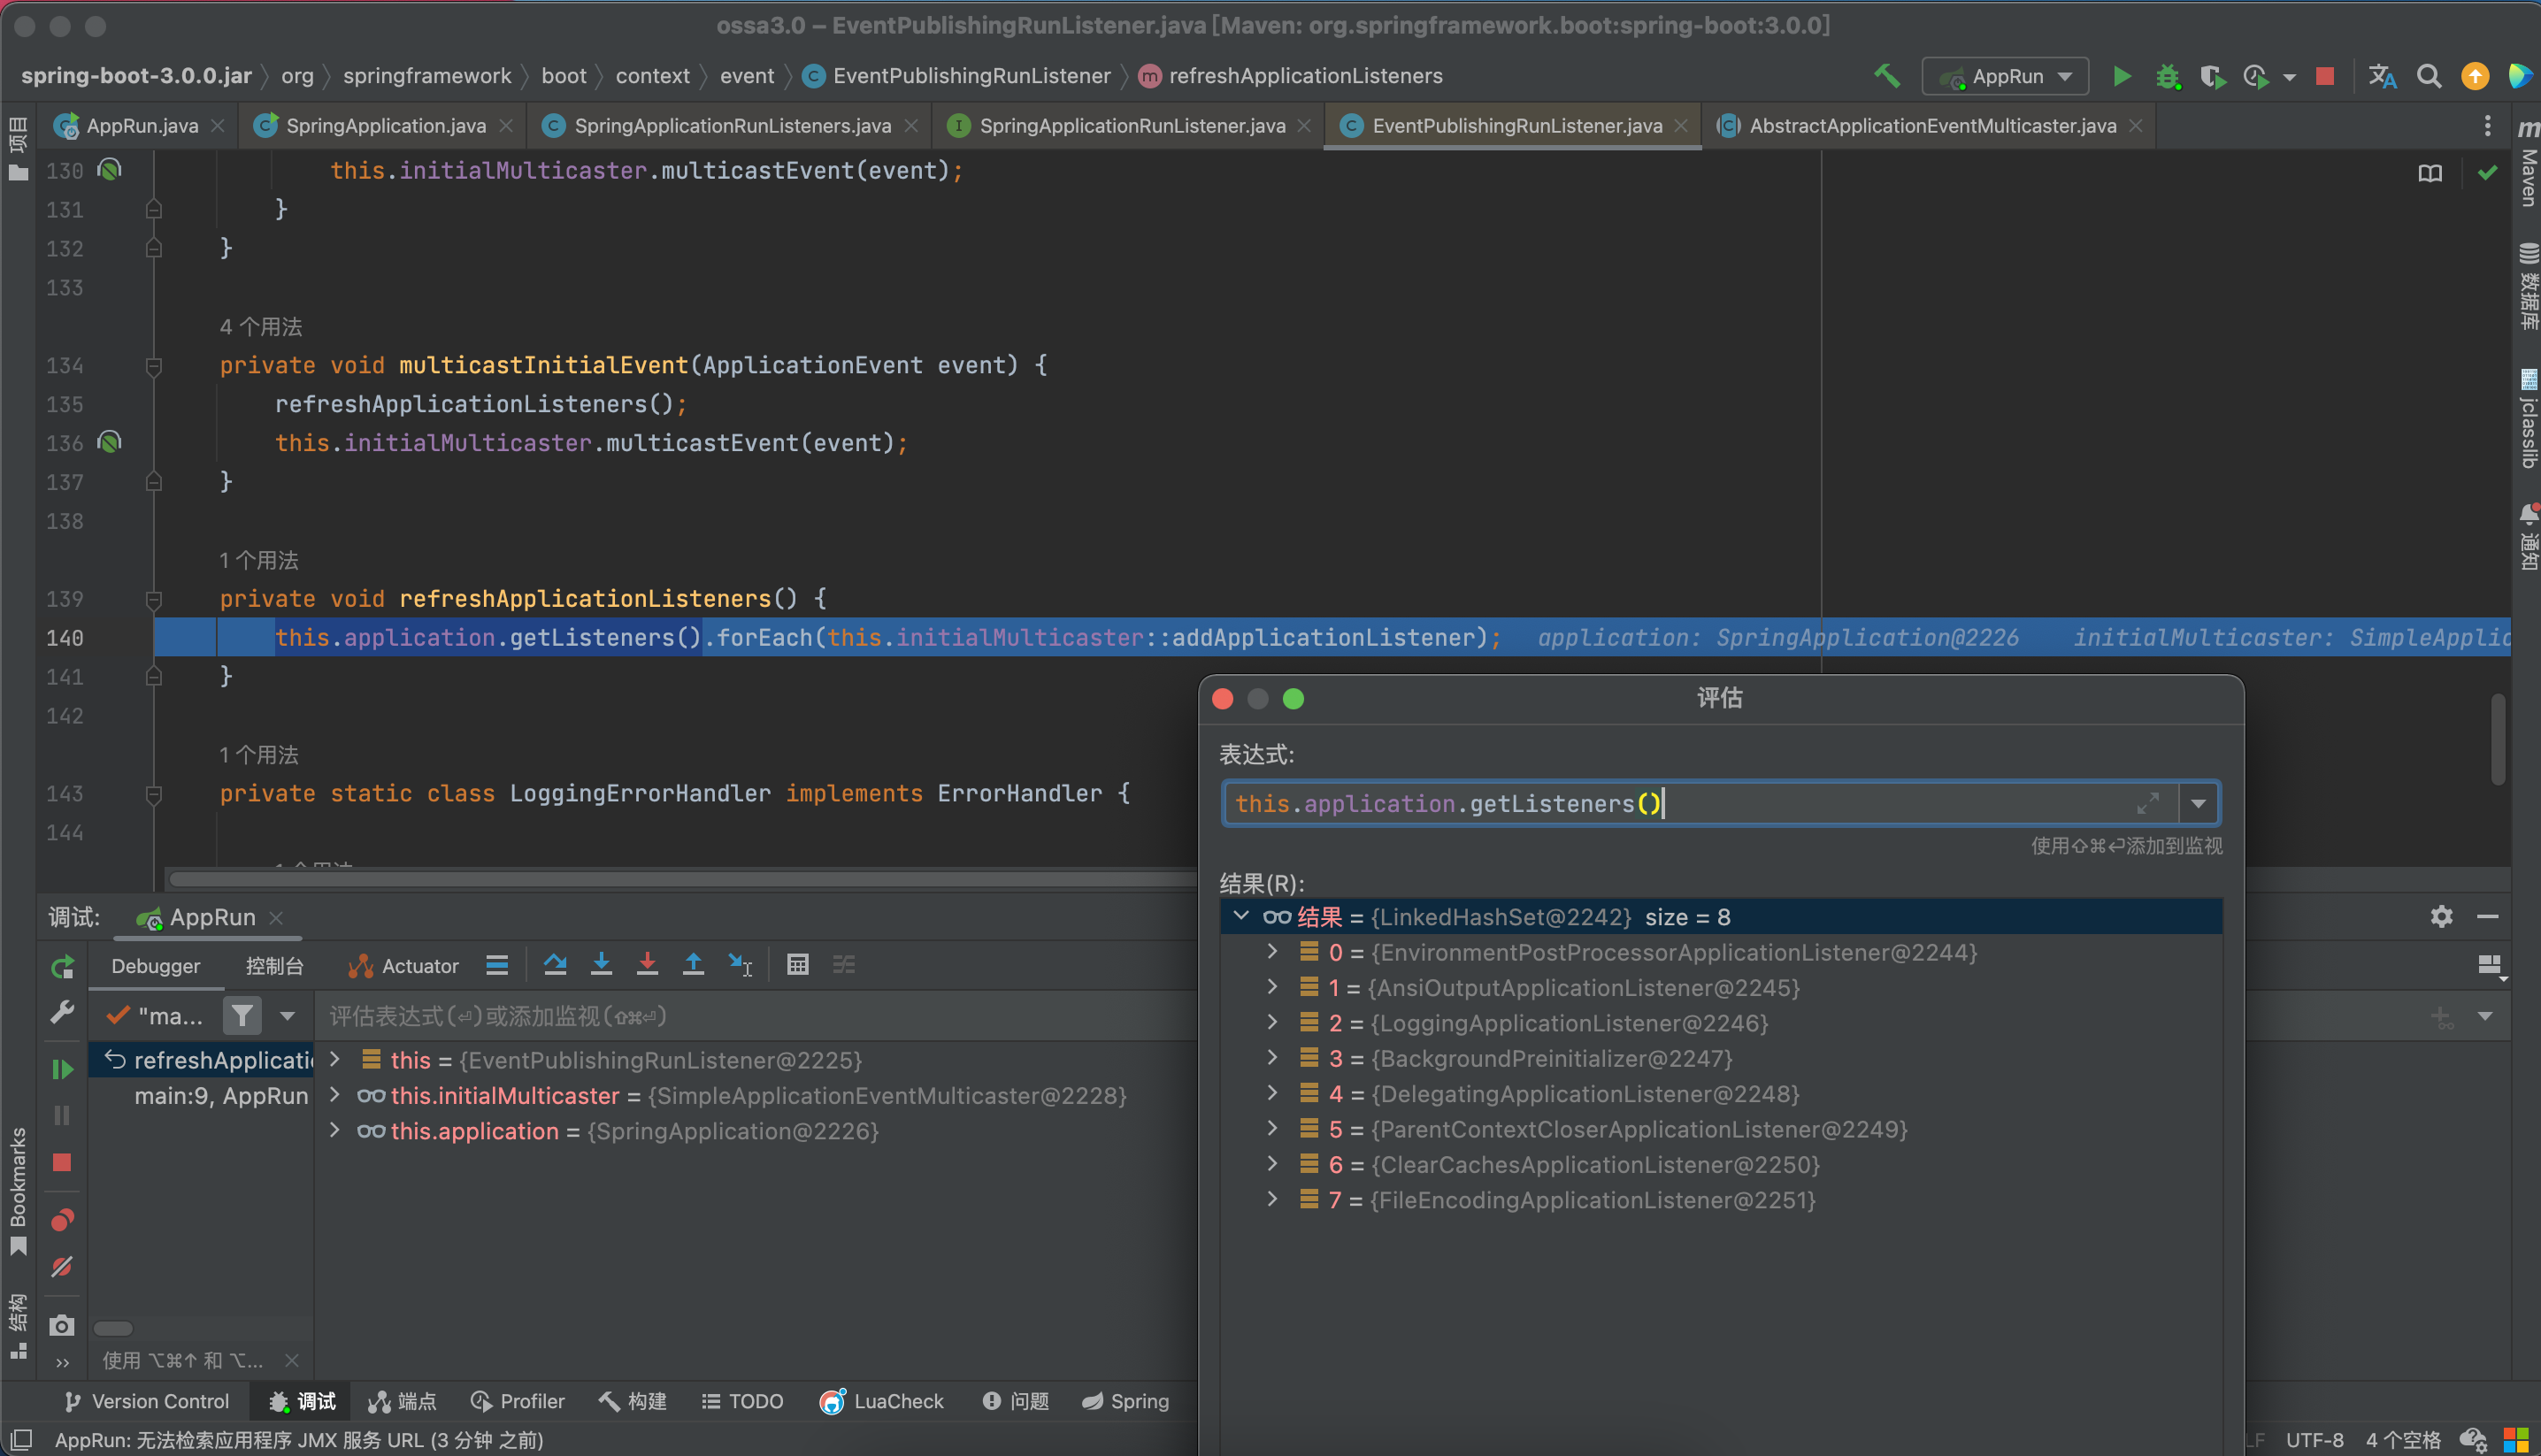
调用this.initialMulticaster::addApplicationListener方法:
显式删除代理的目标(如果已注册),以避免对同一侦听器进行双重调用。
add到applicationListeners的set集合中。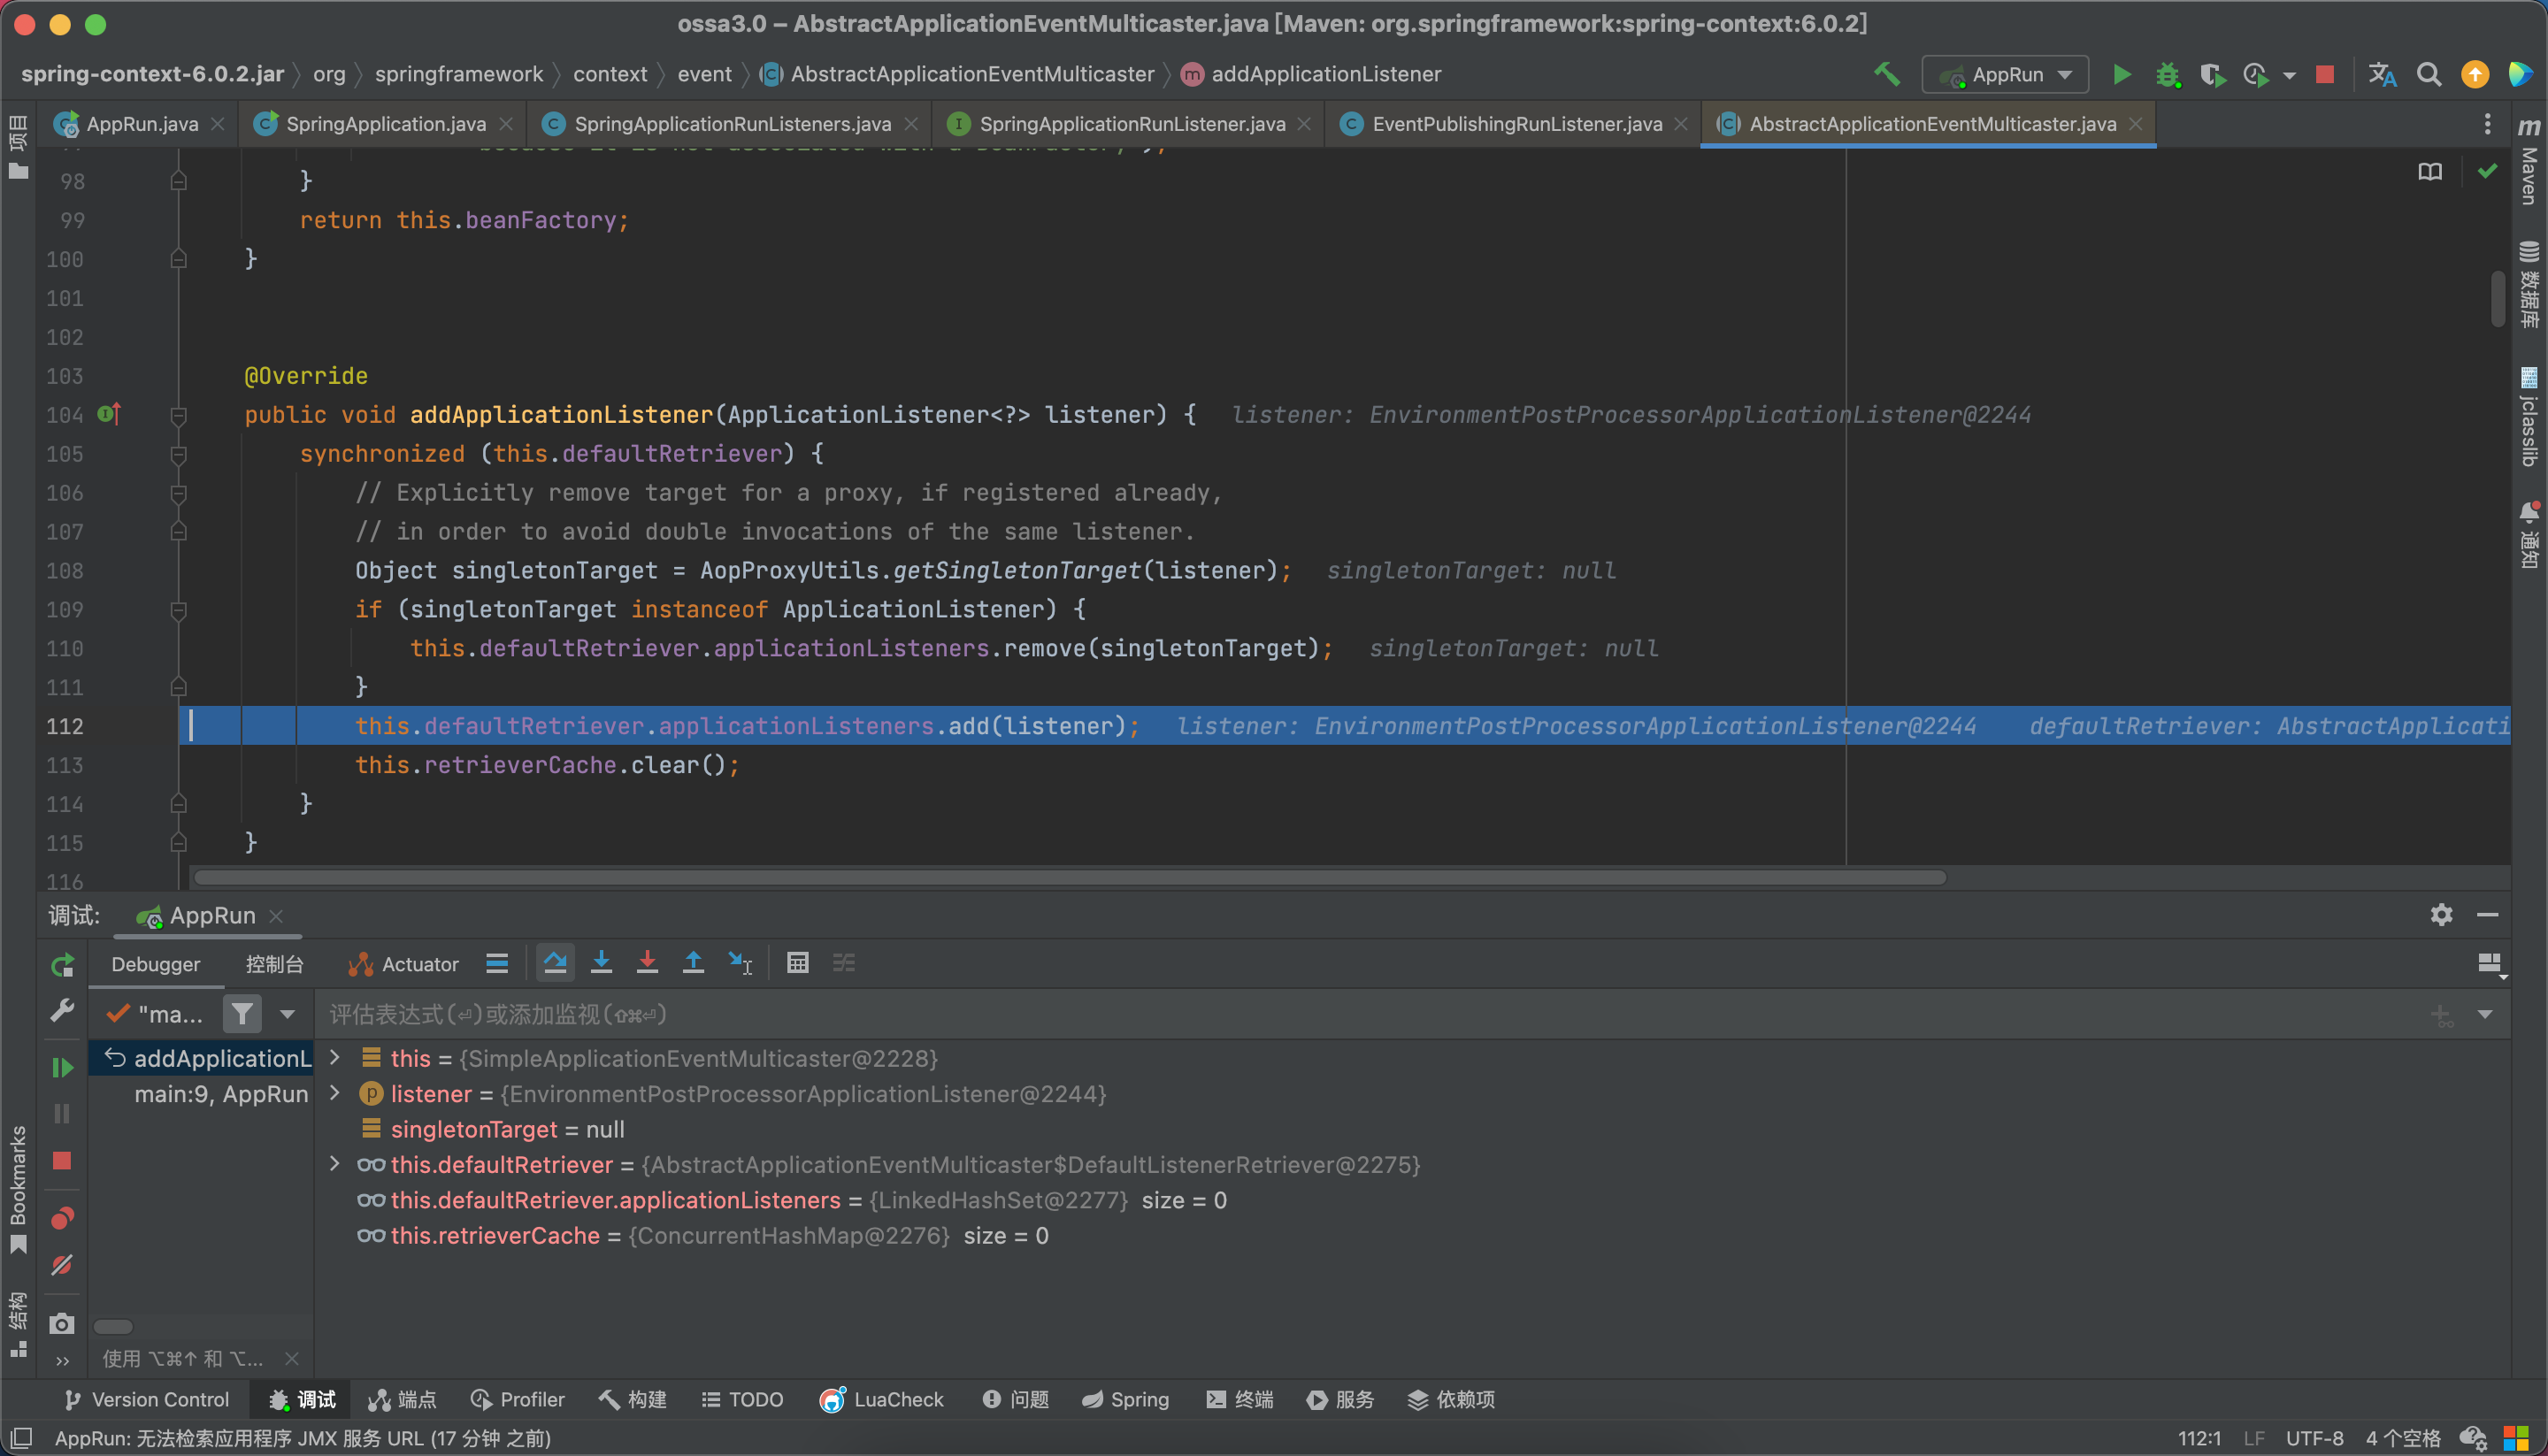
执行完返回:
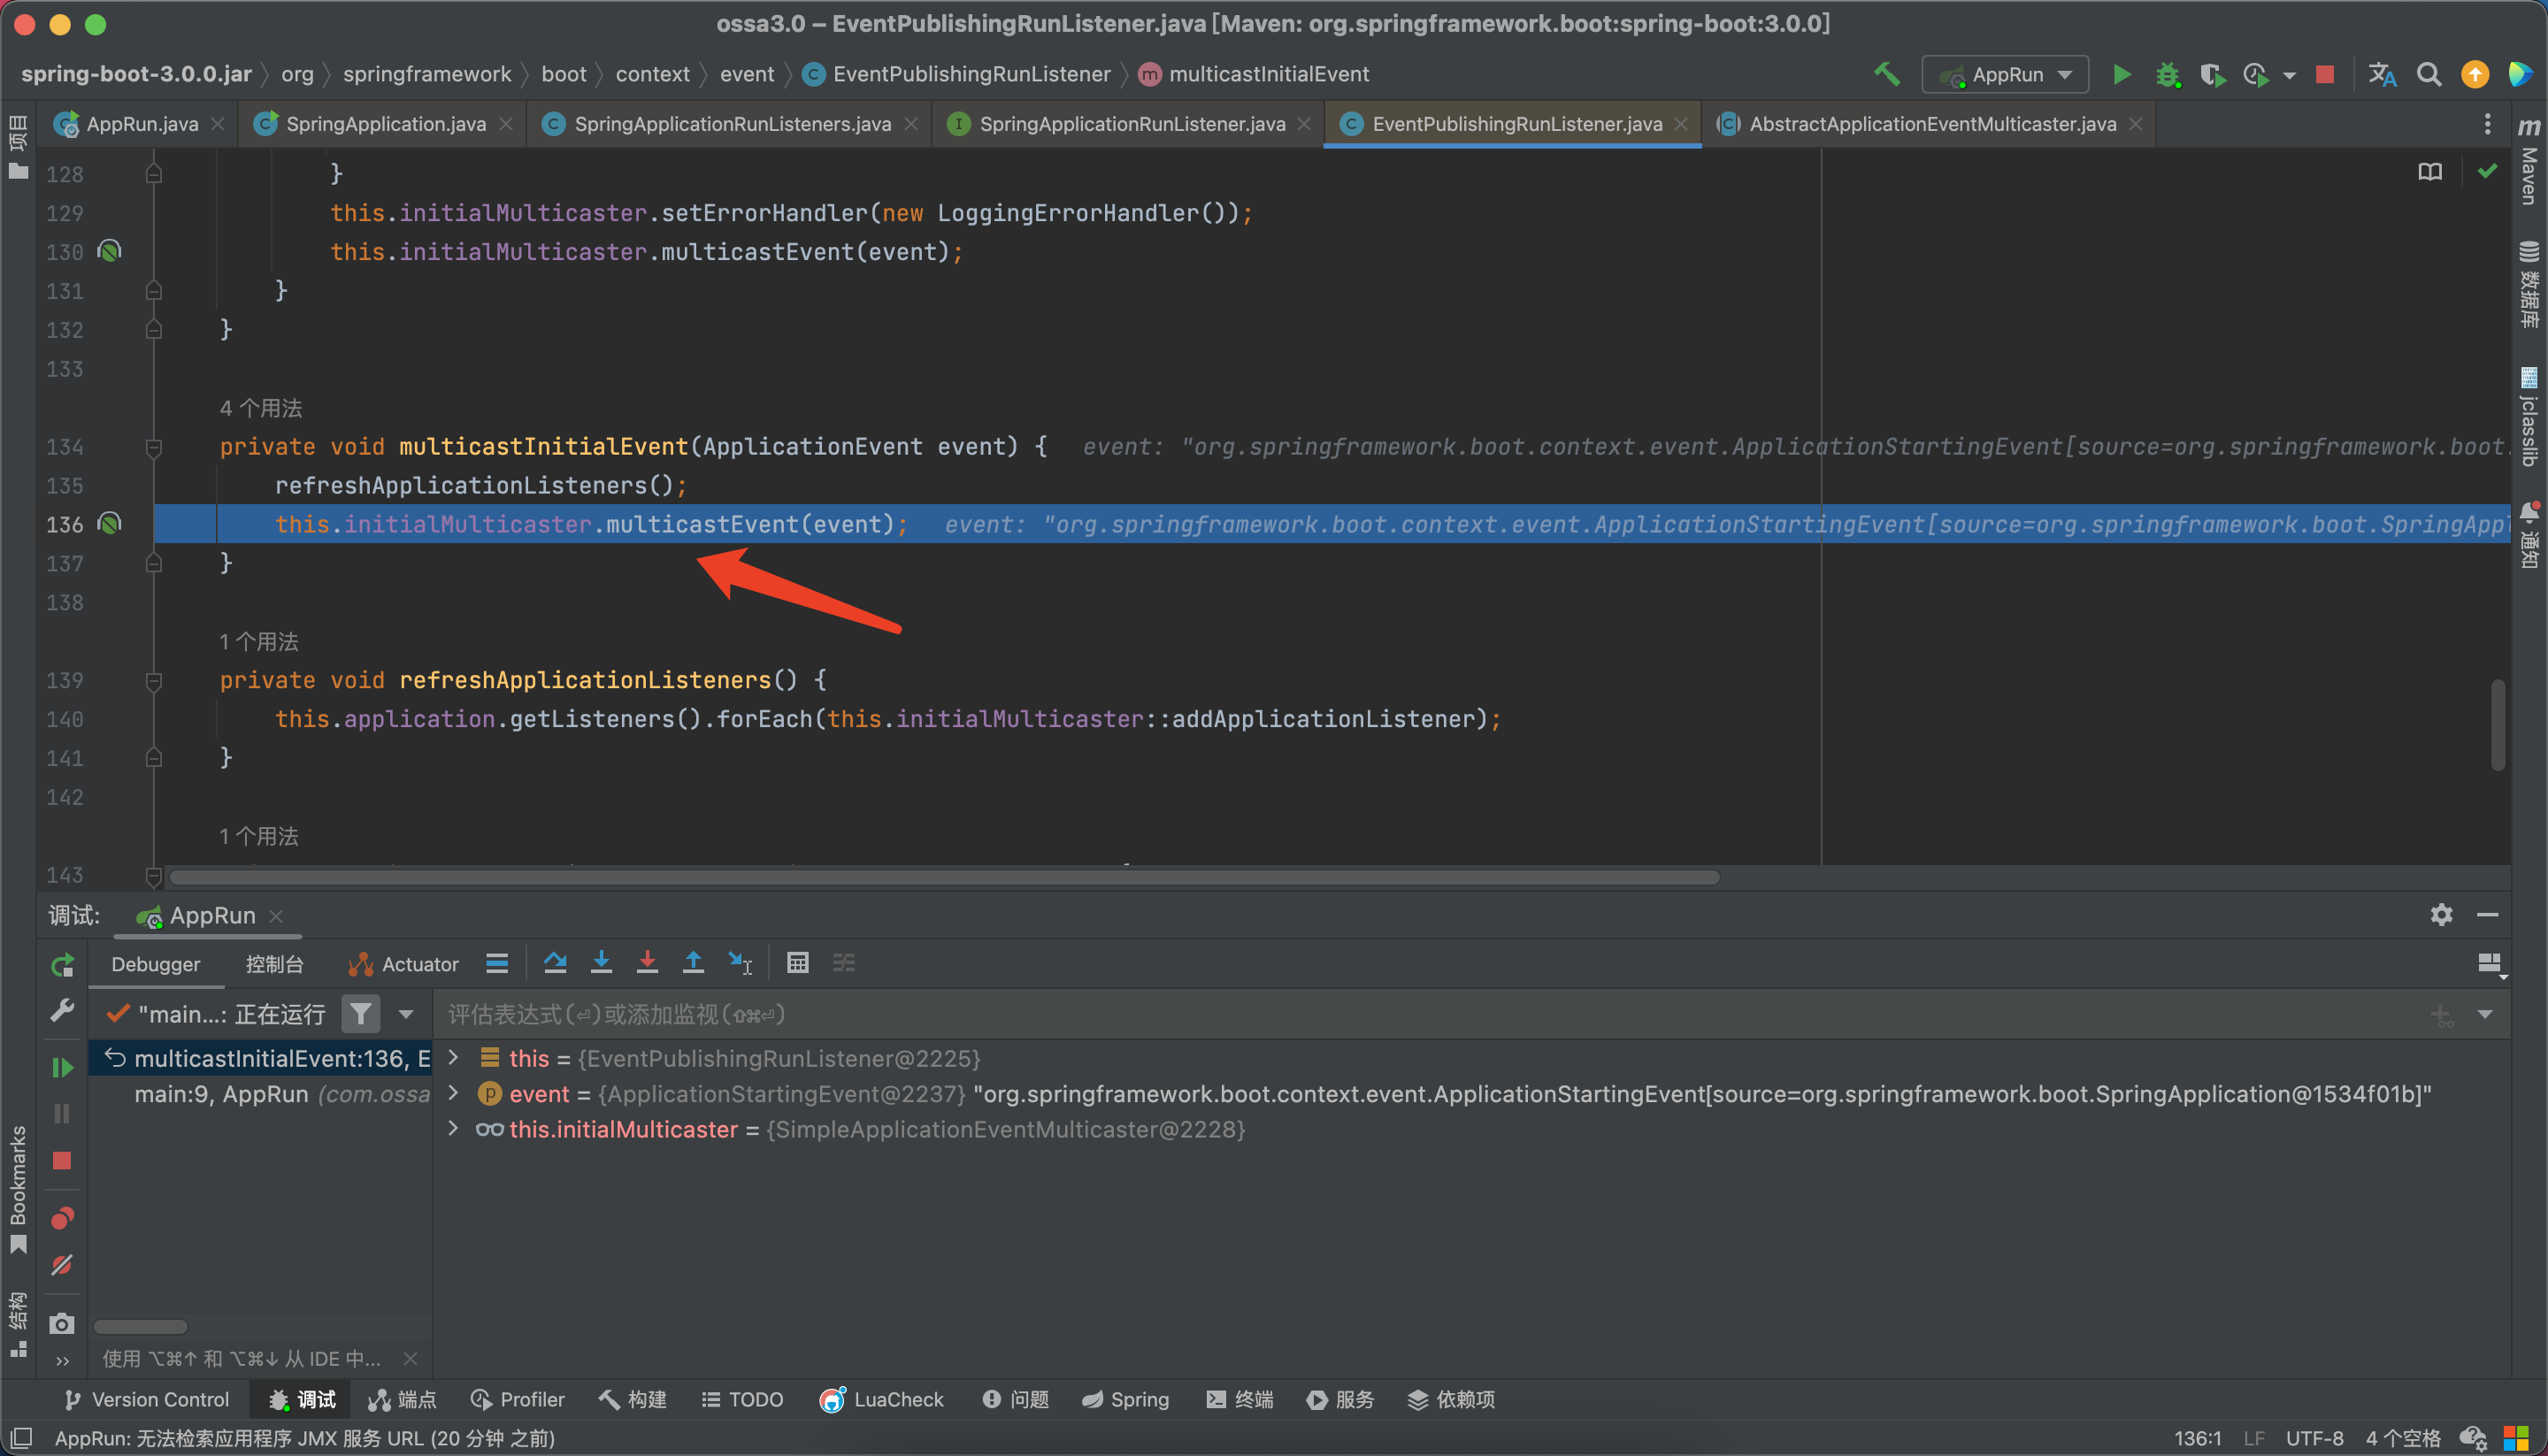
步入multicastEvent方法:

步入invokeListener方法:
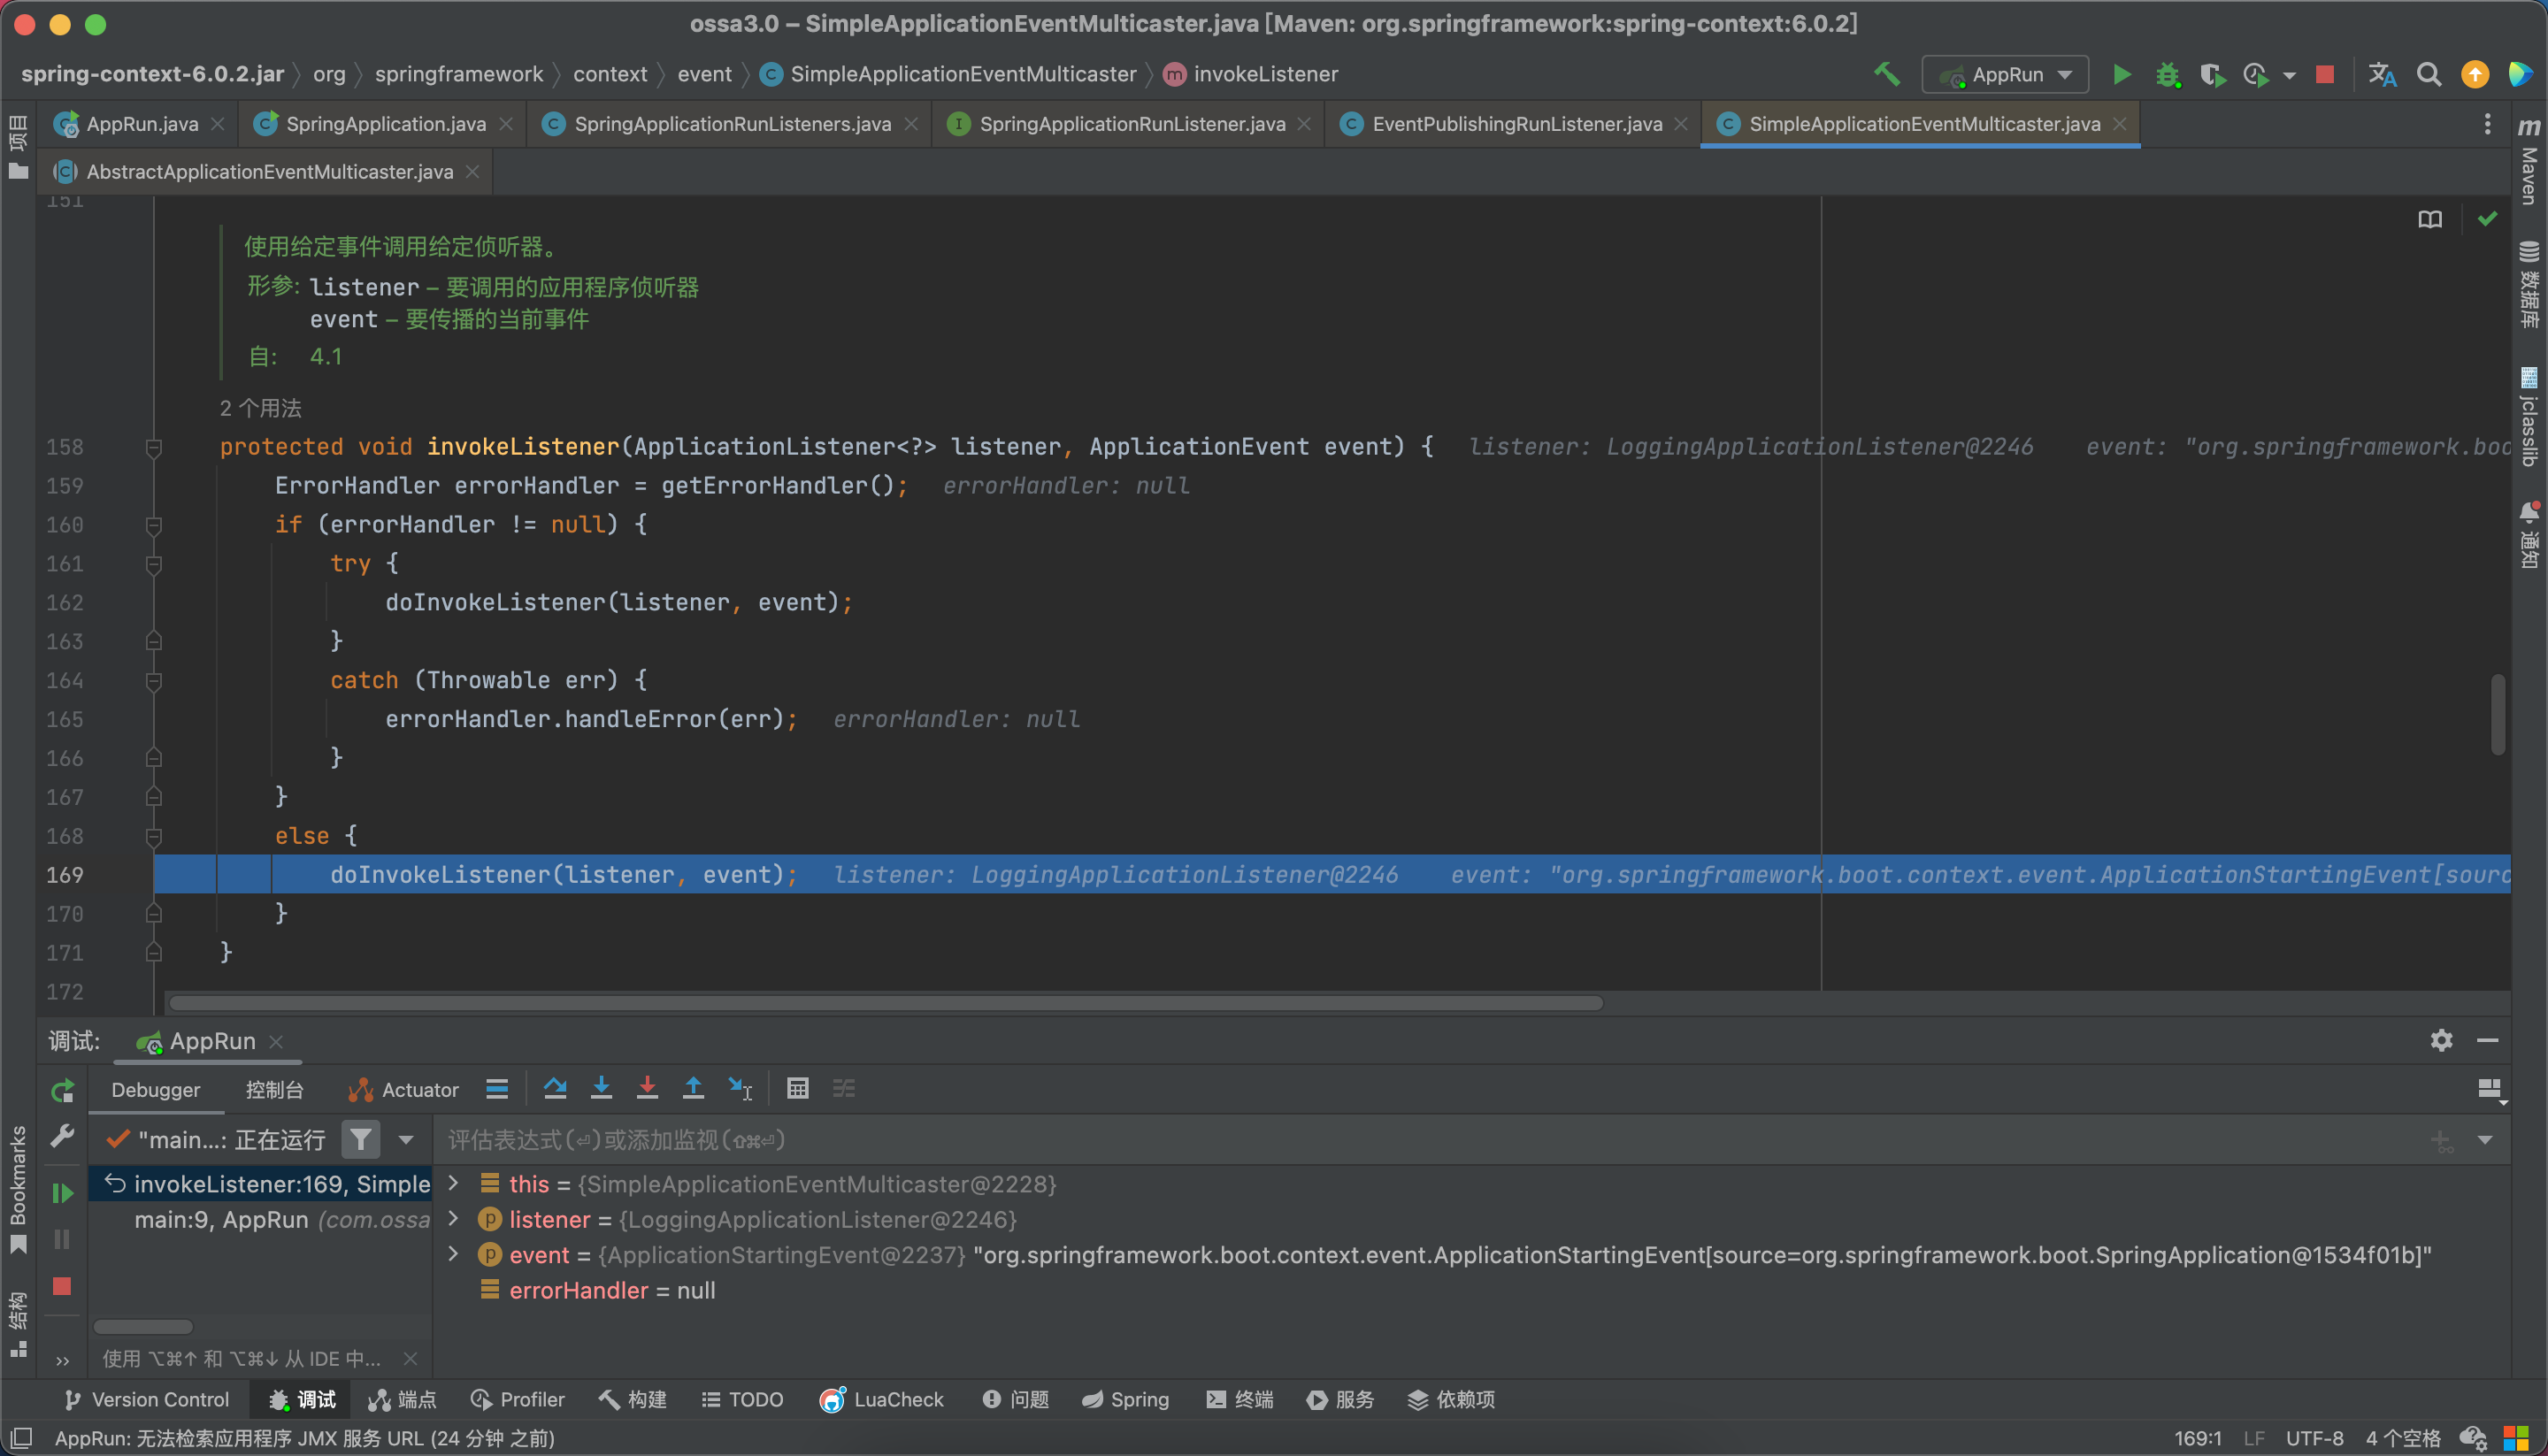
doInvokeListener
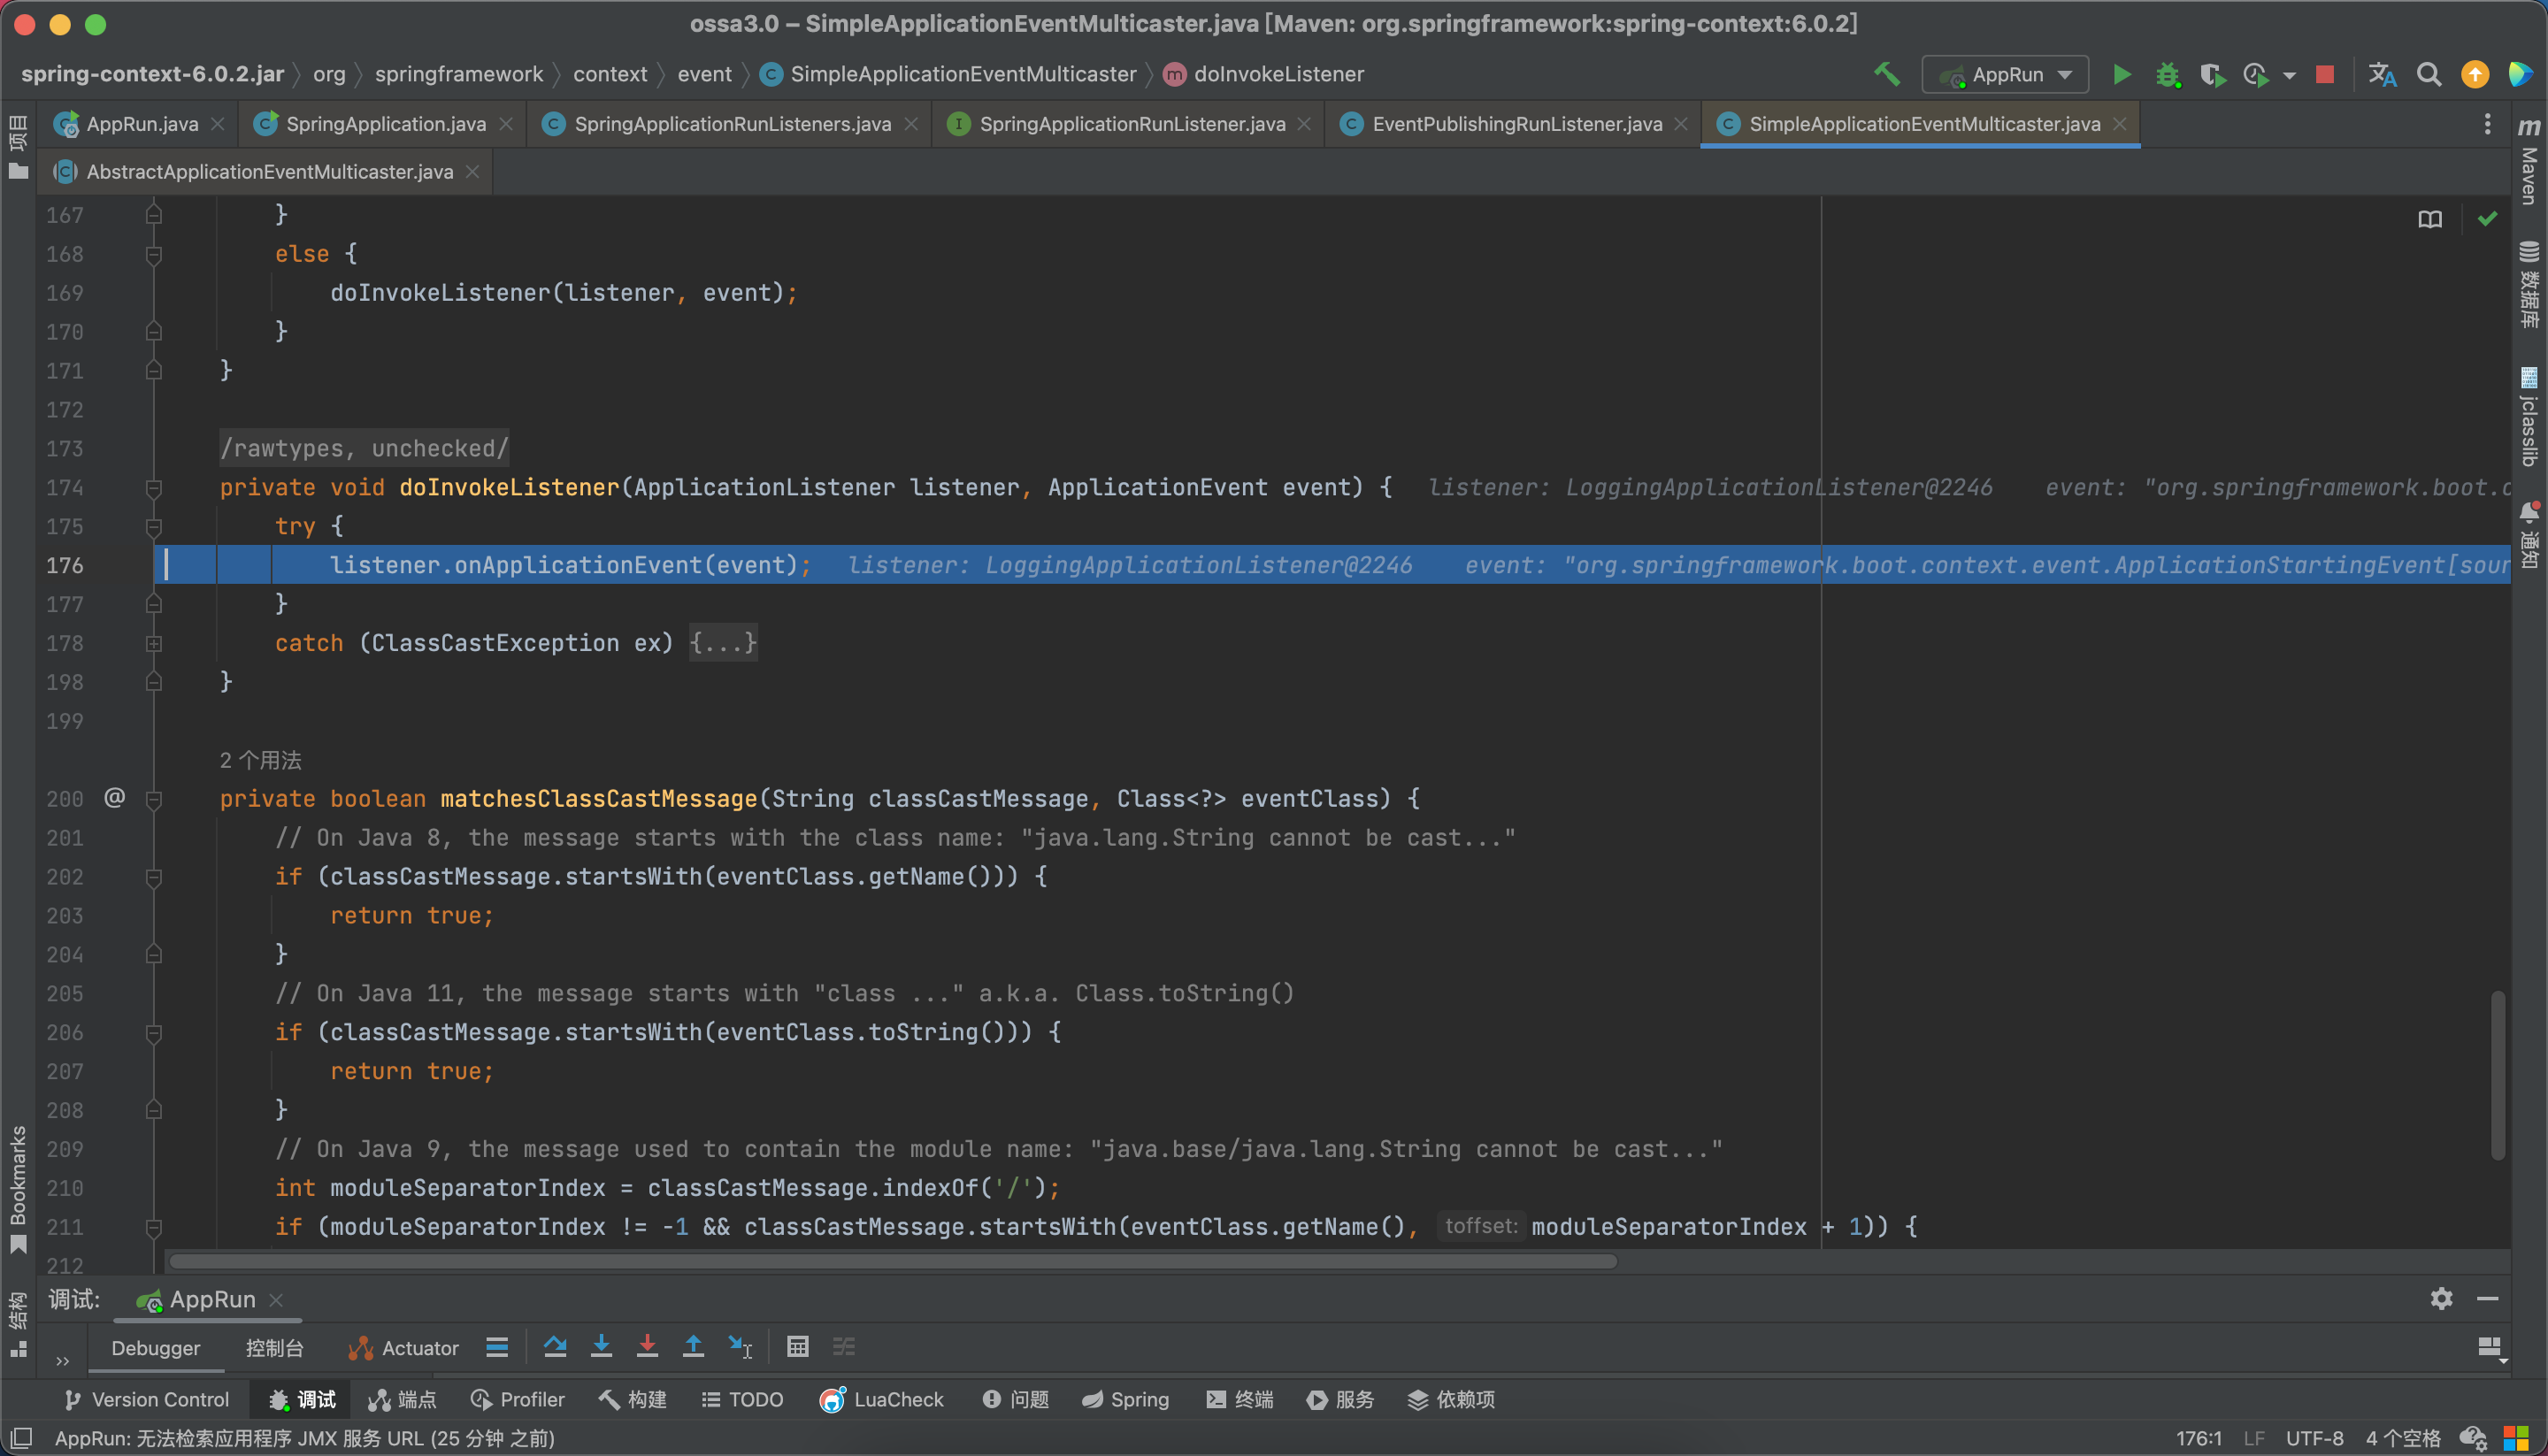
listener.onApplicationEvent(event);
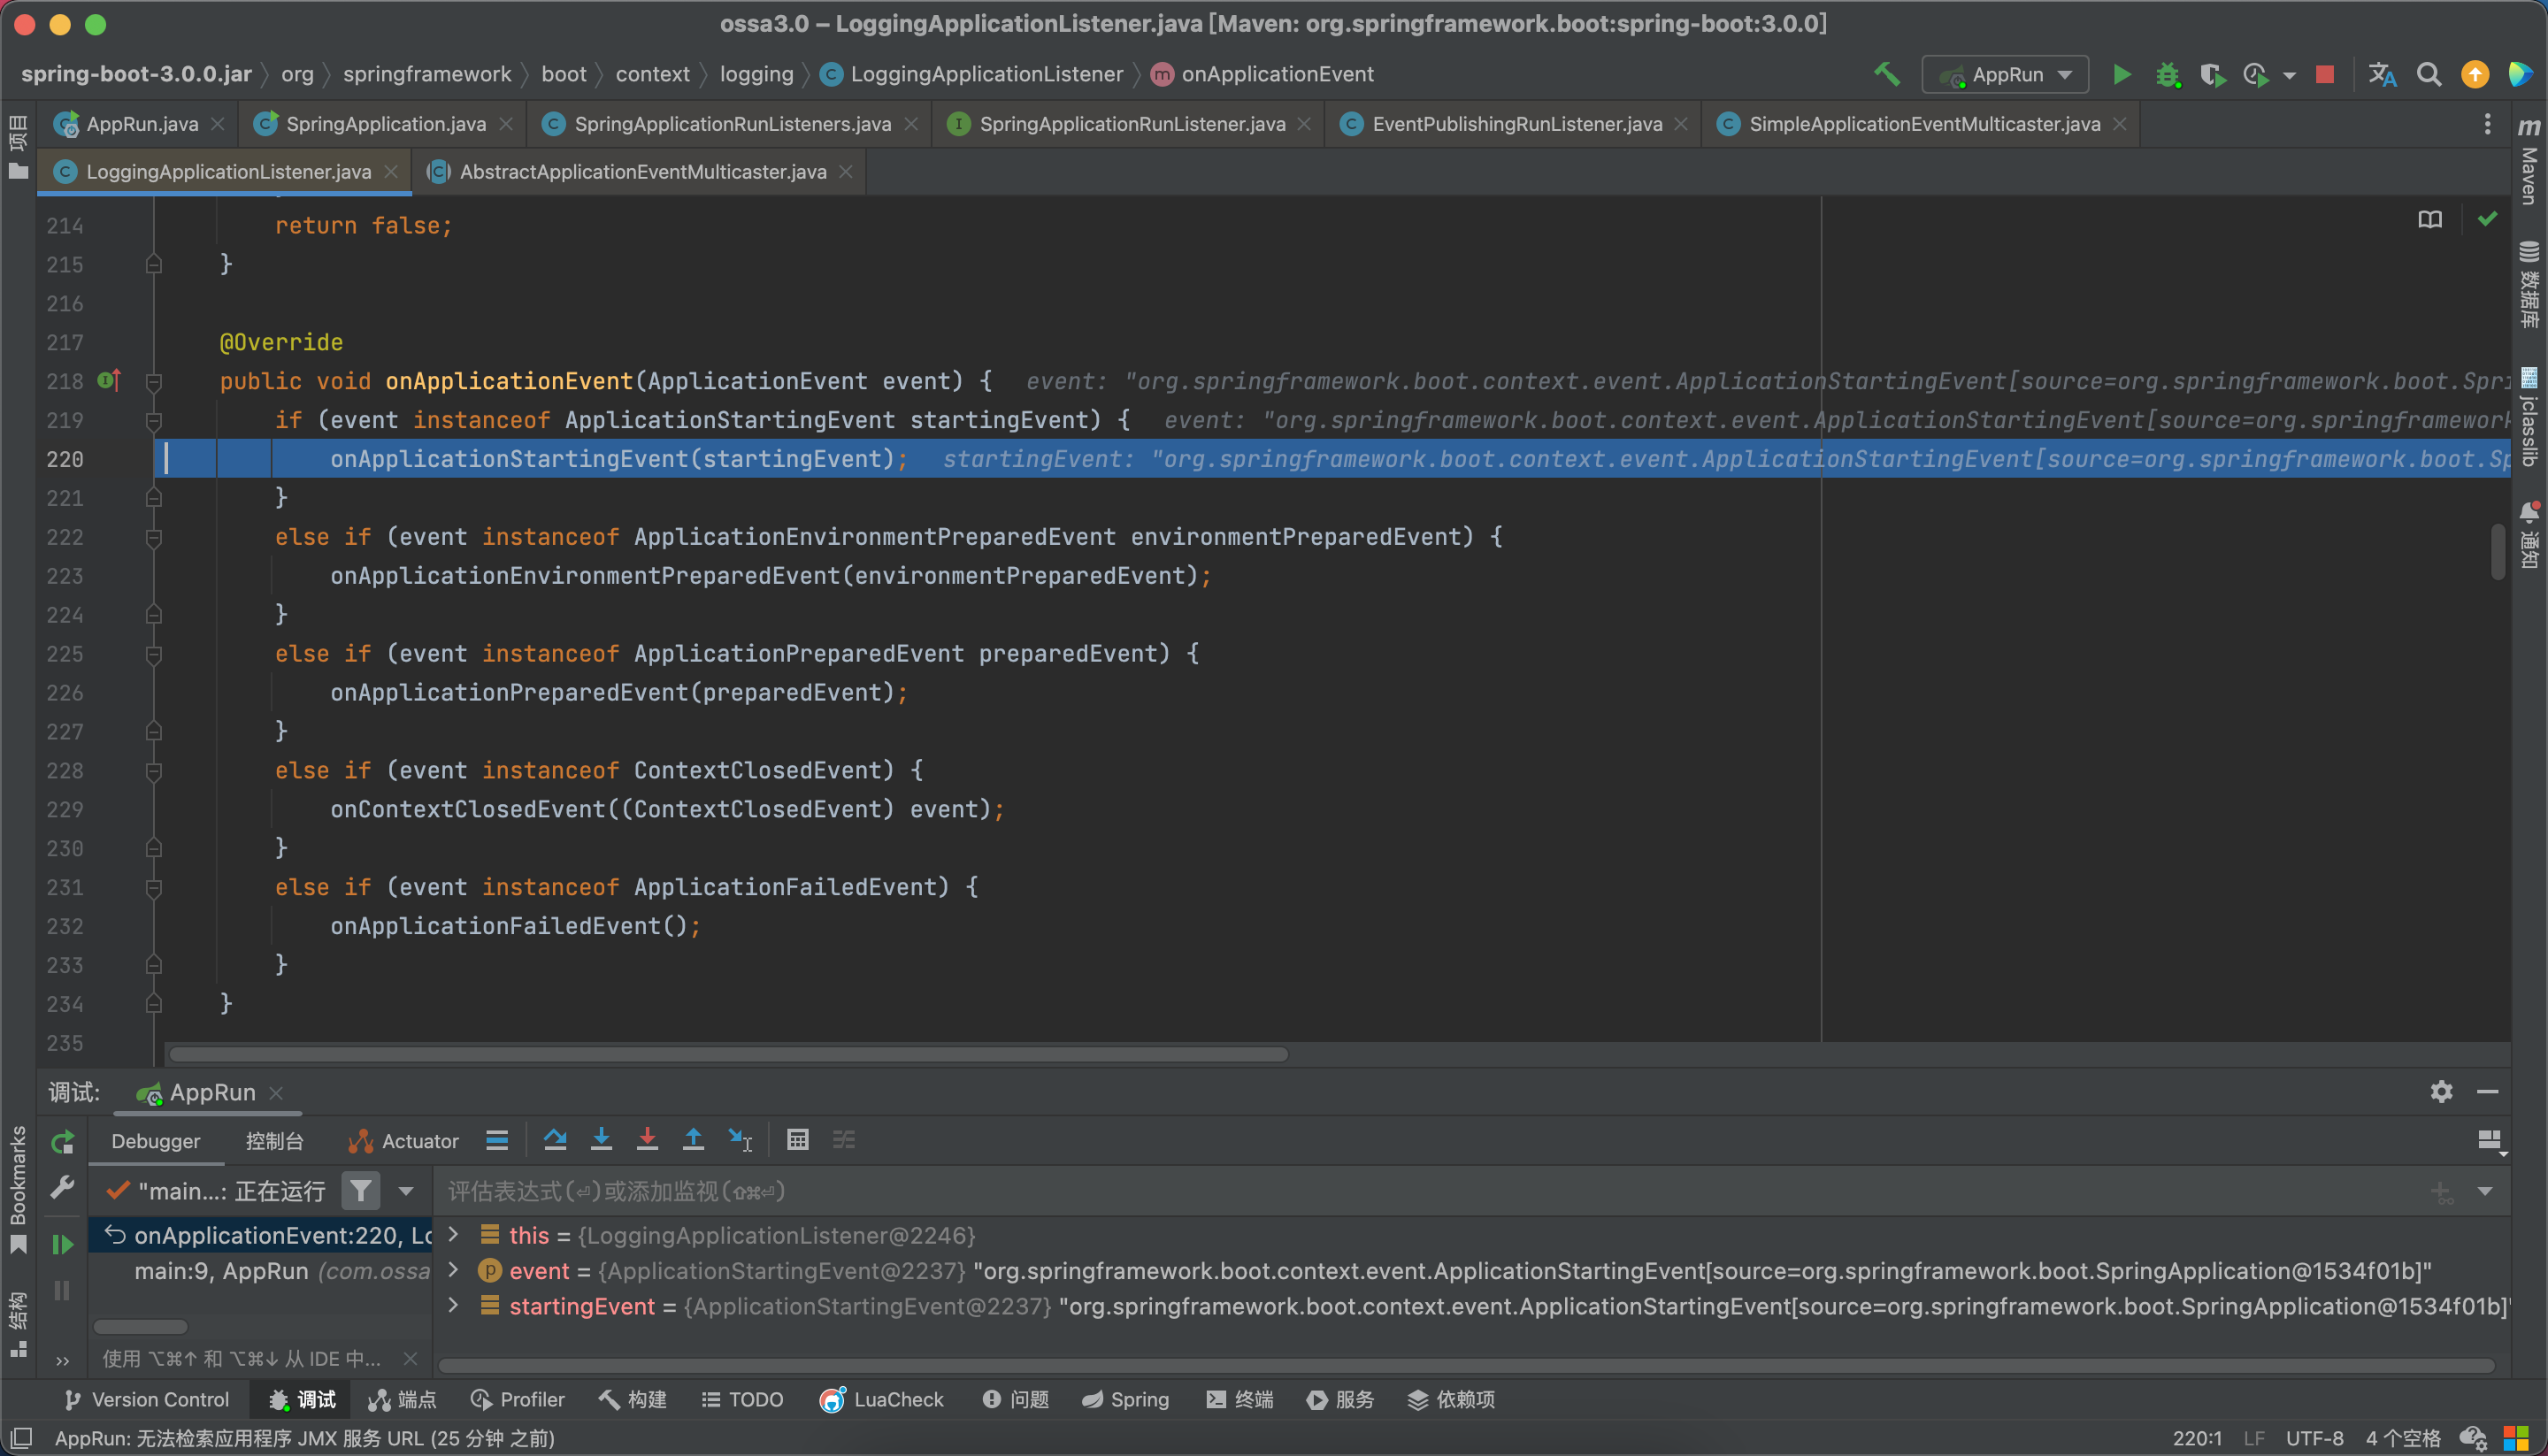
onApplicationStartingEvent
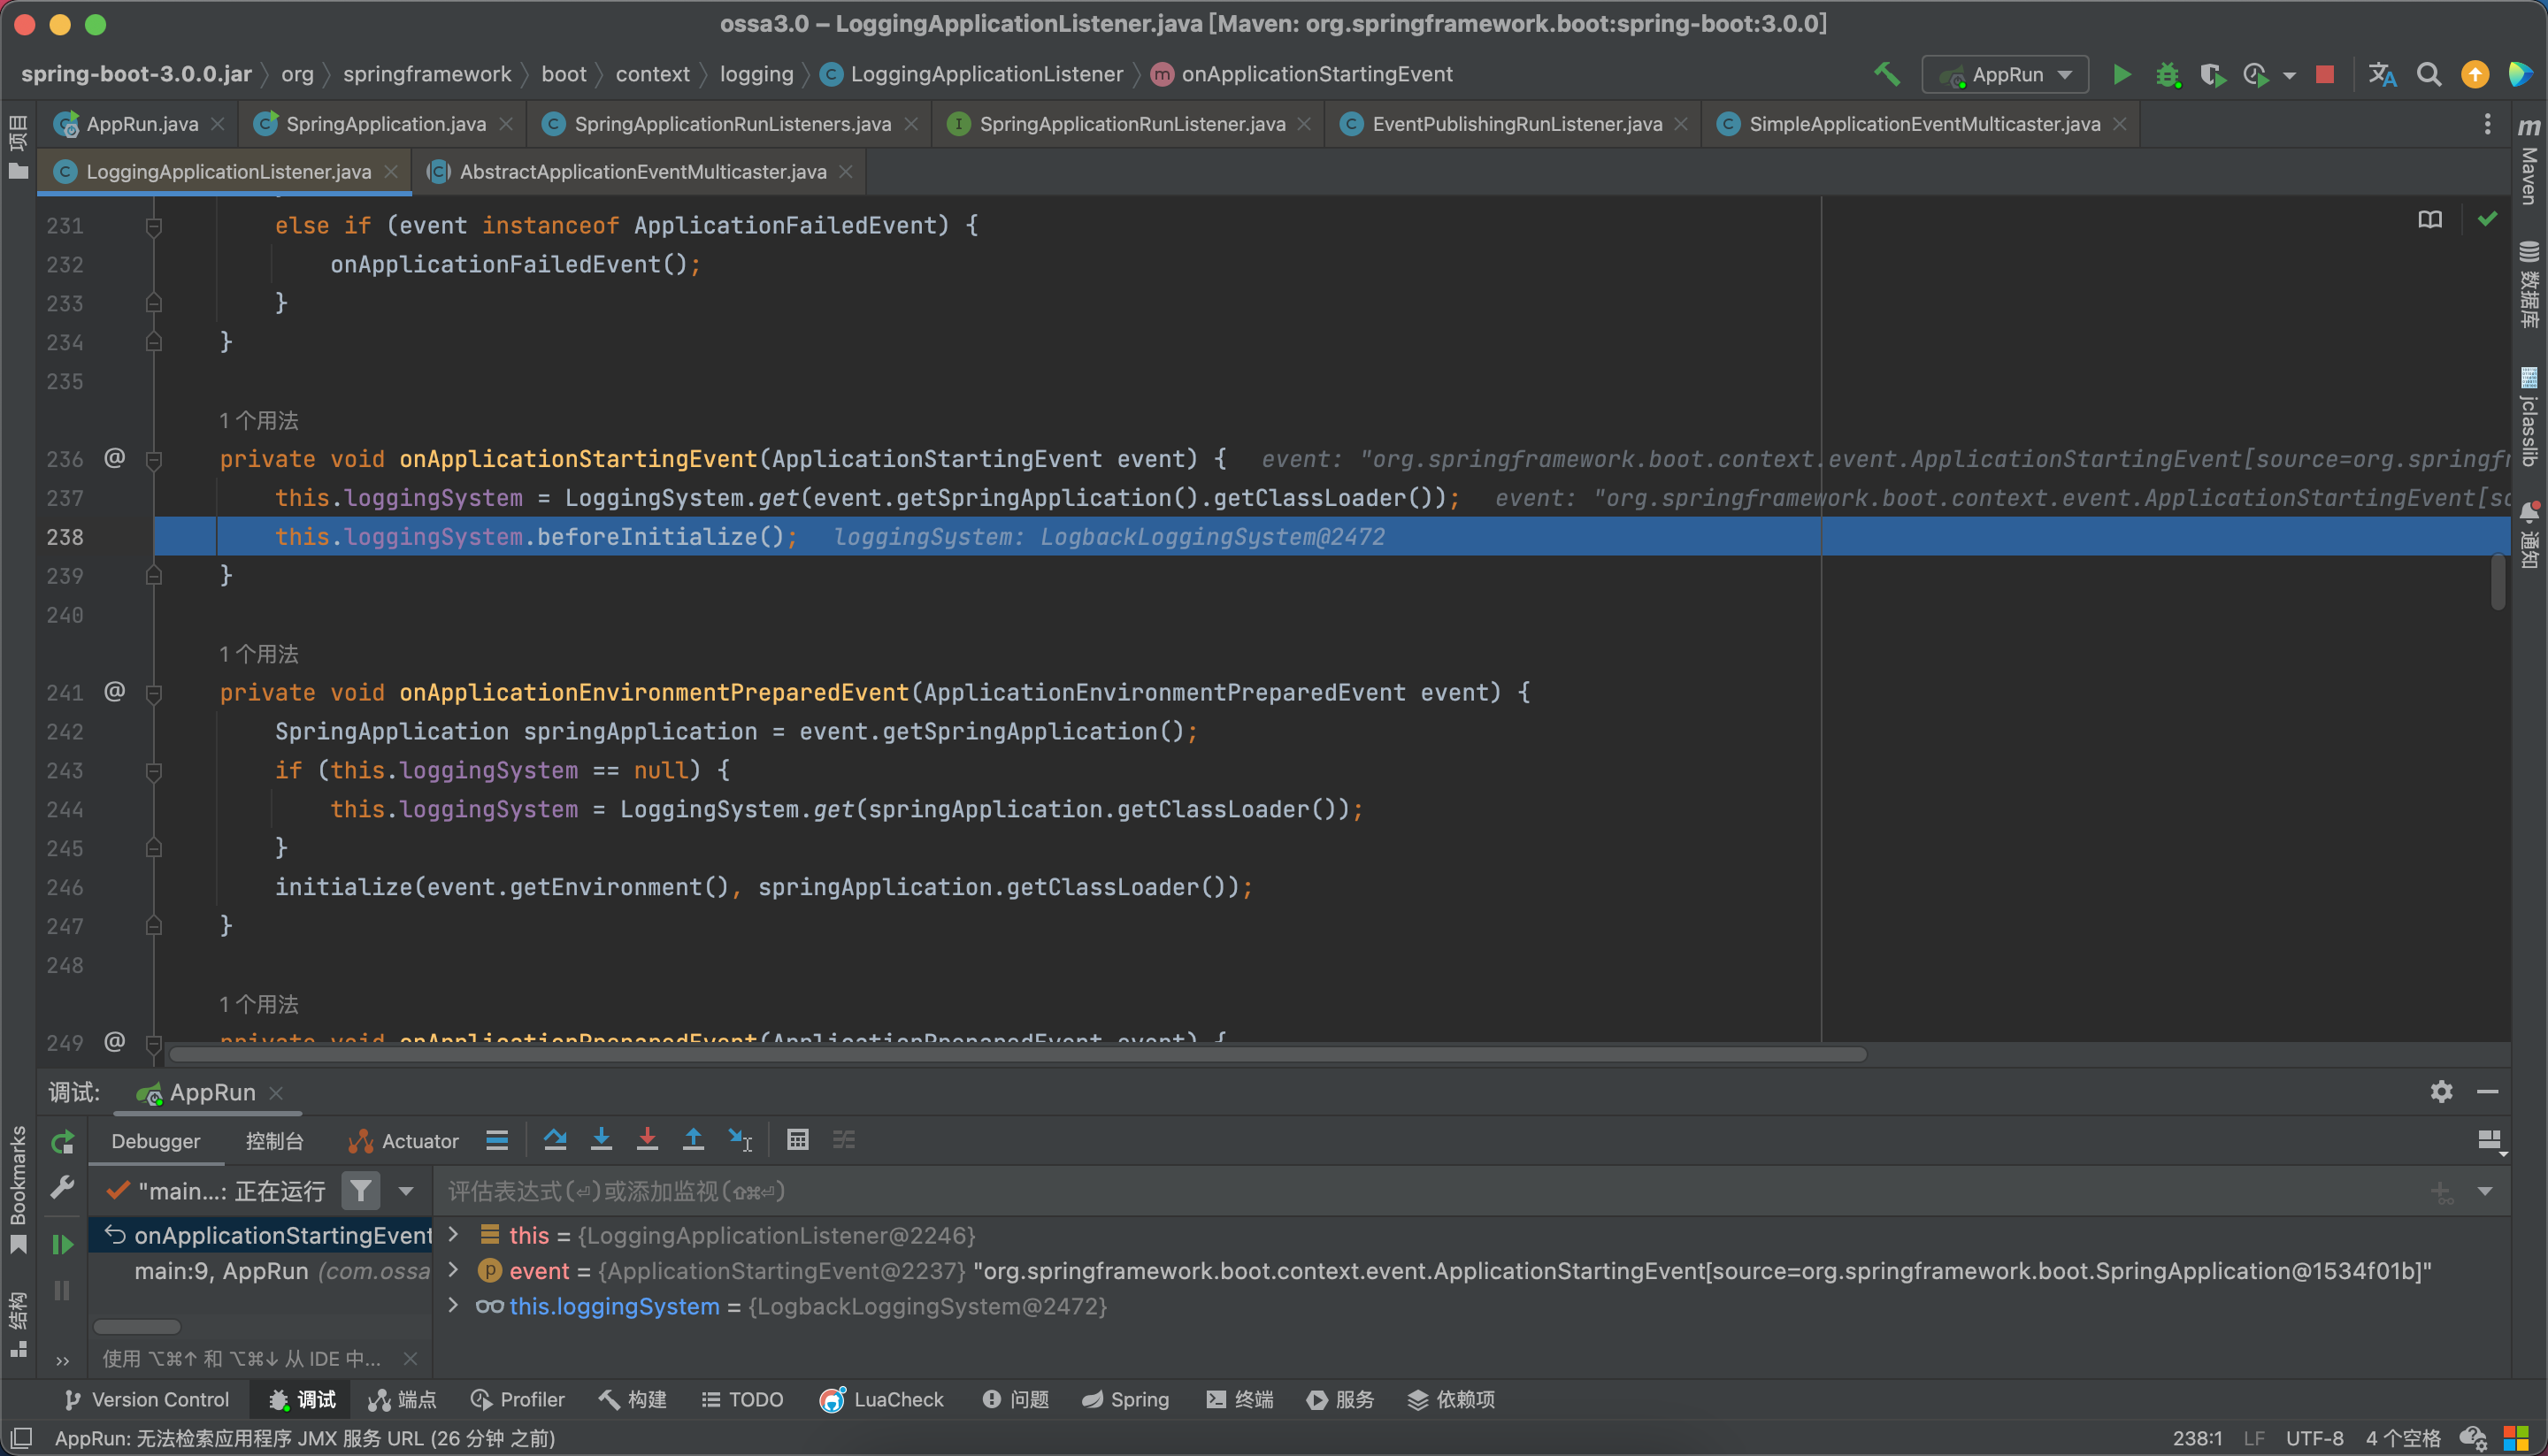
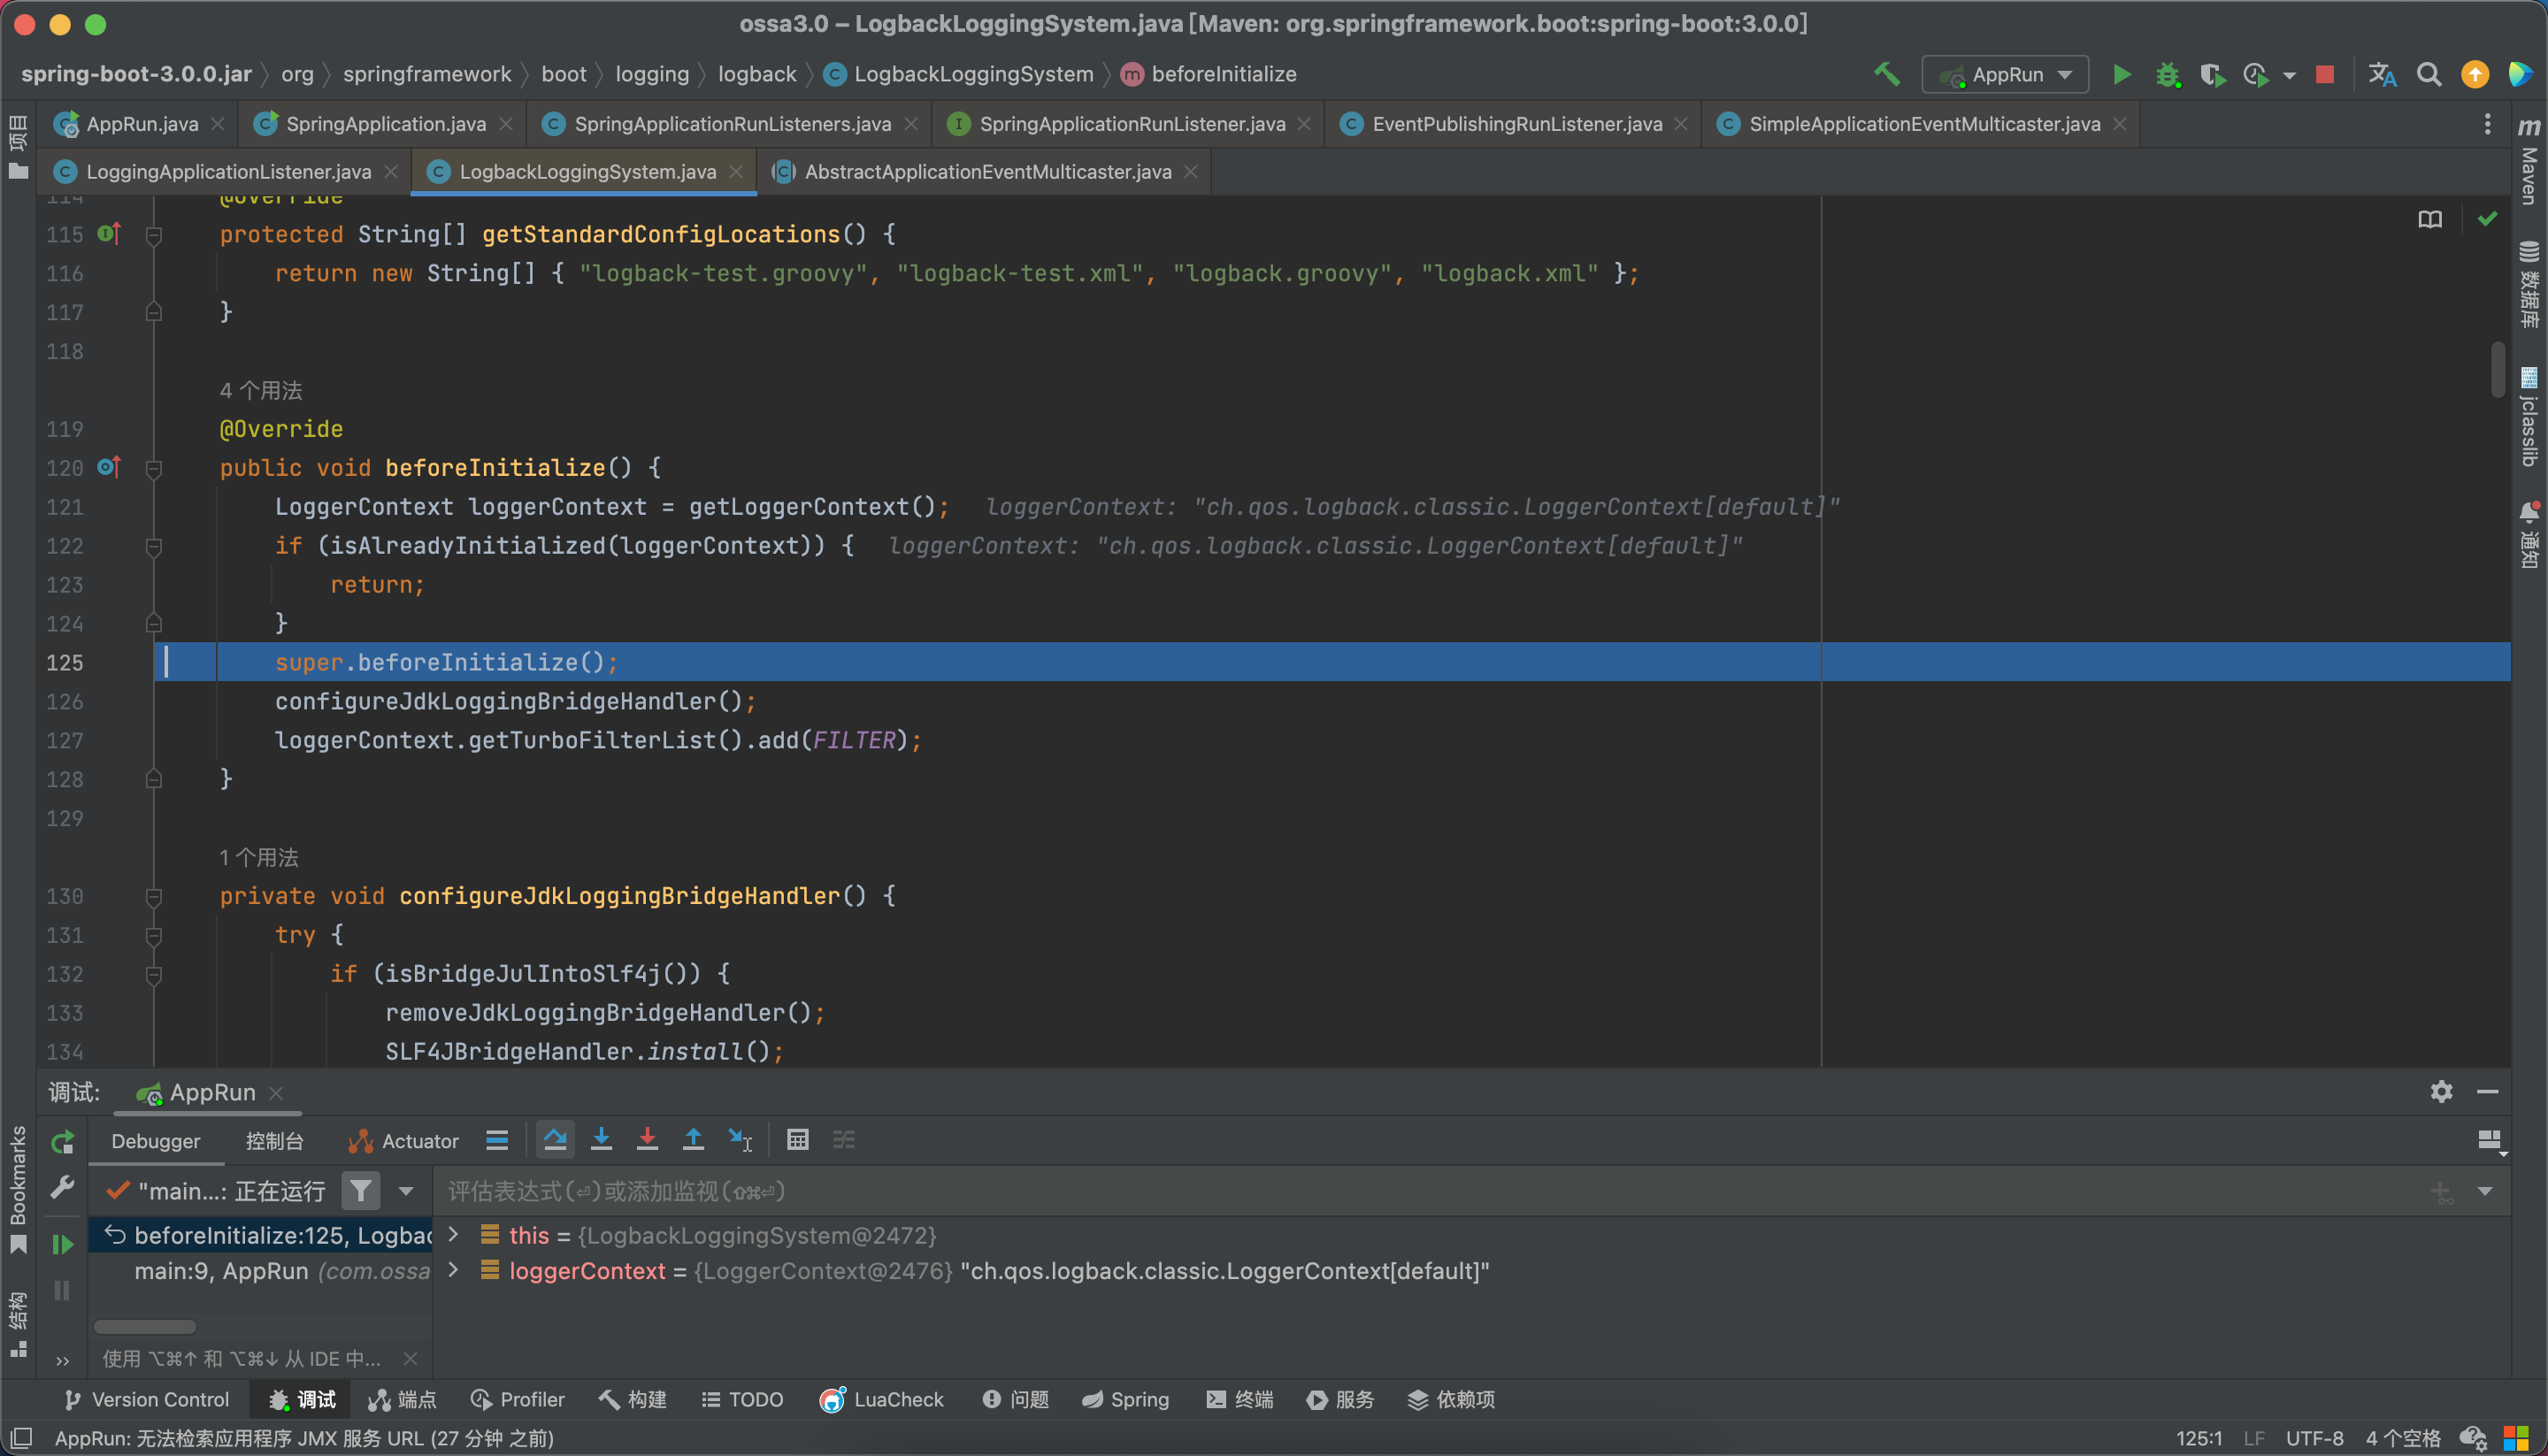
beforeInitialize
最后回到这里:
封装命令行参数
命令行参数配置: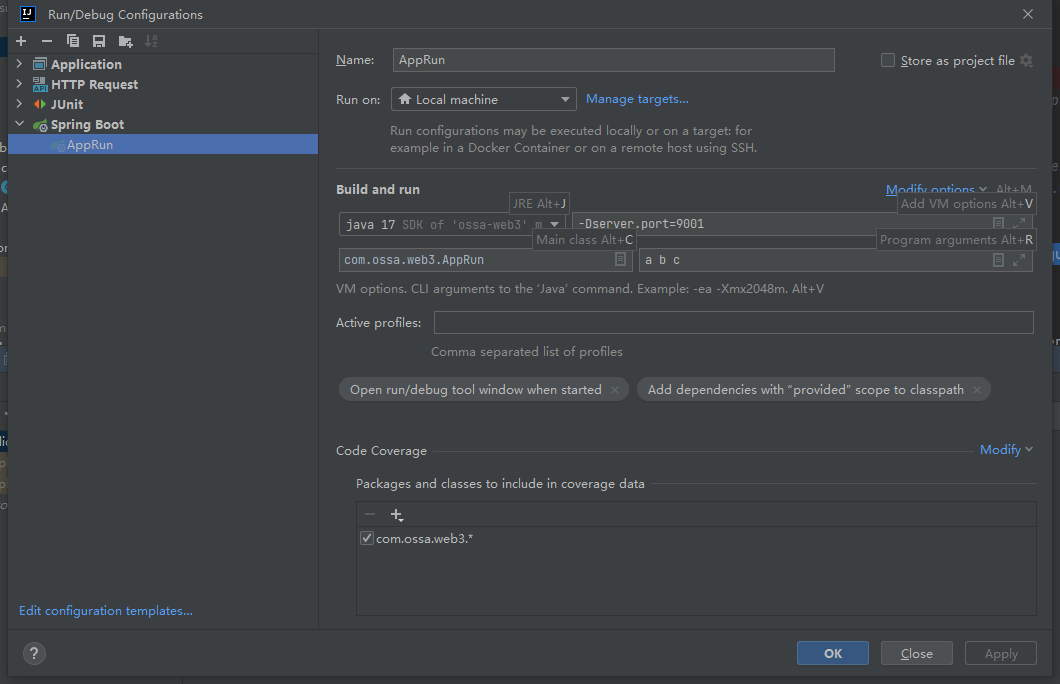
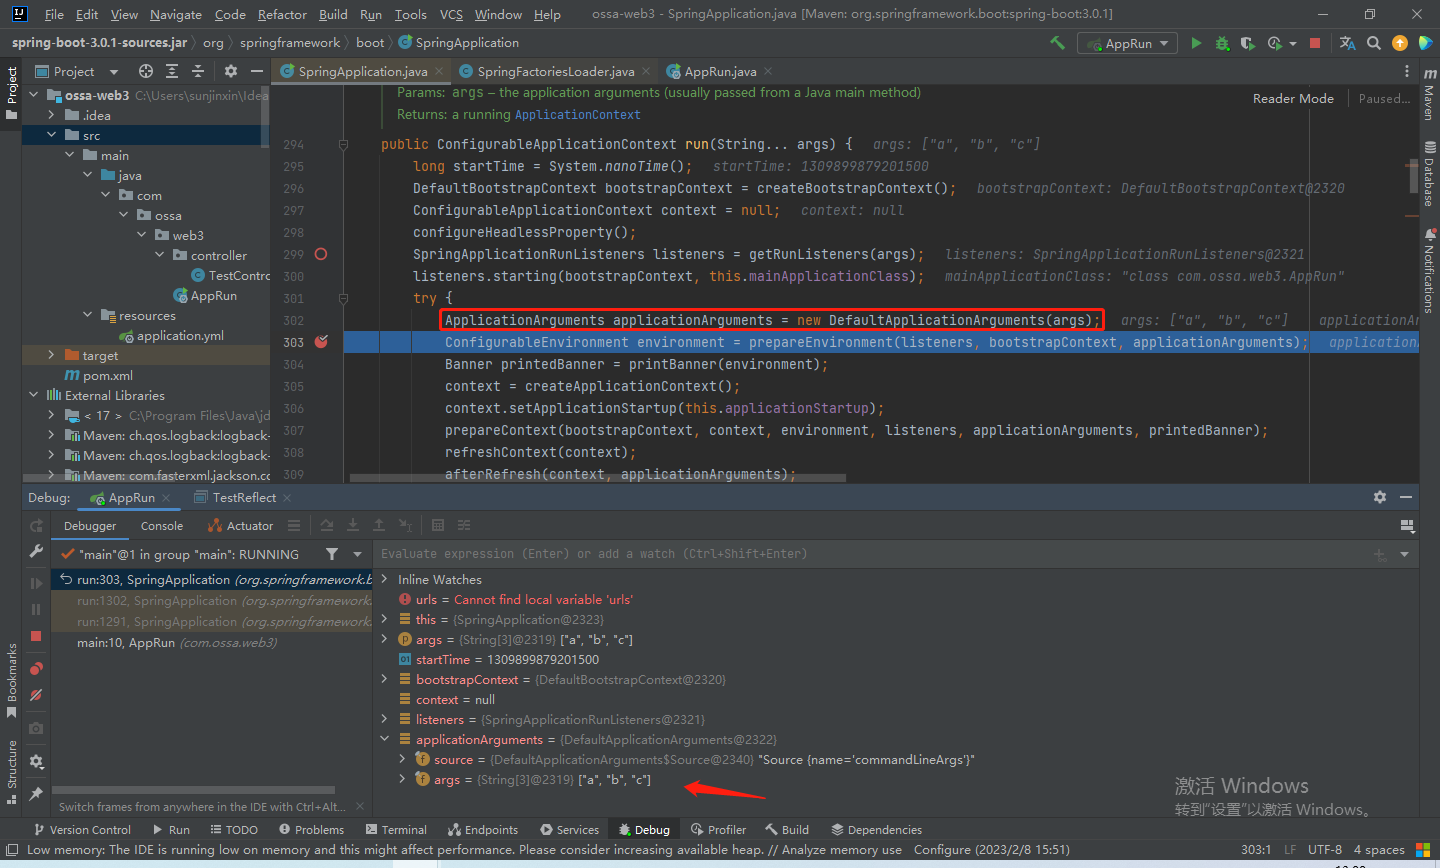
DefaultApplicationArguments构造方法:
public DefaultApplicationArguments(String... args) {Assert.notNull(args, "Args must not be null");this.source = new Source(args);this.args = args;}准备环境
读取环境变量(操作系统的环境变量/JVM的环境变量),读取配置文件信息(基于监听器,会利用EventPublishingRunListener发布一个ApplicationEnvironmentPreparedEvent事件,默认会有一个EnvironmentPostProcessorApplicationListener来处理这个事件,当然也可以通过自定义ApplicationListener来处理这个事件,当ApplicationListener接收到这个事件之后,就会解析application.properties、application.yml文件,并添加到Environment中。
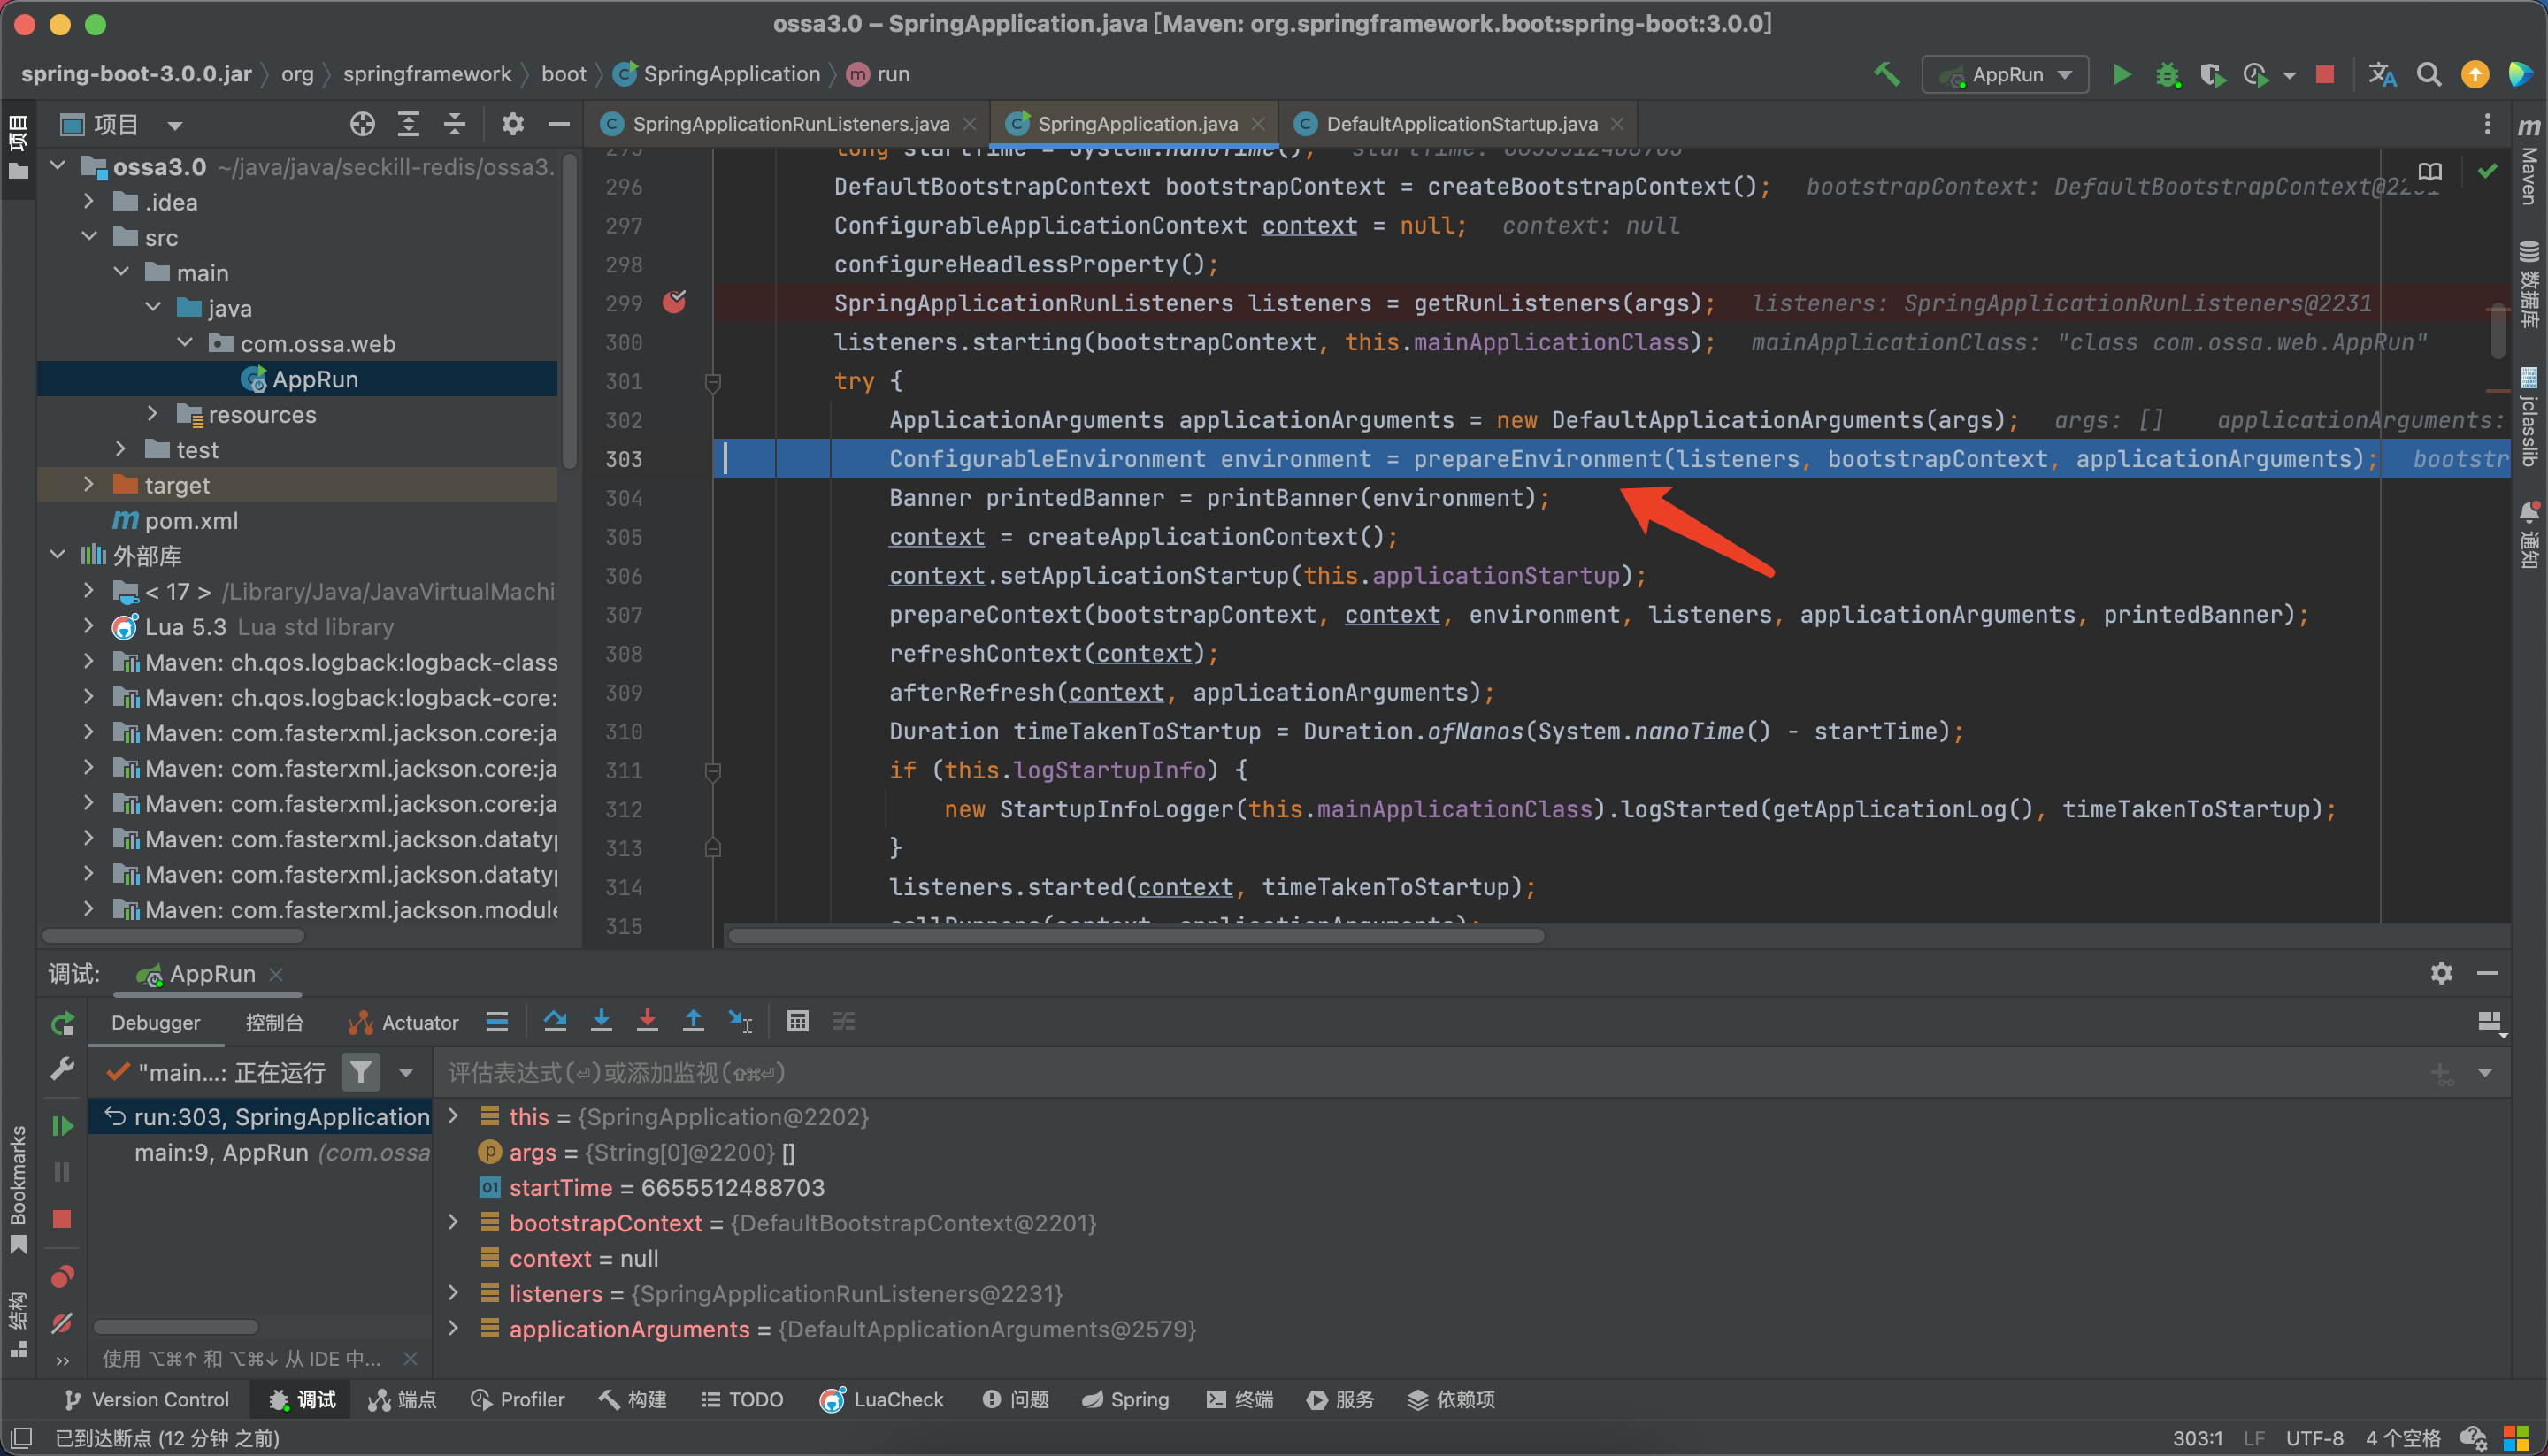
步入prepareEnvironment方法:
private ConfigurableEnvironment prepareEnvironment(SpringApplicationRunListeners listeners,DefaultBootstrapContext bootstrapContext, ApplicationArguments applicationArguments) {// 根据不同的web类型创建不同实现的Environment对象,读取:java环境变量和系统环境变量ConfigurableEnvironment environment = getOrCreateEnvironment();// 将命令行参数读取环境变量中configureEnvironment(environment, applicationArguments.getSourceArgs());// 将@PropertieSource的配置信息 放在第一位,它的优先级是最低的ConfigurationPropertySources.attach(environment);// 发布了ApplicationEnvironmentPreparedEvent 的监听器 读取了全局配置文件listeners.environmentPrepared(bootstrapContext, environment);DefaultPropertiesPropertySource.moveToEnd(environment);Assert.state(!environment.containsProperty("spring.main.environment-prefix"),"Environment prefix cannot be set via properties.");// 将所有spring.main 开头的配置信息绑定到SpringApplication中bindToSpringApplication(environment);if (!this.isCustomEnvironment) {EnvironmentConverter environmentConverter = new EnvironmentConverter(getClassLoader());environment = environmentConverter.convertEnvironmentIfNecessary(environment, deduceEnvironmentClass());}// 更新PropertySources配置ConfigurationPropertySources.attach(environment);return environment;}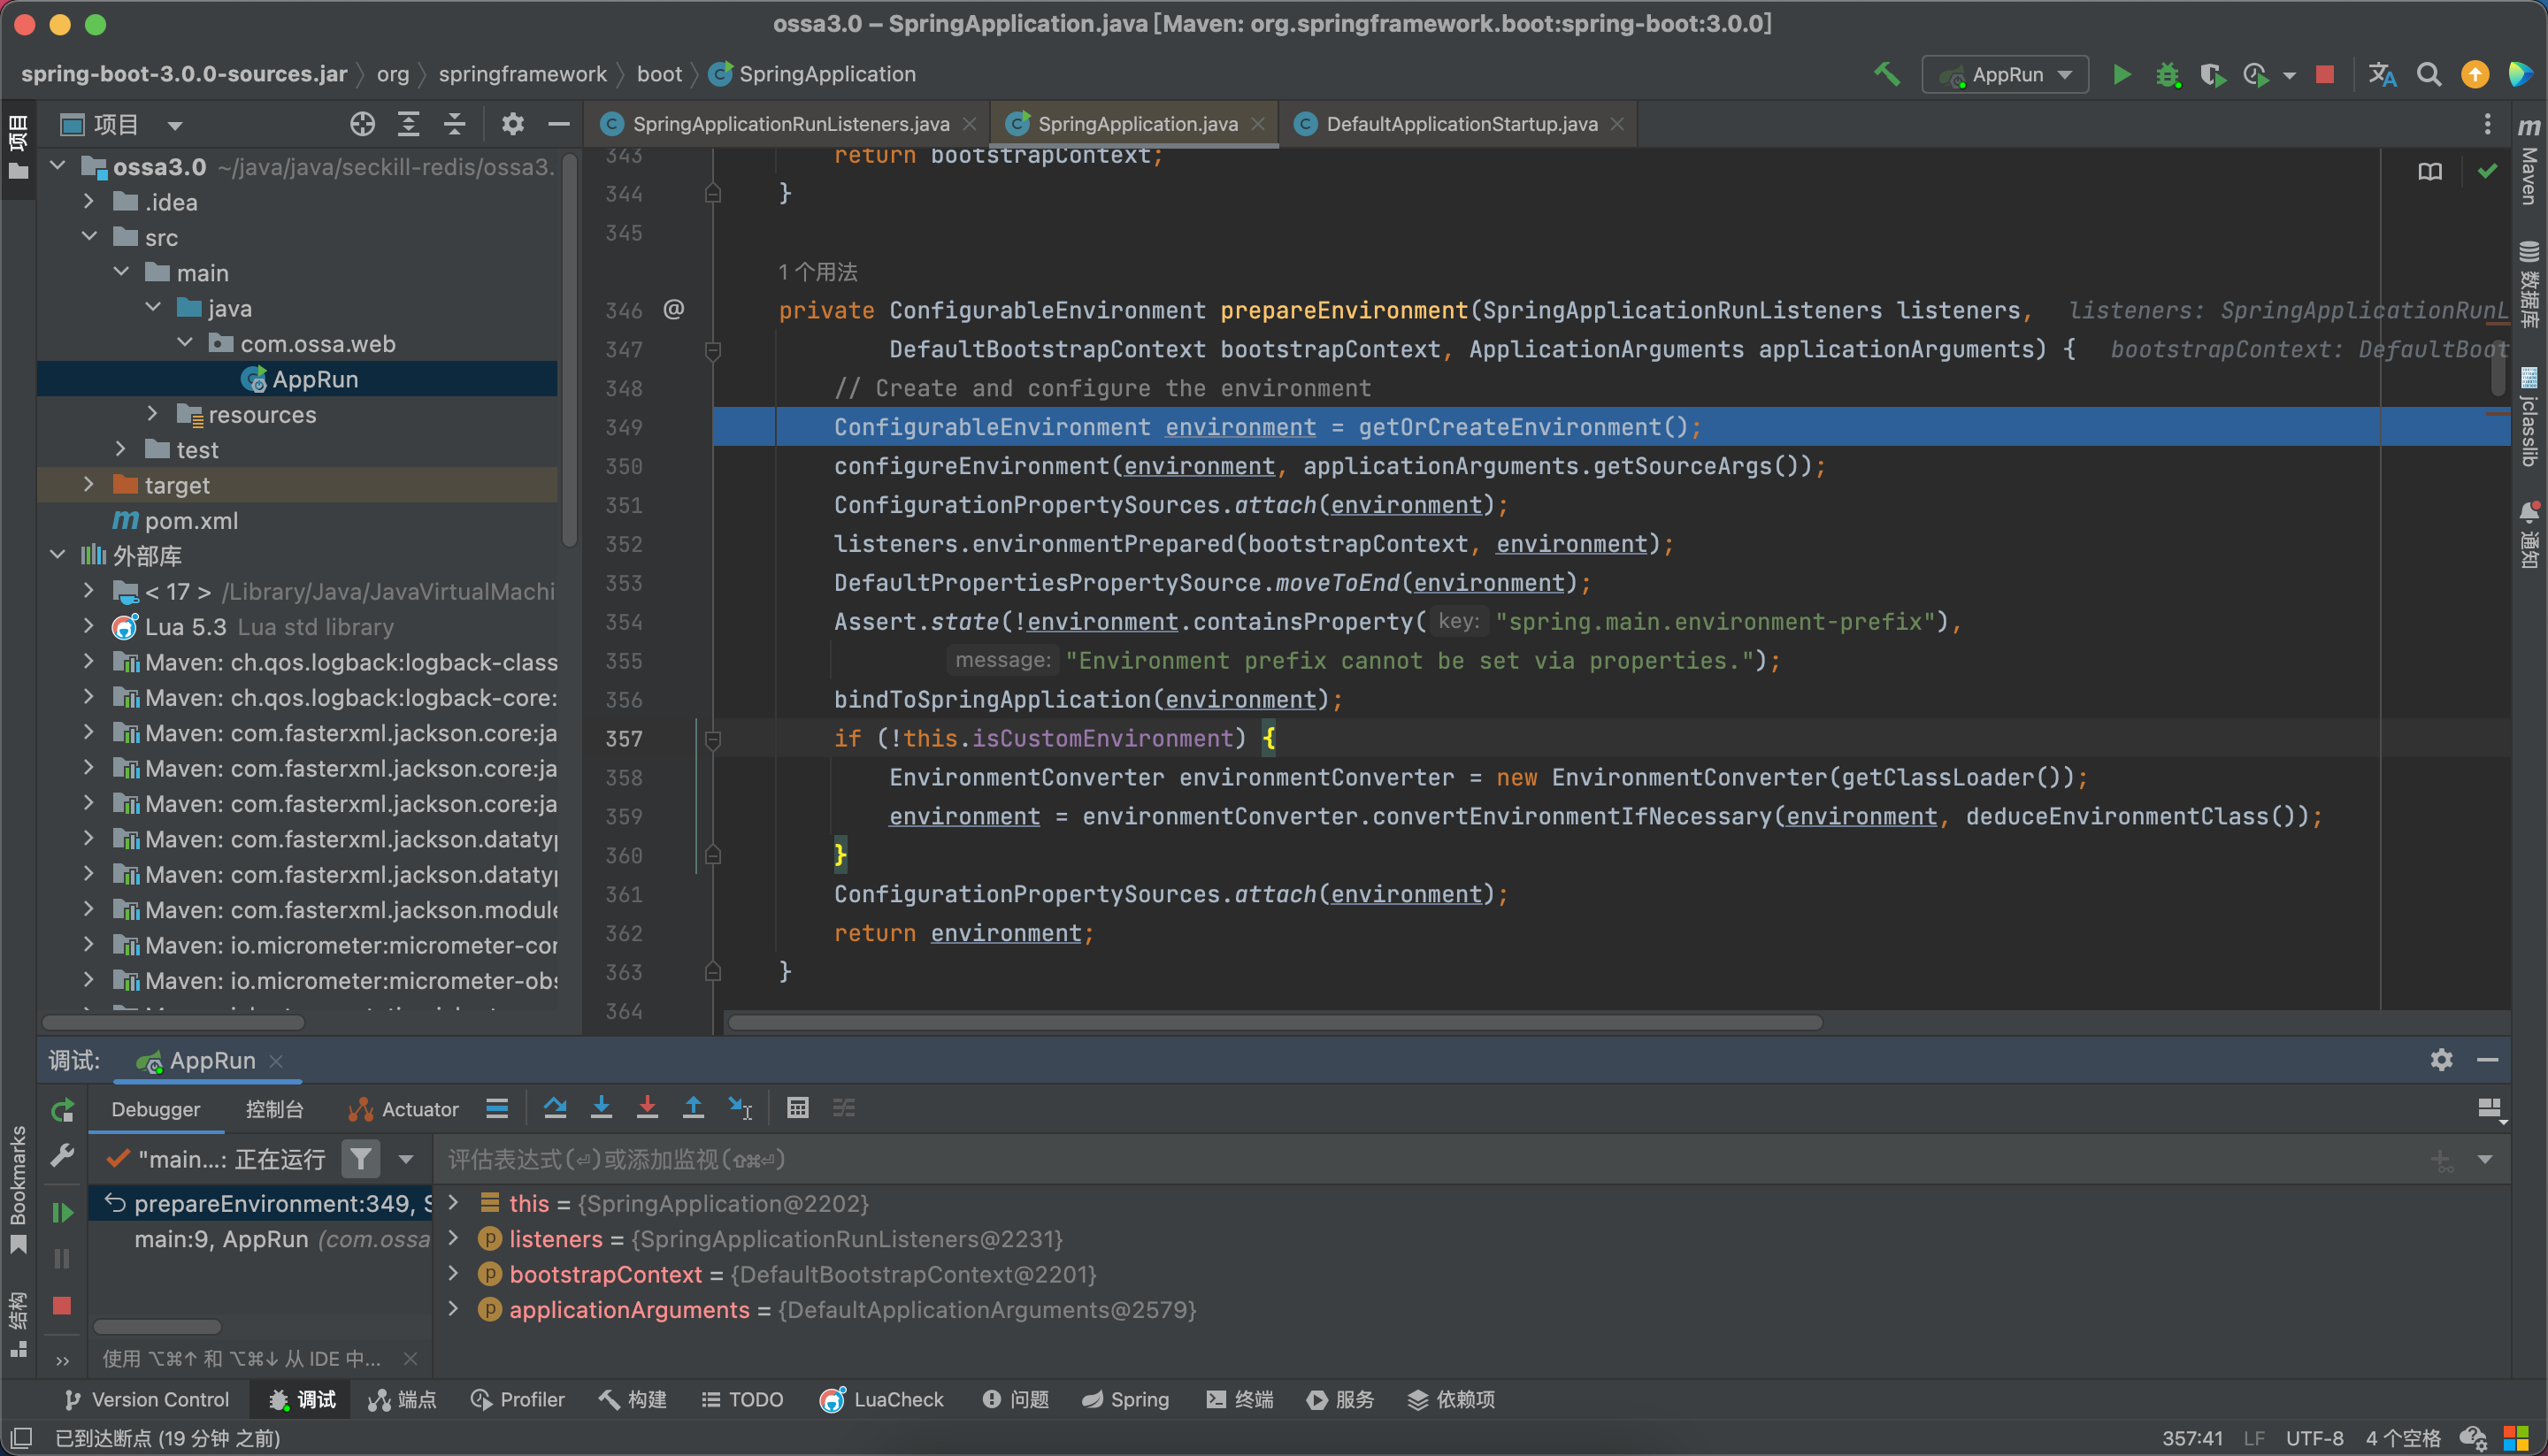
根据不同的web类型创建不同实现的Environment对象,读取java环境变量和系统环境变量
ConfigurableEnvironment environment = getOrCreateEnvironment();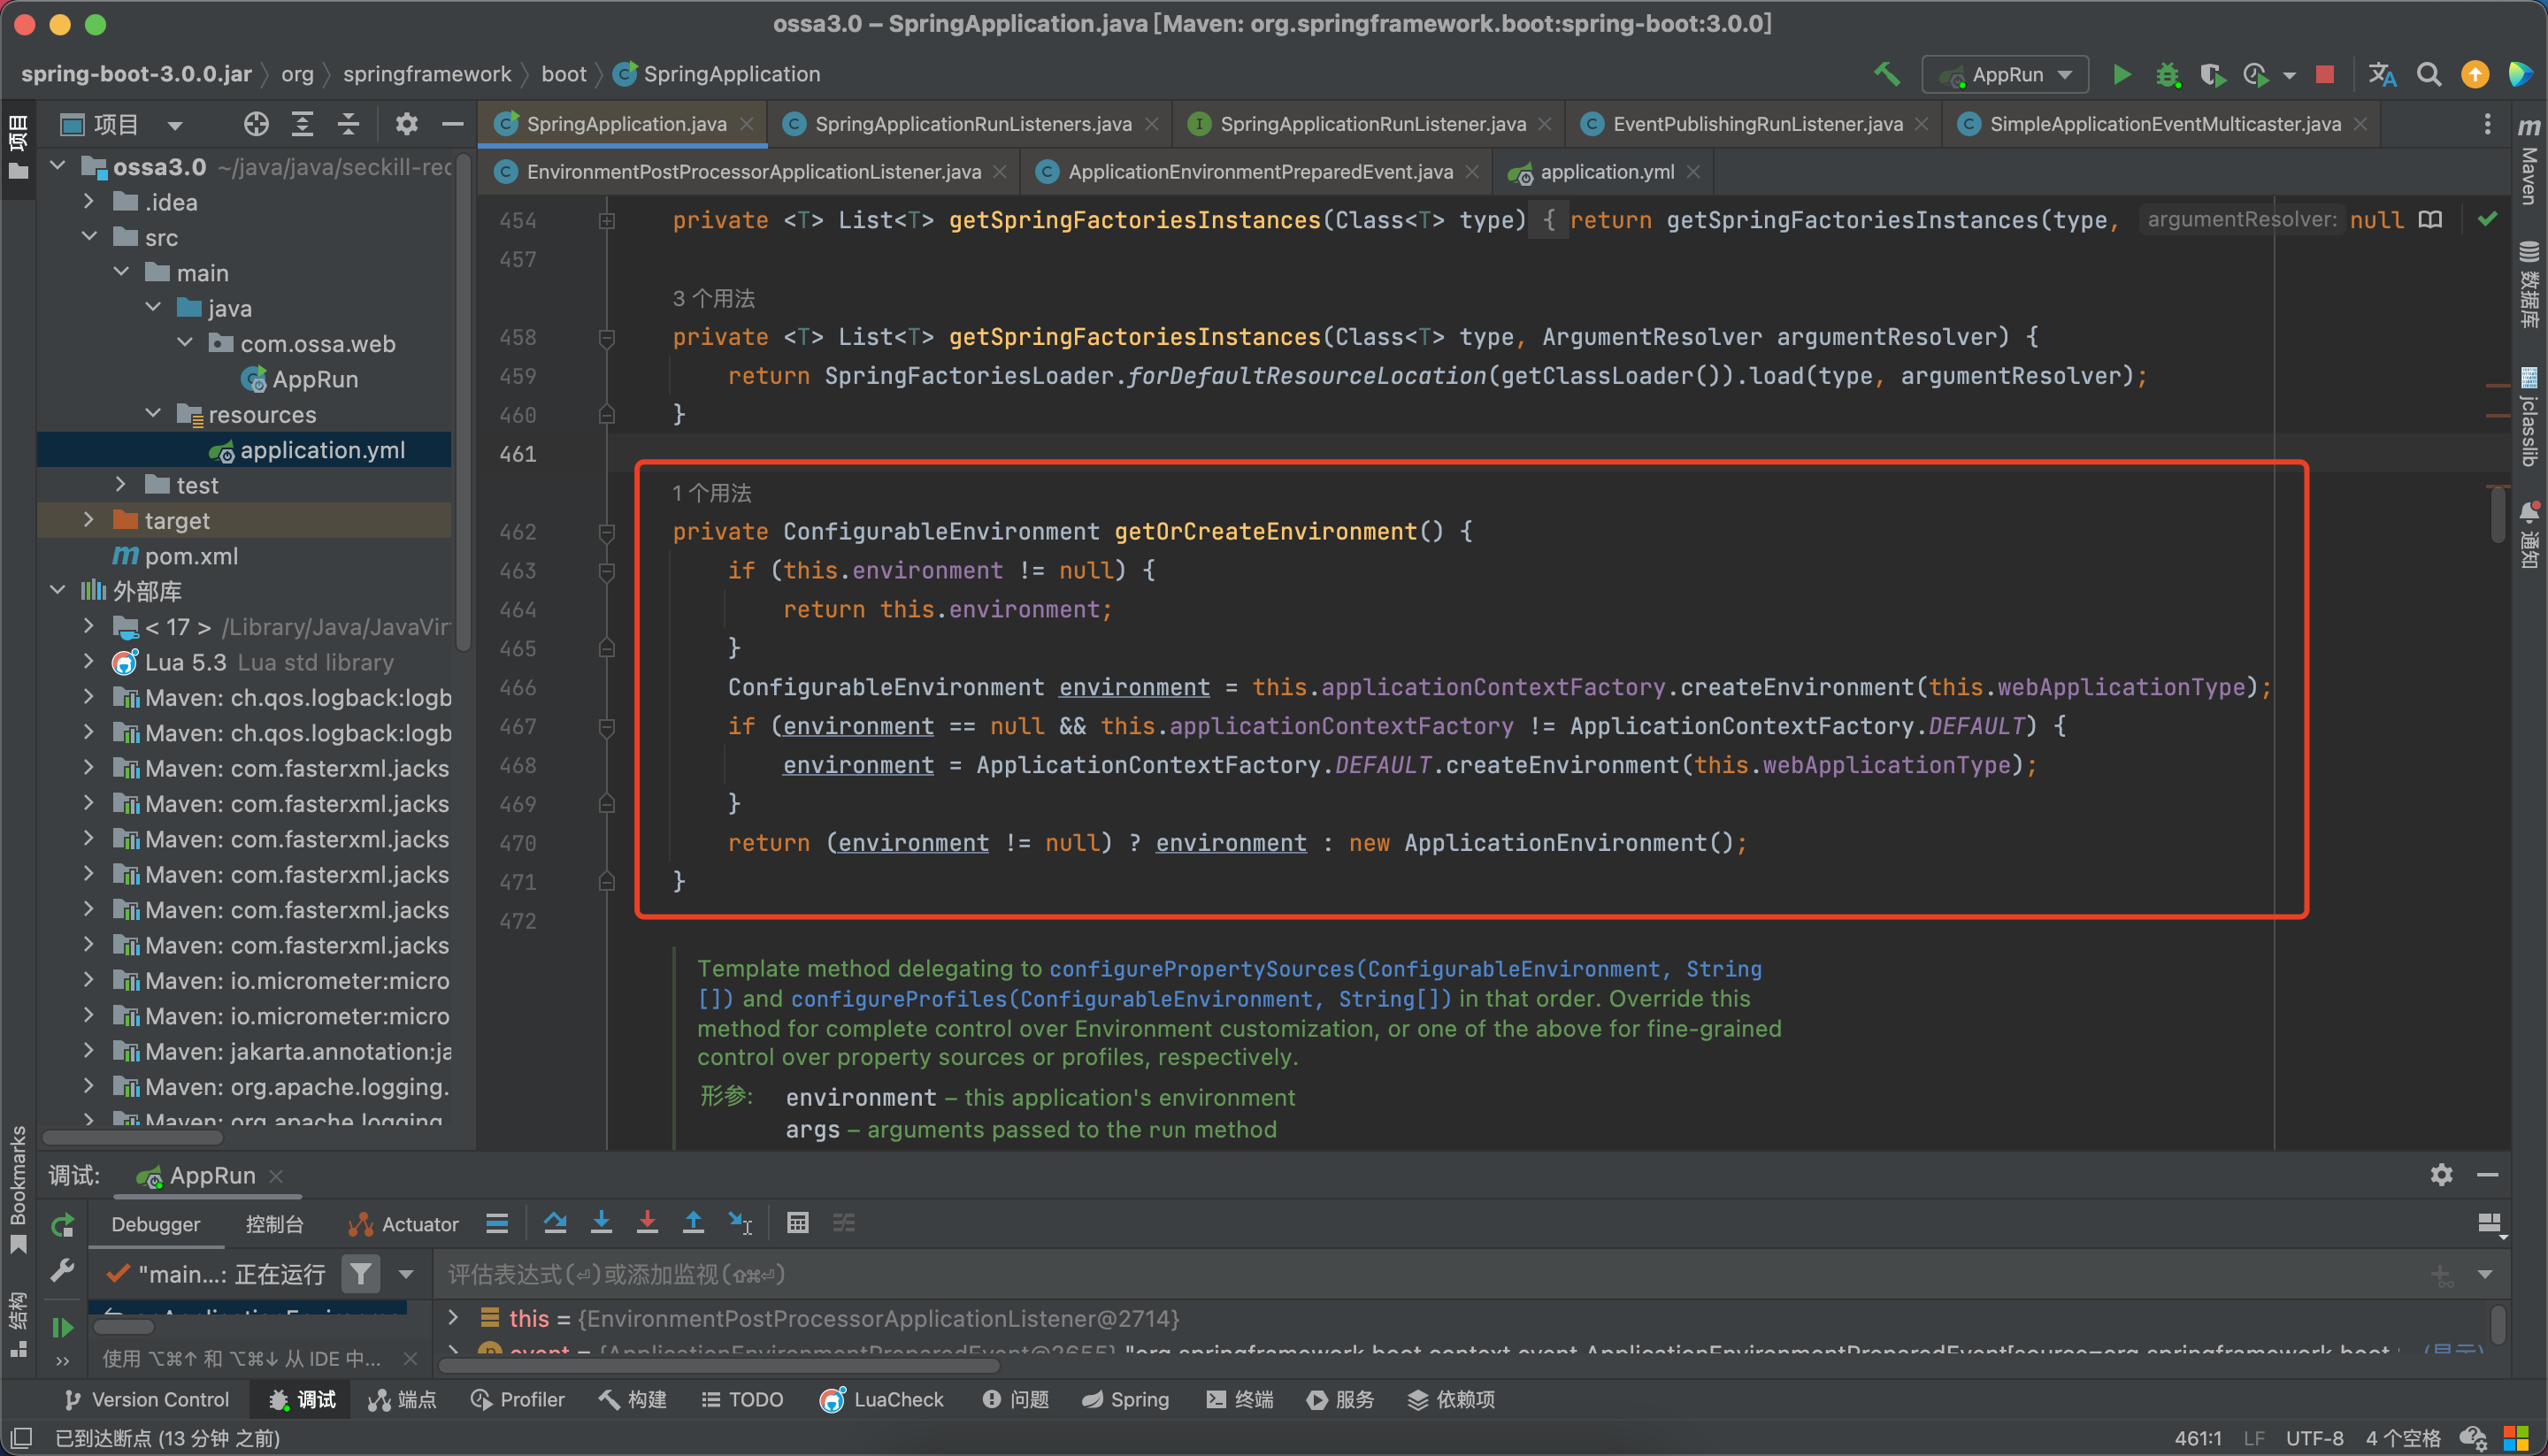
// 将命令行参数读取环境变量中configureEnvironment(environment, applicationArguments.getSourceArgs());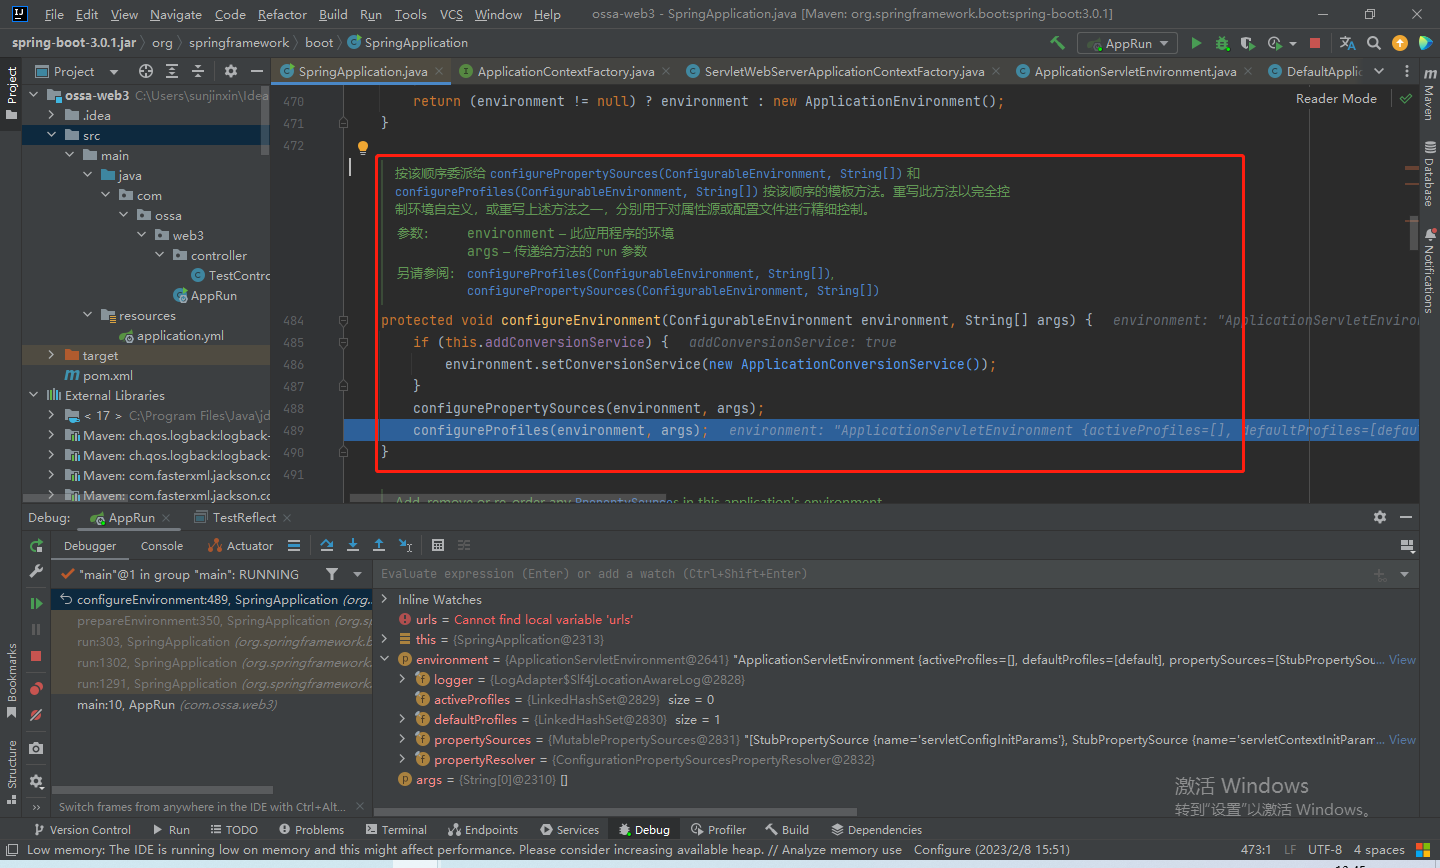
// 将@PropertieSource的配置信息 放在第一位,它的优先级是最低的ConfigurationPropertySources.attach(environment);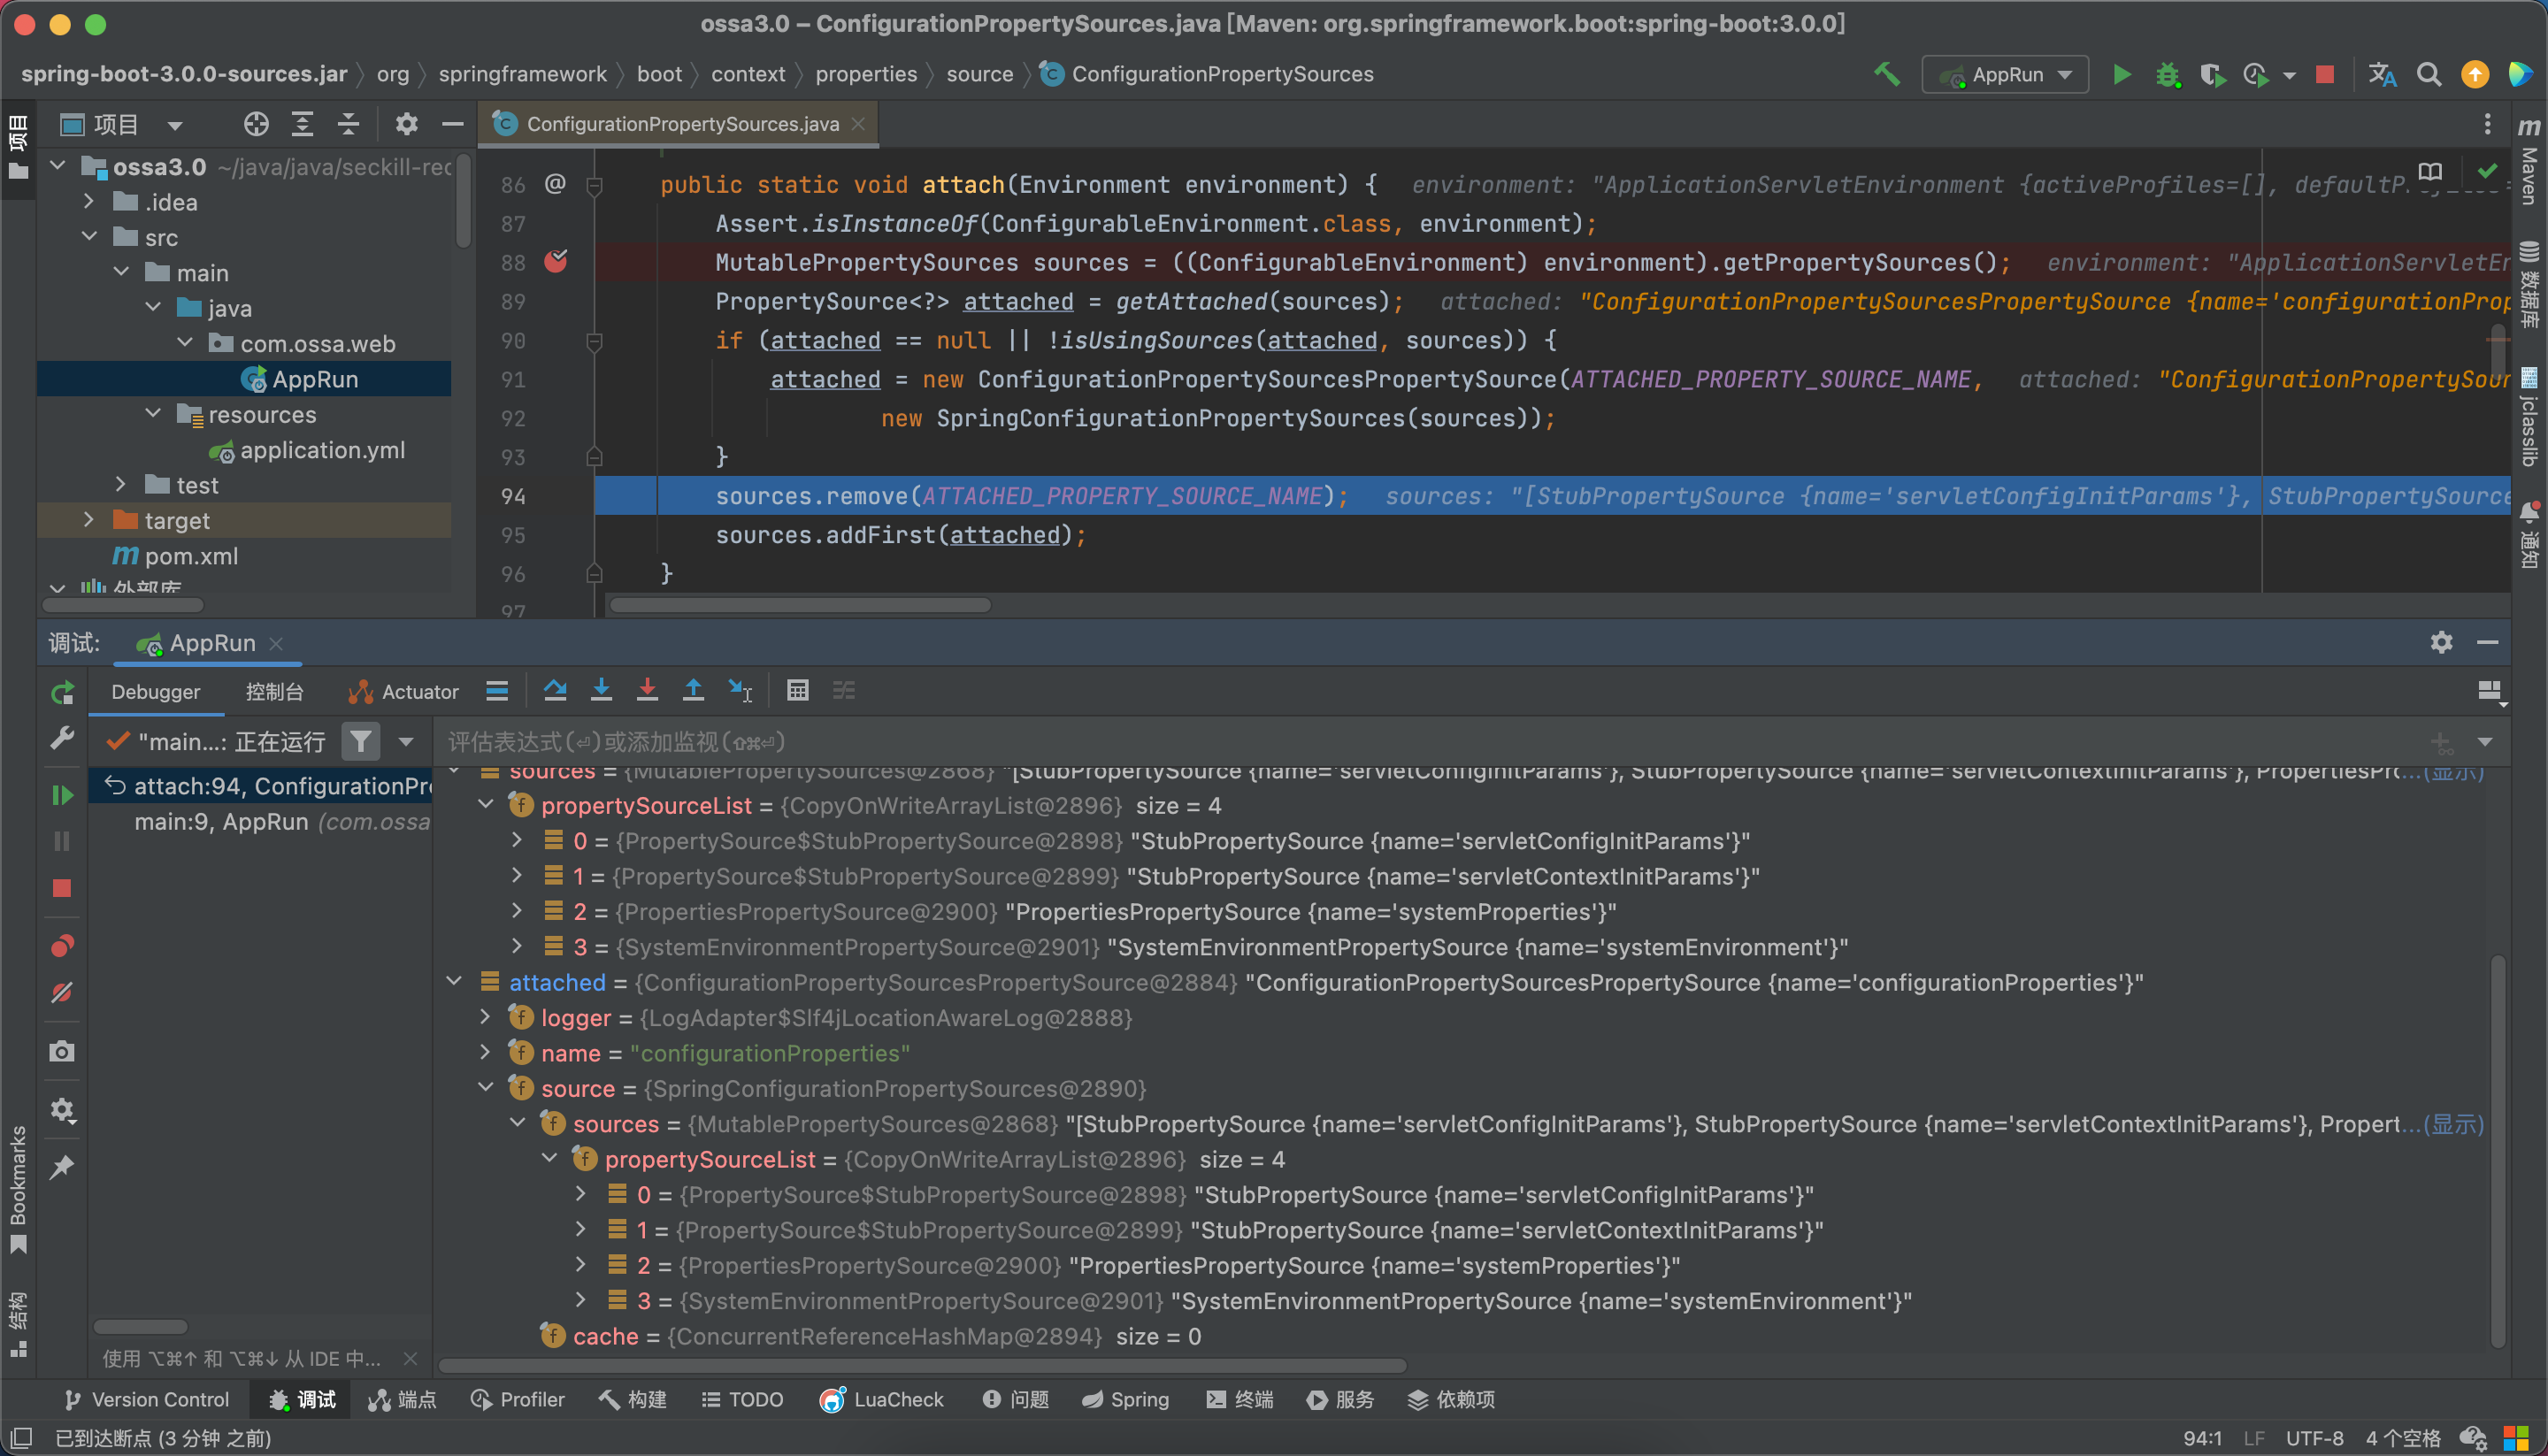
// 发布了ApplicationEnvironmentPreparedEvent的监听器,读取了全局配置文件listeners.environmentPrepared(bootstrapContext, environment);最终调用onApplicationEnvironmentPreparedEvent方法:
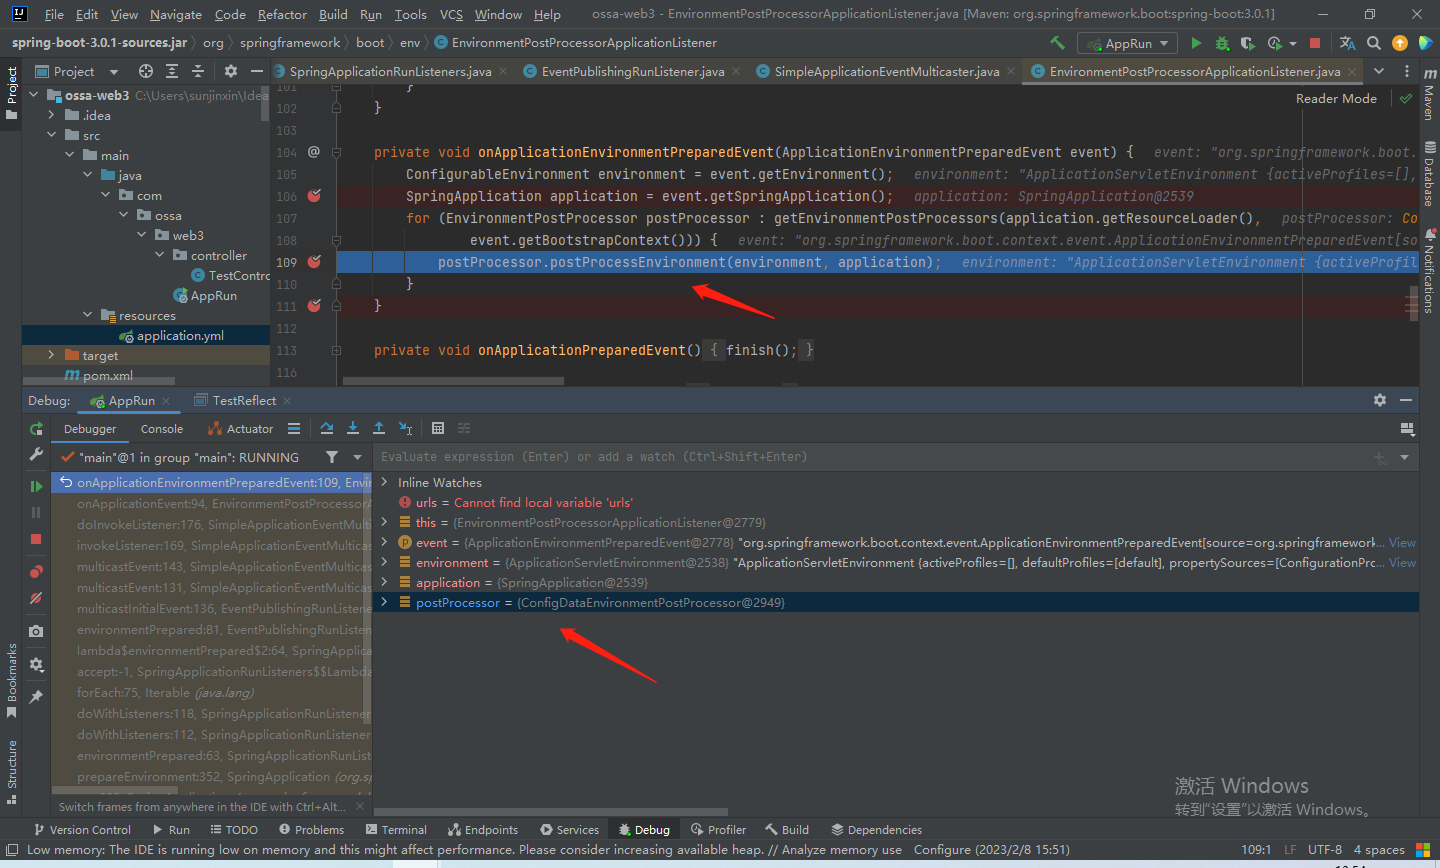
步入postProcessEnvironment方法:
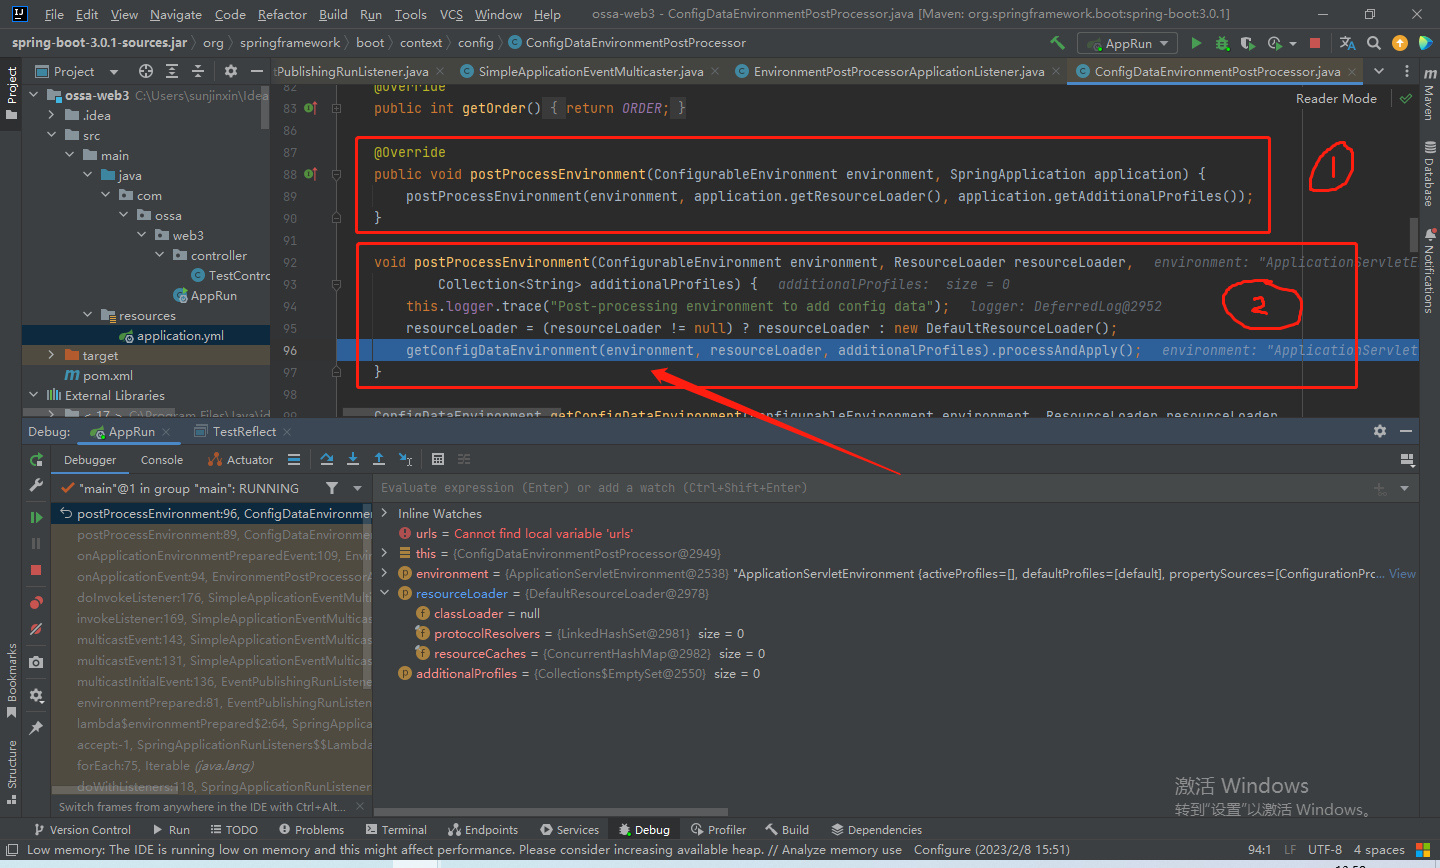
步入processAndApply方法:
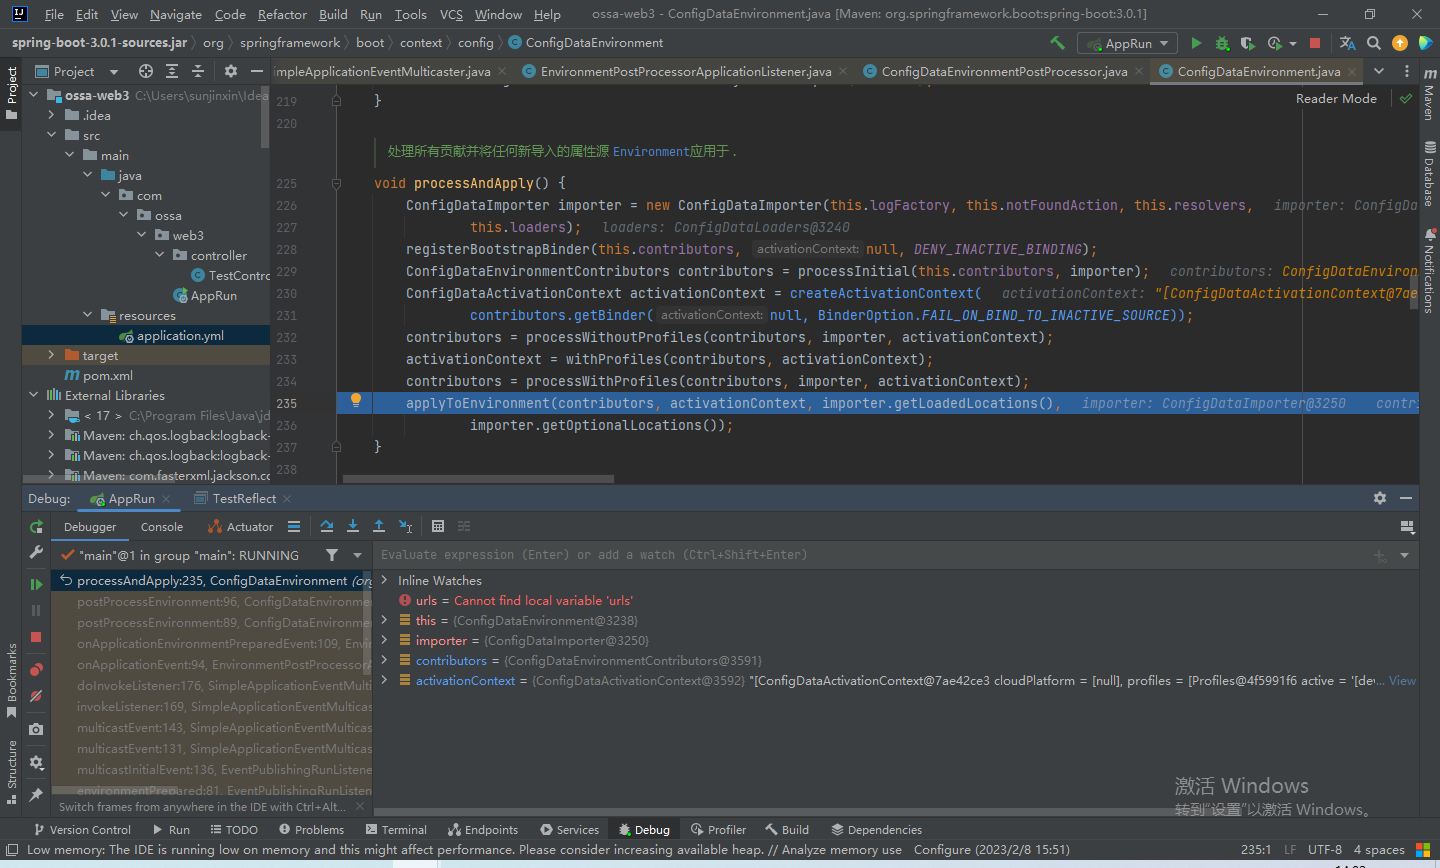
步入applyToEnvironment方法:
// 将所有spring.main 开头的配置信息绑定到SpringApplication中bindToSpringApplication(environment);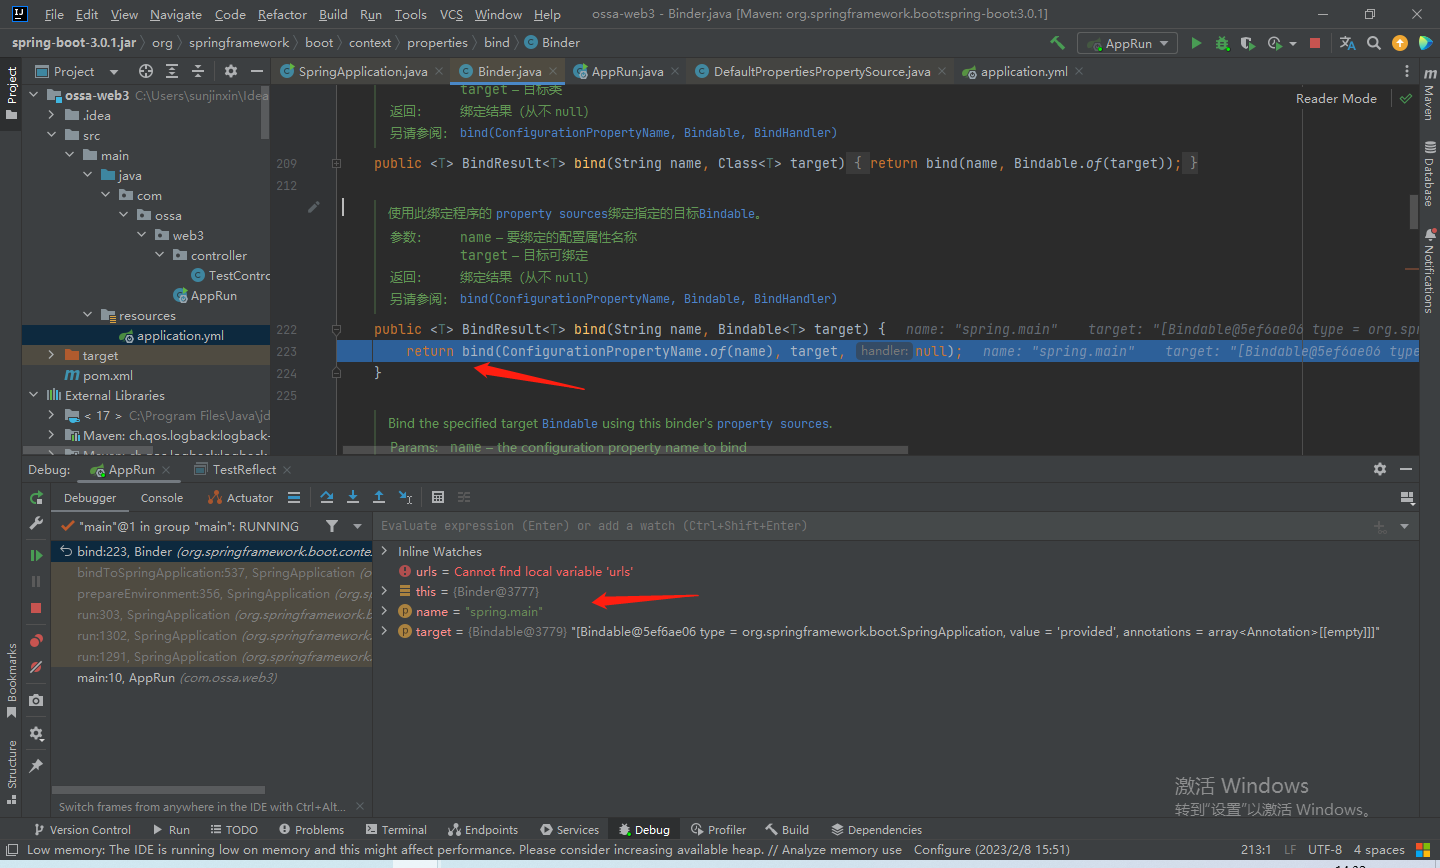
打印Banner
// 打印BannerBanner printedBanner = printBanner(environment);步入printBanner方法:
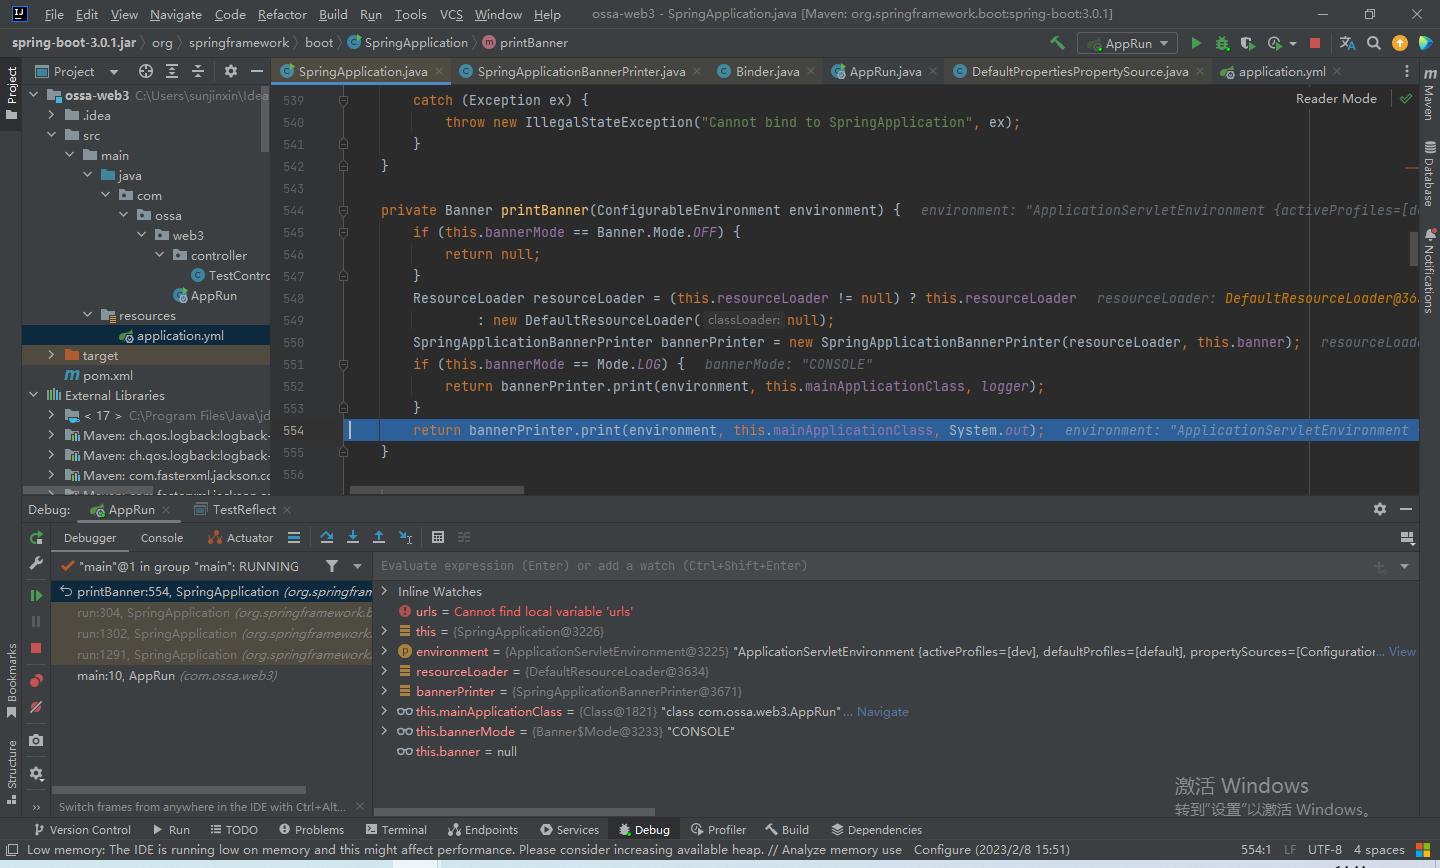
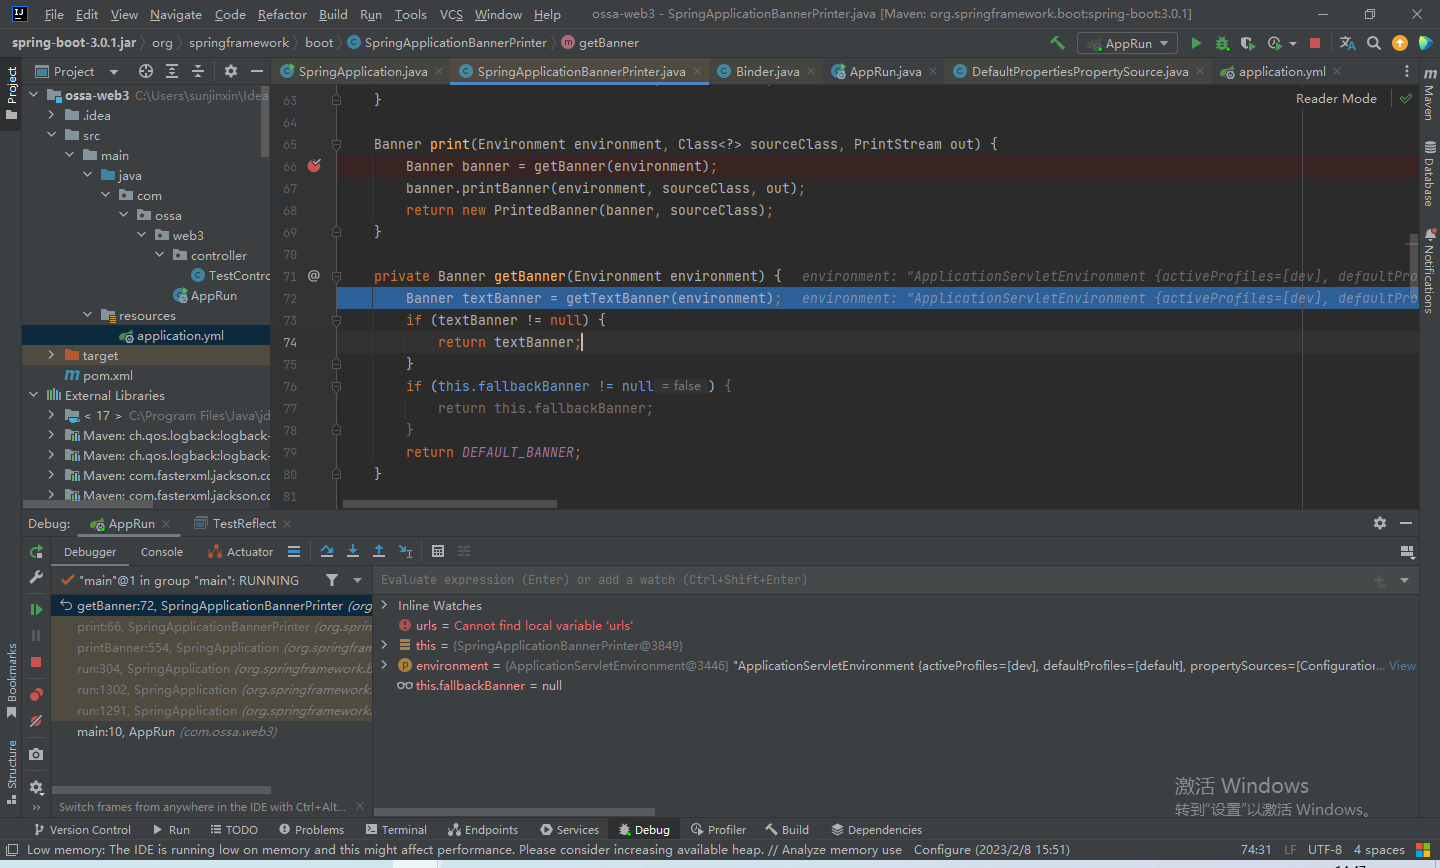
步入print方法:

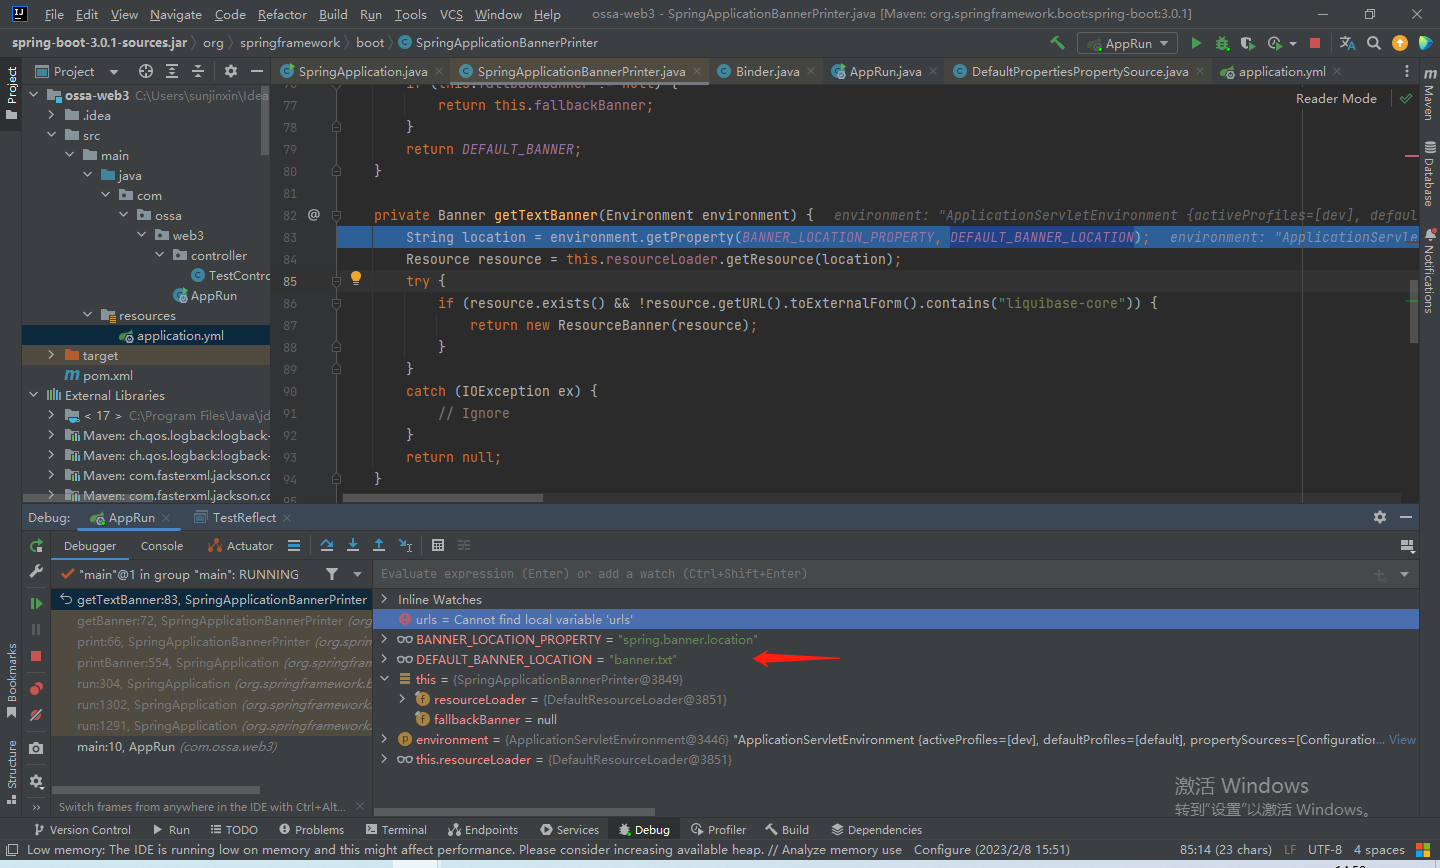
步入getBanner方法:
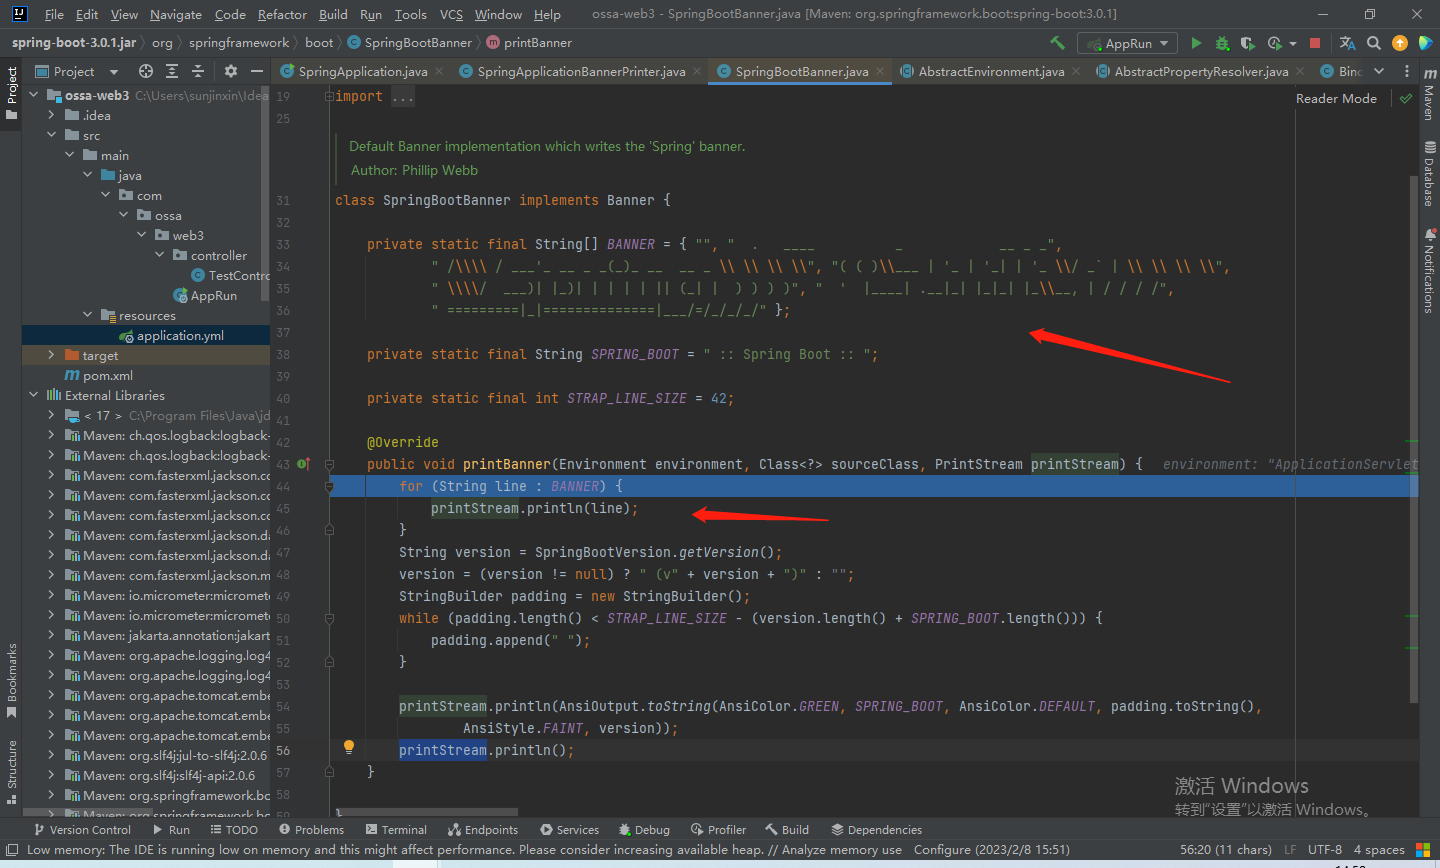
步入getTextBanner方法:首先获取spring.banner.location的值,如果没有就默认在根路径下,输出banner.txt文件。
获取完banner后,会输出:
banner.printBanner(environment, sourceClass, out);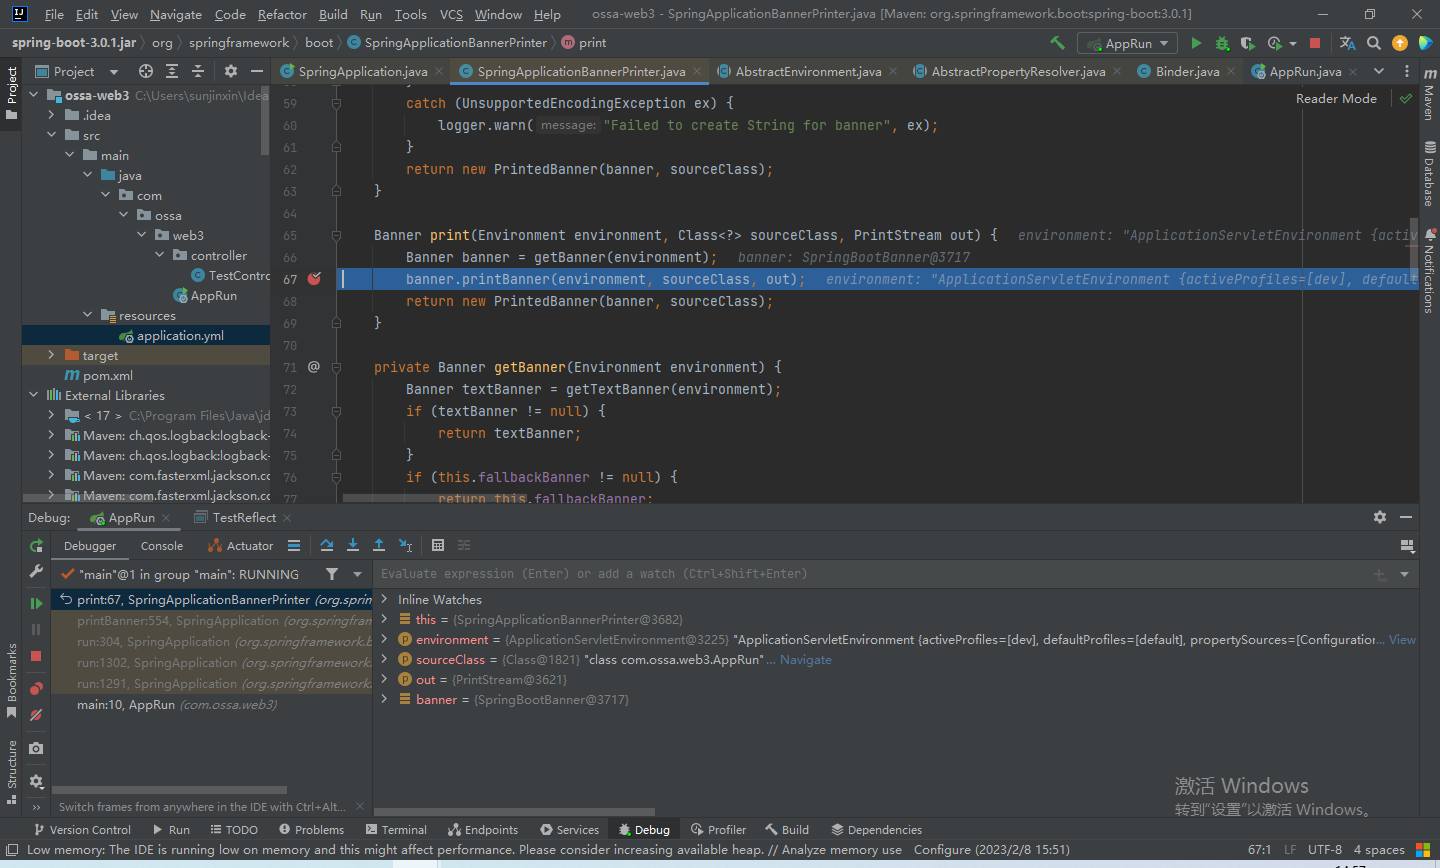
步入该方法,输出banner:
创建上下文容器
// 据webApplicationType创建不同的Spring上下文容器(有三种)context = createApplicationContext();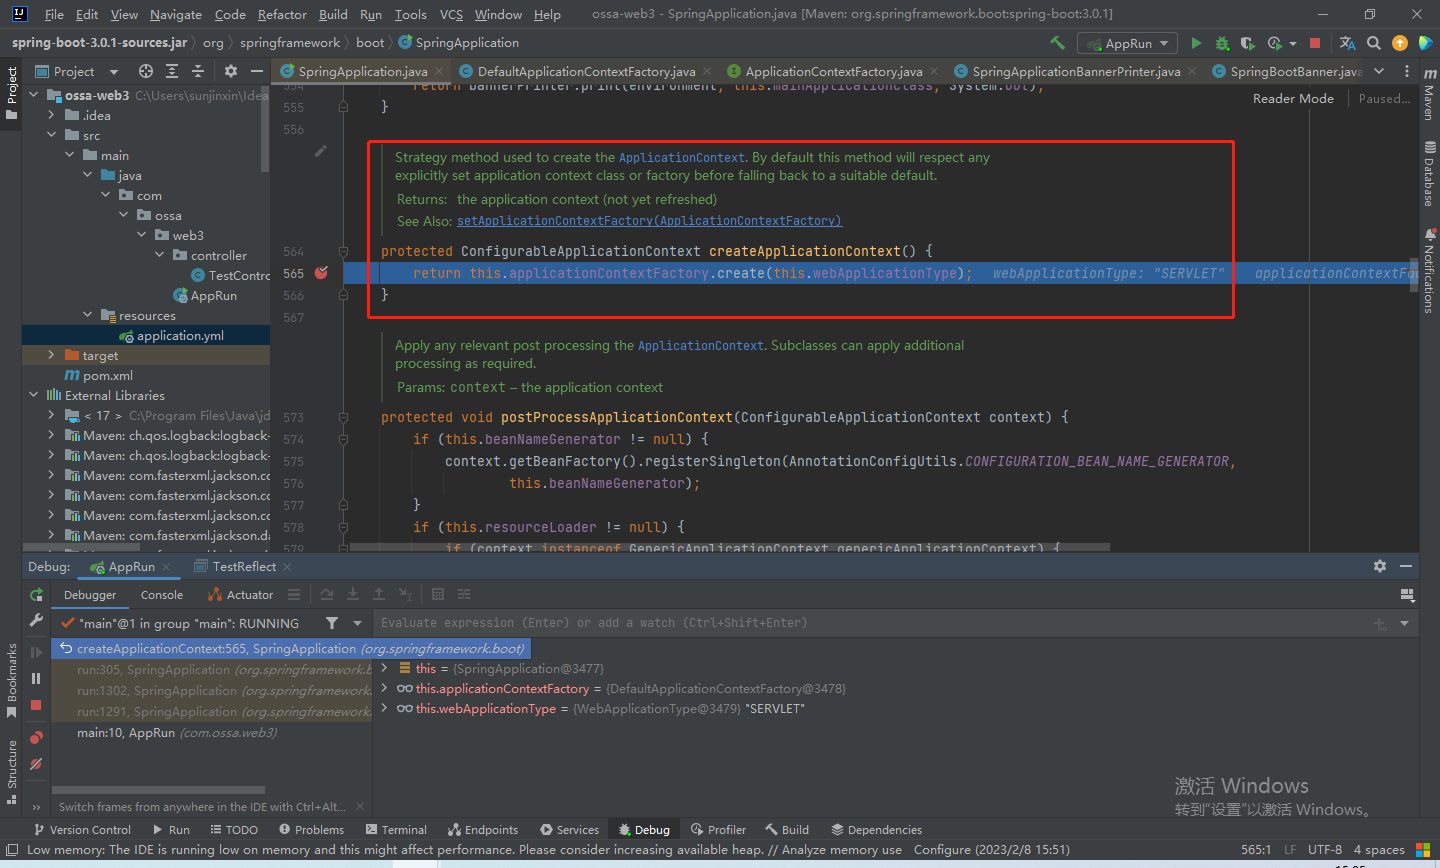
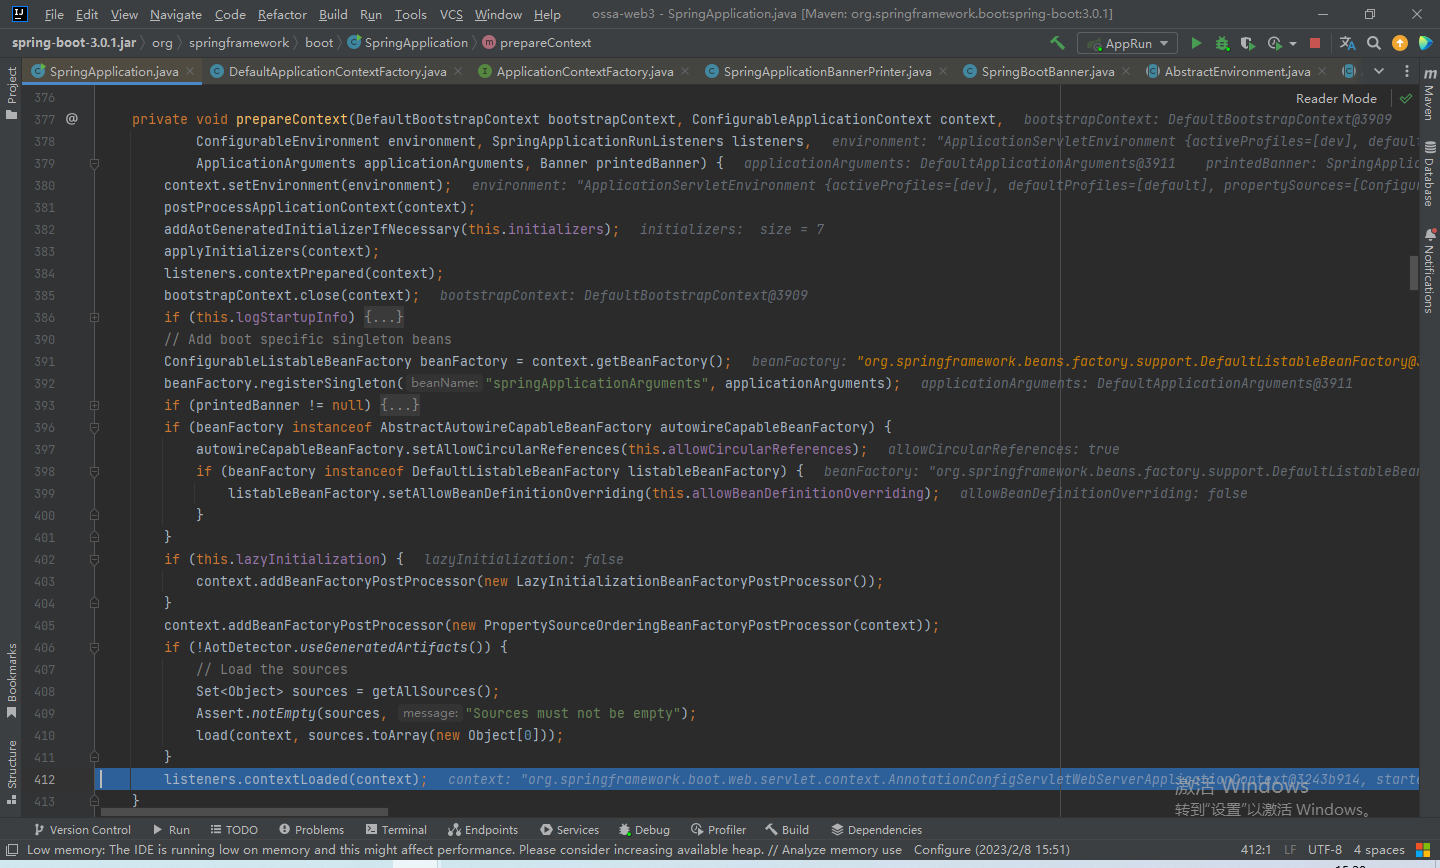
预初始化上下文容器
prepareContext(bootstrapContext, context, environment, listeners, applicationArguments, printedBanner);步入prepareContext方法:
首先获取所有ApplicationContextInitializer, 循环调用initialize方法。
获取beanFactory。
对bean进行check,如果有重复的bean就会抛出异常。
将启动类注册到Spring容器中。
刷新Spring容器
这里前几章文章重点讲的,包括bean的加载、实例化、初始化、aop、事务、tomcat启动。
可以移步专栏查看:
《Java系核心技术》
打印启动时间
Duration timeTakenToStartup = Duration.ofNanos(System.nanoTime() - startTime);if (this.logStartupInfo) {new StartupInfoLogger(this.mainApplicationClass).logStarted(getApplicationLog(), timeTakenToStartup);}发布事件
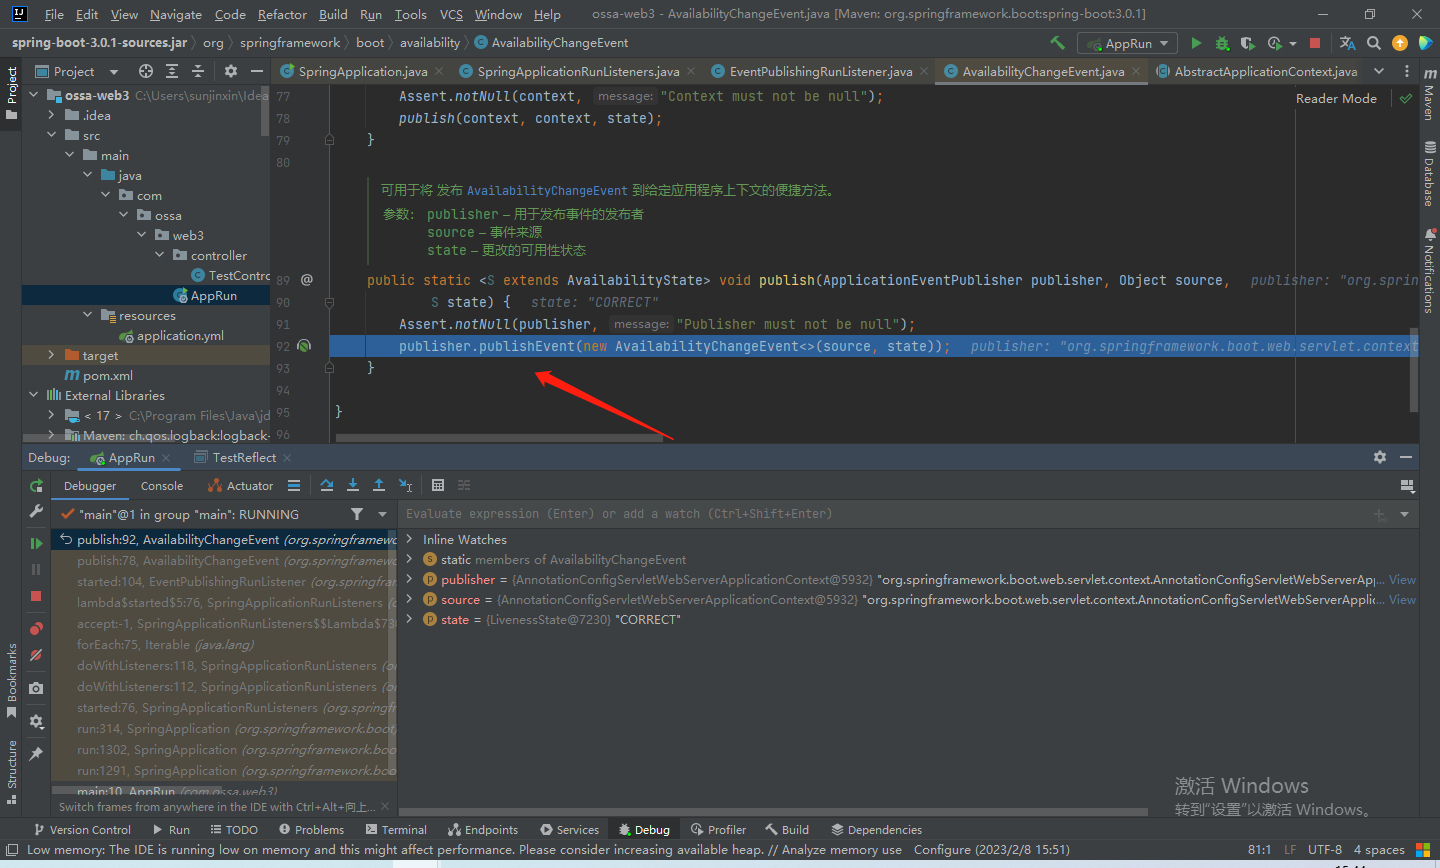
// 发布ApplicationStartedEvent事件和AvailabilityChangeEvent事件listeners.started(context, timeTakenToStartup);最终来到这个方法进行事件的发布:
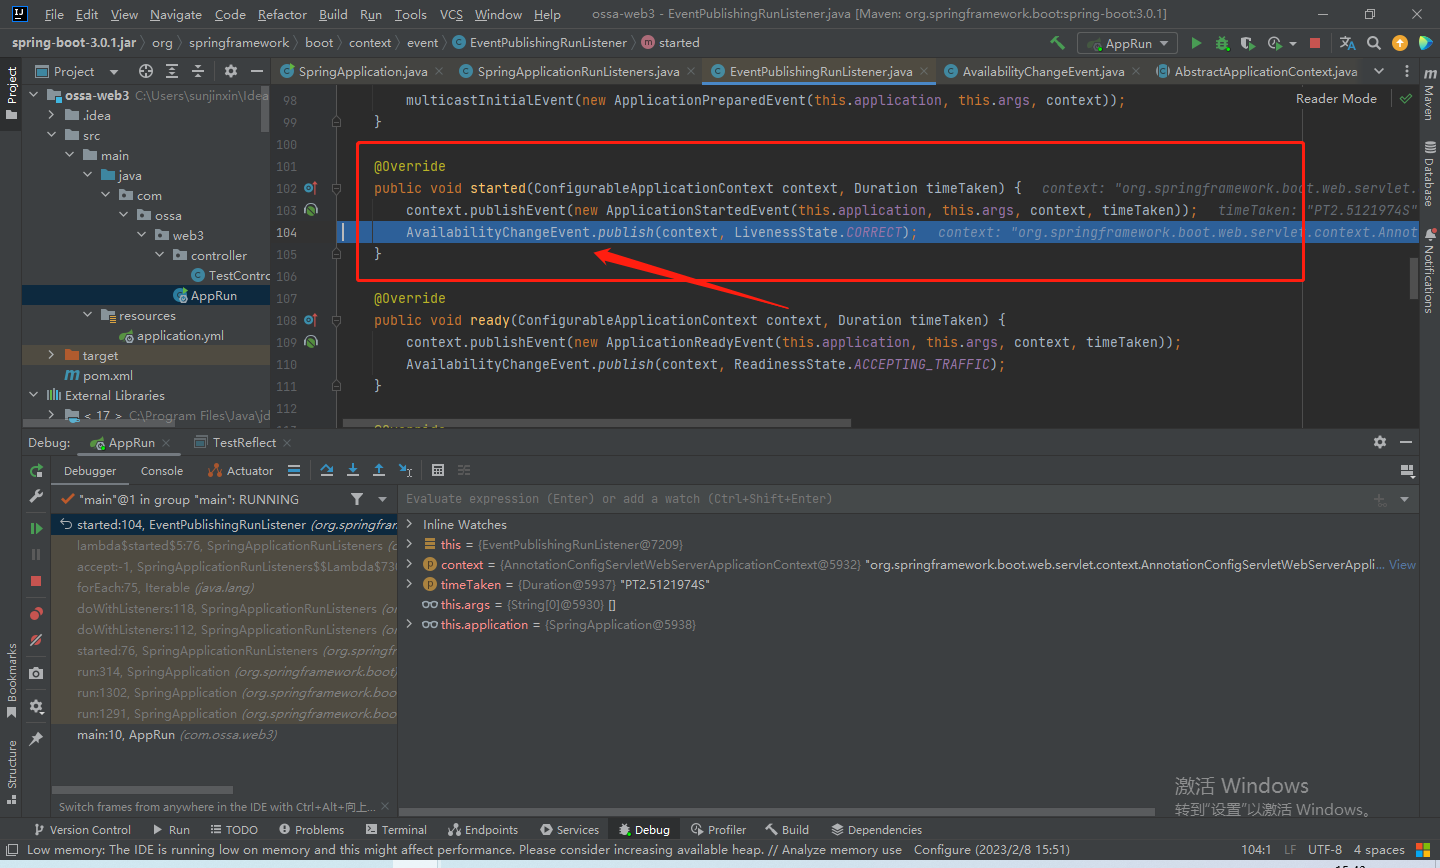
最终进行发布:
执行特定的run方法
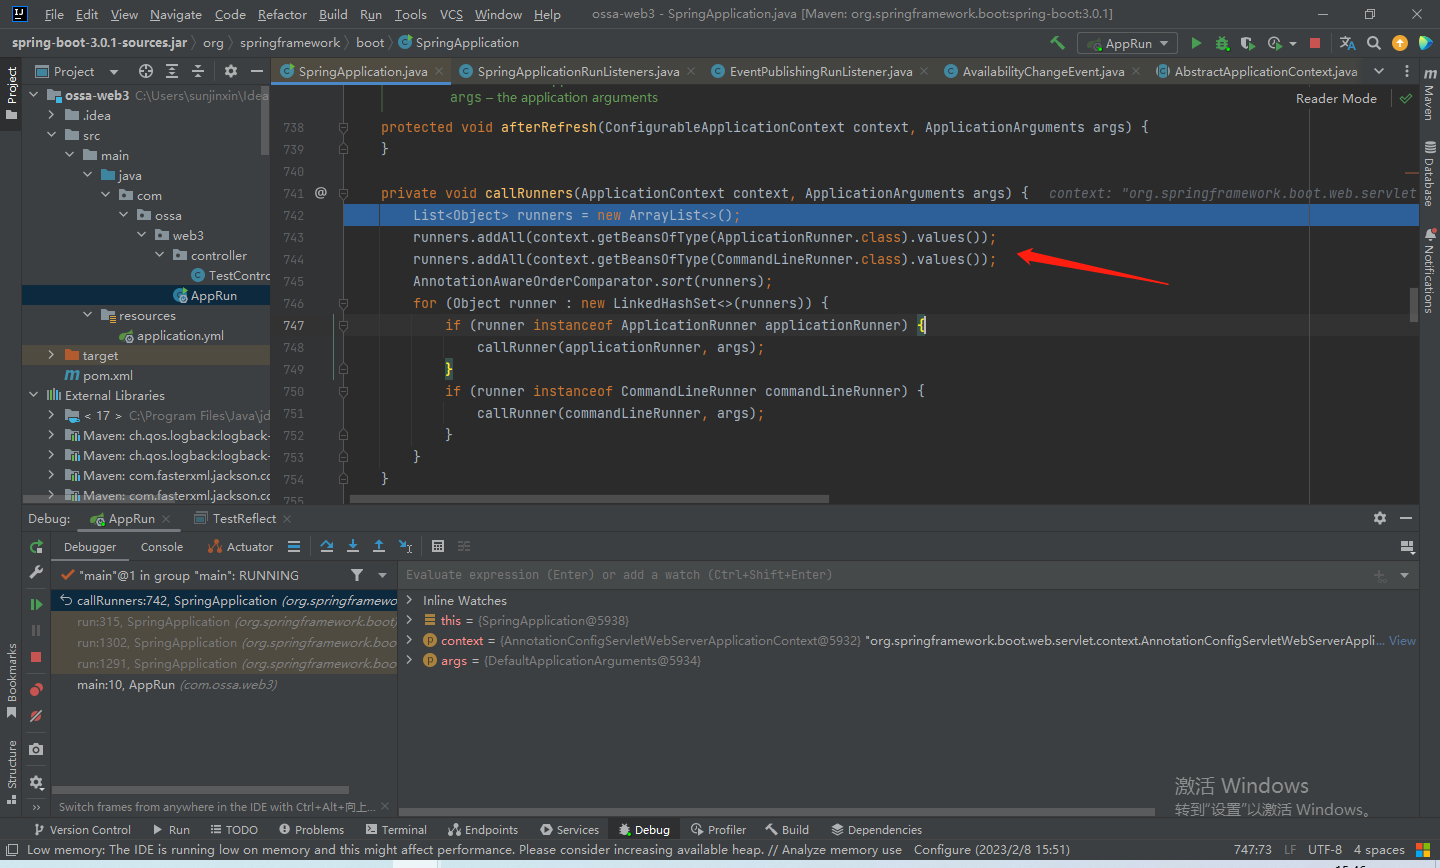
// 获取Spring容器中的ApplicationRunner/CommandLineRunner类型的Bean,并执行run方法callRunners(context, applicationArguments);ApplicationRunner和CommandLineRunner简介
后续就是发布ApplicationReadyEvent事件和AvailabilityChangeEvent事件,以及对异常的处理。