该系统是博主结合许多QT开发项目综合制作,借用了Opencv的开发库来完成的一个项目,具体的可以按照目录来,关于识别方面仅仅提供一个思路,目前还在想如何去优化(准备采用神经网络将数据集拟合,减少时间复杂度,目前还在实现...)。因为识别时间太长会很影响效率,具体的安装我不在这里讲解
QT版本:5.9.9
Opencv: 4.5.1
一、车牌提取
1、图像预处理
首先我们将图像读取出来用imread函数输入图片路径
Mat image = imread("D:\\qthome\\test_car\\test2.png");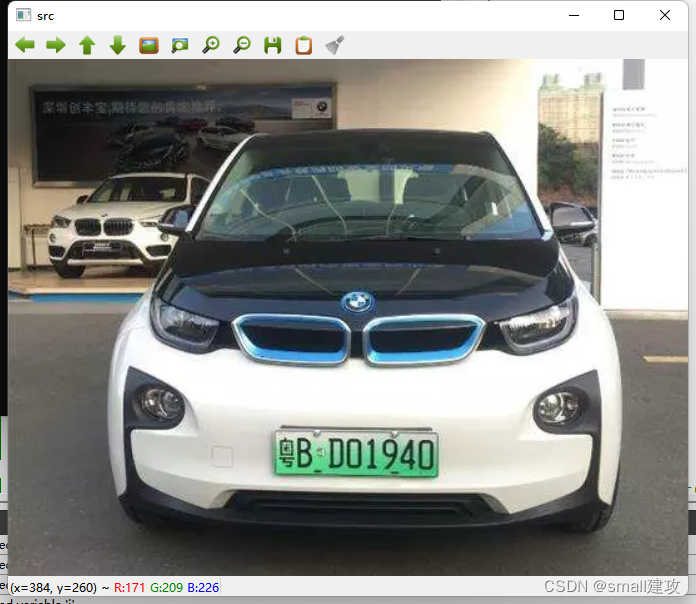
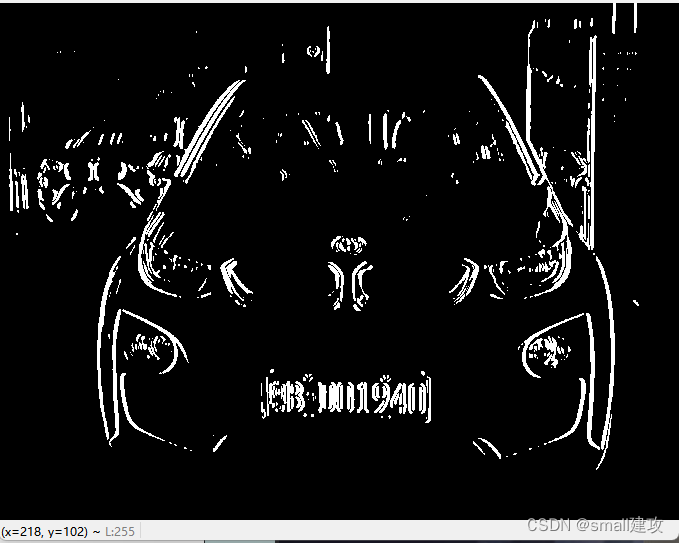
之后我们将图像进行高斯去噪去除一些图像的杂质,之后灰度处理转化成黑白图,进行边缘检测将车牌的轮廓检测出来,使用自适应阀值使图像的灰度大于阀值以便跟好的提取
Mat img_HSV;//原图GaussianBlur(img_HSV, img2_gauss, Size(3, 3), 0);//高斯去噪cvtColor(img2_gauss, img2_gray, COLOR_BGR2GRAY);//灰度处理/*边缘检测*/ Sobel(img2_gray, dst_x, CV_16S, 1, 0); //梯度算子 convertScaleAbs(dst_x, abs_X); //将CV_16S型的输出图像转变成CV_8U型的图像Mat img_temo = abs_X;threshold(img_temo, img_temo, 0, 255, THRESH_OTSU); //自适应阀值图像灰度大于阈值imshow("tests",img_temo);效果如下:
2、轮廓封闭提取
首先对矩形进行封闭操作,长宽比为17:5,然后进行膨胀和腐蚀,将腐蚀的面积扩大,具体的使用函数如下:
图像膨胀:
![]()
图像腐蚀:
![]()
2个函数的意思相近,基本上都是输入原图,然后用一个相同类型的变量去接收,第三个参数进行怎样的处理,具体腐蚀几下和膨胀几下根据效果来
// 闭操作,封闭轮廓 Mat kernelY; Mat kernelX = getStructuringElement(MORPH_RECT, Size(17, 5)); //构造一个矩形 morphologyEx(img_temo, img_temo, MORPH_CLOSE, kernelX); //用矩形来封闭 kernelX = getStructuringElement(MORPH_RECT,Size(20, 1)); kernelY = getStructuringElement(MORPH_RECT,Size(1, 19)); dilate(img_temo, img_temo, kernelX); //图像膨胀 dilate(img_temo, img_temo, kernelX); erode(img_temo, img_temo, kernelX); //图像腐蚀 erode(img_temo, img_temo, kernelY); dilate(img_temo, img_temo, kernelY); // 平滑去噪处理,使边缘检测更准确 GaussianBlur(img_temo, img_temo, Size(15, 0), 1);效果如下:

随后将轮廓在原图勾画出来
vector<vector<Point>> contours; vector<Vec4i> vec_4f; // 从二值化后的img图中提取所有轮廓 findContours(img_temo, contours, vec_4f, RETR_TREE, CHAIN_APPROX_SIMPLE); // 在原图image上绘制所有轮廓(红色) drawContours(image, contours, -1, Scalar(0, 0, 255), 1); imshow("car_num",image); 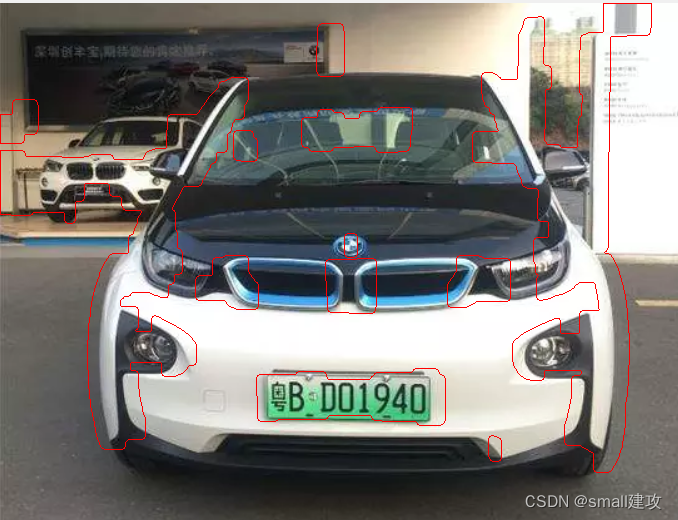
3、车牌号提取
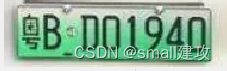
将区域进行比对筛选,选择长宽比例为1:2.3(这个参数具体可以设置,根据自己的感觉来,不一定参考这个)面积选择10000左右的即可
Mat chepai; int j = 0; for (int i = 0; i < contours.size(); i++) { //计算轮廓的垂直边界最小矩形 Rect rect = boundingRect(contours[i]); int x = rect.x; int y = rect.y; int area = rect.height * rect.width; if ((rect.width > (rect.height * 2.3) )&& area > 10000) { chepai = img_HSV(Rect(rect.x,rect.y,rect.width,rect.height)); //区域提取 //将提取出来的区域拿绿色矩形围起来 rectangle(chepai,Point(rect.x,rect.y),Point(rect.x + rect.width, rect.y + rect.height),Scalar(0,255,0),1); } }最后车牌也被提取了出来
效果如下:
车牌提取的完整代码:
Mat getcarnumber_Border(Mat image){ Mat img_HSV = image.clone();//复制 Mat img_t = image.clone(); Mat img2_gauss; Mat img2_gray,dst_x,abs_X; //高斯去噪 GaussianBlur(img_HSV, img2_gauss, Size(3, 3), 0); cvtColor(img2_gauss, img2_gray, COLOR_BGR2GRAY); Sobel(img2_gray, dst_x, CV_16S, 1, 0); //梯度算子 convertScaleAbs(dst_x, abs_X); //将CV_16S型的输出图像转变成CV_8U型的图像 imshow("tests1",dst_x); Mat img_temo = abs_X; threshold(img_temo, img_temo, 0, 255, THRESH_OTSU); //用这个函数,自适应阀值图像灰度大于阈值 imshow("tests",img_temo); // 闭操作,封闭轮廓 Mat kernelY; Mat kernelX = getStructuringElement(MORPH_RECT, Size(17, 5)); //构造一个矩形 morphologyEx(img_temo, img_temo, MORPH_CLOSE, kernelX); //用矩形来封闭 kernelX = getStructuringElement(MORPH_RECT,Size(20, 1)); kernelY = getStructuringElement(MORPH_RECT,Size(1, 19)); dilate(img_temo, img_temo, kernelX); //图像膨胀 dilate(img_temo, img_temo, kernelX); erode(img_temo, img_temo, kernelX); //图像腐蚀 erode(img_temo, img_temo, kernelY); dilate(img_temo, img_temo, kernelY); // 平滑去噪处理,使边缘检测更准确 GaussianBlur(img_temo, img_temo, Size(15, 0), 1); //imshow("car_num",img_temo); vector<vector<Point>> contours; vector<Vec4i> vec_4f; // 从二值化后的img图中提取所有轮廓 findContours(img_temo, contours, vec_4f, RETR_TREE, CHAIN_APPROX_SIMPLE); // 在原图image上绘制所有轮廓(红色)// drawContours(image, contours, -1, Scalar(0, 0, 255), 1);// imshow("car_num",image); //筛选 Mat chepai; int j = 0; vector<vector<Point>>contours_1; Rect rect_1; for (int i = 0; i < contours.size(); i++) { //计算轮廓的垂直边界最小矩形 Rect rect = boundingRect(contours[i]); int x = rect.x; int y = rect.y; int area = rect.height * rect.width; if ((rect.width > (rect.height * 2.3) )&& area > 10000) { chepai = img_HSV(Rect(rect.x,rect.y,rect.width,rect.height)); //区域提取 //将提取出来的区域拿绿色矩形围起来 rectangle(chepai,Point(rect.x,rect.y),Point(rect.x + rect.width, rect.y + rect.height),Scalar(0,255,0),1); rect_1 = rect; contours_1.push_back(contours[i]); } }// drawContours(img_t, contours_1, -1, Scalar(0, 0, 255), 1);// imshow("sda",chepai); //对倾斜车牌进行处理操作// vector<Point> cnt = contours_1[contours_1.size() - 1];// Vec4f d;// fitLine(cnt,d,DIST_L2,0,0.01,0.01);// double k = d[1] / d[0];// double b = d[2] - d[3] * k;// double w = img_t.size().width;// double h = img_t.size().height;// double lefty = b;// double righty = k*w+b;// double a = atan(k);// a = a*180/3.1415926;// Mat m = getRotationMatrix2D(Point(w/2,h/2),a,0.8);// Mat dst;// warpAffine(img_t,dst,m,Size((int(w*0.9)),(int(h*0.9))));// dst = do_line(dst);// if(dst.empty()){// return chepai;// } return chepai;}二、车牌字符串切割
1、车牌号码处理
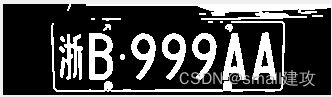
车牌号码提取出来之后我们也要对他进行相同的如以上相同的处理,最后转化为黑白图,但重点不同的是蓝牌、黄牌以及新能源汽车的车牌型号都不同,为此我们对像素点进行将车牌彻底转化为背景为黑色,字为白色的情况
效果1(蓝色车牌的黑白图):

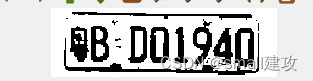
效果2(新能源车牌的黑白图):
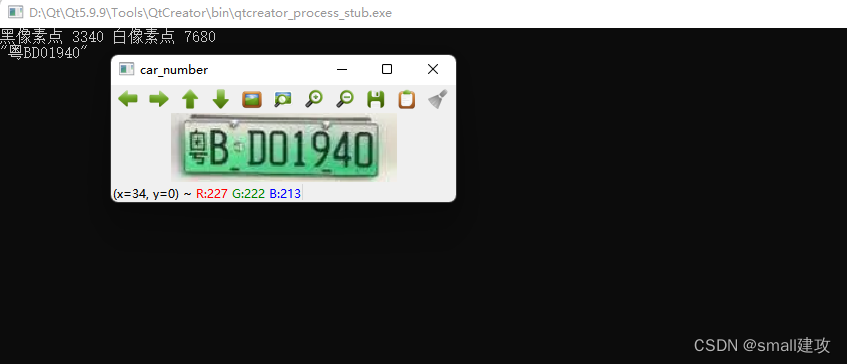
所以就统计了黑白像素点的个数,确保黑像素点个数大于白像素点个数,否则进行翻转
Mat Get_License_ROI(Mat src){ Mat gray; cvtColor(src, gray, COLOR_BGR2GRAY); Mat thresh; threshold(gray, thresh, 0, 255, THRESH_OTSU); //使用形态学开操作去除一些小轮廓 Mat kernel = getStructuringElement(MORPH_RECT, Size(2, 2)); Mat open; morphologyEx(thresh, open, MORPH_OPEN, kernel); //下面是我自己写的,这个可以自己去实现 int black = PixelCounter(open,2); int white = PixelCounter(open,1); qDebug()<<"黑像素点"<<black<<"白像素点"<<white; if(black < white){ threshold(open, open, 0, 255, THRESH_OTSU|THRESH_BINARY_INV); } return open;}效果如下:
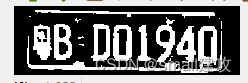
2、水平切割去除多余的边框
我是采取将每一行的白像素点求一个极限阀值,然后从中间一行往两边延伸,当碰到一个阀值时候就停止扩展,因为如上图,白色边框的白像素的个数明显多余中间的白像素点,最后为了方便切割提取将字符膨胀
代码:
Mat Horizon_Cut(Mat image){ Mat temp = image.clone(); int rows = temp.rows; int cols = temp.cols; QVector<int> white_n; for(int row = 0;row < rows;row++){ int tem = 0; for(int col = 0;col < cols;col++){ if(temp.at<uchar>(row, col) > 0){ tem++; } } white_n.append(tem); } int mid = 0; for(int i = 0;i < rows/2;i++){ mid += white_n[i]; } mid = mid/(rows/2 + 1); int i_0; int i_1; for(int i = rows/2 ;i >= 2; i--){ if(white_n[i] < mid){ i_0 = i; break; } } for(int i = rows/2;i < rows; i++){ if(white_n[i] < mid){ i_1 = i; break; } } Mat t_est = temp(Range(i_0,i_1),Range(0,cols)); return t_est;}效果如下:

3、字符串逐步提取
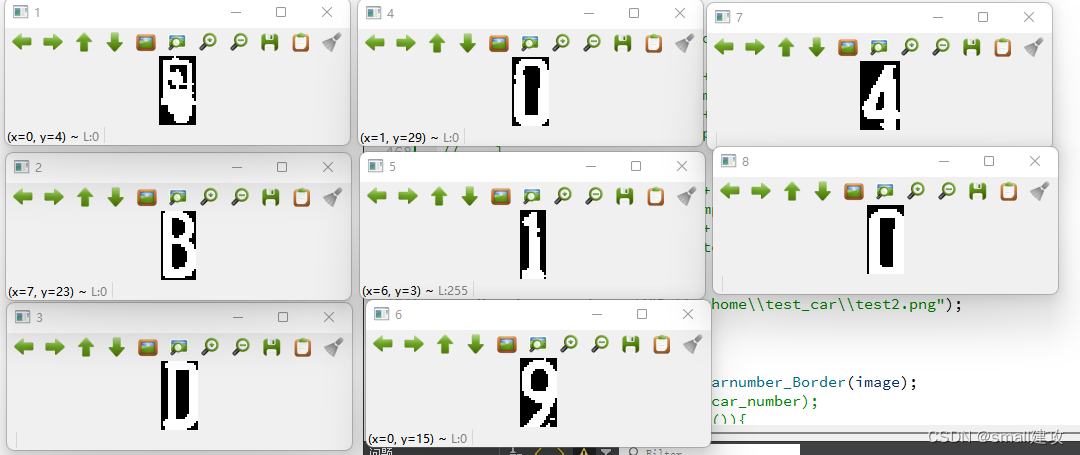
我是采取从左往右进行逐步遍历切割,腐蚀膨胀后的字符串白像素点的间隔明显很大,这个可以注释慢慢去比对,一定距离进行切割,保存每个字符的前后2列数据即可
QVector<QVector<int> > Remove_Vertial_Border(Mat image){ Mat temp = image.clone(); int rows = temp.rows; int cols = temp.cols; QVector<int> white_n; for(int col = 0;col < cols;col++){ int tem = 0; for(int row = 0;row < rows;row++){ if(temp.at<uchar>(row, col) > 0){ tem++; } } white_n.append(tem); } QVector<QVector<int> > region1; QVector<int> reg; int flag = 0; if(white_n[0] != 0){ reg.append(0); } for(int i = 0;i<cols - 1;i++){ if(white_n[i] == 0 && white_n[i + 1] != 0){ reg.append(i); } if(white_n[i] != 0 && white_n[i + 1] == 0){ reg.append(i + 1); } if(reg.size() == 2){ if(reg[1] - reg[0] > 10){ region1.append(reg); reg.clear(); }else{ reg.clear(); } } } return region1;}之后将保存的每一个字符元素返回,写入新的文件夹
QVector<QVector<int> > t = Remove_Vertial_Border(car_gray);int j = 0;for (int i = 0; i < t.size(); i++){ Mat str = car_gray(Range(0,car_gray.rows),Range(t[i][0],t[i][1])); j++; QString t_s = QString::number(j); string s = string((const char *)t_s.toLocal8Bit()); imwrite("D:\\qthome\\test_car\\car_each_number\\"+s+".jpg",str);}效果如下:
 三、图片识别
车牌识别除了字符串提取的难点另一个难点就是识别,识别的话,我是自己准备了一个训练集,每个训练集中包含了多种数据
将每个图文文件中图片的路径保存在列表当中

之后使用MatchTemplate函数讲每个图片进行比对(也许这里很大程度增加了时间复杂度,但是我目前是保证能做出来优先,时间复杂度之后慢慢优化)
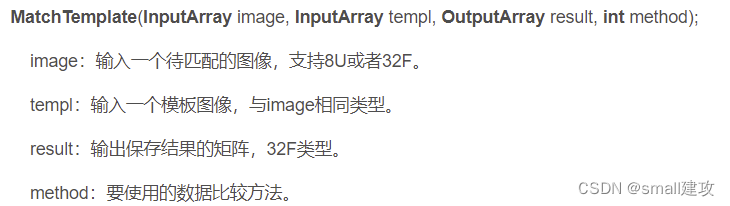
而method方法有很多
cv::TM_SQDIFF:该方法使用平方差进行匹配,因此最佳的匹配结果在结果为0处,值越大匹配结果越差。
cv::TM_SQDIFF_NORMED:该方法使用归一化的平方差进行匹配,最佳匹配也在结果为0处。
cv::TM_CCORR:相关性匹配方法,该方法使用源图像与模板图像的卷积结果进行匹配,因此,最佳匹配位置在值最大处,值越小匹配结果越差。
cv::TM_CCORR_NORMED:归一化的相关性匹配方法,与相关性匹配方法类似,最佳匹配位置也是在值最大处。
cv::TM_CCOEFF:相关性系数匹配方法,该方法使用源图像与其均值的差、模板与其均值的差二者之间的相关性进行匹配,最佳匹配结果在值等于1处,最差匹配结果在值等于-1处,值等于0直接表示二者不相关。
cv::TM_CCOEFF_NORMED:归一化的相关性系数匹配方法,正值表示匹配的结果较好,负值则表示匹配的效果较差,也是值越大,匹配效果也好。
这里可以选择自己喜欢的,我是选择了第5个
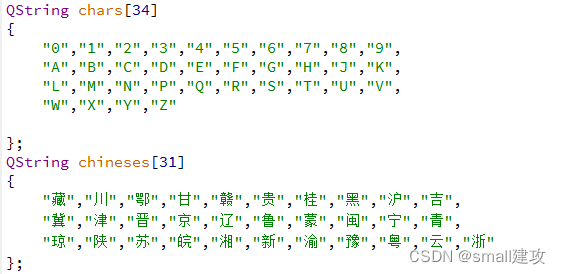
double do_read(Mat temo,Mat temp){ int height = temo.size().height; int width = temo.size().width; Mat image = temp.clone(); resize(image,image,Size(width,height)); Mat result; matchTemplate(image,temo,result,TM_CCOEFF); //求解最大值 double minValue, maxValue; Point minLocation, maxLocation; Point matchLocation; minMaxLoc(result, &minValue, &maxValue, &minLocation, &maxLocation); return maxValue;}车牌里面没有I和O目的就是为了区分0和1而汉字只在第一个出现,后面的则是一些字符所以我进行了分开识别,最后找到该图片中最大相似度的坐标(最大坐标函数是我自己写的,这里我就不详写了)进行锁定
void shibie(){ Mat temp = imread("D:\\qthome\\car_stop_t\\car_each_number\\1.jpg"); cvtColor(temp, temp, COLOR_BGR2GRAY); threshold(temp, temp, 0, 255, THRESH_OTSU); QString str; QVector<double> score; for(int i = 0;i < 31;i++){ double Max = 0; for(int j = 0;j < chinese_str[i].size();j++){ string str = string((const char *)chinese_str[i][j].toLocal8Bit()); Mat temo = imread(str); cvtColor(temo,temo,COLOR_RGB2GRAY); threshold(temo,temo,0,255,THRESH_OTSU); double maxValue = do_read(temo,temp); if(maxValue > Max) Max = maxValue; } score.append(Max); } int posmax = Max_index(score); str.append(chineses[posmax]); for(int i = 2;i <= 8;i++){ QString str_1 = "D:\\qthome\\car_stop_t\\car_each_number\\"+QString::number(i)+".jpg"; temp = imread(string((const char *)str_1.toLocal8Bit())); cvtColor(temp, temp, COLOR_BGR2GRAY); threshold(temp, temp, 0, 255, THRESH_OTSU); score.clear(); for(int i = 0;i < 34;i++){ double Max = 0; for(int j = 0;j < char_str[i].size();j++){ string str = string((const char *)char_str[i][j].toLocal8Bit()); Mat temo = imread(str); cvtColor(temo,temo,COLOR_RGB2GRAY); threshold(temo,temo,0,255,THRESH_OTSU); double maxValue = do_read(temo,temp); if(maxValue > Max) Max = maxValue; } score.append(Max); } posmax = Max_index(score); str.append(chars[posmax]); } qDebug()<<str;}效果展示:
四、总结:
1、项目中整体难点在于车牌处理以及像素点的切割,合理的处理这些对后续的切割有很大帮助
2、字符串的识别速率还有待提高,但是精度方面的话已经完善
最后给观看的人看一个系统雏形旁边的mv纯纯是为了区别识别慢,这个还需要突破,希望还是能带来帮助
