文章目录
- 一、 效果(版本2的效果)
- 二、全部源码
- 版本1:未封装代码
- 版本2:封装好的代码
- 三、 开发工具
- 四、 遇到的问题记录
- 第一个问题: error: (-215:Assertion failed) !_src.empty() in function ‘cv::cvtColor’
- 解决方案:(可能只适用于我,不妨可以试试)
- 第二个问题:使用pip指令,下载opencv-python,numpy等报错
- 解决方案:使用国内镜像安装
一、 效果(版本2的效果)

下面是我的关于Opencv的手势识别代码模型。该源码来自于B站Opencv的大神教程
二、全部源码
版本1:未封装代码
这个代码可以复制后直接运行,看出效果的。
#!/usr/bin/python3.7
# coding=utf-8
import cv2
import mediapipe as mp
import time
# 导入opencv模块
# 捕捉帧,笔记本摄像头设置为0即可
""" VideoCapture第一个参数就是摄像头编号"""
capture =cv2.VideoCapture(0,cv2.CAP_DSHOW)
# 初始化(模型使用之前)
mpHands =mp.solutions.hands
hands=mpHands.Hands()
mpDraw=mp.solutions.drawing_utils
pTime=0
cTime=0
# 循环显示帧
while True :
    success, img = capture.read()
    imgRGB=cv2.cvtColor(img,cv2.COLOR_BGR2RGB)
    results=hands.process(imgRGB)
    """在显示图片之前,我们需要对图像进行一些处理"""
    # 下面这个函数,当手放入摄像头范围内,就会返回相应的Landmark值,否则返回的是None
    #print(results.multi_hand_landmarks)
    # 输出手的每个坐标(一只手几十个点)
    if results.multi_hand_landmarks:
     print("读取成功!")
     for handLms in results.multi_hand_landmarks:
         for id, lm in enumerate(handLms.landmark):
             print(id,lm)
         mpDraw.draw_landmarks(img, handLms,mpHands.HAND_CONNECTIONS) # 第三个参数的意思是,让手中的节点连接。
    cv2.imshow('Carmer', img)
    if cv2.waitKey(1) == ord('q'):  # 按Q退出
     break
版本2:封装好的代码
这个代码是封装好的,都后面如果需要就是直接引用。不过也可以直接运行这个程序,也同样能出结果。
import cv2
import mediapipe as mp
import time


class handDetector():
    def __init__(self, mode=False, maxHands=2, detectionCon=0.5, trackCon=0.5):
        self.mode = mode
        self.maxHands = maxHands
        self.detectionCon = detectionCon
        self.trackCon = trackCon

        self.mpHands = mp.solutions.hands
        self.hands = self.mpHands.Hands(self.mode, self.maxHands,
                                        self.detectionCon, self.trackCon)
        self.mpDraw = mp.solutions.drawing_utils

    def findHands(self, img, draw=True):
        imgRGB = cv2.cvtColor(img, cv2.COLOR_BGR2RGB)
        self.results = self.hands.process(imgRGB)
        # print(results.multi_hand_landmarks)
        if self.results.multi_hand_landmarks:
            for handLms in self.results.multi_hand_landmarks:
                if draw:
                    self.mpDraw.draw_landmarks(img, handLms,
                                               self.mpHands.HAND_CONNECTIONS)
        return img

    def findPosition(self, img, handNo=0, draw=True):

        lmList = []
        if self.results.multi_hand_landmarks:
            myHand = self.results.multi_hand_landmarks[handNo]
            for id, lm in enumerate(myHand.landmark):
                # print(id, lm)
                h, w, c = img.shape
                cx, cy = int(lm.x * w), int(lm.y * h)
                # print(id, cx, cy)
                lmList.append([id, cx, cy])
                # if draw:   这部分代码画出了手上所有结点,因为比较难看,就注释掉了。
                #     cv2.circle(img, (cx, cy), 15, (255, 0, 255), cv2.FILLED)

        return lmList


def main():
    pTime = 0
    cTime = 0
    cap = cv2.VideoCapture(0)
    detector = handDetector()
    while True:
        success, img = cap.read()
        img = detector.findHands(img)
        lmList = detector.findPosition(img)
        if len(lmList) != 0:
            print(lmList[4])

        cTime = time.time()
        fps = 1 / (cTime - pTime)
        pTime = cTime

        cv2.putText(img, str(int(fps)), (10, 70), cv2.FONT_HERSHEY_PLAIN, 3,
                    (255, 0, 255), 3)

        cv2.imshow("Image", img)
        cv2.waitKey(1)

if __name__ == "__main__":
    main()
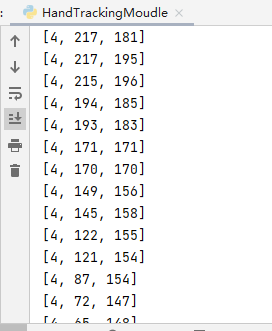
同时打印出了手上的每个结点的位置变化。

三、 开发工具
Pycharm2021,Python3.7 .
四、 遇到的问题记录
第一个问题: error: (-215:Assertion failed) !_src.empty() in function ‘cv::cvtColor’
报错:
imgRGB = cv2.cvtColor(img, cv2.COLOR_BGR2RGB)
cv2.error: OpenCV(4.5.3) C:\Users\runneradmin\AppData\Local\Temp\pip-req-build-_xlv4eex\opencv\modules\imgproc\src\color.cpp:182: error: (-215:Assertion failed) !_src.empty() in function ‘cv::cvtColor’
这个问题,网上的一些解释是,如果你导入的是一个静态图片,那么要么是你的斜杠写错,
或者是你的路径中有中文,不妨换个没有中文的路径,或者修改图片为英文试试。
但是我这里是摄像头:
解决方案:(可能只适用于我,不妨可以试试)
cap = cv2.VideoCapture(1) #这个是B站源码中的摄像头编号
使用B站大神源码报错后,我把上面这行代码改成下面这样,就好了。
cap = cv2.VideoCapture(0)
第二个问题:使用pip指令,下载opencv-python,numpy等报错
在控制台上使用pip指令下载是,经常碰到超时问题,本身文件不大,但是你的下载速度只有12kb/s甚至只有几kb每秒
遇到的问题例如下面这个:

其实这个问题就是因为你的下载速度太慢导致的。
解决方案:使用国内镜像安装
这时候,考虑使用国内镜像安装,会快很多。.点击进入国内镜像安装教程
一般numpy,opencv-python都有国内镜像。不过我安装mediatepipe时,并没有找到国内镜像,但是控制台cmd使用下面这个指令太慢了。也是只有几kb/s
pip install mediapipe
所以我选择了去PyCharm去下载:
方式:
File—>Setting—>Project:python-project-Python Interpreter(Python解释器)


点击“+”,添加解释器,然后在搜索框中搜索你需要的package即可。opencv-python,numpy,mediapipe都可以直接搜到。

点击下面的Install Package即可。