本文详细介绍了如何在ASP.NET WebForms中实现一个功能丰富的图片预览页面。通过结合HTML、CSS和JavaScript,用户可以方便地对图片进行放大、缩小以及旋转操作。文章从页面的基本布局开始,逐步讲解了如何设置图片展示区、添加控制按钮、编写CSS样式以及实现JavaScript功能,最终展示了一个直观且易用的图片预览解决方案。通过这个项目,读者可以学会如何在Web应用中动态处理图片,提高用户交互体验。
一、实现思路
在现代Web应用中,用户对图片的操作需求日益增加,尤其是在图片展示时能够方便地进行放大、缩小以及旋转等操作。为了满足这些需求,本项目基于ASP.NET WebForms开发了一个图片预览页面,用户可以通过简单的按钮操作来调整图片的大小和角度。实现这一功能的核心在于使用HTML、CSS和JavaScript结合来动态调整图片的样式属性,以达到相应的效果。
二、实现步骤
1. 创建ASP.NET页面
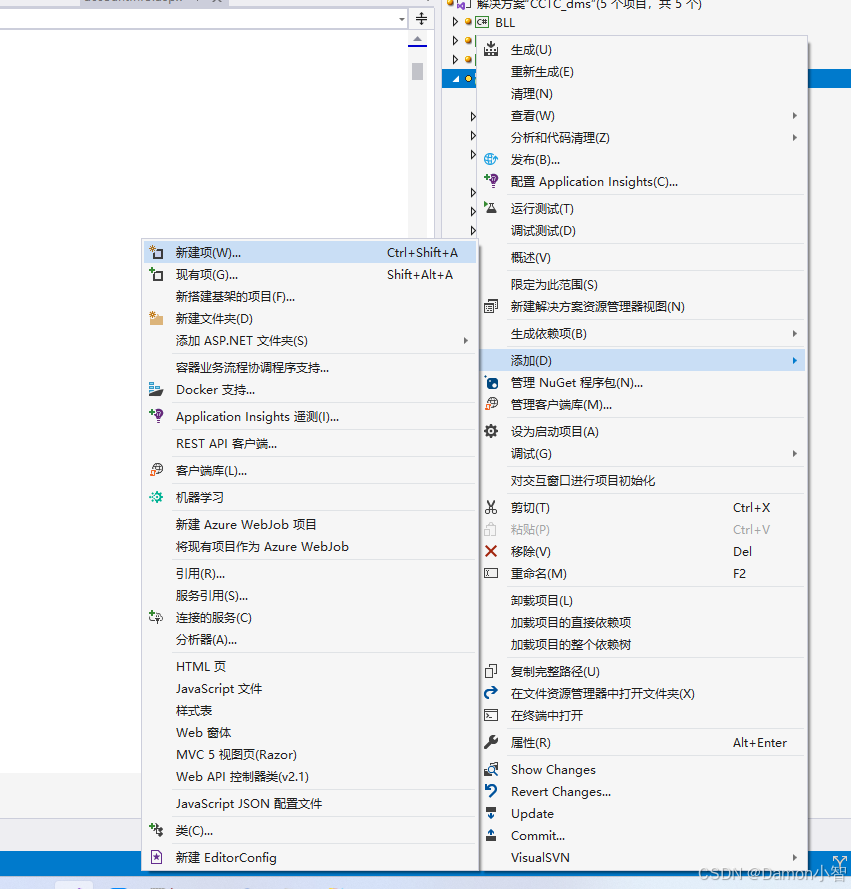
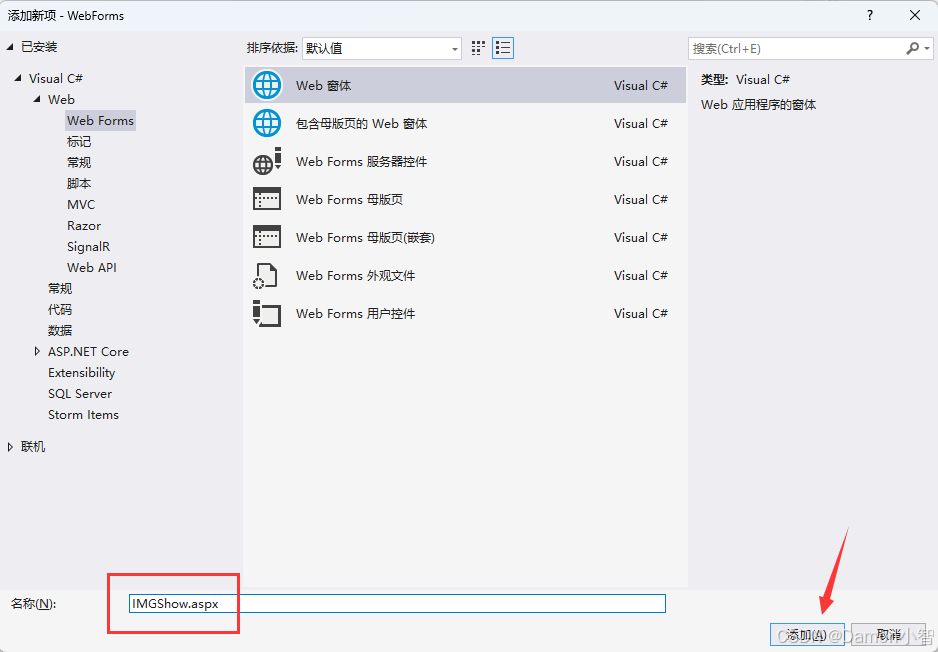
首先,我们需要创建一个ASP.NET WebForms页面。在Visual Studio中,右键点击你的项目,选择添加 -> 新建项。
选择Web 窗体,命名为 IMGShow.aspx。
2. 添加HTML布局
接下来,在 IMGShow.aspx 文件中添加基本的HTML结构。这包括设置页面的DOCTYPE、meta标签、title等,以及link标签导入所需的CSS文件。以下是页面的基本结构:
<%@ Page Language="C#" AutoEventWireup="true" CodeBehind="IMGShow.aspx.cs" Inherits="WebForms.IMGShow" %><!DOCTYPE html><html><head> <meta http-equiv="Content-Type" content="text/html; charset=utf-8" /> <meta name="viewport" content="width=device-width, initial-scale=1.0, maximum-scale=1.0, user-scalable=no" /> <meta http-equiv="X-UA-Compatible" content="IE=Edge" /> <title>图片展示</title> <link href="https://maxcdn.bootstrapcdn.com/bootstrap/4.5.2/css/bootstrap.min.css" rel="stylesheet" type="text/css" /> <script src="https://code.jquery.com/jquery-3.5.1.min.js"></script></head><body class="easyui-layout" data-options="fit:true"></body></html>3. 设置图片展示区
在body标签中,添加一个div容器,用于展示图片。这个容器需要设定宽度和高度,以保证图片能在页面居中显示。然后,使用img标签加载图片。这里,我们设置图片初始宽度为60%。
HTML代码里创建一个放置图片的DIV:
<div style="text-align: center; vertical-align: middle;" class="content"> <img id="bigimg" src="a.png" width="60%" /></div>JavaScript代码里对图片路径赋值:
<script type="text/javascript">// 页面初始化时加载图片$(document).ready(function () {var path = window.location.href.split('=')[1];$("#bigimg").attr('src', path);});</script>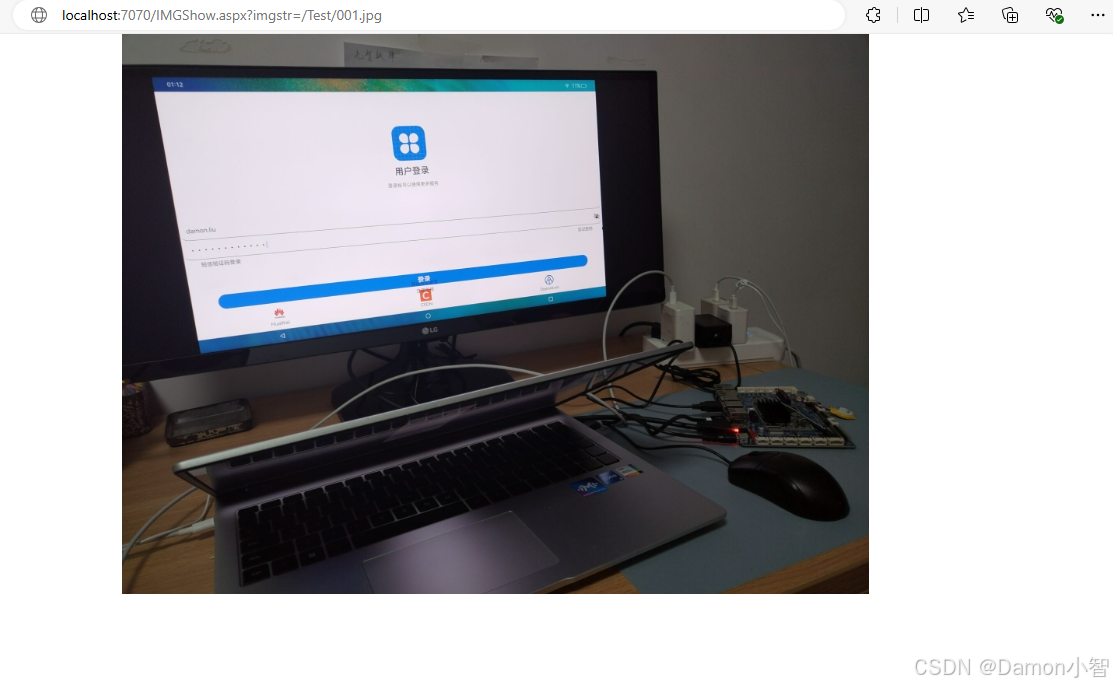
4. 添加控制按钮
在图片展示区的下方,我们需要添加四个按钮,用于放大、缩小、左旋转和右旋转图片。每个按钮都绑定相应的JavaScript函数,点击后会执行特定的图片操作。
<div style="margin-top: 150px; margin-left: 50px"> <a href="javascript:void(0)" class="btn icon-add" onclick="imgBigToSize()">放大</a><br /> <br /> <a href="javascript:void(0)" class="btn icon-remove" onclick="imgSmallToSize()">缩小</a><br /> <br /> <a href="javascript:void(0)" class="btn icon-arrow-turn-left" onclick="imgRotateLeft()">左旋转</a><br /> <br /> <a href="javascript:void(0)" class="btn icon-arrow-turn-right" onclick="imgRotateRight()">右旋转</a></div>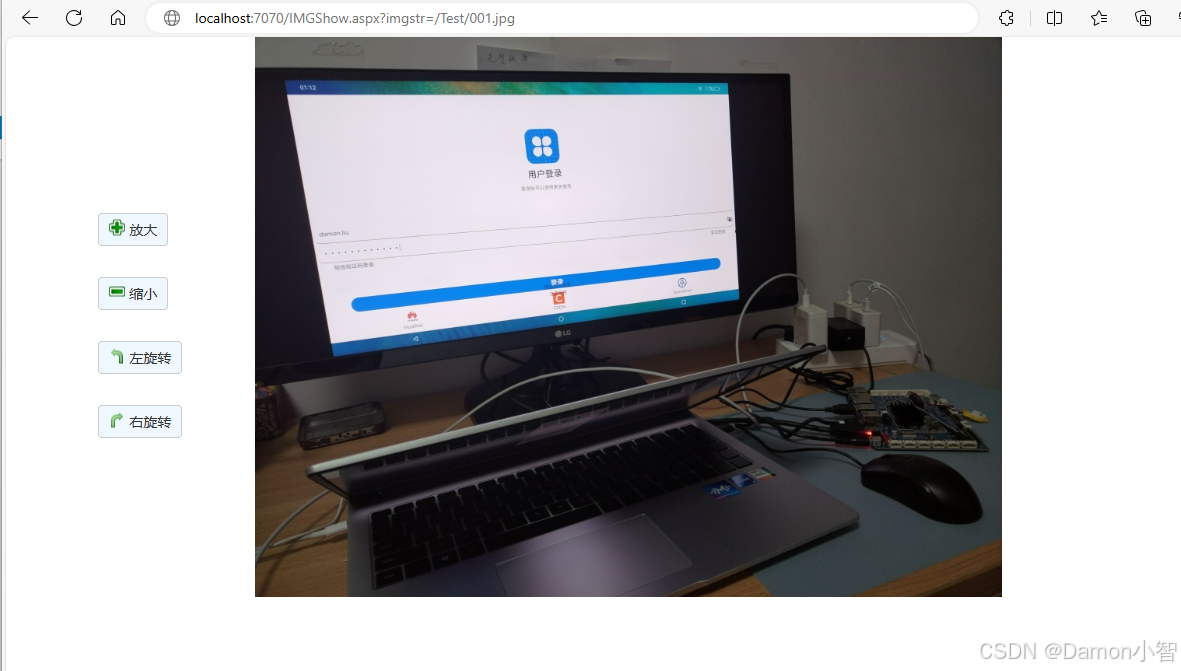
5. 编写CSS样式
为了美化页面,我们需要为按钮添加一些基本的样式。可以在<head>标签中添加<style>标签来定义这些样式。
<style> .content { width: 100%; height: 100%; position: absolute; background-color: white; overflow: hidden; background-position: 50%; } .btn { display: inline-block; padding: 5px 10px; margin: 5px; background-color: aliceblue; border: 1px solid #ccc; border-radius: 4px; text-decoration: none; color: #333; cursor: pointer; font-size: 14px; position: relative; padding-left: 30px; } .btn:hover { background-color: #f0f0f0; } .icon-add::before { content: url('images/add.png'); position: absolute; left: 10px; top: 50%; transform: translateY(-50%); } .icon-remove::before { content: url('images/remove.png'); position: absolute; left: 10px; top: 50%; transform: translateY(-50%); } .icon-arrow-turn-left::before { content: url('images/arrow_turn_left.png'); position: absolute; left: 10px; top: 50%; transform: translateY(-50%); } .icon-arrow-turn-right::before { content: url('images/arrow_turn_right.png'); position: absolute; left: 10px; top: 50%; transform: translateY(-50%); }</style>6. 添加缩放和旋转功能
在页面的<head>标签中,添加JavaScript脚本,分别实现放大、缩小、左旋转和右旋转功能。
<script type="text/javascript"> // 放大图片 function imgBigToSize() { var img = $("#bigimg"); var oWidth = img.width(); var oHeight = img.height(); img.width(oWidth + 50); img.height(oHeight + 50 / oWidth * oHeight); }; // 缩小图片 function imgSmallToSize() { var img = $("#bigimg"); var oWidth = img.width(); var oHeight = img.height(); img.width(oWidth - 50); img.height(oHeight - 50 / oWidth * oHeight); }; var r = 0; // 左旋转图片 function imgRotateLeft() { var img = $("#bigimg"); r -= 90; img.css('transform', 'rotate(' + r + 'deg)'); }; // 右旋转图片 function imgRotateRight() { var img = $("#bigimg"); r += 90; img.css('transform', 'rotate(' + r + 'deg)'); }; // 页面初始化时加载图片 $(document).ready(function () { var path = window.location.href.split('=')[1]; $("#bigimg").attr('src', path); });</script>7. 测试并调整
最后,保存所有文件并运行项目。在浏览器中访问该页面,确保所有按钮功能正常工作。如果需要,可以根据需求进一步调整样式或功能。
通过这些步骤,你将创建一个ASP.NET WebForms页面,用户可以在其中放大、缩小和旋转图片。这些功能是通过JavaScript动态控制图片的width、height和transform属性实现的。
三、实现效果
页面加载后,用户可以看到一张图片居中显示。通过点击页面下方的按钮,用户可以进行以下操作:
放大图片:点击放大按钮,图片的宽度和高度按比例增大。缩小图片:点击缩小按钮,图片的宽度和高度按比例减小。左旋转图片:点击左旋转按钮,图片逆时针旋转90度。右旋转图片:点击右旋转按钮,图片顺时针旋转90度。最终效果如图所示:
作为图片的预览页,我们一般会在点击图片时的事件中调用,下面提供两种常用的调用策略:
页面跳转:用 window.location.href='IMGShow.aspx?imgStr=xxx'来调用,实现当前页面跳转到图片预览页面。
新页面弹窗:用 window.open('IMGShow.aspx?imgStr=xxx', "_blank")来调用,在弹出的新窗口里显示。
这里提供一个可以定义弹窗大小的JavaScript方法:
function opendetailMode(url) {var iWidth = 1250;var iHeight = 700;var iTop = (window.innerHeight - iHeight) / 2;var iLeft = (window.innerWidth - iWidth) / 2;if (typeof (myphoto) != "undefined") {myphoto.close();}myphoto = window.open(url, "_blank", "menubar=0,scrollbars=1,scroll=no,resizable=0,status=1,titlebar=0,toolbar=0,location=0,width=" + iWidth + ",height=" + iHeight + ",top=" + iTop + ",left=" + iLeft);}四、实现总结
通过本项目,我们展示了如何使用ASP.NET WebForms结合HTML、CSS和JavaScript实现一个功能丰富的图片预览页面。这种方式不仅简单易用,而且可以满足大多数Web应用中对图片展示的基本需求。特别是通过JavaScript的动态操作,使得页面在响应用户交互时更加灵活和高效。
五、实现源码
下面是本页面的全部源码:
<%@ Page Language="C#" AutoEventWireup="true" CodeBehind="IMGShow.aspx.cs" Inherits="WebForms.IMGShow" %><!DOCTYPE html><html><head> <meta http-equiv="Content-Type" content="text/html; charset=utf-8" /> <meta name="viewport" content="width=device-width, initial-scale=1.0, maximum-scale=1.0, user-scalable=no" /> <meta http-equiv="X-UA-Compatible" content="IE=Edge" /> <title>图片展示</title> <link href="https://maxcdn.bootstrapcdn.com/bootstrap/4.5.2/css/bootstrap.min.css" rel="stylesheet" type="text/css" /> <script src="https://code.jquery.com/jquery-3.5.1.min.js"></script> <style> .content { width: 100%; height: 100%; position: absolute; background-color: white; overflow: hidden; background-position: 50%; } .btn { display: inline-block; padding: 5px 10px; margin: 5px; background-color: aliceblue; border: 1px solid #ccc; border-radius: 4px; text-decoration: none; color: #333; cursor: pointer; font-size: 14px; position: relative; padding-left: 30px; } .btn:hover { background-color: #f0f0f0; } .icon-add::before { content: url('images/add.png'); position: absolute; left: 10px; top: 50%; transform: translateY(-50%); } .icon-remove::before { content: url('images/remove.png'); position: absolute; left: 10px; top: 50%; transform: translateY(-50%); } .icon-arrow-turn-left::before { content: url('images/arrow_turn_left.png'); position: absolute; left: 10px; top: 50%; transform: translateY(-50%); } .icon-arrow-turn-right::before { content: url('images/arrow_turn_right.png'); position: absolute; left: 10px; top: 50%; transform: translateY(-50%); } </style> <script type="text/javascript"> // 放大图片 function imgBigToSize() { var img = $("#bigimg"); var oWidth = img.width(); var oHeight = img.height(); img.width(oWidth + 50); img.height(oHeight + 50 / oWidth * oHeight); }; // 缩小图片 function imgSmallToSize() { var img = $("#bigimg"); var oWidth = img.width(); var oHeight = img.height(); img.width(oWidth - 50); img.height(oHeight - 50 / oWidth * oHeight); }; var r = 0; // 左旋转图片 function imgRotateLeft() { var img = $("#bigimg"); r -= 90; img.css('transform', 'rotate(' + r + 'deg)'); }; // 右旋转图片 function imgRotateRight() { var img = $("#bigimg"); r += 90; img.css('transform', 'rotate(' + r + 'deg)'); }; // 页面初始化时加载图片 $(document).ready(function () { var path = window.location.href.split('=')[1]; $("#bigimg").attr('src', path); }); </script></head><body class="easyui-layout" data-options="fit:true"> <div style="text-align: center; vertical-align: middle;" class="content"> <img id="bigimg" src="a.png" width="60%" /> </div> <br /> <div style="margin-top: 150px; margin-left: 50px"> <a href="javascript:void(0)" class="btn icon-add" onclick="imgBigToSize()">放大</a><br /> <br /> <a href="javascript:void(0)" class="btn icon-remove" onclick="imgSmallToSize()">缩小</a><br /> <br /> <a href="javascript:void(0)" class="btn icon-arrow-turn-left" onclick="imgRotateLeft()">左旋转</a><br /> <br /> <a href="javascript:void(0)" class="btn icon-arrow-turn-right" onclick="imgRotateRight()">右旋转</a> </div></body></html>