系列文章目录
提示:这里可以添加系列文章的所有文章的目录,目录需要自己手动添加
例如:第一章 Python 机器学习入门之pandas的使用
提示:写完文章后,目录可以自动生成,如何生成可参考右边的帮助文档
文章目录
系列文章目录前言使用步骤1.首先Ubuntu镜像可以去官网、阿里源或清华源者下载2.首先将服务器地址设置为静态IP,同时记住网口名称enp5s0(后面配置会使用到)3.登录Ubuntu 22.04系统,运行apt命令更新包4.安装DHCP5.配置DHCP服务器,修改DHCP运行的网络接口6.修改DHCP配置文件7.运行并启动DHCP Server服务8.检查DHCP Server服务状态,无报错即成功9.将Win10客户端通过网线连接服务器端(也就是我们配置好Ubuntu 22.04 DHCP的这台),并设置自动获取IP,可以看到客户端自动获取了IP地址
前言
上篇文章介绍过了Windows Server 2016下的DHCP配置流程,本篇介绍的是Ubuntu 22.04下的DHCP配置流程
使用步骤
1.首先Ubuntu镜像可以去官网、阿里源或清华源者下载
阿里源:https://developer.aliyun.com/mirror/
清华源:https://mirrors.tuna.tsinghua.edu.cn/#
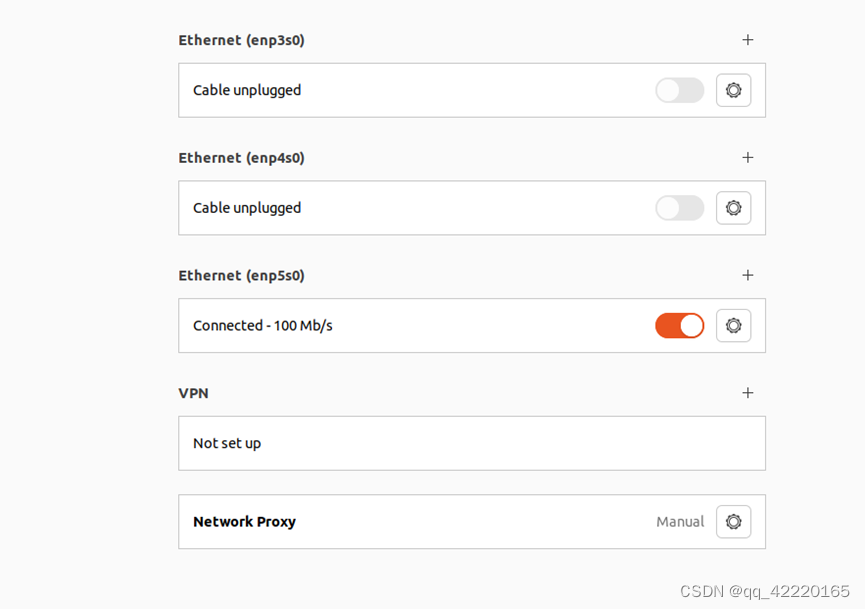
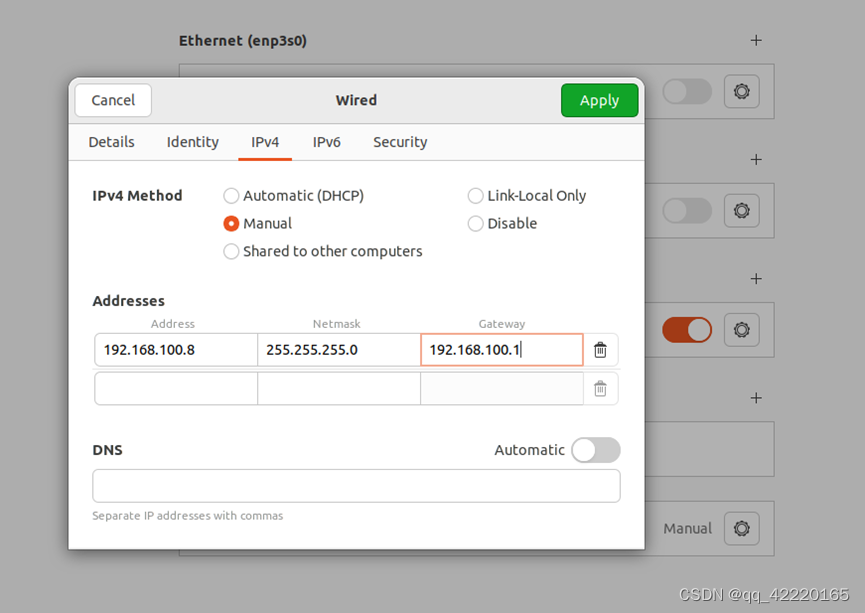
2.首先将服务器地址设置为静态IP,同时记住网口名称enp5s0(后面配置会使用到)
3.登录Ubuntu 22.04系统,运行apt命令更新包
sudo apt update

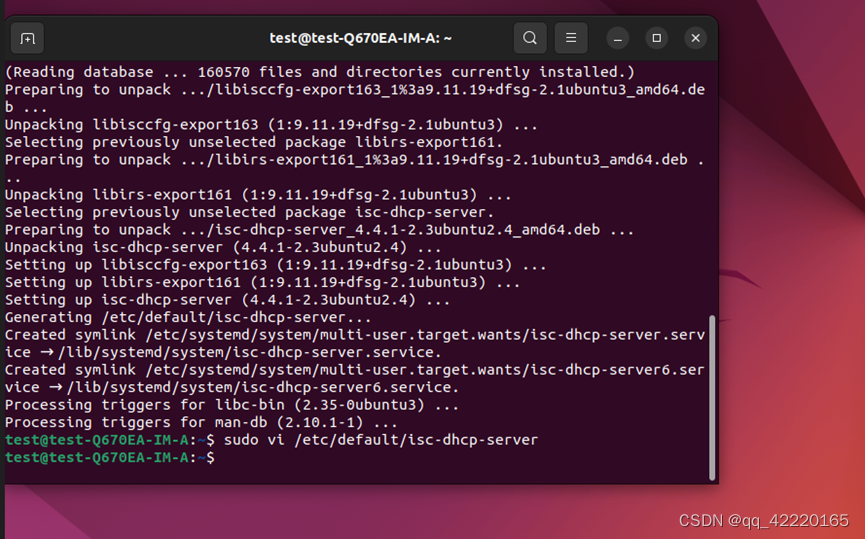
4.安装DHCP
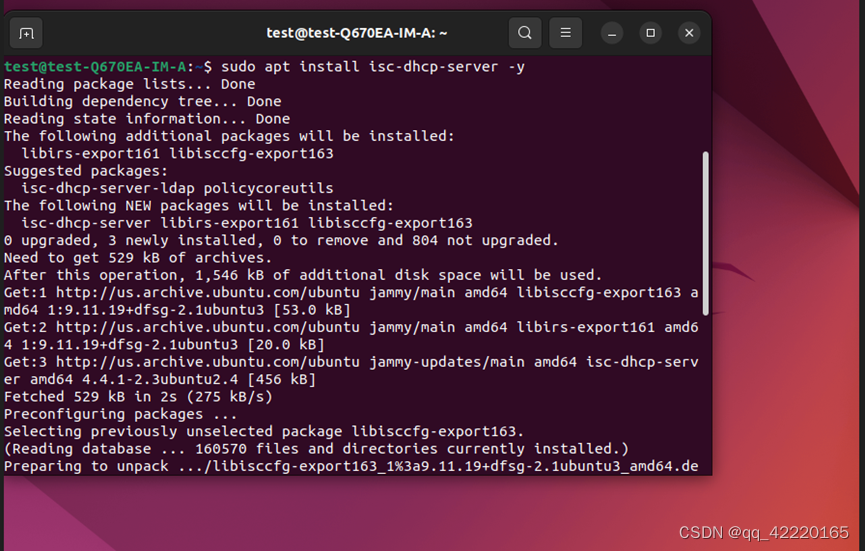
sudo apt install isc-dhcp-server -y
5.配置DHCP服务器,修改DHCP运行的网络接口
a. sudo vi /etc/default/isc-dhcp-server
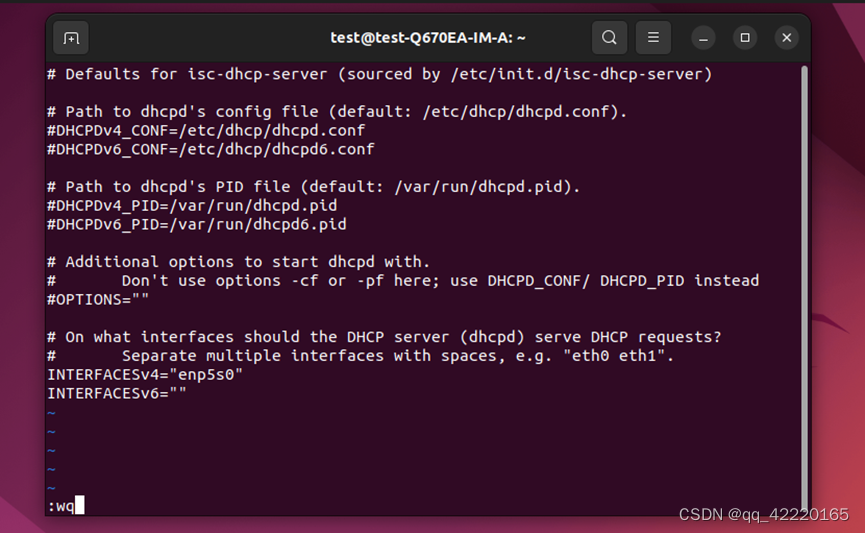
b. 修改DHCP网络接口为上文所提到的enp5s0(这边根据自己的配置来)
6.修改DHCP配置文件
a. sudo vi /etc/dhcp/dhcpd.conf

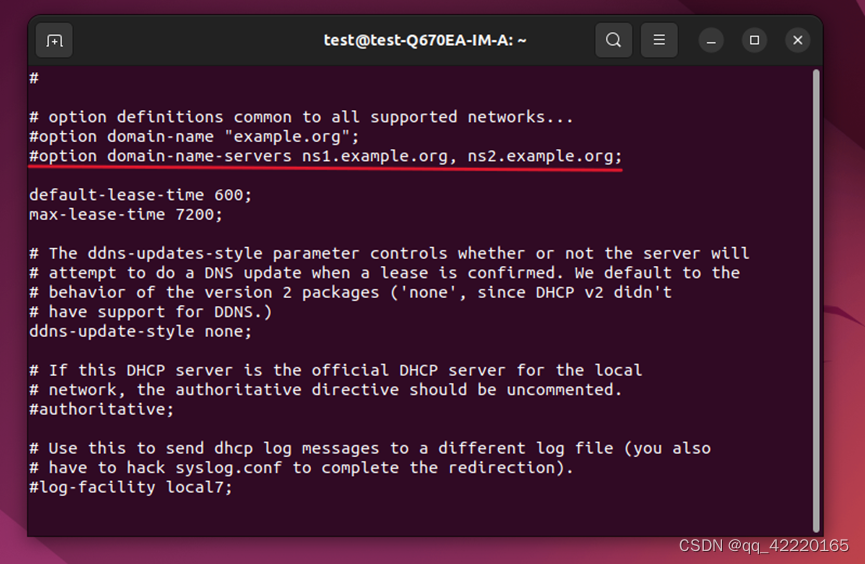
b. 注释掉域名服务器参数
#option domain-name “example.org”;
#option domain-name-servers ns1.example.org, ns2.example.org
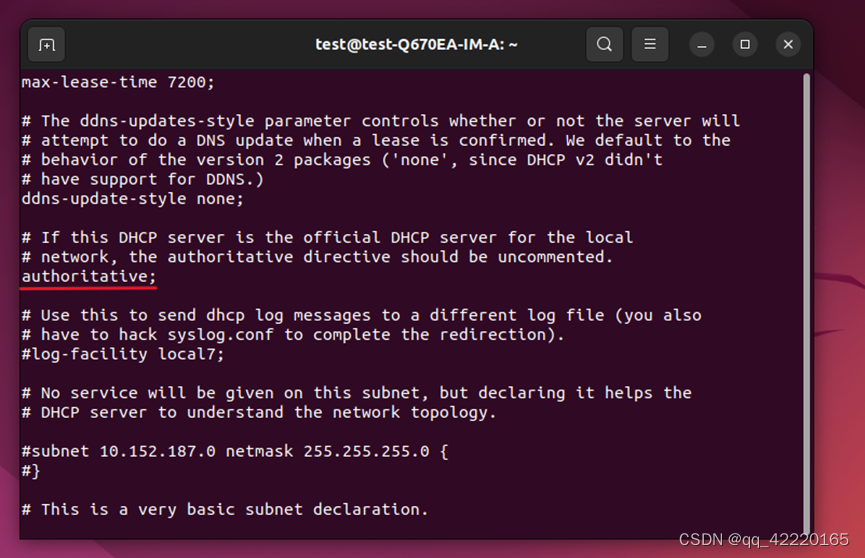
c. 取消authoritative参数注释
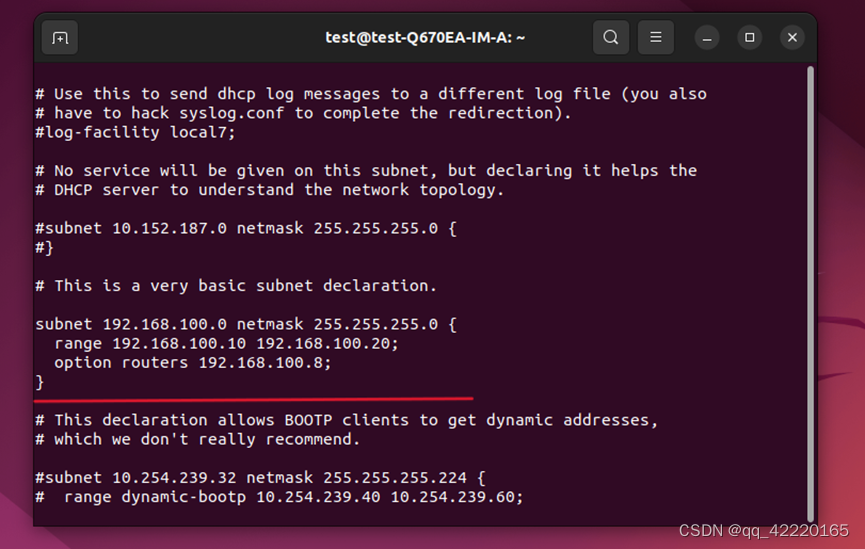
d. 添加DHCP服务器所使用的子网和IP地址范围。同时指定enp5s0接口的ip地址为路由器
subnet 192.168.100.0 netmask 255.255.255.0{
range 192.168.100.10 192.168.100.20;
option routers 192.168.100.8;
}
7.运行并启动DHCP Server服务
a. sudo systemctl start isc-dhcp-server
b. sudo systemctl enable isc-dhcp-server

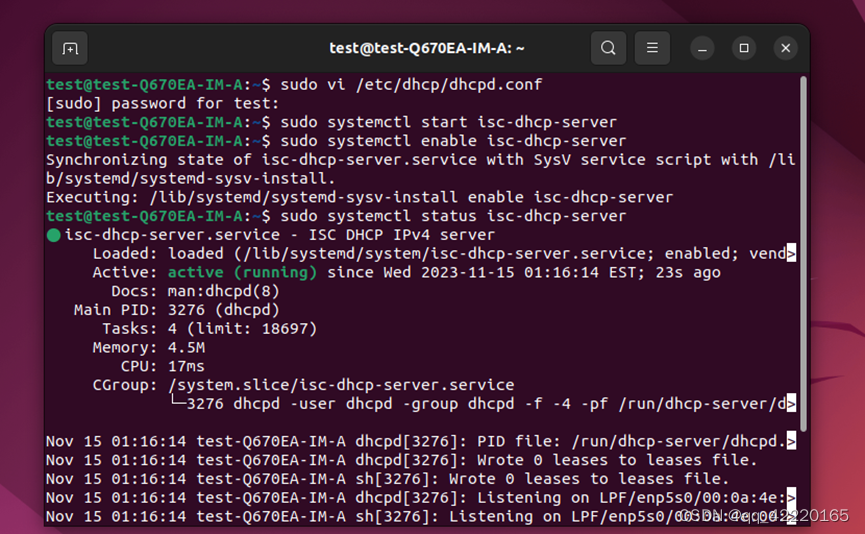
8.检查DHCP Server服务状态,无报错即成功
sudo systemctl status isc-dhcp-server
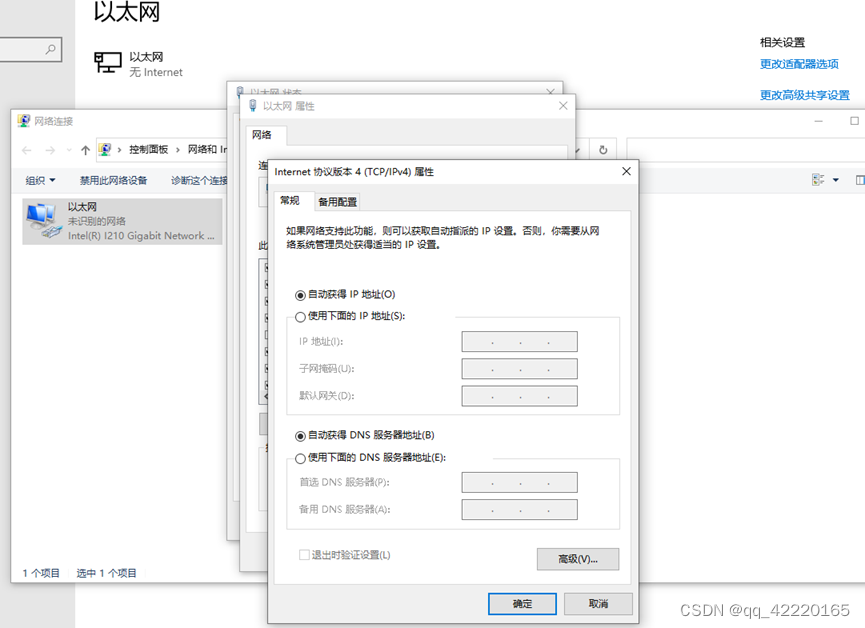
9.将Win10客户端通过网线连接服务器端(也就是我们配置好Ubuntu 22.04 DHCP的这台),并设置自动获取IP,可以看到客户端自动获取了IP地址
