一、虚拟机环境配置
1、关闭防火墙
| Bash
systemctl disable --now ufw |
2、配置hosts文件
| Bash
192.168.137.60 controller
192.168.137.61 compute1
192.168.137.62 compute2 |
3、时间同步
4、配置yoga源(所有节点)
| Bash
sudo add-apt-repository cloud-archive:yoga |
二、部署OpenStack环境
1、安装nova-compute、客户端和apache服务
| Bash
sudo apt -y install nova-compute python3-openstackclient apache2 |
配置apache服务
| Bash
echo 'ServerName controller' >> /etc/apache2/apache2.conf
systemctl restart apache2 |
2、安装数据库并配置
| Bash
sudo apt -y install mariadb-server python3-pymysql
echo '
[mysqld]
bind-address = 192.168.137.60
default-storage-engine = innodb
innodb_file_per_table = on
max_connections = 4096
collation-server = utf8_general_ci
character-set-server = utf8
' >/etc/mysql/mariadb.conf.d/99-openstack.cnf
sudo service mysql restart
mysql_secure_installation |
3、安装rabbitmq
| Bash
sudo apt -y install rabbitmq-server
rabbitmqctl add_user openstack 123456
rabbitmqctl set_permissions openstack ".*" ".*" ".*" |
4、安装memcached缓存
| Bash
sudo apt -y install memcached python3-memcache
sed -i '/-l 127.0.0.1/c -l 192.168.137.60' /etc/memcached.conf
sudo service memcached restart |
三、部署OpenStack组件
1、部署keystone准入服务部署
创建keystone库,并授权
| Bash
CREATE DATABASE keystone;
GRANT ALL PRIVILEGES ON keystone.* TO 'keystone'@'localhost' IDENTIFIED BY 'keystone';
GRANT ALL PRIVILEGES ON keystone.* TO 'keystone'@'%' IDENTIFIED BY 'keystone'; |
安装keystone
| Bash
sudo apt -y install keystone |
修改keystone配置
| Bash
cp -a /etc/keystone/{keystone.conf,keystone.conf.bak}
cat /etc/keystone/keystone.conf.bak |grep -Ev "^$|^#" >/etc/keystone/keystone.conf
vim /etc/keystone/keystone.conf
[database]
connection = mysql+pymysql://keystone:keystone@controller/keystone
[token]
provider = fernet |
同步数据库
| Bash
su -s /bin/sh -c "keystone-manage db_sync" keystone |
初始化fernet密钥库
| Bash
keystone-manage fernet_setup --keystone-user keystone --keystone-group keystone
keystone-manage credential_setup --keystone-user keystone --keystone-group keystone |
运行keystone API
| Bash
keystone-manage bootstrap --bootstrap-password admin \
--bootstrap-admin-url http://controller:5000/v3/ \
--bootstrap-internal-url http://controller:5000/v3/ \
--bootstrap-public-url http://controller:5000/v3/ \
--bootstrap-region-id RegionOne |
| Bash
echo 'ServerName controller' >>/etc/apache2/apache2.conf
sudo service apache2 restart |
设置环境变量
| Bash
echo '
export OS_PROJECT_DOMAIN_NAME=Default
export OS_USER_DOMAIN_NAME=Default
export OS_PROJECT_NAME=myproject
export OS_USERNAME=myuser
export OS_PASSWORD=myuser
export OS_AUTH_URL=http://controller:5000/v3
export OS_IDENTITY_API_VERSION=3
export OS_IMAGE_API_VERSION=2
' > /etc/keystone/admin_openrc.sh
echo 'source /etc/keystone/admin_openrc.sh' >>.bashrc
source .bashrc |
创建域、项目用户和角色
| Bash
openstack domain create --description "An Example Domain" example
openstack project create --domain default --description "Service Project" service
openstack user create --domain default --password myuser myuser
openstack role create myrole
openstack role add --project myproject --user myuser myrole |
验证keystone是否正常配置
| Bash
openstack token issue |
2、glance镜像服务部署
创建库并授权
| Bash
CREATE DATABASE glance;
GRANT ALL PRIVILEGES ON glance.* TO 'glance'@'localhost' IDENTIFIED BY 'glance';
GRANT ALL PRIVILEGES ON glance.* TO 'glance'@'%' IDENTIFIED BY 'glance'; |
创建glance用户和项目,并进行角色绑定
| Bash
openstack user create --domain default --password glance glance
openstack role add --project service --user glance admin
openstack service create --name glance --description "image service" image |
开放端点
| Bash
openstack endpoint create --region RegionOne image public http://controller:9292
openstack endpoint create --region RegionOne image internal http://controller:9292
openstack endpoint create --region RegionOne image admin http://controller:9292 |
安装glance服务软件并进行配置
| Bash
sudo apt -y install glance
cp -a /etc/nova/{glance-api.conf,glance-api.conf.bak}
cat /etc/nova/glance-api.conf.bak|grep -Ev "^$|^#" >/etc/nova/glance-api.conf
vim /etc/glance/glance-api.conf
[DEFAULT]
use_keystone_quotas = True
[database]
connection = mysql+pymysql://glance:glance@controller/glance
[keystone_authtoken]
www_authenticate_uri = http://controller:5000
auth_url = http://controller:5000
memcached_servers = controller:11211
auth_type = password
project_domain_name = Default
user_domain_name = Default
project_name = service
username = glance
password = glance
[paste_deploy]
flavor = keystone
[glance_store]
stores = file,http
default_store = file
filesystem_store_datadir = /var/lib/glance/images/ |
同步glance数据库
| Bash
su -s /bin/sh -c "glance-manage db_sync" glance |
重启glance服务
| Bash
systemctl restart glance-api |
验证glance服务是否安装
| Bash
openstack image list
返回空行即说明安装成功 |
3、部署placement服务
创建placement库,并授权
| Bash
CREATE DATABASE placement;
GRANT ALL PRIVILEGES ON placement.* TO 'placement'@'localhost' IDENTIFIED BY 'placement';
GRANT ALL PRIVILEGES ON placement.* TO 'placement'@'localhost' IDENTIFIED BY 'placement'; |
创建placement项目、用户并绑定角色
| Bash
openstack user create --domain default --password placement placement
openstack role add --project service --user placement admin
openstack service create --name placement --description "Placement API" placement |
开放端口
| Bash
openstack endpoint create --region RegionOne placement public http://controller:8778
openstack endpoint create --region RegionOne placement internal http://controller:8778
openstack endpoint create --region RegionOne placement admin http://controller:8778 |
下载placement服务软件并进行配置
| Bash
sudo apt -y install placement-api
cp -a /etc/placement/{placement.conf,placement.conf.bak}
cat /etc/placement/placement.conf.bak|grep -Ev "^$|^#" >/etc/placement/placement.conf
vim /etc/placement/placement.conf
[placement_database]
connection = mysql+pymysql://placement:placement@controller/placement
[api]
auth_strategy = keystone
[keystone_authtoken]
auth_url = http://controller:5000/v3
memcached_servers = controller:11211
auth_type = password
project_domain_name = Default
user_domain_name = Default
project_name = service
username = placement
password = placement |
同步placement数据库
| Bash
su -s /bin/sh -c "placement-manage db sync" placement |
重启apache2服务
| Bash
systemctl restart apache2 |
验证placement是否安装正常
| Bash
placement-status upgrade check
+-------------------------------------------+
| Upgrade Check Results |
+-------------------------------------------+
| Check: Missing Root Provider IDs |
| Result: Success |
| Details: None |
+-------------------------------------------+
| Check: Incomplete Consumers |
| Result: Success |
| Details: None |
+-------------------------------------------+
| Check: Policy File JSON to YAML Migration |
| Result: Success |
| Details: None |
+-------------------------------------------+
#出现上面内容即说明正常 |
4、部署nova计算服务(控制节点)
创建nova nova_api nova_cell0库并授权
| Bash
CREATE DATABASE nova;
GRANT ALL PRIVILEGES ON nova.* TO 'nova'@'%' IDENTIFIED BY 'nova';
GRANT ALL PRIVILEGES ON nova.* TO 'nova'@'localhost' IDENTIFIED BY 'nova';
CREATE DATABASE nova_api;
GRANT ALL PRIVILEGES ON nova_api.* TO 'nova'@'%' IDENTIFIED BY 'nova';
GRANT ALL PRIVILEGES ON nova_api.* TO 'nova'@'localhost' IDENTIFIED BY 'nova';
CREATE DATABASE nova_cell0;
GRANT ALL PRIVILEGES ON nova_cell0.* TO 'nova'@'%' IDENTIFIED BY 'nova';
GRANT ALL PRIVILEGES ON nova_cell0.* TO 'nova'@'localhost' IDENTIFIED BY 'nova'; |
创建nova项目、用户并进行角色绑定
| Bash
openstack user create --domain default --password nova nova
openstack role add --project service --user nova admin
openstack service create --name nova --description "OpenStack Compute" compute |
开放端点
| Bash
openstack endpoint create --region RegionOne compute public http://controller:8774/v2.1
openstack endpoint create --region RegionOne compute internal http://controller:8774/v2.1
openstack endpoint create --region RegionOne compute admin http://controller:8774/v2.1 |
下载nova相关服务软件,并进行配置
| Bash
sudo apt -y install nova-api nova-conductor nova-novncproxy nova-scheduler
cp -a /etc/nova/{nova.conf,nova.conf.bak}
cat /etc/nova/nova.conf.bak|grep -Ev "^$|^#" >/etc/nova/nova.conf
vim /etc/nova/nova.conf
[DEFAULT]
my_ip = 192.168.137.60
transport_url = rabbit://openstack:123456@controller:5672/
[api_database]
connection = mysql+pymysql://nova:nova@controller/nova_api
[database]
connection = mysql+pymysql://nova:nova@controller/nova
[api]
auth_strategy = keystone
[keystone_authtoken]
www_authenticate_uri = http://controller:5000/
auth_url = http://controller:5000/
memcached_servers = controller:11211
auth_type = password
project_domain_name = Default
user_domain_name = Default
project_name = service
username = nova
password = nova
[vnc]
enabled = true
server_listen = $my_ip
server_proxyclient_address = $my_ip
[glance]
api_servers = http://controller:9292
[oslo_concurrency]
lock_path = /var/lib/nova/tmp
[placement]
region_name = RegionOne
project_domain_name = Default
project_name = service
auth_type = password
user_domain_name = Default
auth_url = http://controller:5000/v3
username = placement
password = placement
[scheduler]
discover_hosts_in_cells_interval = 300 |
同步nova相关数据库
| Bash
su -s /bin/sh -c "nova-manage api_db sync" nova
su -s /bin/sh -c "nova-manage cell_v2 map_cell0" nova
su -s /bin/sh -c "nova-manage cell_v2 create_cell --name=cell1 --verbose" nova
su -s /bin/sh -c "nova-manage db sync" nova |
验证nova服务是否正常
| Bash
su -s /bin/sh -c "nova-manage cell_v2 list_cells" nova
+-------+--------------------------------------+------------------------------------------+-------------------------------------------------+----------+
| Name | UUID | Transport URL | Database Connection | Disabled |
+-------+--------------------------------------+------------------------------------------+-------------------------------------------------+----------+
| cell0 | 00000000-0000-0000-0000-000000000000 | none:/ | mysql+pymysql://nova:****@controller/nova_cell0 | False |
| cell1 | c8d872d1-c57c-4105-9f91-ccf540072a84 | rabbit://openstack:****@controller:5672/ | mysql+pymysql://nova:****@controller/nova | False |
+-------+--------------------------------------+------------------------------------------+-------------------------------------------------+----------+ |
重启nova相关服务
| Bash
systemctl enable --now nova-api nova-scheduler nova-conductor nova-novncproxy |
5、部署nova-compute服务(计算节点)
安装nova-compute服务软件并进行配置
| Bash
sudo apt -y install nova-compute
cp -a /etc/nova/{nova.conf,nova.conf.bak}
cat /etc/nova/nova.conf.bak|grep -Ev "^$|^#" >/etc/nova/nova.conf
vim /etc/nova/nova.conf
[DEFAULT]
transport_url = rabbit://openstack:123456@controller
my_ip = 192.168.137.61
[api]
auth_strategy = keystone
[keystone_authtoken]
www_authenticate_uri = http://controller:5000/
auth_url = http://controller:5000/
memcached_servers = controller:11211
auth_type = password
project_domain_name = Default
user_domain_name = Default
project_name = service
username = nova
password = nova
[vnc]
enabled = true
server_listen = 0.0.0.0
server_proxyclient_address = $my_ip
novncproxy_base_url = http://controller:6080/vnc_auto.html
[glance]
api_servers = http://controller:9292
[oslo_concurrency]
lock_path = /var/lib/nova/tmp
[placement]
region_name = RegionOne
project_domain_name = Default
project_name = service
auth_type = password
user_domain_name = Default
auth_url = http://controller:5000/v3
username = placement
password = placement |
nova创建的虚机格式更改为qemu
| Bash
cp -a /etc/nova/{nova-compute.conf,nova-compute.conf.bak}
cat /etc/nova/nova-compute.conf.bak|grep -Ev "^$|^#" >/etc/nova/nova-compute.conf
vim /etc/nova/nova-compute.conf
[libvirt]
virt_type = qemu |
将compute1节点的nova.conf和nova-compute.conf配置文件传至compute2节点
| Bash
scp /etc/nova/{nova-compute.conf,nova.conf} compute2:/etc/nova/
sed -i '/192.168.137.61/ c 192.168.137.62' /etc/nova/nova.conf |
重启nova-compute服务
| Bash
systemctl enable --now nova-compute |
验证nova-compute是否加入加入集群
| Bash
openstack compute service list --service nova-compute
+--------------------------------------+--------------+------------+------+---------+-------+----------------------------+
| ID | Binary | Host | Zone | Status | State | Updated At |
+--------------------------------------+--------------+------------+------+---------+-------+----------------------------+
| cfbfd903-b19d-4525-a7cb-911c1fd967ea | nova-compute | controller | nova | enabled | up | 2024-04-19T02:25:37.000000 |
| 00a0c02e-6365-451c-b3a8-c3cb2138fb7e | nova-compute | compute1 | nova | enabled | up | 2024-04-19T02:25:36.000000 |
| 0fffb212-2cb4-48f6-9bfb-24f00948a773 | nova-compute | compute2 | nova | enabled | up | 2024-04-19T02:25:35.000000 |
+--------------------------------------+--------------+------------+------+---------+-------+----------------------------+ |
6、neutron服务安装(控制节点)
创建neutron库并授权
| Bash
CREATE DATABASE neutron;
GRANT ALL PRIVILEGES ON neutron.* TO 'neutron'@'localhost' IDENTIFIED BY 'neutron';
GRANT ALL PRIVILEGES ON neutron.* TO 'neutron'@'%' IDENTIFIED BY 'neutron'; |
创建neutron项目、用户并进行角色绑定
| Bash
openstack user create --domain default --password neutron neutron
openstack role add --project service --user neutron admin
openstack service create --name neutron --description "OpenStack Networking" network |
开放端点
| Bash
openstack endpoint create --region RegionOne network public http://controller:9696
openstack endpoint create --region RegionOne network internal http://controller:9696
openstack endpoint create --region RegionOne network admin http://controller:9696 |
安装neutron相关服务软件
| Bash
sudo apt -y install neutron-server neutron-plugin-ml2 neutron-linuxbridge-agent neutron-l3-agent neutron-dhcp-agent neutron-metadata-agent |
修改neutron.conf文件
| Bash
cp -a /etc/neutron/{neutron.conf,neutron.conf.bak}
cat /etc/neutron/neutron.conf.bak|grep -Ev "^$|^#" >/etc/neutron/neutron.conf
vim /etc/neutron/neutron.conf
[DEFAULT]
core_plugin = ml2
service_plugins = router
allow_overlapping_ips = true
transport_url = rabbit://openstack:123456@controller
auth_strategy = keystone
notify_nova_on_port_status_changes = true
notify_nova_on_port_data_changes = true
[database]
connection = mysql+pymysql://neutron:neutron@controller/neutron
[keystone_authtoken]
www_authenticate_uri = http://controller:5000
auth_url = http://controller:5000
memcached_servers = controller:11211
auth_type = password
project_domain_name = default
user_domain_name = default
project_name = service
username = neutron
password = neutron
[nova]
auth_url = http://controller:5000
auth_type = password
project_domain_name = default
user_domain_name = default
region_name = RegionOne
project_name = service
username = nova
password = nova
[oslo_concurrency]
lock_path = /var/lib/neutron/tmp |
修改ml2_conf.ini文件
| Bash
cp -a /etc/neutron/plugins/ml2/{ml2_conf.ini,ml2_conf.ini.bak}
cat /etc/neutron/plugins/ml2/ml2_conf.ini.bak|grep -Ev "^$|^#" >/etc/neutron/plugins/ml2/ml2_conf.ini
vim /etc/neutron/plugins/ml2/ml2_conf.ini
[ml2]
type_drivers = flat,vlan,vxlan
tenant_network_types = vxlan
mechanism_drivers = linuxbridge,l2population
extension_drivers = port_security
[ml2_type_flat]
flat_networks = provider
[ml2_type_vxlan]
vni_ranges = 1:1000 #VID
[securitygroup]
enable_ipset = true |
配置网桥
| Bash
cp -a /etc/neutron/plugins/ml2/{linuxbridge_agent.ini,linuxbridge_agent.ini.bak}
cat /etc/neutron/plugins/ml2/linuxbridge_agent.ini.bak|grep -Ev "^$|^#" >/etc/neutron/plugins/ml2/linuxbridge_agent.ini
vim /etc/neutron/plugins/ml2/linuxbridge_agent.ini
[linux_bridge]
physical_interface_mappings = provider:ens33
[vxlan]
enable_vxlan = true
local_ip = 192.168.137.60
l2_population = true
[securitygroup]
enable_security_group = true
firewall_driver = neutron.agent.linux.iptables_firewall.IptablesFirewallDriver |
配置三层交换机
| Bash
cp -a /etc/neutron/{l3_agent.ini,l3_agent.ini.bak}
cat /etc/neutron/l3_agent.ini.bak|grep -Ev "^$|^#" >/etc/neutron/l3_agent.ini
vim /etc/neutron/l3_agent.ini
[DEFAULT]
interface_driver = linuxbridge |
配置dncp代理服务
| Bash
cp -a /etc/neutron/{dhcp_agent.ini,dhcp_agent.ini.bak}
cat /etc/neutron/dhcp_agent.ini.bak|grep -Ev "^$|^#" >/etc/neutron/dhcp_agent.ini
vim /etc/neutron/dhcp_agent.ini
[DEFAULT]
interface_driver = linuxbridge
dhcp_driver = neutron.agent.linux.dhcp.Dnsmasq
enable_isolated_metadata = true |
修改基本配置
| Bash
cp -a /etc/neutron/{metadata_agent.ini,metadata_agent.ini.bak}
cat /etc/neutron/metadata_agent.ini.bak|grep -Ev "^$|^#" >/etc/neutron/metadata_agent.ini
vim /etc/neutron/metadata_agent.ini
[DEFAULT]
nova_metadata_host = controller
metadata_proxy_shared_secret = metadata #设置了一个叫metadata的密码,需配置到nova.conf文件中 |
将metadata密码配置到nova.conf文件
| Bash
vim /etc/nova/nova.conf
[neutron]
auth_url = http://controller:5000
auth_type = password
project_domain_name = default
user_domain_name = default
region_name = RegionOne
project_name = service
username = neutron
password = neutron
service_metadata_proxy = true
metadata_proxy_shared_secret = metadata |
同步neutron相关数据库
| Bash
su -s /bin/sh -c "neutron-db-manage --config-file /etc/neutron/neutron.conf --config-file /etc/neutron/plugins/ml2/ml2_conf.ini upgrade head" neutron |
重启neutron和nova-api服务
| Bash
systemctl enable --now nova-api neutron-server neutron-linuxbridge-agent neutron-dhcp-agent neutron-metadata-agent neutron-l3-agent |
7、部署neutron服务(compute节点上)
安装neutron服务软件,网桥
| Bash
sudo apt -y install neutron-linuxbridge-agent |
修改neutron.conf文件
| Bash
cp -a /etc/neutron/{neutron.conf,neutron.conf.bak}
cat /etc/neutron/neutron.conf.bak|grep -Ev "^$|^#" >/etc/neutron/neutron.conf
vim /etc/neutron/neutron.conf
[DEFAULT]
transport_url = rabbit://openstack:123456@controller
auth_strategy = keystone
core_plugin = ml2
[keystone_authtoken]
www_authenticate_uri = http://controller:5000
auth_url = http://controller:5000
memcached_servers = controller:11211
auth_type = password
project_domain_name = default
user_domain_name = default
project_name = service
username = neutron
password = neutron
[oslo_concurrency]
lock_path = /var/lib/neutron/tmp |
配置网桥(compute1)
| Bash
scp controller:/etc/neutron/plugins/ml2/linuxbridge_agent.ini /etc/neutron/plugins/ml2/
sed -i '/192.168.137.60/c 192.168.137.61' /etc/neutron/plugins/ml2/linuxbridge_agent.ini |
配置网桥(compute2)
| Bash
scp controller:/etc/neutron/plugins/ml2/linuxbridge_agent.ini /etc/neutron/plugins/ml2/
sed -i '/192.168.137.60/c 192.168.137.62' /etc/neutron/plugins/ml2/linuxbridge_agent.ini |
配置nova.conf文件
| Bash
[neutron]
auth_url = http://controller:5000
auth_type = password
project_domain_name = default
user_domain_name = default
region_name = RegionOne
project_name = service
username = neutron
password = neutron |
重启neutron相关服务
| Bash
systemctl enable --now nova-compute neutron-linuxbridge-agent |
验证neutron服务和计算节点上的网桥是否正常
| Bash
openstack network agent list
+--------------------------------------+--------------------+------------+-------------------+-------+-------+---------------------------+
| ID | Agent Type | Host | Availability Zone | Alive | State | Binary |
+--------------------------------------+--------------------+------------+-------------------+-------+-------+---------------------------+
| 3f1b45d7-90be-4683-a3b7-f6cc20b63f27 | L3 agent | controller | nova | :-) | UP | neutron-l3-agent |
| 6db92aae-8fde-43ac-9ef9-f661a32ea7dd | Linux bridge agent | compute1 | None | :-) | UP | neutron-linuxbridge-agent |
| 896f77f8-ae1e-4de0-a9b8-e3a5b8aea079 | Linux bridge agent | controller | None | :-) | UP | neutron-linuxbridge-agent |
| 91ef4574-0580-4ff2-8a24-d24ea4227b22 | Metadata agent | controller | None | :-) | UP | neutron-metadata-agent |
| cde7ac76-adc3-4e11-9f26-40b027355e0c | Linux bridge agent | compute2 | None | :-) | UP | neutron-linuxbridge-agent |
| d4b435ce-1482-4244-86c2-47bec3c0998c | DHCP agent | controller | nova | :-) | UP | neutron-dhcp-agent |
+--------------------------------------+--------------------+------------+-------------------+-------+-------+---------------------------+ |
8、安装horizon管理界面
安装horizon服务软件
| Bash
sudo apt -y install openstack-dashboard |
修改配置文件
| Bash
cp -a /etc/openstack-dashboard/{local_settings.py,local_settings.py.bak}
vim /etc/openstack-dashboard/local_settings.py
OPENSTACK_HOST = "controller"
COMPRESS_OFFLINE = False
ALLOWED_HOSTS = ['*']
SESSION_ENGINE = 'django.contrib.sessions.backends.cache'
CACHES = {
'default': {
'BACKEND': 'django.core.cache.backends.memcached.MemcachedCache',
'LOCATION': 'controller:11211',
}
}
OPENSTACK_KEYSTONE_URL = "http://%s:5000" % OPENSTACK_HOST
OPENSTACK_KEYSTONE_MULTIDOMAIN_SUPPORT = True
OPENSTACK_API_VERSIONS = {
"identity": 3,
"image": 2,
"volume": 3,
}
OPENSTACK_KEYSTONE_DEFAULT_DOMAIN = "Default"
OPENSTACK_KEYSTONE_DEFAULT_ROLE = "user"
TIME_ZONE = "Asia/Shanghai" |
重启apache服务
| Bash
systemctl reload apache2.service |
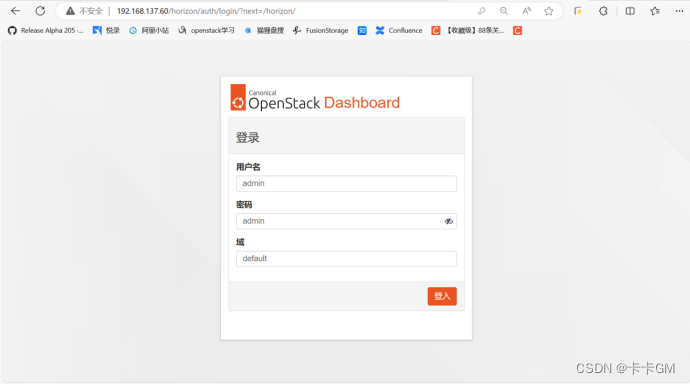
验证horizon服务是否正常
9、安装cinder服务(控制节点)
创建cinder库并授权
| Bash
CREATE DATABASE cinder;
GRANT ALL PRIVILEGES ON cinder.* TO 'cinder'@'localhost' IDENTIFIED BY 'cinder';
GRANT ALL PRIVILEGES ON cinder.* TO 'cinder'@'%' IDENTIFIED BY 'cinder'; |
创建cinder服务、用户并进行角色绑定
| Bash
openstack user create --domain default --password cinder cinder
openstack role add --project service --user cinder admin
openstack service create --name cinderv3 --description "OpenStack Block Storage" volumev3 |
创建端点
| Bash
openstack endpoint create --region RegionOne volumev3 public http://controller:8776/v3/%\(project_id\)s
openstack endpoint create --region RegionOne volumev3 admin http://controller:8776/v3/%\(project_id\)s
openstack endpoint create --region RegionOne volumev3 internal http://controller:8776/v3/%\(project_id\)s |
安装cinder相关软件,并配置
| Bash
sudo apt install cinder-api cinder-scheduler
cp -a /etc/cinder/{cinder.conf,cinder.conf.bak}
cat /etc/cinder/cinder.conf.bak|grep -Ev "^$|^#" >/etc/cinder/cinder.conf
vim/etc/cinder/cinder.conf
[DEFAULT]
my_ip = 192.168.137.60
transport_url = rabbit://openstack:123456@controller
auth_strategy = keystone
[keystone_authtoken]
www_authenticate_uri = http://controller:5000
auth_url = http://controller:5000
memcached_servers = controller:11211
auth_type = password
project_domain_name = default
user_domain_name = default
project_name = service
username = cinder
password = cinder
[database]
connection = mysql+pymysql://cinder:cinder@controller/cinder
[oslo_concurrency]
lock_path = /var/lib/cinder/tmp |
配置nova.conf文件
| Bash
vim /etc/nova/nova.conf
[cinder]
os_region_name = RegionOne |
同步cinder数据库
| Bash
su -s /bin/sh -c "cinder-manage db sync" cinder |
重启nova-api和cinder服务
| Bash
systemctl enable --now nova-api cinder-scheduler apache2 |
10、安装cinder服务(计算节点)
安装逻辑卷管理相关软件
| Bash
sudo apt install lvm2 thin-provisioning-tools |
创建卷组
| Bash
sudo vgcreate cinder-volumes /dev/sdb
Volume group "cinder-volumes" successfully created |
配置lvm.conf文件
| Bash
filter = [ "a/sda/", "a/sdb/", "r/.*/"] |
安装cinder-volume及相关软件,并进行配置
| Bash
sudo apt install cinder-volume tgt
cp -a /etc/cinder/{cinder.conf,cinder.conf.bak}
cat /etc/cinder/cinder.conf.bak|grep -Ev "^$|^#" >/etc/cinder/cinder.conf
vim/etc/cinder/cinder.conf
[DEFAULT]
my_ip = 192.168.137.61
transport_url = rabbit://openstack:123456@controller
auth_strategy = keystone
enabled_backends = lvm
glance_api_servers = http://controller:9292
[database]
connection = mysql+pymysql://cinder:cinder@controller/cinder
[keystone_authtoken]
www_authenticate_uri = http://controller:5000
auth_url = http://controller:5000
memcached_servers = controller:11211
auth_type = password
project_domain_name = default
user_domain_name = default
project_name = service
username = cinder
password = cinder
[lvm]
volume_driver = cinder.volume.drivers.lvm.LVMVolumeDriver
volume_group = cinder-volumes
target_protocol = iscsi
target_helper = tgtadm
[oslo_concurrency]
lock_path = /var/lib/cinder/tmp |
防止volume创建失败,修改target.conf文件
| Bash
echo 'include /var/lib/cinder/volumes/*' >>/etc/tgt/targets.conf |
重启tgt和cinder-volume服务
| Bash
systemctl enable --now tgt cinder-volume |
查看cinder-volume服务是否正常启动
| Bash
openstack volume service list
+------------------+--------------+------+---------+-------+----------------------------+
| Binary | Host | Zone | Status | State | Updated At |
+------------------+--------------+------+---------+-------+----------------------------+
| cinder-scheduler | controller | nova | enabled | up | 2024-04-19T04:26:09.000000 |
| cinder-volume | compute1@lvm | nova | enabled | up | 2024-04-19T04:26:05.000000 |
| cinder-volume | compute2@lvm | nova | enabled | up | 2024-04-19T04:26:11.000000 |
+------------------+--------------+------+---------+-------+----------------------------+ |
| Bash
systemctl restart cinder.conf |
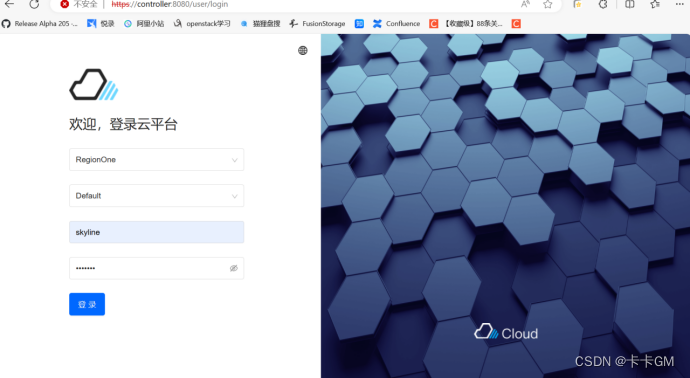
11、部署Skyline管理服务
创建skyline库,并授权
| Bash
CREATE DATABASE skyline;
GRANT ALL PRIVILEGES ON skyline.* TO 'skyline'@'localhost' IDENTIFIED BY 'skyline';
GRANT ALL PRIVILEGES ON skyline.* TO 'skyline'@'%' IDENTIFIED BY 'skyline'; |
创建skyline用户,并进行角色绑定
| Bash
openstack user create --domain default --password skyline skyline
openstack role add --project service --user skyline admin |
创建skyline.yaml配置文件
| Bash
mkdir /etc/skyline/
vim /etc/skyline/skyline.yaml
default:
database_url: mysql://skyline:skyline@192.168.137.60:3306/skyline
debug: true
log_dir: /var/log/skyline
openstack:
keystone_url: http://192.168.137.60:5000/v3/
system_user_password: skyline |
安装docker服务
| Bash
apt -y install docker |
配置加速镜像
| Bash
vim /etc/docker/daemon.json
{
"registry-mirrors": [
"https://hub-mirror.c.163.com",
"https://mirror.baidubce.com",
"https://ung2thfc.mirror.aliyuncs.com",
"https://mirror.ccs.tencentyun.com"
]
}
systemctl restart docker |
运行skyline检测容器
| Bash
docker run -d --name skyline_bootstrap -e KOLLA_BOOTSTRAP="" -v /etc/skyline/skyline.yaml:/etc/skyline/skyline.yaml --net=host 99cloud/skyline:latest
#确保docker ps -a 中该容器退出码为0,若不为0,查看容器日志排查 |
启动skyline容器
| Bash
docker rm -f skyline_bootstrap
docker run -d --name |
验证skyline服务是否启动 查看容器是否正常启动
| Bash
docker ps
CONTAINER ID IMAGE COMMAND CREATED STATUS PORTS NAMES
3c5a70834e30 99cloud/skyline:latest "start_service.sh" 14 hours ago Up 30 minutes skyline |
查看9999端口或8080端口是否开启
| Bash
netstat -anpt|grep -E "9999|8080"
tcp 0 0 0.0.0.0:8080 0.0.0.0:* LISTEN 2954/nginx: master |
若没有9999端口可访问8080端口,没有9999端口,可以尝试关闭horizon服务 登录skyline