先看效果是否可以满足你们,如果可以满足你只要一步一步照着做绝对没有错。
本人技术不佳,研究了一整天,全网的大佬们写的博客看的晕头转向,避免大伙再走弯路,跟着我以下步骤一点一点来绝对可以实现。
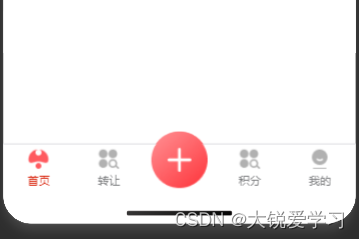
最终效果图: (如果你看着还满意的话那就跟着教程一步一步来吧)
首先你要确保你的项目中安装了 uview的UI框架和vuex,具体安装教程这两个网上都有详细教程,我这项目是Vue3.0的,用的是uview-plus框架。
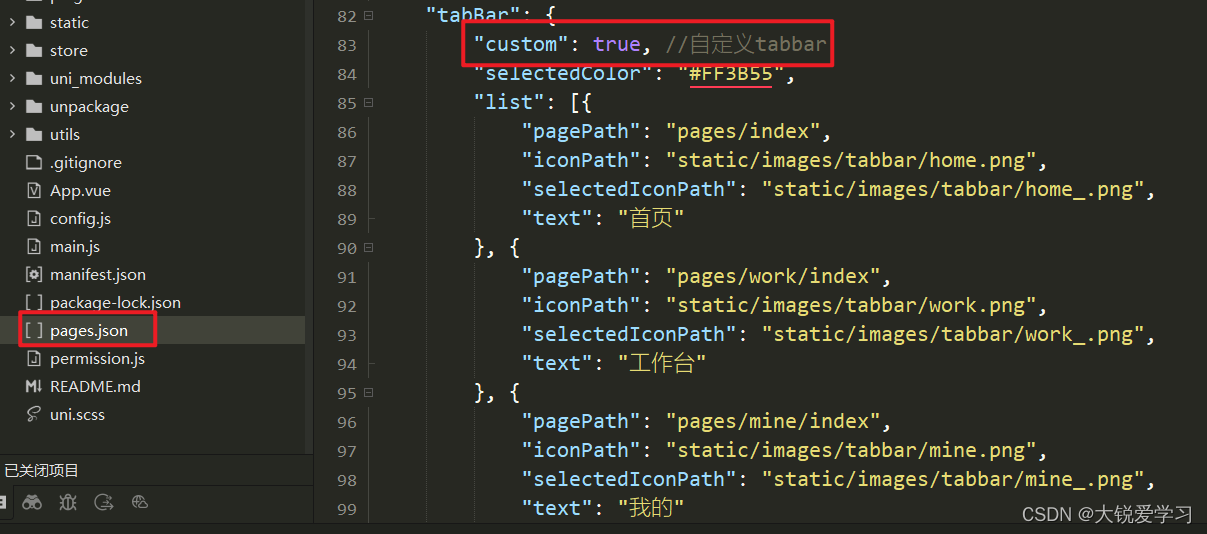
第一步:配置信息
pages.js 添加 "custom": true 属性
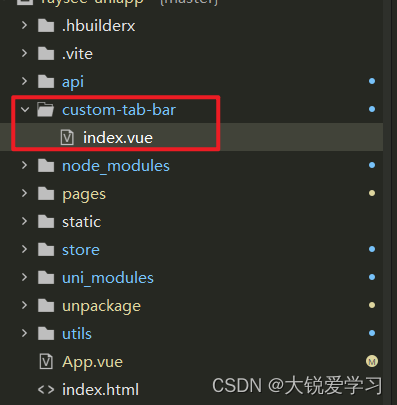
第二步:添加自定义tabBar代码文件
注意:这里是按官方要求必须放在项目根目录下,而且文件名不能修改,index中代码如下:
<template><view><u-tabbar :value="index" @change="tabBarChange" :fixed="true" :placeholder="true" :safeAreaInsetBottom="true"activeColor="#d81e06"><u-tabbar-item text="首页"><template #active-icon><image class="u-page__item__slot-icon" :src="list[0].selectedIconPath"></image></template><template #inactive-icon><image class="u-page__item__slot-icon" :src="list[0].iconPath"></image></template></u-tabbar-item><u-tabbar-item text="转让"><template #active-icon><image class="u-page__item__slot-icon" :src="list[1].selectedIconPath"></image></template><template #inactive-icon><image class="u-page__item__slot-icon" :src="list[1].iconPath"></image></template></u-tabbar-item><u-tabbar-item @click="show = true"><template #active-icon><image class="u-page__item__slot-icon-big" :src="list[2].selectedIconPath"></image></template><template #inactive-icon><image class="u-page__item__slot-icon-big" :src="list[2].iconPath"></image></template></u-tabbar-item><u-tabbar-item text="积分"><template #active-icon><image class="u-page__item__slot-icon" :src="list[3].selectedIconPath"></image></template><template #inactive-icon><image class="u-page__item__slot-icon" :src="list[3].iconPath"></image></template></u-tabbar-item><u-tabbar-item text="我的"><template #active-icon><image class="u-page__item__slot-icon" :src="list[4].selectedIconPath"></image></template><template #inactive-icon><image class="u-page__item__slot-icon" :src="list[4].iconPath"></image></template></u-tabbar-item></u-tabbar><view><u-popup :overlayOpacity="0.6" :round="10" :show="show" @close="close" @open="open"><view class="issue-item"><view class="issue-item-buy" @click="toBuy"><text>我要卖</text></view><view class="issue-item-sell"><text>我要买</text></view></view></u-popup></view></view></template><script>export default {data() {return {show: false,list: [{"pagePath": "/pages/index/index","text": "首页","iconPath": "/static/tabs/home_default.png","selectedIconPath": "/static/tabs/home_selected.png"},{"pagePath": "/pages/makeOver/makeOver","text": "转让","iconPath": "/static/tabs/mass_default.png","selectedIconPath": "/static/tabs/mass_selected.png"},{"pagePath": "/pages/issue/issue","text": "发布","iconPath": "/static/images/tab_issue.png","selectedIconPath": "/static/images/tab_issue.png"},{"pagePath": "/pages/integral/integral","text": "积分","iconPath": "/static/tabs/mass_default.png","selectedIconPath": "/static/tabs/mass_selected.png"},{"pagePath": "/pages/my/my","text": "我的","iconPath": "/static/tabs/my_default.png","selectedIconPath": "/static/tabs/my_selected.png"}]}},computed: {index() {return this.$store.state.tabbarIndex}},methods: {tabBarChange(e) {if (e !== 2) {uni.switchTab({url: this.list[e].pagePath})}},//点击发布按钮的弹出层open() {console.log('open');},close() {this.show = false;console.log('close');},//点击我要卖toBuy() {console.log("点击了");uni.switchTab({url: '/pages/issue/issue'})}}}</script><style lang="scss">.u-page__item__slot-icon {width: 50rpx;height: 50rpx;}.u-page__item__slot-icon-big {width: 120rpx;height: 120rpx;margin-bottom: 30rpx;}.issue-item {height: 400rpx;display: flex;justify-content: center;align-items: center;.issue-item-buy,.issue-item-sell {width: 30%;height: 100rpx;font-size: 28rpx;border-radius: 20rpx;background-color: pink;margin: 40rpx;line-height: 100rpx;text-align: center;}}</style>下面我给大家先讲讲实现的逻辑,首先逛了一天的博客,有的人用for循环来做,刚开始我也用循环,但是我中间有个凸起的发布按钮,我想做出点击后有弹出层,然后再选择的功能,按照网上他们说的去做都直接跳转了,我这点击发布效果如下图: 没办法我只能我只有会写死,反正后面这个换的也不是太频繁。

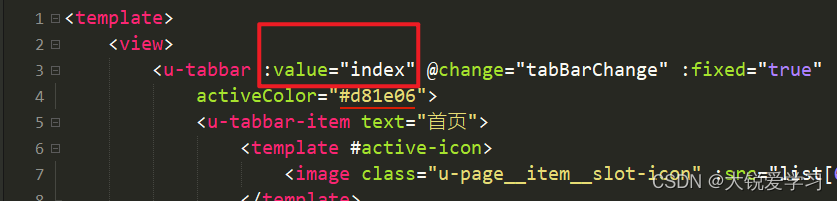
我再讲讲代码中需要注意的点吧,首先 如下图的value值我绑定的computed计算属性中的index,然后methods中的tabBarChange方法呢是点击tabBar切换的每一项,下面我又加个if判断就是用来控制中间发布的那个图标点击后不跳转

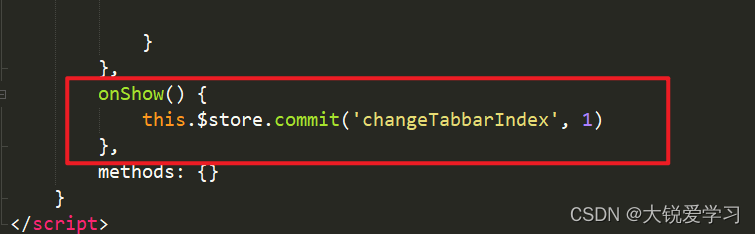
以上配置好后,那就在每一个跳转页配一下代码,作用是用来更store中的changgeTabbarIndex的值,也就是确保页面跳转后,图标选中你所点击的那个页面,我这里每个页面都配置了一下。代码如下:
onShow() {this.$store.commit('changeTabbarIndex', 1)},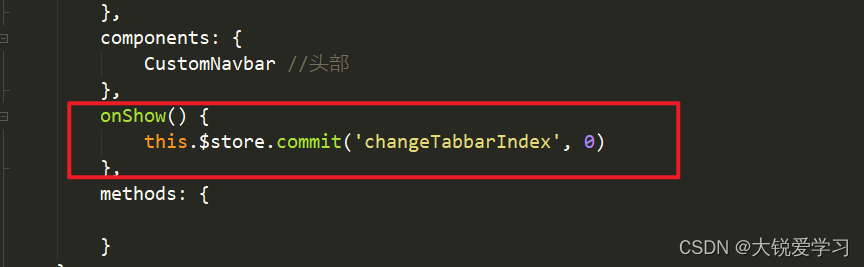
第三步:安装配置vuex
首先说为什么要安装vuex,因为通过vuex来实现组件和组件之间数据传递,当你点击不同tabBar来回切换的时候把对应的值存在store中。
安装命令:npm install vuex --save
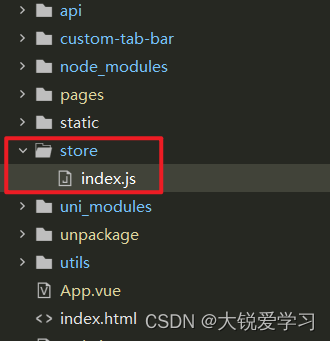
配置vuex:项目根目录下新建 store/index.js文件,代码如下:
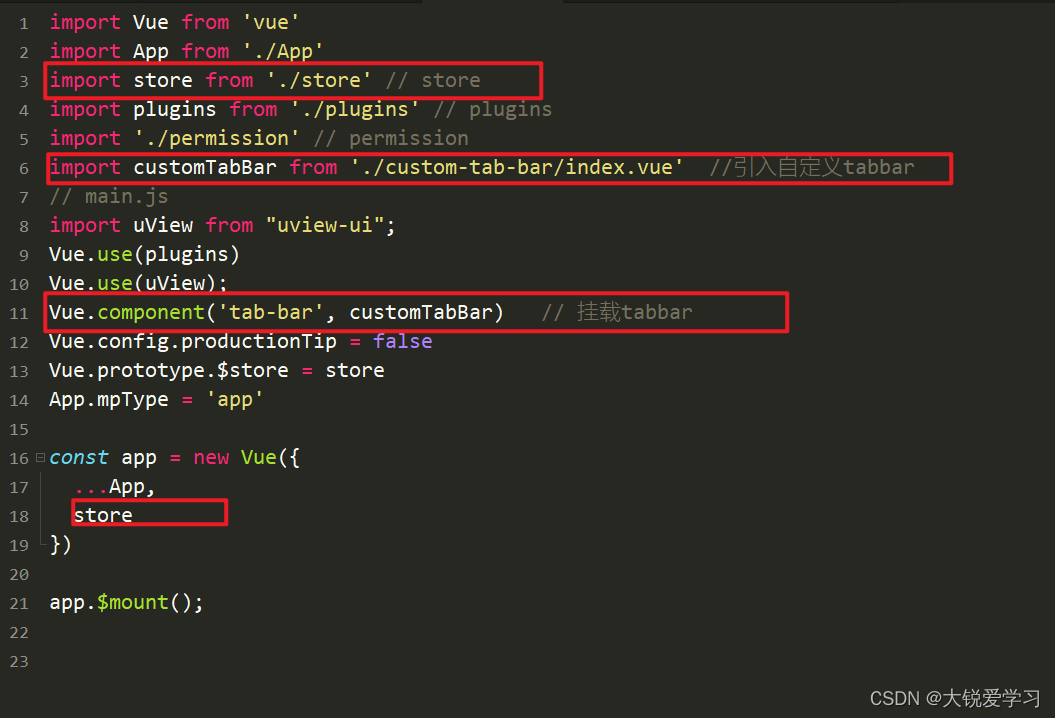
import {createStore} from 'vuex'const store = createStore({//全局状态state: {tabbarIndex: 0,},//同步的方法,commitmutations: {changeTabbarIndex(state, index) {state.tabbarIndex = index;console.log('uvexIndex',state.tabbarIndex);}},//异步的方法 dispatchactions: {}})export default store第四步:配置主入口文件
到这里就已经完成了,这是本人第一个小程序项目,希望能给新手们带来点帮助,欢迎大佬们前来批评指正。