Vue-router
路由的核心:改变URL,页面不会整体刷新
一、创建项目
1、使用vite创建项目
npm init vue@latest注意:根据需求,选择‘可选功能’完成安装(具体安装步骤vue.md)
2、项目结构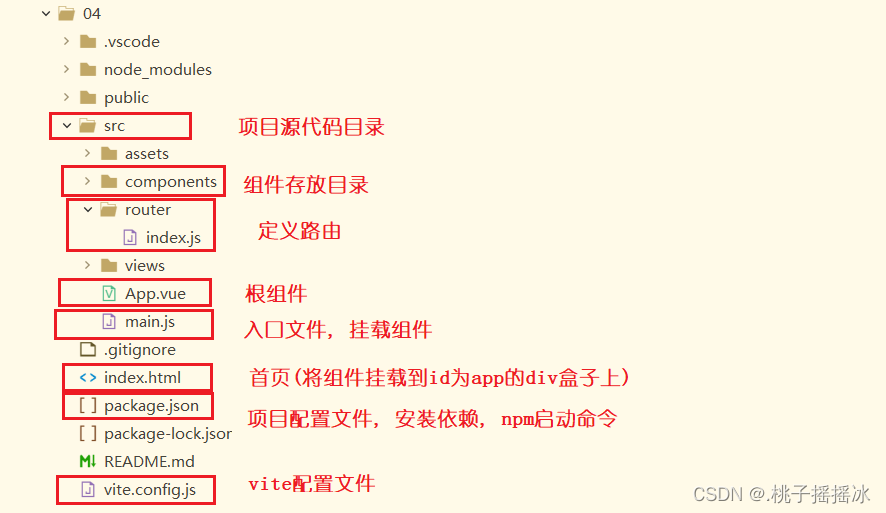
3、创建登录项目
<1>创建一个组件(登录页面),我们把这个组件称为单文件组件
位置:(规范情况下,将组件写到components目录下)
命名:大驼峰式命名规则
格式(三个部分):
<script></script><template></template><style scoped></style><2>Login.vue(登录组件)
<script>export default { // 响应式数据 data() 函数 data(){ return{ name:'', password:'', tip:'', // 设置标识 flag:'false' } }, // 方法书写在 methods 中 methods:{ sign(){ // 先判断用户名和密码是否为空 if(this.name === '' || this.password === ''){ // 如果为空的弹出提示 this.flag='false' this.tip='用户名和密码为空' } else if(this.name ==='admin' && this.password === '123456'){ this.flag='true', this.tip='' // 跳转页面 this.$router.push({ path:'/logins' }) } else { this.flag='false', this.tip='账号名或密码错误' } } }}</script><template> <div class="box1"> <div> <h1>Login</h1> <ul> <label> <li>用户:<input type="text" placeholder="请输入用户名" v-model.trim="name"></li> </label> <label> <li>密码:<input type="password" placeholder="请输入密码" v-model.trim="password"></li> </label> <li><button @click="sign">登录</button></li> <li v-show="flag" :class="{style1:flag}"> {{ this.tip }} </li> </ul> </div> </div></template>// scoped 样式的作用域在本组件中<style scoped>div.box1 { height: 50%; width: 100%; /* background-color: red; */}.style1{ color:red;} div.box1 div{ text-align: center; height: 50%; color:rgb(96, 207, 170); /* background-color: aqua; */ border: 1px solid #111; } /* 注意:使用弹性布局时,内部所有的元素都会变成内联块 */ div.box1 div ul li { margin-top: 10px; list-style: none; color:rgb(96, 207, 170) } div.box1 div ul li button { width: 35%; }</style>Tips:
1、使用弹性布局时,内部所有的元素都会变成内联块
2、在输入用户名和密码的时候,在表单元素上进行数据的双向绑定,v-model=‘响应式变量’,进行去除前后空格的修饰操作.trim
3、在按钮上取消默认行为(.prevent,相当于事件对象event.defaultPrevent()),并绑定点击事件,触发sign函数
相当于v-on=‘sign’ 简写为@click=‘sign’
4、响应式数据 模块是 data函数,返回一个对象
5、methods是一个对象,在对象内部书写各种函数
①书写函数sign函数
sign(){ // 先判断用户名和密码是否为空 if(this.name === '' || this.password === ''){ // 如果为空的弹出提示 this.flag='false' this.tip='用户名和密码为空' } else if(this.name ==='admin' && this.password === '123456'){ this.flag='true', this.tip='' // 跳转页面 this.$router.push({ path:'/logins' }) } else { this.flag='false', this.tip='账号名或密码错误' } }注意:
1、函数中获取响应式数据需要使用this获取
2、通过一个标识来判断提示信息是否弹出,使用v-show判断(注意:v-if和v-show的区别)
-------v-if(判断时,不断的销毁重建)
-------v-show(相当于使用display:none)
3、用户名和密码正确,进行跳转页面
②页面的跳转
使用路由router进行页面的跳转:用法:this.$router (路由实例)
this.$router.push()或replace()方法
启动项目,打开页面,直接进入login页面
**方式一:**将Login组件作为App.vue的子组件
在APP.vue中引入Login组件,并注册
<script>import Login from './components/Login.vue'export default { // 参数是对象 components: {Login},}</script><template> // 组件一般都是大驼峰式,和html标签区分<Login></Login></template>在使用时,将原有的所有样式都清除(src->assets->main.css)
启动项目,打开前端页面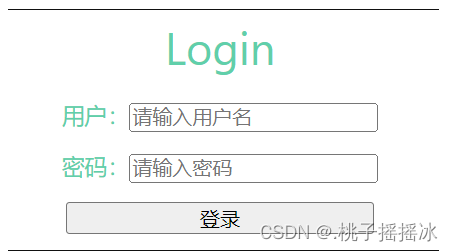
问题:在地址栏中输入任何内容,都会跳转到登录页面
**原因:**因为我们把Login组件作为了App.vue中模板的内容,App.vue是根组件,所以当我们的路径发生变化时,只会显示Login组件。我们所使用的this.$router.push就会失效,导致跳转不成功。
补充知识点:路由(router)
路由:是组件和路径的一一映射关系
位置:我们将路由再写(src->router->路由名称)
①创建路由
创建路由对象,通过createRouter函数创建,首先引入方法
import { createRouter, createWebHashHistory } from "vue-router";通过createRouter函数创建路由
// 创建路由实例const Router = createRouter({ // 模式有两种:createWebHashHistory()--路径中含有#,createWebHistory() history: createWebHashHistory(), // 将每个路由映射到对应的组件 routes: [ { path:'/logins', // 路径 name:'logins', component:LoginFirst // 组件--当访问'/'时就会显示LoginFirst组件中的内容 } ]});要使用LoginFirst组件就需要引入组件
import LoginFirst from '../components/login/LoginFirst.vue'将路由导出
export default Router使用路由,在main.js中引入路由,使用路由
import Router from '../src/router/Router'app.use(Router)通过对路由知识的补充,我们能够充分理解到方法一的问题,为解决这个问题,我们使用方式二
**方式二:**应该要有路由显示的位置,但是上面没有,所以我们需要指定区域显示路由,在App.vue中中使用显示我们的路由,也可以使用
<script>import Login from './components/Login.vue'export default { // 参数是对象 components: {Login},}</script><template> // 显示路由的区域 <RouterView></RouterView></template>我们使用的是显示路由,所以登录的组件(Login.vue)也需要和路径进行一一对应
因为我们需要打开页面就进入Login组件,所以我们可以将路径设置为‘/’或者‘/login’
// 创建路由实例const Router = createRouter({ history: createWebHashHistory(), // 将每个路由映射到对应的组件 routes: [ { path:'/', // 设置别名 alias:'/login' component:Login }, { path:'/logins', name:'logins', component:LoginFirst } ]});当然Login组件也需要引用
import Login from '../components/Login.vue'但是,输入路径不对时,出现空白。用户体验不好,所以当输入别的路径时,出现404NotFound。同样的我们在路由中进行设置
import { createRouter, createWebHashHistory } from "vue-router";import NotFound from '../components/test/NotFound.vue'import LoginFirst from '../components/login/LoginFirst.vue'import Login from '../components/Login.vue'// 创建路由实例const Router = createRouter({ history: createWebHashHistory(), // 将每个路由映射到对应的组件 routes: [ // 404 { path: '/:paths(.*)*', component: NotFound }, { path:'/', component:Login }, { path:'/logins', name:'logins', component:LoginFirst } ]});export default Router当路径不正确时,出现NotFound组件。简单的写一个404页面。
<script></script><template> <div> 404 NotFout </div></template><style></style>详细解释匹配404路径知识:
{ path: '/:path(.*)*', component: NotFound},将所有匹配到的路径存放在 $route.params.path 下, 将非法路径的所有部分作为参数
我们使用$route.params.path获取动态路由参数
<template> <div> 404 NotFout {{ this.$route.params.path }} </div></template>区别:
/:paths(.*):如果是这样书写的,意思是:将/后所有的路径放入一个字符串中
![[外链图片转存失败,源站可能有防盗链机制,建议将图片保存下来直接上传(img-fBBnvpIT-1677066821432)(C:\Users\Administrator\AppData\Roaming\Typora\typora-user-images\image-20230221113043609.png)]](http://zhangshiyu.com/zb_users/upload/2023/05/20230504134502168317910278496.png)
/:paths(.*)*:如果是这样书写的,意思是:将/后所有路径,以/分割,将分割的内容,放入数组中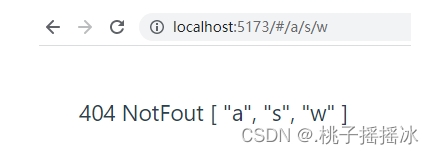
4、首页(登录进去后的页面)
<1>设计页面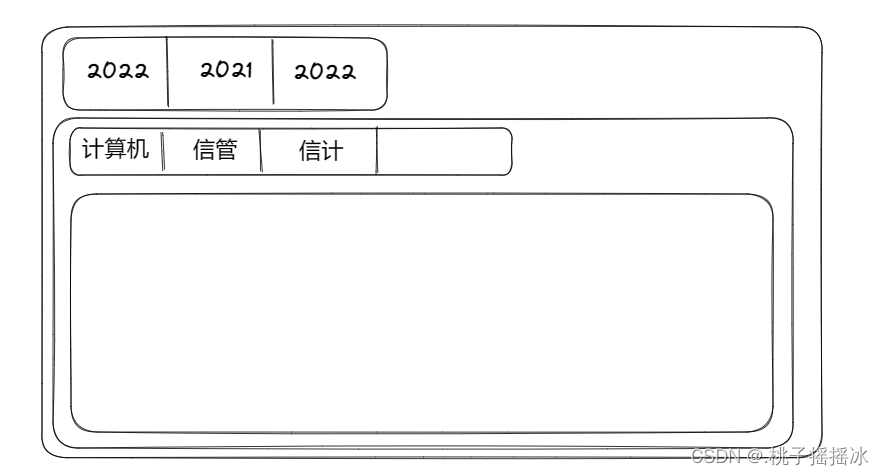
注意:这里就需要路由相关知识了
<2>创建路由
①一级标签可以做成超链接(a链接),但是点击a标签会进行整个页面的刷新,性能低。我们需要点击时,只刷新渲染局部。(改变地址栏路径,页面不会重新刷新)
通过<router-link to=''></router-link> 来实现
②我们修改LoginFirst.vue组件(只导了template部分的代码)
<template> <div class="box1"> <ul> <router-link to="/grade2022"><li>2022级</li></router-link> <router-link to="/grade2021"><li>2021级</li></router-link> <router-link to="/grade2020"><li>2020级</li></router-link> </ul> // 显示区 <router-view></router-view> </div></template>提示:当点击2022时,会在地址栏中显示/grade2022地址,同时,/grade2022会对应一个组件,因此,需要在路由中设置路径与组件的映射
③在路由(Router)中设置映射
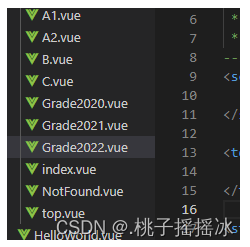
创建三个Grade组件
在路由中引入,在完成路径和组件的映射
发现问题?组件太多了,三个组件的模板基本相同,只是数据不同。因此可以写一个组件,复用组件进行传参。
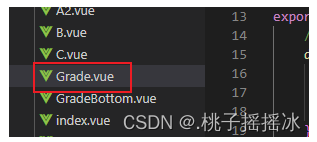
代码优化:
<1>创建一个Grade组件,显示参数
<2>在路由中引入Grade
<3>配置映射,并传参
<4>修改router-link to 中的路径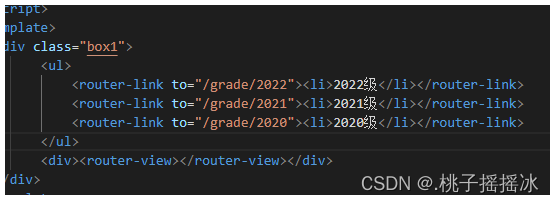
二、完善需求
1、发现问题:
当路径地址为/grade/2022时,Grade组件显示在App.vue中的区域中,但是我们的需求是想要Grade组件中的内容显示在LoginFirst组件列表的下方。
解决方法:路由的嵌套
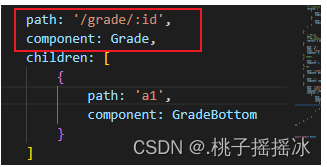
<1>修改路由(我这里嵌套了三个路由—Login)
{ path: '/logins', name: 'logins', component: LoginFirst, children: [ { path: 'grade/:id', component: Grade, children: [ { path: 'a1', component: GradeBottom } ] } ] },注意:
1>使用children关键字,值为数组,数组中每一个元素都是路径与组件的映射
2>子路由中路径开始的地方不应该有/
<2>修改路径
![[外链图片转存失败,源站可能有防盗链机制,建议将图片保存下来直接上传(img-Z0tfLB4Y-1677066821435)(C:\Users\Administrator\AppData\Roaming\Typora\typora-user-images\image-20230221211714963.png)]](http://zhangshiyu.com/zb_users/upload/2023/05/20230504134502168317910296747.png)
访问结果:
![[外链图片转存失败,源站可能有防盗链机制,建议将图片保存下来直接上传(img-VLHCXrMZ-1677066821436)(C:\Users\Administrator\AppData\Roaming\Typora\typora-user-images\image-20230222192337360.png)]](http://zhangshiyu.com/zb_users/upload/2023/05/20230504134503168317910370309.png)
<3>修饰样式
LoginFirst.vue
<script></script><template> <div class="box1"> <ul> <!-- class="router-link-active" 设置点击产生高亮行为 --> <router-link :to="{name:'grade',params:{id:1}}"><li>2022级</li></router-link> <router-link :to="{name:'grade',params:{id:2}}"><li>2021级</li></router-link> <router-link :to="{name:'grade',params:{id:3}}"><li>2020级</li></router-link> </ul> <div><router-view></router-view></div> </div></template><style scoped> *{ margin: 0; padding: 0; } div.box1 ul li { display: inline-block; text-align: center; margin-left: 15px; width: 50px; height: 30px; line-height: 30px; background-color: rgb(228, 233, 233); list-style: none; } /* .router-link-active{ background-color:red; } */</style>Grade.vue
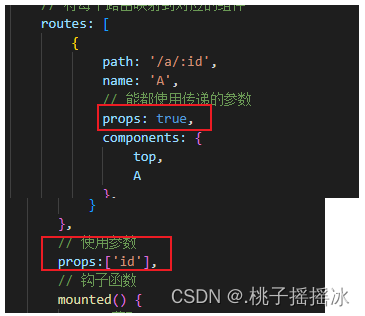
<script>// 导入数据import data from '../../Data'export default { // 定义一个数组接收数据 data() { return { list: [] } }, // 使用参数 props:['id'], // 钩子函数 mounted() { // 获取id const id = this.$route.params.id // 使用list接收数据,初始化 this.list = data.filter(item => item.id === id)[0].items }, updated() { const id = this.$route.params.id; // 更新时也要更新list this.list = data.filter(item => item.id === id)[0].items }}</script><template> <!-- <div class="topBox"> Grade---{{ this.$route.params.id }} </div> --> <div class="divBox"> <router-link v-for='item of list' :to="{ name: 'school', params: { id } }">{{ item }}</router-link> <router-view></router-view> </div></template><style scoped>/* div.topBox { text-align: center;} */a { margin-left: 10px; color:rgb(81, 87, 82); font-size:14px}</style><4>显示二级标签(就是路由的嵌套)
{ path: '/logins', name: 'logins', // 当地址为/main时也是登录页面 // 使用别名 alias:'/main', // 使用重定向 // redirect:{name:'logins'}, component: LoginFirst, children: [ { path: 'grade/:id', name:'grade', // 方便传参数 props:true, component: Grade, children: [ { path: 'a1', name:'school', component: GradeBottom } ] } ] },效果图:
![[外链图片转存失败,源站可能有防盗链机制,建议将图片保存下来直接上传(img-K6oD7fKS-1677066821436)(C:\Users\Administrator\AppData\Roaming\Typora\typora-user-images\image-20230222193105881.png)]](http://zhangshiyu.com/zb_users/upload/2023/05/20230504134503168317910397354.png)
<5>为了让路由的使用更加方便,我们可以给路由设置名称(ps:前面的路由代码中已设置是使用了)
<6>我们设置了名称后,就可以在router-link中使用了,传递参数方便
<router-link :to="{name:'grade',params:{id:1}}"><li>2022级</li></router-link> <router-link :to="{name:'grade',params:{id:2}}"><li>2021级</li></router-link> <router-link :to="{name:'grade',params:{id:3}}"><li>2020级</li></router-link><7>在push(replace)中使用
this.$router.replace({name:'logins'})tip:在编程式导航中,可以使用replace替换当前位置,它的作用类似于router.push,唯一的不同是,它在导航时不会向history添加新记录
2、新的需求:
当点击一级菜单时,显示对应的二级菜单,二级菜单各不相同。
<1>如何在组件中获取参数?
通过this.$route.param来获取参数
<2>在Grade组件中获取参数,根据一级菜单不同,加载对应的二级菜单,因此,需要使用生命周期函数mounted页面加载完成后的事情(初始化的工作一般都在此函数中运行)
// 定义一个数组接收数据 data() { return { list: [] } }, // 使用参数 props:['id'], // 钩子函数 mounted() { // 获取id const id = this.$route.params.id // 使用list接收数据,初始化 this.list = data.filter(item => item.id === id)[0].items },注意:data是声明的假数据,真实的数据需要从后台获取
data.js假数据:
// 数据const data = [ { id:'1', items:['计算机科学与技术','信息管理','信息与计算'] }, { id:'2', items:['人工智能','计算机科学','大数据'] }, { id:'3', items:['云存储','算法','信息与计算'] }];export default data<3>参数更新后也要对数据进行更新,使用updated函数
updated() { const id = this.$route.params.id; // 更新时也要更新list this.list = data.filter(item => item.id === id)[0].items }<4>动态渲染
<template> <!-- <div class="topBox"> Grade---{{ this.$route.params.id }} </div> --> <div class="divBox"> <router-link v-for='item of list' :to="{ name: 'school', params: { id } }">{{ item }}</router-link> <router-view></router-view> </div></template><5>为了方便使用参数,可以将props(路径中的参数)传递给组件。