✅作者简介:人工智能专业本科在读,喜欢计算机与编程,写博客记录自己的学习历程。
?个人主页:小嗷犬的博客
?个人信条:为天地立心,为生民立命,为往圣继绝学,为万世开太平。
?本文内容:Pytorch 基于ResNet-18的服饰识别(使用Fashion-MNIST数据集)
更多内容请见?
本文目录
介绍1.导入相关库2.定义 ResNet-18 网络结构3.下载并配置数据集和加载器4.定义训练函数5.训练模型(或加载模型)6.可视化展示7.预测图
介绍
使用到的库:
Pytorchmatplotlibd2ld2l 为斯坦福大学李沐教授打包的一个库,其中包含一些深度学习中常用的函数方法。
安装:
pip install matplotlibpip install d2lPytorch 环境请自行配置。
数据集:
Fashion-MNIST 是一个替代 MNIST 手写数字集的图像数据集。 它是由 Zalando(一家德国的时尚科技公司)旗下的研究部门提供。其涵盖了来自 10 种类别的共 7 万个不同商品的正面图片。
Fashion-MNIST 的大小、格式和训练集/测试集划分与原始的 MNIST 完全一致。60000/10000 的训练测试数据划分,28x28 的灰度图片。你可以直接用它来测试你的机器学习和深度学习算法性能,且不需要改动任何的代码。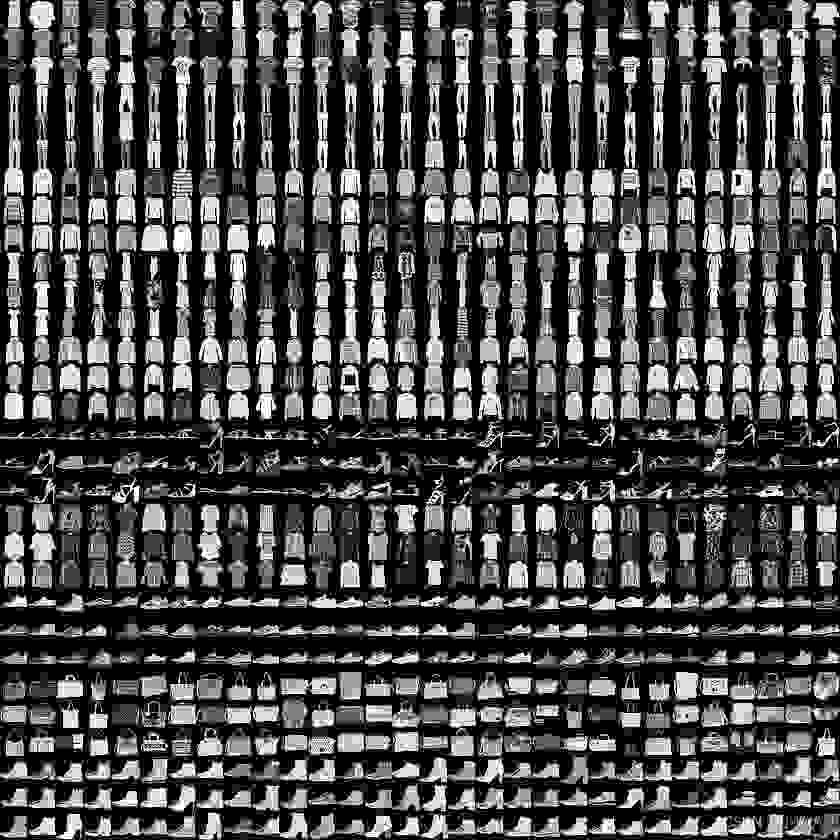
下载地址:
本文使用 Pytorch 自动下载。
残差神经网络(ResNet) 是由微软研究院的 何恺明、张祥雨、任少卿、孙剑 等人提出的。ResNet 在 2015 年的 ILSVRC(ImageNet Large Scale Visual Recognition Challenge)中取得了冠军。
残差神经网络 的主要贡献是发现了“退化现象(Degradation)”,并针对退化现象发明了 “快捷连接(Shortcut connection)”,极大的消除了深度过大的神经网络训练困难问题。神经网络的“深度”首次突破了 100 层、最大的神经网络甚至超过了 1000 层。
正常块(左)与残差块(右):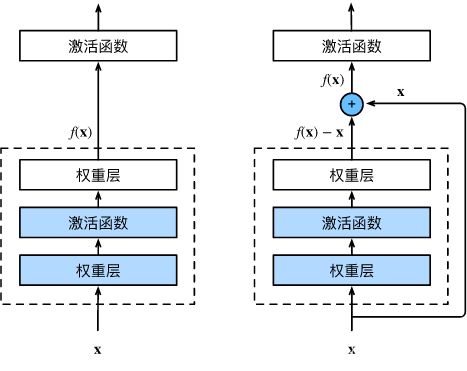
两种具体结构(包含以及不包含 1*1 卷积层的残差块):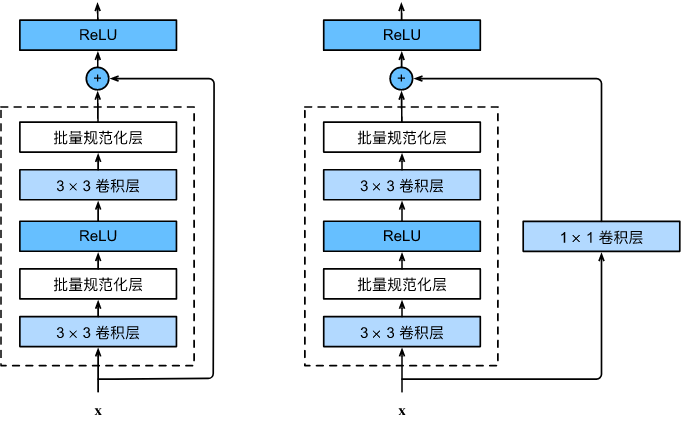
ResNet-18网络结构: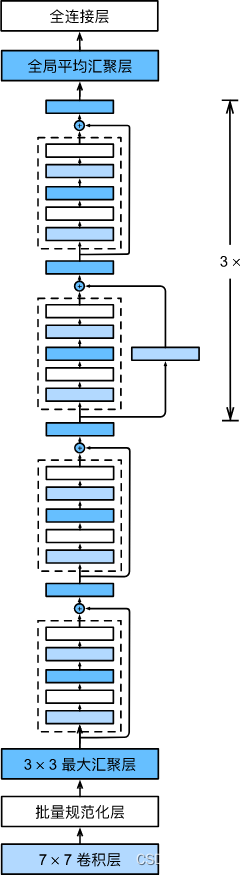
1.导入相关库
import torchfrom torch import nnfrom torch.nn import functional as Ffrom torch.utils.data import DataLoaderfrom torchvision import datasets, transformsimport matplotlib.pyplot as pltfrom d2l import torch as d2l2.定义 ResNet-18 网络结构
class Residual(nn.Module): # 残差块 def __init__(self, input_channels, num_channels, use_1x1conv=False, strides=1): super().__init__() self.conv1 = nn.Conv2d(input_channels, num_channels, kernel_size=3, padding=1, stride=strides) self.conv2 = nn.Conv2d(num_channels, num_channels, kernel_size=3, padding=1) if use_1x1conv: self.conv3 = nn.Conv2d(input_channels, num_channels, kernel_size=1, stride=strides) else: self.conv3 = None self.bn1 = nn.BatchNorm2d(num_channels) self.bn2 = nn.BatchNorm2d(num_channels) def forward(self, X): Y = F.relu(self.bn1(self.conv1(X))) Y = self.bn2(self.conv2(Y)) if self.conv3: X = self.conv3(X) Y += X return F.relu(Y)# ResNet-18b1 = nn.Sequential(nn.Conv2d(1, 64, kernel_size=7, stride=2, padding=3), nn.BatchNorm2d(64), nn.ReLU(), nn.MaxPool2d(kernel_size=3, stride=2, padding=1))def resnet_block(input_channels, num_channels, num_residuals, first_block=False): blk = [] for i in range(num_residuals): if i == 0 and not first_block: blk.append(Residual(input_channels, num_channels, use_1x1conv=True, strides=2)) else: blk.append(Residual(num_channels, num_channels)) return blkb2 = nn.Sequential(*resnet_block(64, 64, 2, first_block=True))b3 = nn.Sequential(*resnet_block(64, 128, 2))b4 = nn.Sequential(*resnet_block(128, 256, 2))b5 = nn.Sequential(*resnet_block(256, 512, 2))net = nn.Sequential(b1, b2, b3, b4, b5, nn.AdaptiveAvgPool2d((1, 1)), nn.Flatten(), nn.Linear(512, 10))3.下载并配置数据集和加载器
# 下载并配置数据集trans = transforms.Compose( [transforms.Resize((96, 96)), transforms.ToTensor()])train_dataset = datasets.FashionMNIST(root=r'E:\Deep Learning\dataset', train=True, transform=trans, download=True)test_dataset = datasets.FashionMNIST(root=r'E:\Deep Learning\dataset', train=False, transform=trans, download=True)# 配置数据加载器batch_size = 64train_loader = DataLoader(dataset=train_dataset, batch_size=batch_size, shuffle=True)test_loader = DataLoader(dataset=test_dataset, batch_size=batch_size, shuffle=True)4.定义训练函数
训练完成后会保存模型,可以修改模型的保存路径。
def train(net, train_iter, test_iter, epochs, lr, device): def init_weights(m): if type(m) == nn.Linear or type(m) == nn.Conv2d: nn.init.xavier_uniform_(m.weight) net.apply(init_weights) print(f'Training on:[{device}]') net.to(device) optimizer = torch.optim.SGD(net.parameters(), lr=lr) loss = nn.CrossEntropyLoss() timer, num_batches = d2l.Timer(), len(train_iter) for epoch in range(epochs): # 训练损失之和,训练准确率之和,样本数 metric = d2l.Accumulator(3) net.train() for i, (X, y) in enumerate(train_iter): timer.start() optimizer.zero_grad() X, y = X.to(device), y.to(device) y_hat = net(X) l = loss(y_hat, y) l.backward() optimizer.step() with torch.no_grad(): metric.add(l * X.shape[0], d2l.accuracy(y_hat, y), X.shape[0]) timer.stop() train_l = metric[0] / metric[2] train_acc = metric[1] / metric[2] if (i + 1) % (num_batches // 30) == 0 or i == num_batches - 1: print(f'Epoch: {epoch+1}, Step: {i+1}, Loss: {train_l:.4f}') test_acc = d2l.evaluate_accuracy_gpu(net, test_iter) print( f'Train Accuracy: {train_acc*100:.2f}%, Test Accuracy: {test_acc*100:.2f}%') print(f'{metric[2] * epochs / timer.sum():.1f} examples/sec ' f'on: [{str(device)}]') torch.save(net.state_dict(), f"E:\\Deep Learning\\model\\ResNet-18_Fashion-MNIST_Epoch{epochs}_Accuracy{test_acc*100:.2f}%.pth")5.训练模型(或加载模型)
如果环境正确配置了CUDA,则会由GPU进行训练。
加载模型需要根据自身情况修改路径。
epochs, lr = 10, 0.05device = torch.device("cuda:0" if torch.cuda.is_available() else "cpu")train(net, train_loader, test_loader, epochs, lr, device)# 加载保存的模型# net.load_state_dict(torch.load(r"E:\Deep Learning\model\ResNet-18_Fashion-MNIST_Epoch10_Accuracy92.00%.pth"))6.可视化展示
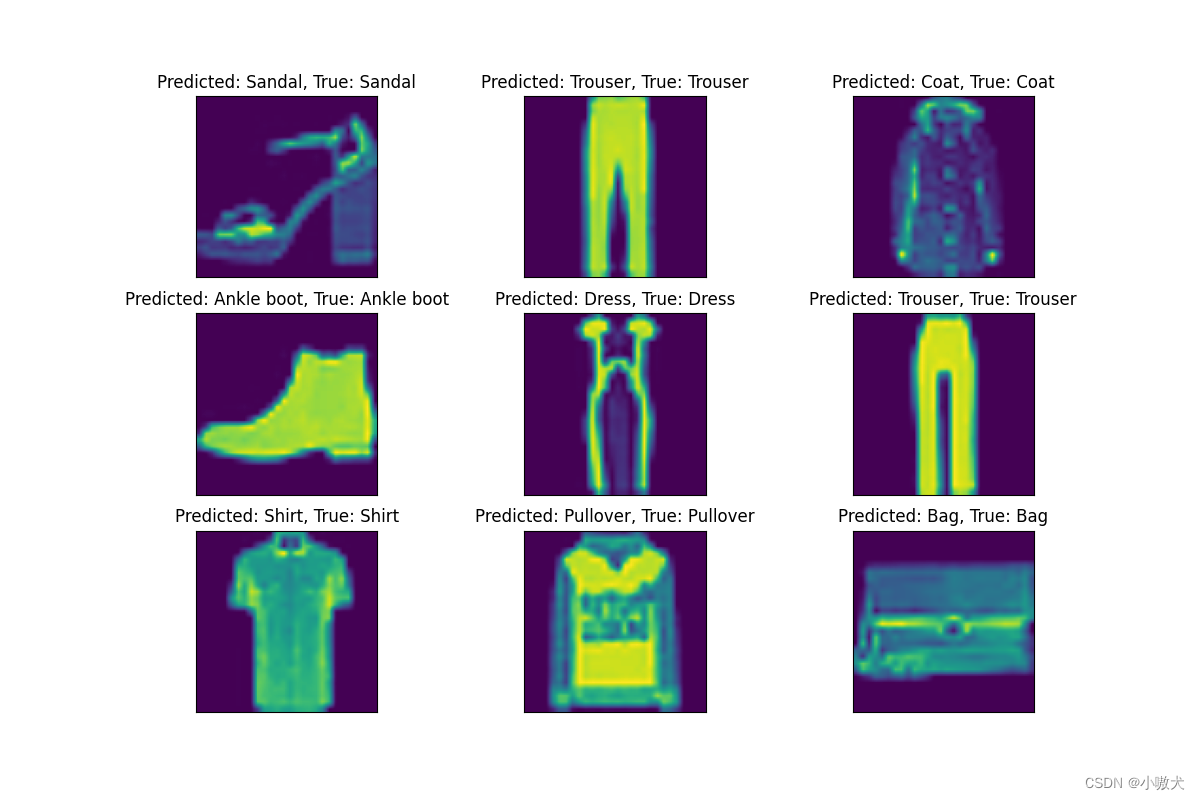
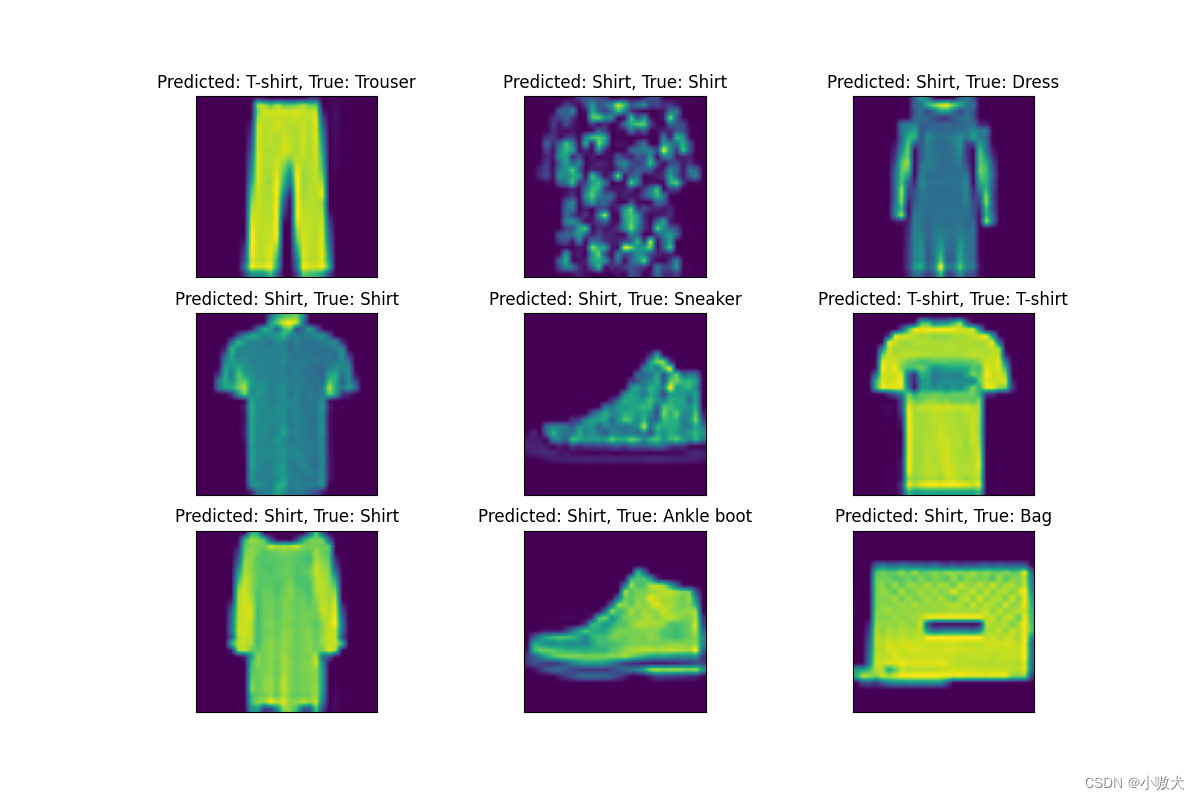
def show_predict(): # 预测结果图像可视化 net.to(device) loader = DataLoader(dataset=test_dataset, batch_size=1, shuffle=True) plt.figure(figsize=(12, 8)) name = ['T-shirt', 'Trouser', 'Pullover', 'Dress', 'Coat', 'Sandal', 'Shirt', 'Sneaker', 'Bag', 'Ankle boot'] for i in range(9): (images, labels) = next(iter(loader)) images = images.to(device) labels = labels.to(device) outputs = net(images) _, predicted = torch.max(outputs.data, 1) title = f"Predicted: {name[int(predicted[0])]}, True: {name[int(labels[0])]}" plt.subplot(3, 3, i + 1) plt.imshow(images.cpu()[0].squeeze()) plt.title(title) plt.xticks([]) plt.yticks([]) plt.show()show_predict()7.预测图
结果来自训练轮数epochs=10,准确率Accuracy=92.00%的 ResNet-18 模型: