一文详解C++多线程
文章目录
1. 多线程1.1 多进程与多线程1.2 多线程理解1.3 创建线程1.4 join与detach方式(1)join举例(2)detach举例 1.5 this_thread 2. mutex2.1 lock与unlock2.2 lock_guard2.3 unique_lock 3. condition_variable3.1 wait3.2 wait_for 4. 线程池4.1 概念4.2 线程池的实现
1. 多线程
传统的C++(C++11之前)中并没有引入线程这个概念,在C++11出来之前,如果我们想要在C++中实现多线程,需要借助操作系统平台提供的API,比如Linux的<pthread.h>,或者windows下的<windows.h> 。
C++11提供了语言层面上的多线程,包含在头文件<thread>中。它解决了跨平台的问题,提供了管理线程、保护共享数据、线程间同步操作、原子操作等类。C++11 新标准中引入了5个头文件来支持多线程编程,如下图所示: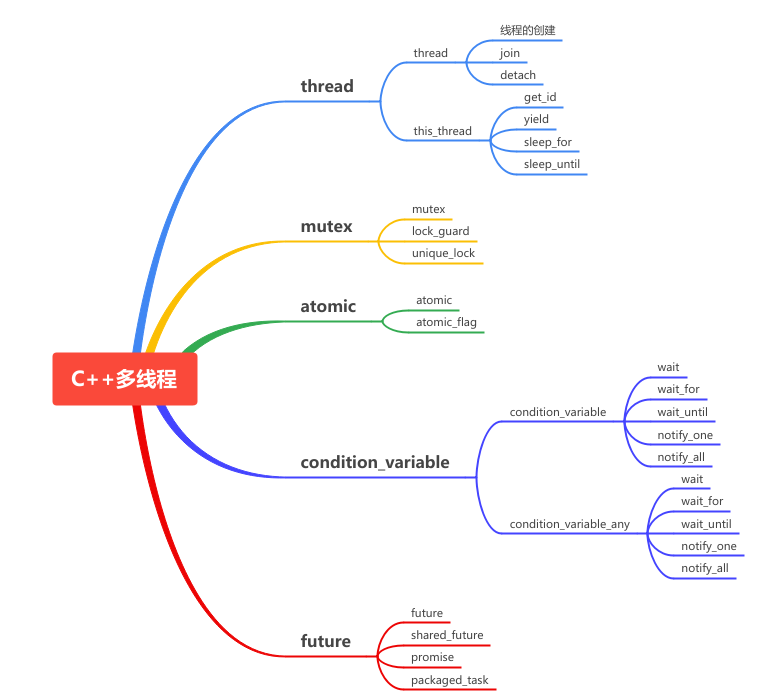
1.1 多进程与多线程
多进程并发使用多进程并发是将一个应用程序划分为多个独立的进程(每个进程只有一个线程),这些独立的进程间可以互相通信,共同完成任务。由于操作系统对进程提供了大量的保护机制,以避免一个进程修改了另一个进程的数据,使用多进程比多线程更容易写出安全的代码。但是这也造就了多进程并发的两个缺点:
比较复杂,要么就是速度较慢或者两者兼而有之。运行多个线程的开销很大,操作系统要分配很多的资源来对这些进程进行管理。 由于多个进程并发完成同一个任务时,不可避免的是:操作同一个数据和进程间的相互通信,上述的两个缺点也就决定了多进程的并发不是一个好的选择。
多线程并发指的是在同一个进程中执行多个线程。
优点:
有操作系统相关知识的应该知道,线程是轻量级的进程,每个线程可以独立的运行不同的指令序列,但是线程不独立的拥有资源,依赖于创建它的进程而存在。也就是说,同一进程中的多个线程共享相同的地址空间,可以访问进程中的大部分数据,指针和引用可以在线程间进行传递。这样,同一进程内的多个线程能够很方便的进行数据共享以及通信,也就比进程更适用于并发操作。
缺点:
由于缺少操作系统提供的保护机制,在多线程共享数据及通信时,就需要程序员做更多的工作以保证对共享数据段的操作是以预想的操作顺序进行的,并且要极力的避免死锁(deadlock)。
摘自《C++ 并发编程》
1.2 多线程理解
单CPU内核的多个线程。一个时间片运行一个线程的代码,并不是真正意义的并行计算。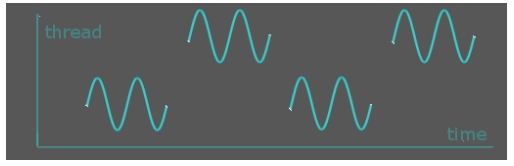
可以做到真正的并行计算。
1.3 创建线程
创建线程很简单,只需要把函数添加到线程当中即可。
形式1:std::thread myThread ( thread_fun);//函数形式为void thread_fun()myThread.join();//同一个函数可以代码复用,创建多个线程std::thread myThread ( thread_fun(100));myThread.join();//函数形式为void thread_fun(int x)//同一个函数可以代码复用,创建多个线程std::thread (thread_fun,1).detach();//直接创建线程,没有名字//函数形式为void thread_fun(int x)使用g++编译下列代码的方式:g++ test.cc -o test -l pthread
#include <iostream>#include <thread>using namespace std;void thread_1(){ cout<<"子线程1"<<endl;}void thread_2(int x){ cout<<"x:"<<x<<endl; cout<<"子线程2"<<endl;}int main(){ thread first ( thread_1); // 开启线程,调用:thread_1() thread second (thread_2,100); // 开启线程,调用:thread_2(100) //thread third(thread_2,3);//开启第3个线程,共享thread_2函数。 std::cout << "主线程\n"; first.join(); //必须说明添加线程的方式 second.join(); std::cout << "子线程结束.\n";//必须join完成 return 0;}1.4 join与detach方式
当线程启动后,一定要在和线程相关联的thread销毁前,确定以何种方式等待线程执行结束。比如上例中的join。
detach方式,启动的线程自主在后台运行,当前的代码继续往下执行,不等待新线程结束。join方式,等待启动的线程完成,才会继续往下执行。可以使用joinable判断是join模式还是detach模式。
if (myThread.joinable()) foo.join();(1)join举例
下列代码中,join后面的代码不会被执行,除非子线程结束。
#include <iostream>#include <thread>using namespace std;void thread_1(){ while(1) { //cout<<"子线程1111"<<endl; }}void thread_2(int x){ while(1) { //cout<<"子线程2222"<<endl; }}int main(){ thread first ( thread_1); // 开启线程,调用:thread_1() thread second (thread_2,100); // 开启线程,调用:thread_2(100) first.join(); // pauses until first finishes 这个操作完了之后才能destroyed second.join(); // pauses until second finishes//join完了之后,才能往下执行。 while(1) { std::cout << "主线程\n"; } return 0;}(2)detach举例
下列代码中,主线程不会等待子线程结束。如果主线程运行结束,程序则结束。
#include <iostream>#include <thread>using namespace std;void thread_1(){ while(1) { cout<<"子线程1111"<<endl; }}void thread_2(int x){ while(1) { cout<<"子线程2222"<<endl; }}int main(){ thread first ( thread_1); // 开启线程,调用:thread_1() thread second (thread_2,100); // 开启线程,调用:thread_2(100) first.detach(); second.detach(); for(int i = 0; i < 10; i++) { std::cout << "主线程\n"; } return 0;}1.5 this_thread
this_thread是一个类,它有4个功能函数,具体如下:
| 函数 | 使用 | 说明 |
|---|---|---|
| get_id | std::this_thread::get_id() | 获取线程id |
| yield | std::this_thread::yield() | 放弃线程执行,回到就绪状态 |
| sleep_for | std::this_thread::sleep_for(std::chrono::seconds(1)); | 暂停1秒 |
| sleep_until | 如下 | 一分钟后执行吗,如下 |
using std::chrono::system_clock;std::time_t tt = system_clock::to_time_t(system_clock::now());struct std::tm * ptm = std::localtime(&tt);cout << "Waiting for the next minute to begin...\n";++ptm->tm_min; //加一分钟ptm->tm_sec = 0; //秒数设置为0//暂停执行,到下一整分执行this_thread::sleep_until(system_clock::from_time_t(mktime(ptm)));2. mutex
mutex头文件主要声明了与互斥量(mutex)相关的类。mutex提供了4种互斥类型,如下表所示。
| 类型 | 说明 |
|---|---|
| std::mutex | 最基本的 Mutex 类。 |
| std::recursive_mutex | 递归 Mutex 类。 |
| std::time_mutex | 定时 Mutex 类。 |
| std::recursive_timed_mutex | 定时递归 Mutex 类。 |
std::mutex 是C++11 中最基本的互斥量,std::mutex 对象提供了独占所有权的特性——即不支持递归地对 std::mutex 对象上锁,而 std::recursive_lock 则可以递归地对互斥量对象上锁。
2.1 lock与unlock
mutex常用操作:
lock():资源上锁unlock():解锁资源trylock():查看是否上锁,它有下列3种类情况:(1)未上锁返回false,并锁住;
(2)其他线程已经上锁,返回true;
(3)同一个线程已经对它上锁,将会产生死锁。
死锁:是指两个或两个以上的进程在执行过程中,由于竞争资源或者由于彼此通信而造成的一种阻塞的现象,若无外力作用,它们都将无法推进下去。此时称系统处于死锁状态或系统产生了死锁,这些永远在互相等待的进程称为死锁进程。
下面结合实例对lock和unlock进行说明。
同一个mutex变量上锁之后,一个时间段内,只允许一个线程访问它。例如:
#include <iostream> // std::cout#include <thread> // std::thread#include <mutex> // std::mutexstd::mutex mtx; // mutex for critical sectionvoid print_block (int n, char c) { // critical section (exclusive access to std::cout signaled by locking mtx): mtx.lock(); for (int i=0; i<n; ++i) { std::cout << c; } std::cout << '\n'; mtx.unlock();}int main (){ std::thread th1 (print_block,50,'*');//线程1:打印* std::thread th2 (print_block,50,'$');//线程2:打印$ th1.join(); th2.join(); return 0;}输出:
**************************************************$$$$$$$$$$$$$$$$$$$$$$$$$$$$$$$$$$$$$$$$$$$$$$$$$$如果是不同mutex变量,因为不涉及到同一资源的竞争,所以下列代码运行可能会出现交替打印的情况,或者另一个线程可以修改共同的全局变量!!!:
#include <iostream> // std::cout#include <thread> // std::thread#include <mutex> // std::mutexstd::mutex mtx_1; // mutex for critical sectionstd::mutex mtx_2; // mutex for critical sectionint test_num = 1;void print_block_1 (int n, char c) { // critical section (exclusive access to std::cout signaled by locking mtx): mtx_1.lock(); for (int i=0; i<n; ++i) { //std::cout << c; test_num = 1; std::cout<<test_num<<std::endl; } std::cout << '\n'; mtx_1.unlock();}void print_block_2 (int n, char c) { // critical section (exclusive access to std::cout signaled by locking mtx): mtx_2.lock(); test_num = 2; for (int i=0; i<n; ++i) { //std::cout << c; test_num = 2; std::cout<<test_num<<std::endl; } mtx_2.unlock();}int main (){ std::thread th1 (print_block_1,10000,'*'); std::thread th2 (print_block_2,10000,'$'); th1.join(); th2.join(); return 0;}2.2 lock_guard
创建lock_guard对象时,它将尝试获取提供给它的互斥锁的所有权。当控制流离开lock_guard对象的作用域时,lock_guard析构并释放互斥量。
lock_guard的特点:
创建即加锁,作用域结束自动析构并解锁,无需手工解锁不能中途解锁,必须等作用域结束才解锁不能复制代码举例
#include <thread>#include <mutex>#include <iostream>int g_i = 0;std::mutex g_i_mutex; // protects g_i,用来保护g_ivoid safe_increment(){ const std::lock_guard<std::mutex> lock(g_i_mutex); ++g_i; std::cout << std::this_thread::get_id() << ": " << g_i << '\n'; // g_i_mutex自动解锁}int main(){std::cout << "main id: " <<std::this_thread::get_id()<<std::endl; std::cout << "main: " << g_i << '\n'; std::thread t1(safe_increment); std::thread t2(safe_increment); t1.join(); t2.join(); std::cout << "main: " << g_i << '\n';}说明:
该程序的功能为,每经过一个线程,g_i 加1。因为涉及到共同资源g_i ,所以需要一个共同mutex:g_i_mutex。main线程的id为1,所以下次的线程id依次加1。2.3 unique_lock
简单地讲,unique_lock 是 lock_guard 的升级加强版,它具有 lock_guard 的所有功能,同时又具有其他很多方法,使用起来更强灵活方便,能够应对更复杂的锁定需要。
unique_lock的特点:
创建时可以不锁定(通过指定第二个参数为std::defer_lock),而在需要时再锁定可以随时加锁解锁作用域规则同 lock_grard,析构时自动释放锁不可复制,可移动条件变量需要该类型的锁作为参数(此时必须使用unique_lock)所有 lock_guard 能够做到的事情,都可以使用 unique_lock 做到,反之则不然。那么何时使lock_guard呢?很简单,需要使用锁的时候,首先考虑使用 lock_guard,因为lock_guard是最简单的锁。
下面是代码举例:
#include <mutex>#include <thread>#include <iostream>struct Box { explicit Box(int num) : num_things{num} {} int num_things; std::mutex m;};void transfer(Box &from, Box &to, int num){ // defer_lock表示暂时unlock,默认自动加锁 std::unique_lock<std::mutex> lock1(from.m, std::defer_lock); std::unique_lock<std::mutex> lock2(to.m, std::defer_lock); //两个同时加锁 std::lock(lock1, lock2);//或者使用lock1.lock() from.num_things -= num; to.num_things += num; //作用域结束自动解锁,也可以使用lock1.unlock()手动解锁}int main(){ Box acc1(100); Box acc2(50); std::thread t1(transfer, std::ref(acc1), std::ref(acc2), 10); std::thread t2(transfer, std::ref(acc2), std::ref(acc1), 5); t1.join(); t2.join(); std::cout << "acc1 num_things: " << acc1.num_things << std::endl; std::cout << "acc2 num_things: " << acc2.num_things << std::endl;}说明:
该函数的作用是,从一个结构体中的变量减去一个num,加载到另一个结构体的变量中去。std::mutex m;在结构体中,mutex不是共享的。但是只需要一把锁也能锁住,因为引用传递后,同一把锁传给了两个函数。cout需要在join后面进行,要不然cout的结果不一定是最终算出来的结果。std::ref 用于包装按引用传递的值。std::cref 用于包装按const引用传递的值。3. condition_variable
condition_variable的头文件有两个variable类,一个是condition_variable,另一个是condition_variable_any。condition_variable必须结合unique_lock使用。condition_variable_any可以使用任何的锁。下面以condition_variable为例进行介绍。
condition_variable条件变量可以阻塞(wait、wait_for、wait_until)调用的线程直到使用(notify_one或notify_all)通知恢复为止。condition_variable是一个类,这个类既有构造函数也有析构函数,使用时需要构造对应的condition_variable对象,调用对象相应的函数来实现上面的功能。
| 类型 | 说明 |
|---|---|
| condition_variable | 构建对象 |
| 析构 | 删除 |
| wait | Wait until notified |
| wait_for | Wait for timeout or until notified |
| wait_until | Wait until notified or time point |
| notify_one | 解锁一个线程,如果有多个,则未知哪个线程执行 |
| notify_all | 解锁所有线程 |
| cv_status | 这是一个类,表示variable 的状态,如下所示 |
enum class cv_status { no_timeout, timeout };3.1 wait
当前线程调用 wait() 后将被阻塞(此时当前线程应该获得了锁(mutex),不妨设获得锁 lck),直到另外某个线程调用 notify_* 唤醒了当前线程。
在线程被阻塞时,该函数会自动调用 lck.unlock() 释放锁,使得其他被阻塞在锁竞争上的线程得以继续执行。另外,一旦当前线程获得通知(notified,通常是另外某个线程调用 notify_* 唤醒了当前线程),wait()函数也是自动调用 lck.lock(),使得lck的状态和 wait 函数被调用时相同。
代码示例:
#include <iostream> // std::cout#include <thread> // std::thread, std::this_thread::yield#include <mutex> // std::mutex, std::unique_lock#include <condition_variable> // std::condition_variablestd::mutex mtx;std::condition_variable cv;int cargo = 0;bool shipment_available() {return cargo!=0;}void consume (int n) { for (int i=0; i<n; ++i) { std::unique_lock<std::mutex> lck(mtx);//自动上锁 //第二个参数为false才阻塞(wait),阻塞完即unlock,给其它线程资源 cv.wait(lck,shipment_available); // consume: std::cout << cargo << '\n'; cargo=0; }}int main (){ std::thread consumer_thread (consume,10); for (int i=0; i<10; ++i) { //每次cargo每次为0才运行。 while (shipment_available()) std::this_thread::yield(); std::unique_lock<std::mutex> lck(mtx); cargo = i+1; cv.notify_one(); } consumer_thread.join();, return 0;}说明:
主线程中的while,每次在cargo=0才运行。每次cargo被置为0,会通知子线程unblock(非阻塞),也就是子线程可以继续往下执行。子线程中cargo被置为0后,wait又一次启动等待。也就是说shipment_available为false,则等待。3.2 wait_for
与std::condition_variable::wait() 类似,不过 wait_for可以指定一个时间段,在当前线程收到通知或者指定的时间 rel_time 超时之前,该线程都会处于阻塞状态。 而一旦超时或者收到了其他线程的通知,wait_for返回,剩下的处理步骤和 wait()类似。
template <class Rep, class Period> cv_status wait_for (unique_lock<mutex>& lck, const chrono::duration<Rep,Period>& rel_time);另外,wait_for 的重载版本的最后一个参数pred表示 wait_for的预测条件,只有当 pred条件为false时调用 wait()才会阻塞当前线程,并且在收到其他线程的通知后只有当 pred为 true时才会被解除阻塞。
template <class Rep, class Period, class Predicate> bool wait_for (unique_lock<mutex>& lck, const chrono::duration<Rep,Period>& rel_time, Predicate pred);代码示例:
#include <iostream> // std::cout#include <thread> // std::thread#include <chrono> // std::chrono::seconds#include <mutex> // std::mutex, std::unique_lock#include <condition_variable> // std::condition_variable, std::cv_statusstd::condition_variable cv;int value;void read_value() { std::cin >> value; cv.notify_one();}int main (){ std::cout << "Please, enter an integer (I'll be printing dots): \n"; std::thread th (read_value); std::mutex mtx; std::unique_lock<std::mutex> lck(mtx); while (cv.wait_for(lck,std::chrono::seconds(1))==std::cv_status::timeout) { std::cout << '.' << std::endl; } std::cout << "You entered: " << value << '\n'; th.join(); return 0;}4. 线程池
4.1 概念
在一个程序中,如果我们需要多次使用线程,这就意味着,需要多次的创建并销毁线程。而创建并销毁线程的过程势必会消耗内存,线程过多会带来调动的开销,进而影响缓存局部性和整体性能。
线程的创建并销毁有以下一些缺点:
创建太多线程,将会浪费一定的资源,有些线程未被充分使用。销毁太多线程,将导致之后浪费时间再次创建它们。创建线程太慢,将会导致长时间的等待,性能变差。销毁线程太慢,导致其它线程资源饥饿。线程池维护着多个线程,这避免了在处理短时间任务时,创建与销毁线程的代价。
4.2 线程池的实现
因为程序边运行边创建线程是比较耗时的,所以我们通过池化的思想:在程序开始运行前创建多个线程,这样,程序在运行时,只需要从线程池中拿来用就可以了.大大提高了程序运行效率.
一般线程池都会有以下几个部分构成:
线程池管理器(ThreadPoolManager):用于创建并管理线程池,也就是线程池类工作线程(WorkThread): 线程池中线程任务队列task: 用于存放没有处理的任务。提供一种缓冲机制。append:用于添加任务的接口线程池实现代码:
#ifndef _THREADPOOL_H#define _THREADPOOL_H#include <vector>#include <queue>#include <thread>#include <iostream>#include <stdexcept>#include <condition_variable>#include <memory> //unique_ptr#include<assert.h>const int MAX_THREADS = 1000; //最大线程数目template <typename T>class threadPool{public: threadPool(int number = 1);//默认开一个线程 ~threadPool(); std::queue<T *> tasks_queue; //任务队列 bool append(T *request);//往请求队列<task_queue>中添加任务<T *>private: //工作线程需要运行的函数,不断的从任务队列中取出并执行 static void *worker(void *arg); void run();private: std::vector<std::thread> work_threads; //工作线程 std::mutex queue_mutex; std::condition_variable condition; //必须与unique_lock配合使用 bool stop;};//end class//构造函数,创建线程template <typename T>threadPool<T>::threadPool(int number) : stop(false){ if (number <= 0 || number > MAX_THREADS) throw std::exception(); for (int i = 0; i < number; i++) { std::cout << "created Thread num is : " << i <<std::endl; work_threads.emplace_back(worker, this);//添加线程 //直接在容器尾部创建这个元素,省去了拷贝或移动元素的过程。 }}template <typename T>inline threadPool<T>::~threadPool(){ std::unique_lock<std::mutex> lock(queue_mutex); stop = true; condition.notify_all(); for (auto &ww : work_threads) ww.join();//可以在析构函数中join}//添加任务template <typename T>bool threadPool<T>::append(T *request){ /*操作工作队列时一定要加锁,因为他被所有线程共享*/ queue_mutex.lock();//同一个类的锁 tasks_queue.push(request); queue_mutex.unlock(); condition.notify_one(); //线程池添加进去了任务,自然要通知等待的线程 return true;}//单个线程template <typename T>void *threadPool<T>::worker(void *arg){ threadPool *pool = (threadPool *)arg; pool->run();//线程运行 return pool;}template <typename T>void threadPool<T>::run(){ while (!stop) { std::unique_lock<std::mutex> lk(this->queue_mutex); /* unique_lock() 出作用域会自动解锁 */ this->condition.wait(lk, [this] { return !this->tasks_queue.empty(); }); //如果任务为空,则wait,就停下来等待唤醒 //需要有任务,才启动该线程,不然就休眠 if (this->tasks_queue.empty())//任务为空,双重保障 { assert(0&&"断了");//实际上不会运行到这一步,因为任务为空,wait就休眠了。 continue; } else { T *request = tasks_queue.front(); tasks_queue.pop(); if (request)//来任务了,开始执行 request->process(); } }}#endif说明:
构造函数创建所需要的线程数一个线程对应一个任务,任务随时可能完成,线程则可能休眠,所以任务用队列queue实现(线程数量有限),线程用采用wait机制。任务在不断的添加,有可能大于线程数,处于队首的任务先执行。只有添加任务(append)后,才开启线程condition.notify_one()。wait表示,任务为空时,则线程休眠,等待新任务的加入。添加任务时需要添加锁,因为共享资源。测试代码:
#include "mythread.h"#include<string>#include<math.h>using namespace std;class Task{ public: void process() { //cout << "run........." << endl; //测试任务数量 long i=1000000; while(i!=0) { int j = sqrt(i); i--; } }};int main(void){ threadPool<Task> pool(6);//6个线程,vector std::string str; while (1) { Task *tt = new Task(); //使用智能指针 pool.append(tt);//不停的添加任务,任务是队列queue,因为只有固定的线程数 cout<<"添加的任务数量: "<<pool.tasks_queue.size()<<endl;; delete tt; }}参考:
C++11线程池实现github:https://github.com/progschj/ThreadPool
C++11线程池的两种实现:https://blog.csdn.net/liushengxi_root/article/details/83932654
原子操作(类似于互斥,但更接近底层实现,效率更高。还没更新)
登录后可发表评论
点击登录