狂飙Linux平台,软件部署大全
文章标签:
《随便一记》
??????
哈喽!大家好,我是【IT邦德】,江湖人称jeames007,10余年DBA及大数据工作经验
一位上进心十足的【大数据领域博主】!???
中国DBA联盟(ACDU)成员,目前服务于工业互联网
擅长主流Oracle、MySQL、PG、高斯及GP 运维开发,备份恢复,安装迁移,性能优化、故障应急处理等。
✨ 如果有对【数据库】感兴趣的【小可爱】,欢迎关注【IT邦德】???
❤️❤️❤️感谢各位大可爱小可爱!❤️❤️❤️
文章目录
前言? 1.开发环境✨ 1.1 JDK环境✨ 1.2 Tomcat环境✨ 1.3 Python环境✨ 1.4 PHP安装 ? 2.数据库安装✨ 2.1 Oracle部署✨ 2.2 MySQL部署✨ 2.3 postgreSQL部署✨ 2.4 国产数据库部署 ? 3.Docker安装
前言
本篇介绍了基于Linux平台部署各种软件及应用的集锦? 1.开发环境
✨ 1.1 JDK环境
JDK是 Java 语言的软件开发工具包,主要用于移动设备、嵌入式设备上的java应用程序
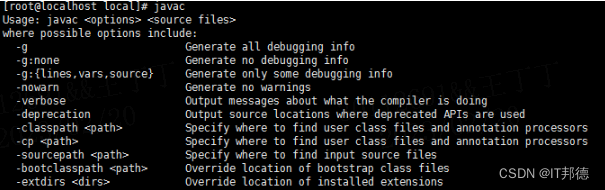
1.下载Linux环境下的jdk1.8https://www.oracle.com/java/technologies/downloads/#java82.JDK压缩包解压tar -zxvf jdk-8u181-linux-x64.tar.gz -C /usr/local3.环境变量导入[root@localhost local]# vim /etc/profileexport JAVA_HOME=/usr/local/jdk1.8.0_181 #jdk安装目录export JRE_HOME=${JAVA_HOME}/jreexport CLASSPATH=.:${JAVA_HOME}/lib:${JRE_HOME}/lib:$CLASSPATHexport JAVA_PATH=${JAVA_HOME}/bin:${JRE_HOME}/binexport PATH=$PATH:${JAVA_PATH}##环境变量生效[root@localhost local]# source /etc/profile##确认安装是否成功[root@localhost local]# javac[root@localhost local]# java -version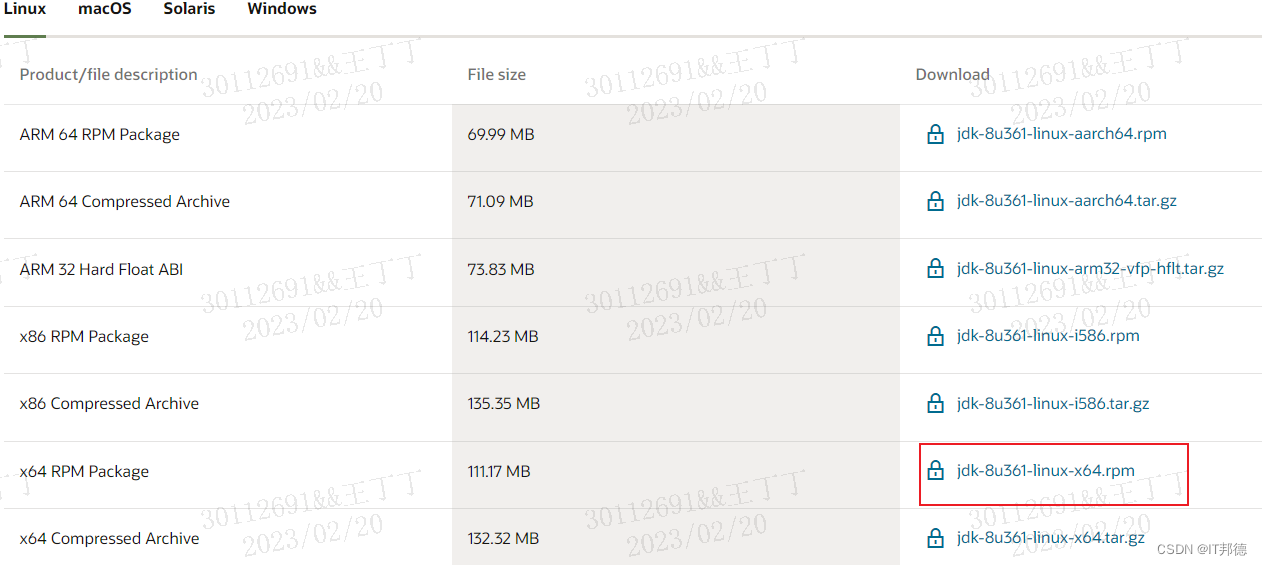
✨ 1.2 Tomcat环境
tomcat是一个开源的Web应用服务器
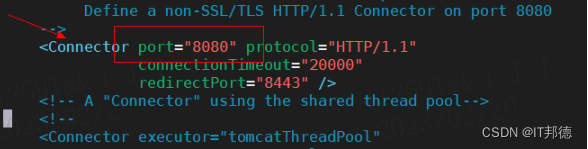
1.通过官网下载Tomcathttps://tomcat.apache.org/download-80.cgi2.上传tomcat安装包解压tar -xzvf apache-tomcat-8.5.66.tar.gz3.启动及关闭tomcatcd进入tomcat目录,然后进入tomcat的bin目录,这里面就有tomcat的启动程序(statrup.sh)和关闭程序(shutdown.sh)4.访问页面tomcat启动完以后,为了验证是否能够访问到tomcat首页,我们在浏览器url地址输入ip:8080访问输入以下命令关闭防火墙:systemctl stop firewalld 暂时性关闭防火墙systemctl status firewalld 查看防火墙状态systemctl disable firewalld 永久关闭防火墙systemctl start firewalld 开启防火墙5.web部署部署Maven项目至tomcat,在pom.xml文件中的打包方式改为war,在build标签中加入一个finalName标签,这就是打包后的名字war包需要上传到tomcat的webapps包下。6.server.xml配置修改tomcat配置文件找到tomcat下conf目录下的server.xml文件,可以修改端口和web工程的路径 <Service name="Catalina1"> <Connector port="7777" protocol="HTTP/1.1" maxHttpHeaderSize="65536" connectionTimeout="20000" redirectPort="7333" /> <Connector port="7443" protocol="AJP/1.3" redirectPort="7333" /> <Engine name="Catalina1" defaultHost="localhost"> <Realm className="org.apache.catalina.realm.LockOutRealm"> <!-- This Realm uses the UserDatabase configured in the global JNDI resources under the key "UserDatabase". Any edits that are performed against this UserDatabase are immediately available for use by the Realm. --> <Realm className="org.apache.catalina.realm.UserDatabaseRealm" resourceName="UserDatabase"/> </Realm> <Host name="localhost" appBase="webapps" unpackWARs="true" autoDeploy="true"> <Valve className="org.apache.catalina.valves.AccessLogValve" directory="logs" prefix="localhost_access_log." suffix=".txt" pattern="%h %l %u %t "%r" %s %b" /><Context docBase="webReport" path="" reloadable="true" /> </Host> </Engine> </Service>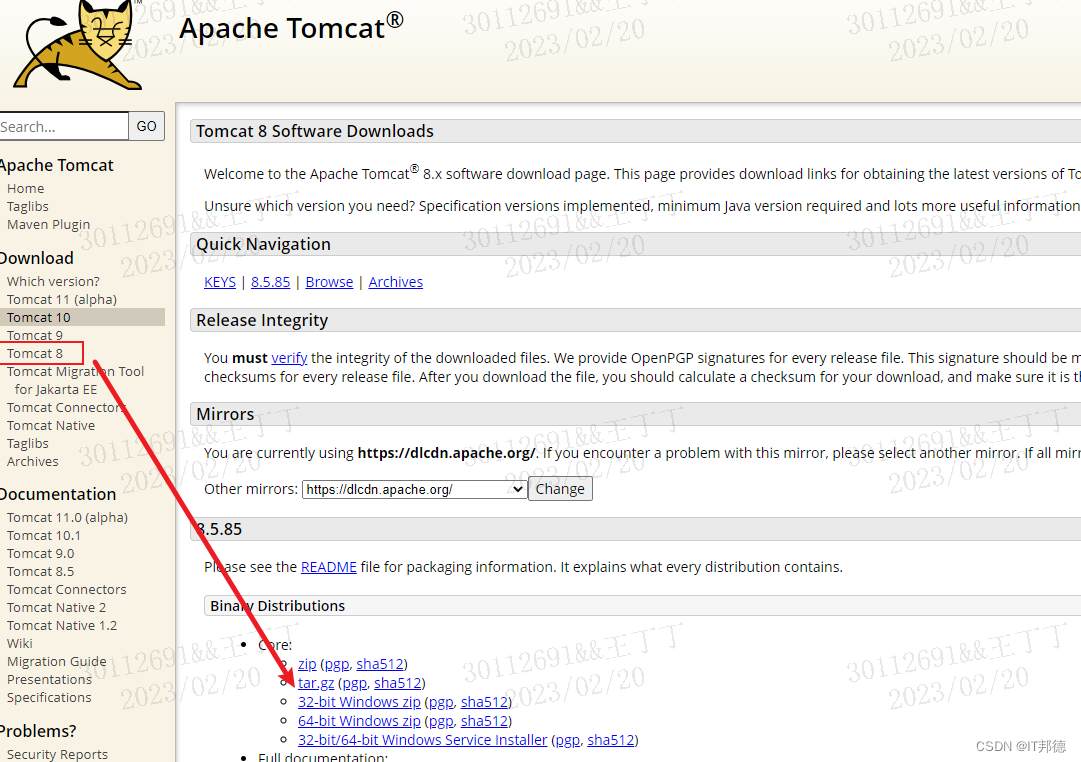
✨ 1.3 Python环境
Python 是荷兰人 Guido van Rossum (吉多·范罗苏姆,中国程序员称其为“龟叔”)在 1990 年初开发的一种解释型编程语言。
这里我们安装python3.6的版本
1.依赖包安装[root@jeames ~]# yum install -y zlib[root@jeames ~]# rpm -qa | grep zlibzlib-1.2.11-17.el8.x86_64zlib-devel-1.2.11-17.el8.x86_642.安装包下载python官网 https://www.python.org/downloads/release/python-3615/下载安装包即可安装包为:Python-3.6.15.tgz3.解压并编译[root@jeames ~]# tar -zxvf Python-3.6.15.tgz [root@jeames ~]# cd Python-3.6.15/ [root@jeames ~]# ./configure --prefix=/usr/local/python3 --enable-shared [root@jeames ~]# make [root@jeames ~]# make install注意:make编译时间比较长,耐心等待4.OS上设置python的软连接>[root@jeames ~]# ln -s /usr/local/python3/bin/python3.6 /usr/bin/python[root@jeames ~]# ln -s /usr/local/python3/bin/pip3 /usr/bin/pip5.环境校验[root@jeames ~]# python -V[root@jeames ~]# python此处注意有个个坑,在部署过程中,python升级后,结果导致了yum不可用[root@jeames ~]# which /usr/bin/yum/usr/bin/yum修改/usr/bin/yum中的第一行,#!/usr/libexec/platform-python,替换为#!/usr/bin/python即可记得要重启服务器哈,之后yum就可以正常使用了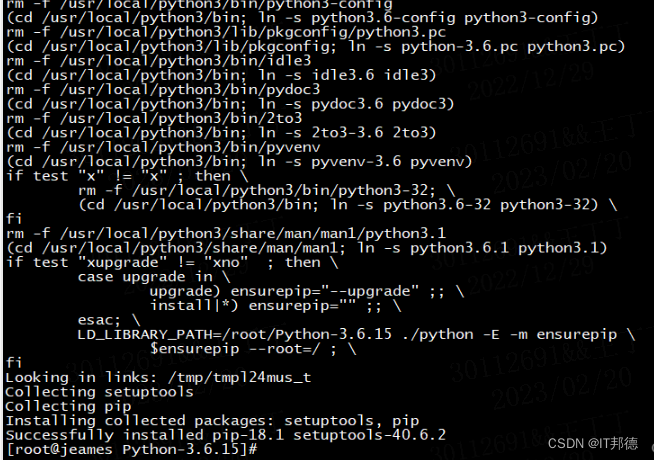

✨ 1.4 PHP安装
即“超文本预处理器”,是在服务器端执行的脚本语言,尤其适用于Web开发并可嵌入HTML中
1.如果服务器为Linux7,自带PHP版本为5.6,需要卸载[root@jeames ~]# yum remove php* -y2.安装httpdyum install httpd -ysystemctl restart httpd[root@jeames ~]# systemctl status httpd[root@jeames ~]# systemctl enable httpdCreated symlink from /etc/systemd/system/multi-user.target.wants/httpd.service to /usr/lib/systemd/system/httpd.service.#配置文件/etc/httpd/conf/httpd.conf/var/www/html3.PHP下载# 官网地址 https://www.php.net/downloads# 或国内网站https://mirrors.sohu.com/php/#下载php压缩包wget https://mirrors.sohu.com/php/php-7.4.9.tar.gz注意:第一次用的php5, 访问zabbix页面一直报错 FIle not found...4.安装php# 安装简单依赖yum remove php* -yyum install autoconf automake libtool sqlite-devel libjpeg-devel libpng-devel freetype-devel -y# 安装php依赖 - oniguruma[root@jeames ~]# tar xf oniguruma-6.9.7.1.tar.gz[root@jeames ~]# cd oniguruma-6.9.7.1/[root@jeames oniguruma-6.9.7.1]# [root@jeames oniguruma-6.9.7.1]# autoreconf --install --force[root@jeames oniguruma-6.9.7.1]# ./configure[root@jeames oniguruma-6.9.7.1]# make -j4[root@jeames oniguruma-6.9.7.1]# make install /bin/mkdir -p '/usr/local/bin' /bin/install -c onig-config '/usr/local/bin' /bin/mkdir -p '/usr/local/lib/pkgconfig' /bin/install -c -m 644 oniguruma.pc '/usr/local/lib/pkgconfig'make[2]: Leaving directory `/root/oniguruma-6.9.7.1'make[1]: Leaving directory `/root/oniguruma-6.9.7.1'# 安装php依赖 - libzip-1.2[root@jeames ~]# rpm -qa | grep libziplibzip-0.10.1-8.el7.x86_64[root@jeames ~]# rpm -e libzip-0.10.1-8.el7.x86_64cd ..wget https://libzip.org/download/libzip-1.2.0.tar.gztar xf libzip-1.2.0.tar.gzcd libzip-1.2.0./configuremake -j4make install /bin/mkdir -p '/usr/local/lib/pkgconfig' /bin/install -c -m 644 libzip.pc '/usr/local/lib/pkgconfig'make[2]: Leaving directory `/root/libzip-1.2.0'make[1]: Leaving directory `/root/libzip-1.2.0'# 安装libjpeg在libjpeg项目主页上下载源码,解压并进入源码目录,安装包为jpegsrc.v9d.tar.gzhttp://www.ijg.org/files/tar -zxvf jpegsrc.v9d.tar.gzcd jpeg-9d./configuremake -j4 && make install /usr/bin/mkdir -p '/usr/local/bin' /bin/sh ./libtool --mode=install /usr/bin/install -c cjpeg djpeg jpegtran rdjpgcom wrjpgcom '/usr/local/bin'libtool: install: /usr/bin/install -c .libs/cjpeg /usr/local/bin/cjpeglibtool: install: /usr/bin/install -c .libs/djpeg /usr/local/bin/djpeglibtool: install: /usr/bin/install -c .libs/jpegtran /usr/local/bin/jpegtranlibtool: install: /usr/bin/install -c rdjpgcom /usr/local/bin/rdjpgcomlibtool: install: /usr/bin/install -c wrjpgcom /usr/local/bin/wrjpgcom/bin/sh /root/jpeg-9d/install-sh -d /usr/local/include/usr/bin/install -c -m 644 jconfig.h /usr/local/include/jconfig.h /usr/bin/mkdir -p '/usr/local/include' /usr/bin/install -c -m 644 jerror.h jmorecfg.h jpeglib.h '/usr/local/include' /usr/bin/mkdir -p '/usr/local/share/man/man1' /usr/bin/install -c -m 644 cjpeg.1 djpeg.1 jpegtran.1 rdjpgcom.1 wrjpgcom.1 '/usr/local/share/man/man1' /usr/bin/mkdir -p '/usr/local/lib/pkgconfig' /usr/bin/install -c -m 644 libjpeg.pc '/usr/local/lib/pkgconfig'make[1]: Leaving directory `/root/jpeg-9d'# 安装phpcd ..wget https://www.php.net/distributions/php-7.4.29.tar.gz[root@jeames ~]# tar xf php-7.4.9.tar.gz[root@jeames ~]# useradd -s /sbin/nologin -M php --此处用户创建非常重要[root@jeames ~]# cd php-7.4.9[root@jeames php-7.4.9]### 记得导入环境变量export PKG_CONFIG_PATH="/usr/local/lib/pkgconfig/"./configure --prefix=/usr/local/php7 --with-config-file-path=/usr/local/php7/etc --with-mhash --with-openssl --with-mysqli=mysqlnd --with-pdo-mysql=mysqlnd --with-zlib --enable-bcmath --enable-gd --with-freetype --enable-mbstring --enable-ftp --enable-sockets --with-gettext --enable-session --with-curl --enable-fpm --with-fpm-user=php --with-fpm-group=php \--enable-pdo -enable-tokenizer --with-zip --with-jpeg出现以下报错configure: error: Package requirements (libjpeg) were not met:No package 'libjpeg' foundConsider adjusting the PKG_CONFIG_PATH environment variable if youinstalled software in a non-standard prefix.Alternatively, you may set the environment variables JPEG_CFLAGSand JPEG_LIBS to avoid the need to call pkg-config.See the pkg-config man page for more details.处理方法:一定要导入环境变量+--------------------------------------------------------------------+| License: || This software is subject to the PHP License, available in this || distribution in the file LICENSE. By continuing this installation || process, you are bound by the terms of this license agreement. || If you do not agree with the terms of this license, you must abort || the installation process at this point. |+--------------------------------------------------------------------+Thank you for using PHP.## 编译,这个时间比较长make -j4 && make installInstalling shared extensions: /usr/local/php7/lib/php/extensions/no-debug-non-zts-20190902/Installing PHP CLI binary: /usr/local/php7/bin/Installing PHP CLI man page: /usr/local/php7/php/man/man1/Installing PHP FPM binary: /usr/local/php7/sbin/Installing PHP FPM defconfig: /usr/local/php7/etc/Installing PHP FPM man page: /usr/local/php7/php/man/man8/Installing PHP FPM status page: /usr/local/php7/php/php/fpm/Installing phpdbg binary: /usr/local/php7/bin/Installing phpdbg man page: /usr/local/php7/php/man/man1/Installing PHP CGI binary: /usr/local/php7/bin/Installing PHP CGI man page: /usr/local/php7/php/man/man1/Installing build environment: /usr/local/php7/lib/php/build/Installing header files: /usr/local/php7/include/php/Installing helper programs: /usr/local/php7/bin/ program: phpize program: php-configInstalling man pages: /usr/local/php7/php/man/man1/ page: phpize.1 page: php-config.1/root/php-7.4.9/build/shtool install -c ext/phar/phar.phar /usr/local/php7/bin/phar.pharln -s -f phar.phar /usr/local/php7/bin/pharInstalling PDO headers: /usr/local/php7/include/php/ext/pdo/#配置文件改名cd /usr/local/php7/etc/cp php-fpm.conf.default php-fpm.confcp php-fpm.d/www.conf.default php-fpm.d/www.conf#php命令设置软链接ln -s /usr/local/php7/bin/* /usr/local/binln -s /usr/local/php7/sbin/* /usr/local/sbin#查看php的版本[root@jeames etc]# php -vPHP 7.4.9 (cli) (built: Sep 17 2022 23:51:00) ( NTS )Copyright (c) The PHP GroupZend Engine v3.4.0, Copyright (c) Zend Technologies#杀死当前php进程,重启killall php-fpmphp-fpmnetstat -antp | grep php-fpmtail -f /usr/local/php7/var/log/php-fpm.lognetstat -tln | grep 9000netstat -tln | grep 80[root@jeames ~]# tail -f /usr/local/php7/var/log/php-fpm.log[18-Sep-2022 00:21:25] ERROR: [pool www] cannot get uid for user 'php'[18-Sep-2022 00:21:25] ERROR: FPM initialization failed[18-Sep-2022 00:22:51] NOTICE: fpm is running, pid 12777[18-Sep-2022 00:22:51] NOTICE: ready to handle connections[18-Sep-2022 00:25:32] NOTICE: Terminating ...[18-Sep-2022 00:25:32] NOTICE: exiting, bye-bye![18-Sep-2022 00:26:38] NOTICE: fpm is running, pid 12872[18-Sep-2022 00:26:38] NOTICE: ready to handle connections#安装ldap扩展模块[root@jeames ~]# cd /root/php-7.4.9/ext/ldap[root@jeames ldap]# find / -name phpize/root/php-7.4.9/scripts/phpize/usr/local/bin/phpize#运行phpize[root@jeames ldap]# /usr/local/php7/bin/phpizeConfiguring for:PHP Api Version: 20190902Zend Module Api No: 20190902Zend Extension Api No: 320190902#复制库文件cp -frp /usr/lib64/libldap* /usr/lib/#安装至/usr/local/php7/bin/php-config[root@jeames ldap]# ./configure --with-php-config=/usr/local/php7/bin/php-config#编译安装[root@jeames ldap]# make && make installBuild complete.Don't forget to run 'make test'.Installing shared extensions: /usr/local/php7/lib/php/extensions/no-debug-non-zts-20190902/[root@jeames lib64]# find / -name ldap.so/root/php-7.4.9/ext/ldap/modules/ldap.so/root/php-7.4.9/ext/ldap/.libs/ldap.so/usr/local/php7/lib/php/extensions/no-debug-non-zts-20190902/ldap.so#修改参数cd /root/php-7.4.9cp php.ini-production /usr/local/php7/etc/php.inivim /usr/local/php7/etc/php.iniextension_dir = "/usr/local/php7/lib/php/extensions/no-debug-non-zts-20190902/"extension=ldap.somax_execution_time = 300post_max_size = 16Mmax_input_time = 300date.timezone = Asia/Shanghai 说明:1.make clean 是取消编译,后面可以重装2.make -j4 是用4个CPU同时编译,速度快? 2.数据库安装
✨ 2.1 Oracle部署
https://blog.csdn.net/weixin_41645135/category_11595745.html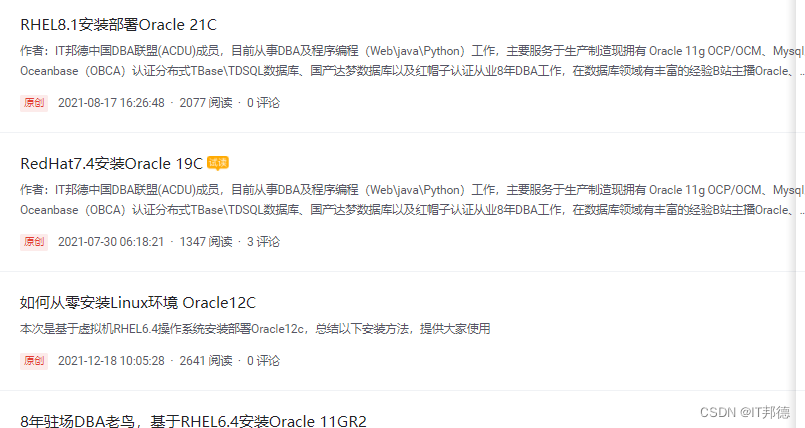
✨ 2.2 MySQL部署
https://blog.csdn.net/weixin_41645135/category_11595820.html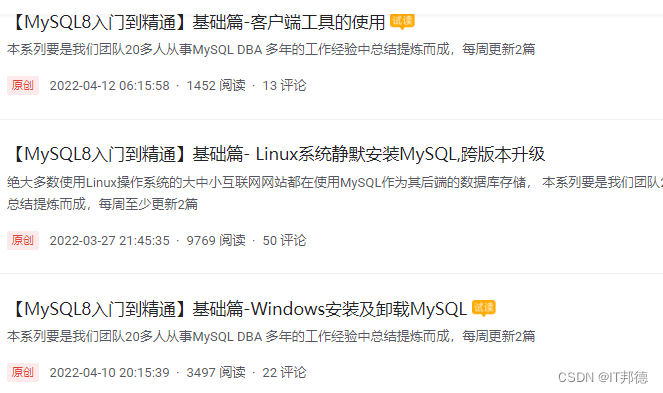
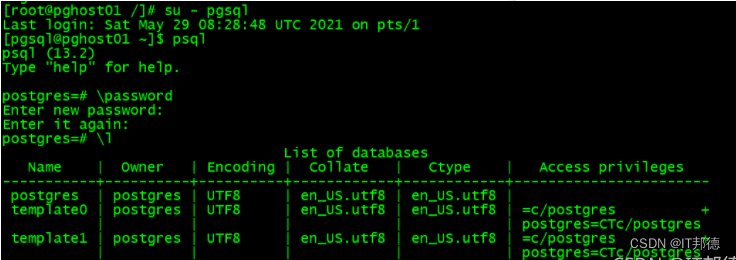
✨ 2.3 postgreSQL部署
https://jeames.blog.csdn.net/article/details/120052749
✨ 2.4 国产数据库部署
https://blog.csdn.net/weixin_41645135/category_12037141.html
? 3.Docker安装
1.安装依赖包yum install -y yum-utils device-mapper-persistent-data lvm2sudo yum-config-manager \--add-repo \https://download.docker.com/linux/centos/docker-ce.repo[root@centos7 ~] yum -y install docker-ce docker-ce-cli containerd.io2.启动 Docker[root@centos7 ~]# systemctl enable docker[root@centos7 ~]# systemctl start docker[root@centos7 ~]# systemctl status docker3 修改Docker存储位置默认情况下 Docker的存放位置为:/var/lib/docker可以通过命令查看具体位置:docker info | grep "Docker Root Dir"首先停掉 Docker 服务:systemctl stop docker然后移动整个/var/lib/docker 目录到目的路径mkdir -p /root/datamv /var/lib/docker /root/data/dockerln -s /root/data/docker /var/lib/docker --快捷方式
登录后可发表评论
点击登录