开始之前,你可以使用 Nest CLI 创建项目,也可以克隆一个 starter project(两者的结果是一样的)。
若要使用 Nest CLI 构建项目,请运行以下命令。这将创建一个新的项目目录,并使用核心的 Nest 文件和支撑模块填充该目录,从而为项目创建一个传统的基本结构。建议初学者使用 Nest CLI 创建新项目。我们将 第一步 章节中继续采用这种方法。
$ npm i -g @nestjs/cli
$ nest new project-name
选择要创建的目录:
例如你要创建的目录是D盘,那就是D:
创建一个目录 例如nest
D:\>cd nest
nest new nestdemo1
开始创建
如果创建失败!报错
Error: EPERM: operation not permitted, mkdir 'D:\nest\nestdemo1'
Failed to execute command: node @nestjs/schematics:application --name=nestdemo1 --directory=undefined --no-dry-run --no-skip-git --no-strict --package-manager=undefined --collection="@nestjs/schematics" --language="ts"
请下载npm i -g @nestjs/schematics
就会发现下载成功
npm WARN @nestjs/schematics@9.0.3 requires a peer of typescript@^4.3.5 but none is installed. You must install peer dependencies yourself.
+ @nestjs/schematics@9.0.3
added 53 packages from 84 contributors in 21.302s
如果继续创建显示
Error: EPERM: operation not permitted, mkdir 'D:\nest\demo1'
Failed to execute command: node @nestjs/schematics:application --name=demo1 --directory=undefined --no-dry-run --no-skip-git --no-strict --package-manager=undefined --collection="@nestjs/schematics" --language="ts"
那就是管理员控制台原因
直接再windows用管理员权限打开控制台进行创建
D:\>cd nest
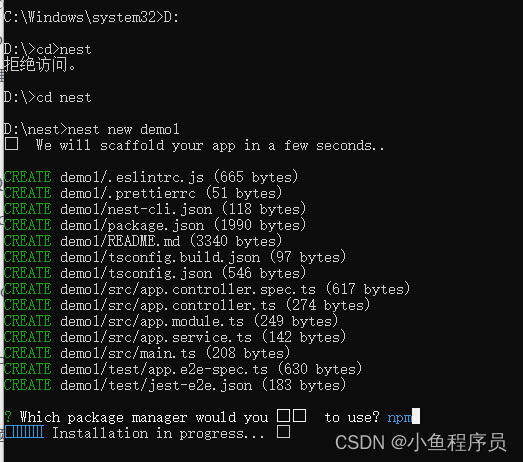
D:\nest>nest new demo1
⚡ We will scaffold your app in a few seconds..
CREATE demo1/.eslintrc.js (665 bytes)
CREATE demo1/.prettierrc (51 bytes)
CREATE demo1/nest-cli.json (118 bytes)
CREATE demo1/package.json (1990 bytes)
CREATE demo1/README.md (3340 bytes)
CREATE demo1/tsconfig.build.json (97 bytes)
CREATE demo1/tsconfig.json (546 bytes)
CREATE demo1/src/app.controller.spec.ts (617 bytes)
CREATE demo1/src/app.controller.ts (274 bytes)
CREATE demo1/src/app.module.ts (249 bytes)
CREATE demo1/src/app.service.ts (142 bytes)
CREATE demo1/src/main.ts (208 bytes)
CREATE demo1/test/app.e2e-spec.ts (630 bytes)
CREATE demo1/test/jest-e2e.json (183 bytes)
? Which package manager would you ❤️ to use? (Use arrow keys)
> npm
yarn
pnpm
完事
让你使用一个创建的命令,懂得都懂了吧
