目录
一、创建项目
二、 less转px转rem
1、移动端适配
2、px转rem
三、反向代理+axios的配置
1、利用反向代理实现跨域请求
2、配置axios
四、其他
1、解决运行 npm run build 打开页面空白的问题
2、一些cmd命令
一、创建项目
1. 首先找到创建项目的文件夹,这里使用的地址是C:\Users\Administrator\Desktop\code\vue\projects\project

2.此时打开命令提示符窗口,有多种方式可供选择:
(1).在项目地址栏输入cmd命令打开命令提示符窗口;


(2).使用win+R打开运行,在命令行中输入cmd打开命令提示符,复制项目所在的目录,在cmd输入命令 ,
cd C:\Users\Administrator\Desktop\code\vue\projects\project然后回车进入项目目录

3.创建vue/cli脚手架
- 在cmd命令提示符中输入命令vue create .
-
vue create . - 此时会显示提示,是否在当前目录中生成项目,这里输入y,然后回车

- 这时显示请选择预设,这里我们使用方向键选择最后一个手动选择功能,然后回车下一步

- 这里根据需求选择所需的功能,使用空格进行功能选择,a全选,选择好功能后回车进入下一步

- 这里是根据选择的功能,选择vue版本,这里选择2.x
 然后选择是否使用路由器的历史模式?这里不使用(会在地址栏中显示#),输入n
 选择css预处理器,这里选择less
 选择单元测试的方案,这里默认就行
 选择配置放置的文件,第一个会在专门的配置文件中保存配置,第二个就是在package中保存配置,按需选择即可
 是否将当前配置保存为预设,按需设置即可
 然后回车等待下载完成即可,注意必须要联网~~

- 安装完成后,如图所示

- 此时输入 npm run serve
npm run serve命令即可开启项目。
二、 less转px转rem
1、移动端适配
1.项目成功运行后,在cmd命令提示符中按ctrl+c结束项目运行
2.在命令提示符中输入 npm i lib-flexible postcss-px2rem-exclude axios -s,在当前项目中下载 'lib-flexible' 'postcss-px2rem-exclude' 'axios'三个插件
npm i lib-flexible postcss-px2rem-exclude axios -s3.下载完毕后使用vscode打开项目
- lib-flexible插件,移动端适配解决方案。如果使用cube-ui来创建项目,则不需要lib-flexible适配,cube-ui里面自带了适配。--cube进行适配
4.(在项目入口文件 main.js 里 引入 lib-flexible) import 'lib-flexible'
通过上面两步,就实现了vue项目使用lib-flexible来即将移动端适配
2、px转rem
这里使用的是postcss-px2rem-exclude,而不是postcss-px2rem,所以配置不一样
1.在项目根目录下创建vue.config.js,在里面进行配置

// vue.config.js
module.exports = {
  css:{
    loaderOptions:{
      postcss:{
        plugins:[
          require('postcss-px2rem-exclude')({
            remUnit:75,
            exclude:/node_modules/
          }),//换算的基数
        ]
      }
    }
  },
}
2.打开package.json文件,添加
"postcss":{
    "plugins":{
      "autoprefixed":{}
    }
}3.配置完成后,重启,即可,因为修改了config文件,这里必须要重启,否则没有效果
4.这里可以看到块元素的css样式已经变成了rem,就说明已经配置成功了

三、反向代理+axios的配置
1、利用反向代理实现跨域请求
1.打开vue.config.js配置文件,在 module.exports 添加如下代码
devServer: {
    proxy: {
        //    配置跨域
        '/api': {
            target: 'http://',      //后端接口地址
                changeOrigin: true,
                pathRewrite: {
                '^/api': ''
            }
        }
    }
}
2、配置axios
1.上面已经下载了axios,这里直接配置
2.在src目录下创建api文件夹,里面创建 index.js 和 request.js 两个文件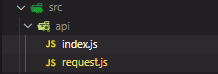
3.打开request.js文件
导入axios,而后创建axios实例,这里直接上代码
import axios from 'axios';//导入axios

// 创建axios实例
export const Service = axios.create({
    timeout:3000, //延迟时间
    method:'POST',//请求方式
    headers:{//请求头
        "content-Type": "application/x-www-form-urlencoded"
    },
})

//请求拦截
Service.interceptors.request.use(config =>  config);

//响应拦截
Service.interceptors.response.use(response => response.data,err => console.log(err))
4.打开index.js
- 导入request中的axios实例
- 创建AxiosPromisse模块
直接上代码
import {Service} from './request';

//获取汽车列表
export function getCarList(config){
    const params = new URLSearchParams()
    params.append('page',config.page);

    return Service({
        url:'./api/getCarList',
        data:params
    })
}
这里写一个方法测试一下
<template>
  <div class="about">
    <h1>This is an about page</h1>
    <button @click="getData">获取数据</button>
  </div>
</template>

<script>
import {getCarList} from '@/api'

export default {
  methods:{
    getData(){
      getCarList({page:1}).then((res)=>console.log(res))
    }
  }
}
</script>

这里点击按钮可以看到,已经成功获取到数据,完结撒花!!
四、其他
1、解决运行 npm run build 打开页面空白的问题
这里只需要在vue.config.js中添加如下代码即可
module.exports = {
  publicPath: './',//解决打包后找不到路径的问题
}
2、一些cmd命令
| 命令 | 含义 | 命令 | 含义 | 命令 | 含义 |
cd \ | 返回根目录 | help | 查看帮助 | d: | 切换磁盘(进入 d 盘) |
| cd /d d:/test | 切换磁盘和目录 | cd .. | 回到上级目录 | dir | 显示目录中文件列表 |
| ping ip/域名 | 延迟和丢包率 | ipconfig /flushdns | 清除本地 DNS 缓存 | ping ip/域名 -n 5 | Ping 测试 5 次 |
| tree d:\test | 显示目录结构 | cd \test1\test2 | 进入文件夹 | md test | 新建文件夹 |