Cenots7搭建HAProxy+nginx+nfs实现wed高可用性集群_m0_61624550的博客
一:关闭防火墙
systemctl stop firewalld.service
systemctl disable firewalld.service
vim /etc/selinux/config/        #进入文件将SELINUX=enforcing里修改为SELINUX=disabled
二:安装nginx
yum -y install  gcc gcc-c++ autoconf automake libtool make openssl openssl-devel pcre pcre-devel   依赖包安装


cd  /usr/local/src/     切换安装路径


wget  http://nginx.org/download/nginx-1.8.1.tar.gz    下载nginx,如果提示没有wget请自行安装  yum -y install wget


 tar -zxvf nginx-1.8.1.tar.gz   解压安装包


cd  nginx-1.8.1         打开解压出来的目录


./configure \
--prefix=/usr/local/nginx \
--with-http_ssl_module \
--with-http_flv_module \
--with-http_stub_status_module \
--with-http_gzip_static_module \
--with-pcre     编译命令

make && make install 安装


/usr/local/nginx/sbin/nginx -V     # 启动
在浏览器上测试:

若要更改nginx网页的内容:
vim /usr/locar/nginx/html/index.html
之后修改内容即可
三:安装haproxy:
yum install haproxy -y
修改配置文件:
 vi /etc/haproxy/haproxy.cfg
# Global settings
global
   #日志管理为local2载体,需要在rsyslog中设置存放目录
    log         127.0.0.1 local2
    chroot      /var/lib/haproxy
    pidfile     /var/run/haproxy.pid
    maxconn     4000
    user        haproxy
    group       haproxy
    daemon
    stats socket /var/lib/haproxy/stats
    ssl-default-bind-ciphers PROFILE=SYSTEM
    ssl-default-server-ciphers PROFILE=SYSTEM
defaults
	#设定为HTTP模式
    mode                    http
    log                     global
    option                  httplog
    option                  dontlognull
    #设置为关闭长连接
    option                  httpclose
    option http-server-close
    option forwardfor       except 127.0.0.0/8
    option                  redispatch
    retries                 3
    timeout http-request    10s
    timeout queue           1m
    timeout connect         10s
    timeout client          1m
    timeout server          1m
    timeout http-keep-alive 10s
    timeout check           10s
    maxconn                 3000
#前端设置
frontend main
    #绑定5000端口进行负载均衡
    bind *:5000
    #对用户申请的不同请求进行分流
    acl url_static       path_beg       -i /static /images /javascript /stylesheets
    acl url_static       path_end       -i .jpg .gif .png .css .js
    acl url_html         url_reg        -i \.html$
	#设置不同请求的后端服务器组
    use_backend static          if url_static
    use_backend app             if url_html
    #设置默认后端服务器组
    default_backend             app
#后端转发设置
#static后端组服务器设置
backend static
    balance     roundrobin
    server      static 127.0.0.1:4331 check
#app后端组服务器设置
backend app
	#设置转发策略
    balance     roundrobin
    #以下设置为把真实服务器的ID插入到回复用户的信息中,用户相同的请求可根据cookie找到相同的服务器
    #cookie      SERVERID insert indirect nocache
    #server  app1 192.168.234.130:80 check cookie 3
    #server  app2 192.168.234.151:80 check cookie 4
    #设定转发的后台服务器地址并开启对后台服务器的健康检查
    server  app1 192.168.29.132:80 check
    server  app2 192.168.29.138:80 check
#设定监控平台
listen admin_stats
        stats   enable
	#绑定监控端口号
        bind    *:5000
        mode    http
        option  httplog
        log     global
        maxconn 10
        stats   refresh 30s
        stats   uri /admin
        stats   realm haproxy
	#设定访问权限,用户名和密码
        stats   auth admin:admin
        stats   hide-version
        stats   admin if TRUE
配置rsyslog
vi /etc/rsyslog.conf
#配置使用udp协议
module(load="imudp")
input(type="imudp" port="514")
#设定haproxy日志
local2.*                                                /var/log/haproxy.log
重启服务
systemctl restart rsyslog
启动服务
systemctl start haproxy     ##查看启动情况
netstat -tnlp |grep haproxy
测试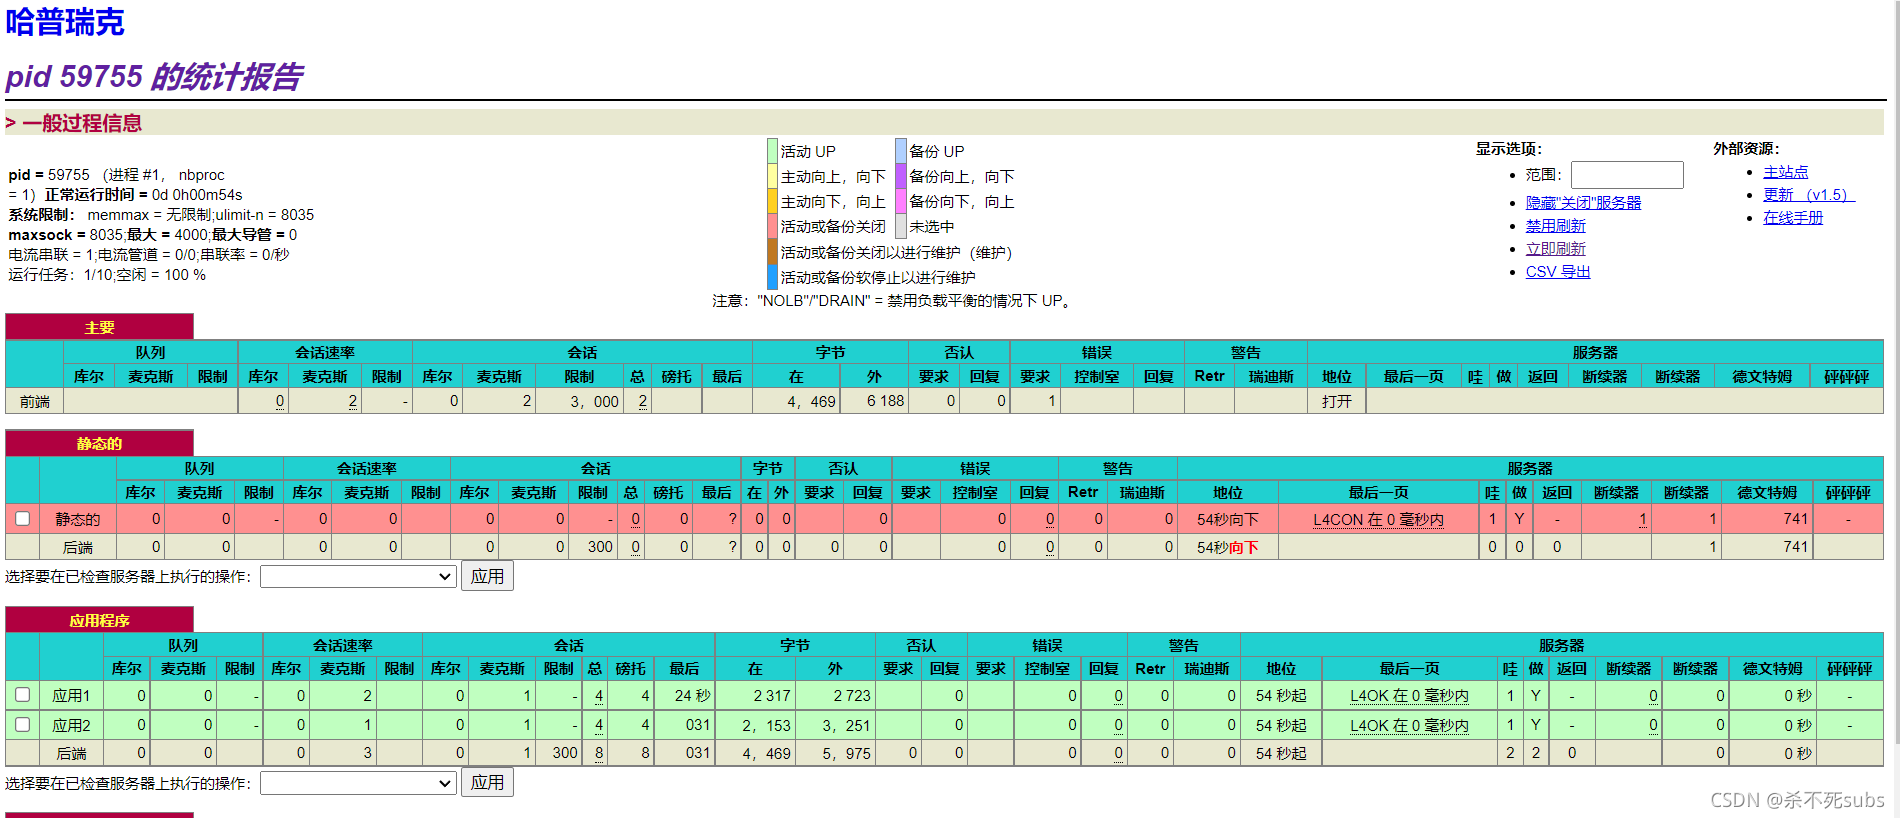
安装NFS:
yum install -y rpc-bind nfs-utils创建文件夹
mkdir /x-x #文件名x-x

chmod -R 777 /xxx

touch /xxx/index.html

vim /xxx/index.html   #编辑

xxxx     #内容
修改NFS配置文件
vim /etc/exports

/x-x *(rw,sync)   #内容
启动
systemctl start rpcbind
systemctl start nfs

exportfs -r       #使配置立即生效
查看是否连接
showmount -e localhost挂载
mount localhost:/xxx /mnt配置nginx
mount -v -t nfs 192.168.234.130:/xxx /usr/local/nginx/html/查看
登录后可发表评论
点击登录