一、nginx代理服务器
在互联网中,客户端是无法直接向服务器发起请求,那么就需要的代理服务器,来实现客户端和服务通信
过程:客户端----->代理----->服务端
客户端向代理请求代理服务器向服务端请求
nginx可以实现很多协议代理,我们主要以http代理为主;ngin可以代理的协议有:HTTP、IMAP\POP、HTTPS
(一)、nginx代理配置
准备两台linux服务器
| 名称 | IP | |
| C7--01 | 192.168.2.1 | 代理服务端 |
| C7--02 | 192.168.2.2 | 服务端 |
因C7--01服务器已经安装nginx服务,所有我们所有命令进行复制到C7--02代理服务端
-------------在c7---01上进行复制


[root@C7--01 ~]# nginx -s stop
[root@C7--01 ~]# cd /usr/local/
[root@C7--01 local]# scp -r nginx root@192.168.2.2:/usr/local/
........
....
Are you sure you want to continue connecting (yes/no)? yes             #输入yes
.......
...
root@192.168.2.2's password:                                           #输入c7--02服务器root密码

..............
........
...
..
.


------------在c7---02上

[root@C7--02 ~]# useradd -M -s /sbin/nologin nginx
[root@C7--02 ~]# ln -s /usr/local/nginx/sbin/nginx /usr/local/sbin/
[root@C7--02 ~]# nginx
[root@C7--02 ~]# netstat -auptn |grep 80
tcp        0      0 0.0.0.0:80              0.0.0.0:*               LISTEN      4681/nginx: master
在C7--01修改配置nginx.conf文件
[root@C7--01 ~]# nginx
[root@C7--01 ~]# mkdir /usr/local/nginx/html/aaa
[root@C7--01 ~]# vim /usr/local/nginx/html/aaa/index.html
<h1>代理服务器</h1>哈喽
[root@C7--01 ~]# vim /usr/local/nginx/conf/nginx.conf
worker_processes 1;
events {
worker_connections 1024;
}
http {
include mime.types;
default_type application/octet-stream;
sendfile on;
keepalive_timeout 65;
server {
listen 80;
server_name localhost;
location /aaa {
root html;
index index.html index.htm;
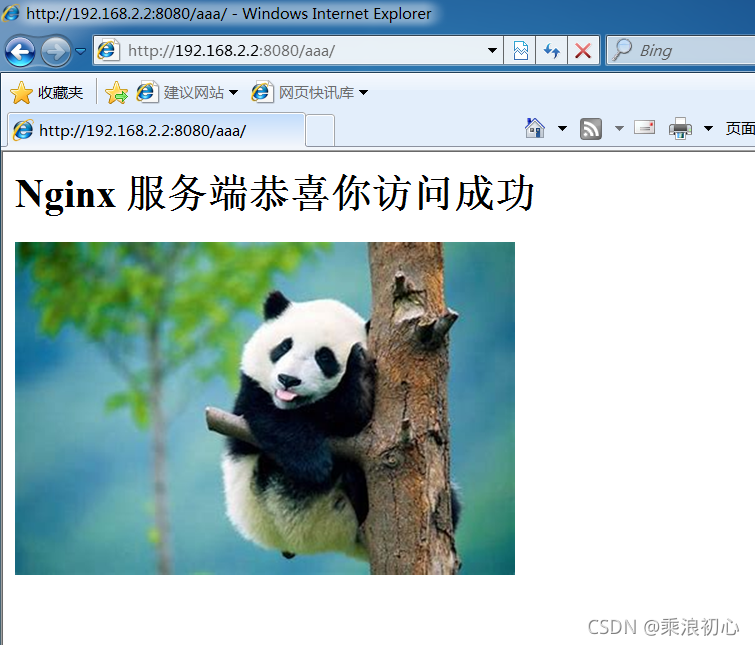
proxy_pass http://192.168.2.2:8080/aaa;
proxy_redirect off;
#proxy_redirect http://192.168.2.2:8080/ /aaa;
}
error_page 500 502 503 504 /50x.html;
location = /50x.html {
root html;
}
}
}
保存
[root@C7--01 ~]# nginx -s reload在C7--02修改配置nginx.conf文件
[root@C7--02 ~]# mkdir /usr/local/nginx/html/aaa
[root@C7--02 ~]# vim /usr/local/nginx/html/aaa/index.html
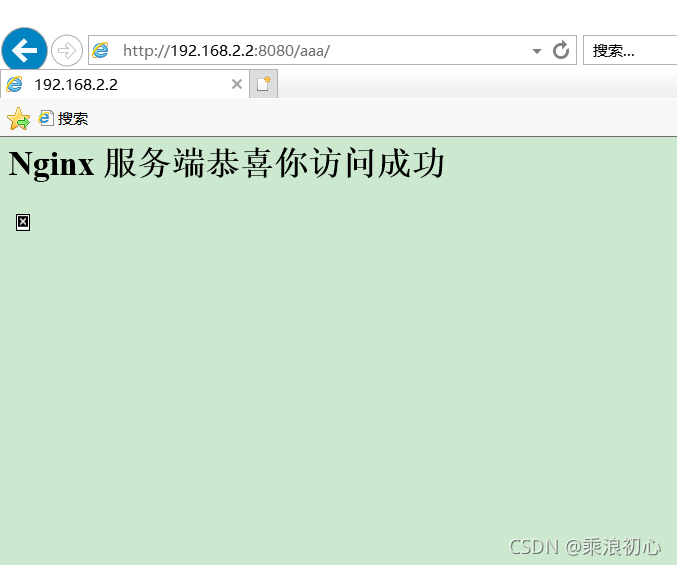
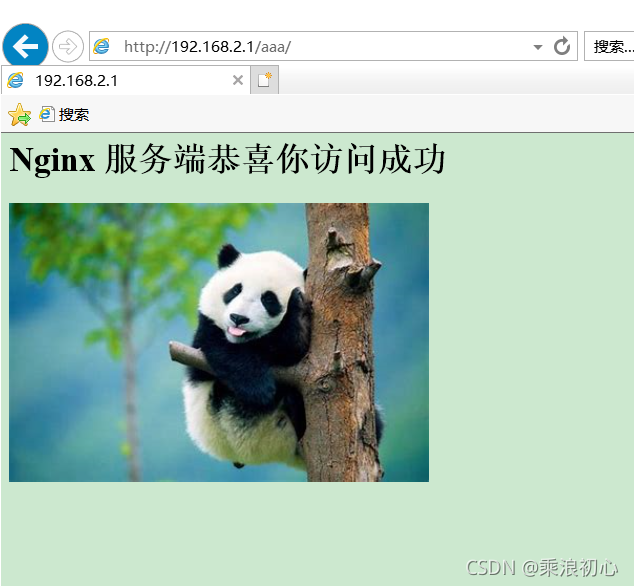
<h1>Nginx 服务端恭喜你访问成功</h1>
[root@C7--02 ~]# vim /usr/local/nginx/conf/nginx.conf
worker_processes 1;
events {
worker_connections 1024;
}
http {
include mime.types;
default_type application/octet-stream;
sendfile on;
keepalive_timeout 65;
server {
listen 8080; #修改端口为8080
server_name 192.168.2.2;
location / {
root html;
index index.html index.htm;
}
error_page 500 502 503 504 /50x.html;
location = /50x.html {
root html;
}
}
}
保存退出
[root@C7--01 ~]# nginx -s reload 进行访问测试:访问成功说明设置成功
访问方法一:
[root@C7--01 ~]# curl -I http://192.168.2.1/aaa


HTTP/1.1 301 Moved Permanently
Server: nginx/1.18.0
Date: Mon, 22 Nov 2021 19:51:43 GMT
Content-Type: text/html
Content-Length: 169
Connection: keep-alive
Location: http://192.168.2.2:8080/aaa/     #显示了我们内部地址还有8080端口
方法二:http://192.168.2.1/aaa
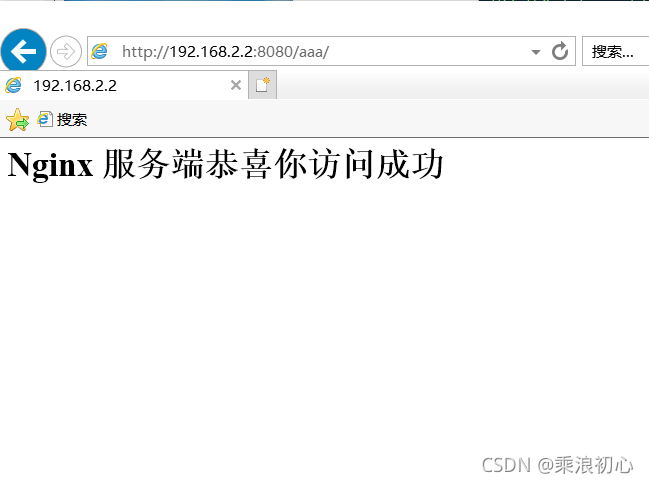
但是我们发现我们的IP地址和8080端口号也被显示出来了;这对于公司来说危险是非常大的我们现在在C7--01修改配置nginx.conf文件
[root@C7--01 ~]# vim /usr/local/nginx/conf/nginx.conf
.......
..
.
location /aaa {
root html;
index index.html index.htm;
proxy_pass http://192.168.2.2:8080/aaa;
proxy_redirect http://192.168.2.2:8080/aaa /aaa; #修改把off修改为http://192.168.2.2:8080/ /aaa
........
....
保存
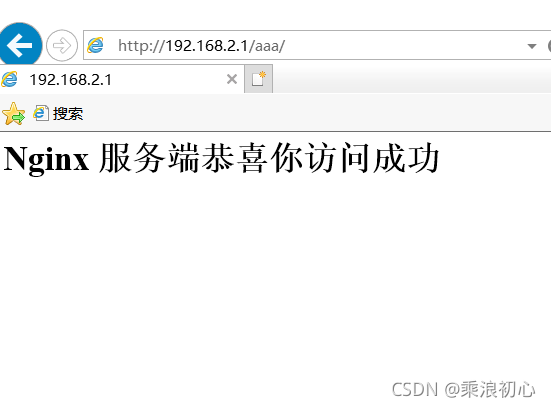
[root@C7--01 ~]# nginx -s reload在进行验证
方法一:
[root@C7--01 ~]# curl -I http://192.168.2.1/aaa     #访问失败显示301
HTTP/1.1 301 Moved Permanently
Server: nginx/1.18.0
Date: Mon, 22 Nov 2021 19:56:55 GMT
Content-Type: text/html
Content-Length: 169
Location: http://192.168.2.1/aaa/
Connection: keep-alive

[root@C7--01 ~]# curl -I http://192.168.2.1/aaa/    #访问成功200状态码
HTTP/1.1 200 OK
Server: nginx/1.18.0
Date: Mon, 22 Nov 2021 19:57:57 GMT
Content-Type: text/html
Content-Length: 46
Connection: keep-alive
Last-Modified: Mon, 22 Nov 2021 19:11:46 GMT
ETag: "619beb72-2e"
Accept-Ranges: bytes


[root@C7--01 ~]# curl http://192.168.2.1/aaa/
<h1>Nginx 服务端恭喜你访问成功</h1>方法二:输入 http://192.168.2.1/aaa 和自动添加一个/
2、在服务端查看用户IP地址
先查看c7--02上的acces.log
[root@C7--02 ~]# tail -f /usr/local/nginx/logs/access.log         #实时查看文件内容

192.168.2.1 - - [23/Nov/2021:04:12:14 +0800] "GET / HTTP/1.0" 200 46 "-" "Mozilla/5.0 (Windows NT 10.0; WOW64; Trident/7.0; rv:11.0) like Gecko"

ctrl + c 退出修改c7--01上的配置文件
[root@C7--01 ~]# vim /usr/local/nginx/conf/nginx.conf

............
......
            proxy_redirect http://192.168.2.2:8080/aaa  /aaa;
            proxy_set_header Host $host;                                   #添加内容;host就是代理服务器请求的host也就是后端的服务器 c7--02
            proxy_set_header X-Real-IP $remote_addr;                       #添加内容;remote_addr 的值为客户端的IP地址
            proxy_set_header X-Forwarded-For $proxy_add_x_forwarded_for;   #添加内容;$proxy_add_x_forwarded_for  或  $remote_addr  代表转发服务器;表示c7--01转发服务器请求后端服务器的端口号,也就是80

......
...
.
       #如果有多个代理服务器也可以这样玩 : $proxy_add_x_forwarded_for,$remote_addr,$host    以英文的逗号隔开
proxy_set_header X-Forwarded-For $proxy_add_x_forwarded_for,$remote_addr,$host;修改c7--02的配置文件
[root@C7--02 ~]# vim /usr/local/nginx/conf/nginx.conf

worker_processes  1;
events {
    worker_connections  1024;
}
http {
    include       mime.types;
    default_type  application/octet-stream;
    log_format  main  '$remote_addr - $remote_user [$time_local] "$request" '      #去了井号
                      '$status $body_bytes_sent "$http_referer" '                  #去了井号
                      '"$http_user_agent" "$http_x_forwarded_for"';                #去了井号

    access_log  logs/access.log  main;                                             #去了井号
    sendfile        on;

    keepalive_timeout  65;

    server {
        listen       8080;
        server_name  192.168.2.2;

        location / {
            root   html;
            index index.html index.htm;
        }
        error_page   500 502 503 504  /50x.html;
        location = /50x.html {
            root   html;
        }
   }
 }

保存退出

[root@C7--02 ~]# tail -f /usr/local/nginx/logs/access.log

192.168.2.1 - - [23/Nov/2021:05:11:16 +0800] "GET /aaa/ HTTP/1.0" 304 0 "-" "Mozilla/5.0 (Windows NT 10.0; WOW64; Trident/7.0; rv:11.0) like Gecko" "192.168.2.254"
192.168.2.1 - - [23/Nov/2021:05:11:16 +0800] "GET /aaa/ HTTP/1.0" 304 0 "-" "Mozilla/5.0 (Windows NT 10.0; WOW64; Trident/7.0; rv:11.0) like Gecko" "192.168.2.254"
192.168.2.1 - - [23/Nov/2021:05:49:33 +0800] "GET /aaa/ HTTP/1.0" 200 46 "-" "Mozilla/5.0 (Windows NT 10.0; WOW64; Trident/7.0; rv:11.0) like Gecko" "192.168.2.254,192.168.2.1,"
192.168.2.1 - - [23/Nov/2021:05:49:34 +0800] "GET /aaa/ HTTP/1.0" 304 0 "-" "Mozilla/5.0 (Windows NT 10.0; WOW64; Trident/7.0; rv:11.0) like Gecko" "192.168.2.254,192.168.2.1,"每一次访问都会记录客户端的IP地址
我们也可以把用户的IP放到第一列,修改c7--02配置文件
[root@C7--02 ~]# vim /usr/local/nginx/conf/nginx.conf
.......
...
.

http {
    include       mime.types;
    default_type  application/octet-stream;
    log_format  main  '"$http_x_forwarded_for" $remote_addr - $remote_user [$time_local] "$request" '                       #把"$http_x_forwarded_for"  移动到第一个位置
                      '$status $body_bytes_sent "$http_referer" '
                      '"$http_user_agent" ';                   #原本的位置

    access_log  logs/access.log  main;
    sendfile        on;

    keepalive_timeout  65;

    server {
.....
..
.
访问省略
再次查看c7--02的access.log 访问日志文件完成实验
[root@C7--02 ~]# tail -f /usr/local/nginx/logs/access.log

"192.168.2.254" 192.168.2.1 - - [23/Nov/2021:08:46:07 +0800] "GET /aaa/ HTTP/1.0" 304 0 "-" "Mozilla/5.0 (Windows NT 10.0; WOW64; Trident/7.0; rv:11.0) like Gecko"
"192.168.2.254" 192.168.2.1 - - [23/Nov/2021:08:46:09 +0800] "GET /aaa/ HTTP/1.0" 304 0 "-" "Mozilla/5.0 (Windows NT 10.0; WOW64; Trident/7.0; rv:11.0) like Gecko"
(二)、正向代理
在公司内部
客户端<------>代理------->服务端
条件:限制只允许192.168.2.1代理服务器查看图片,不允许其他ip查看图片
[root@C7--02 ~]# vim /usr/local/nginx/html/aaa/index.html    #修改内容

<h1>Nginx  服务端恭喜你访问成功</h1>
<img src="1.jpg" />

保存

----上传1.jpg图片

[root@C7--02 ~]# ls /usr/local/nginx/html/aaa/
1.jpg  index.html
先访问一下
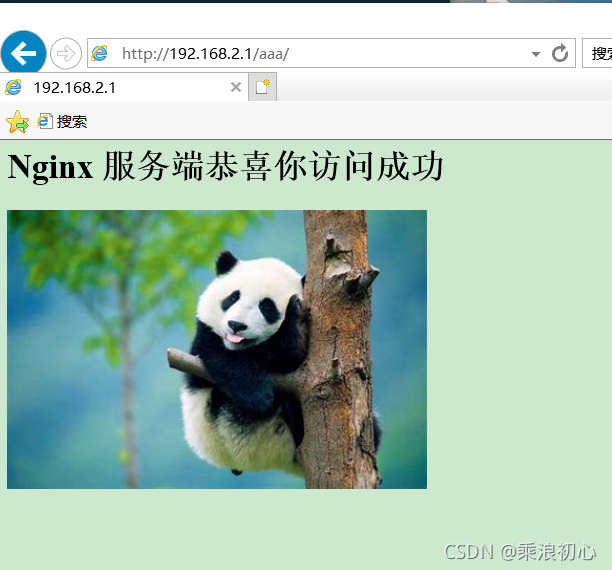
两个都可以访问
在c7--02上配置nginx.conf文件
[root@C7--02 ~]# vim /usr/local/nginx/conf/nginx.conf
.....
..
    server {
        listen       8080;
        server_name  192.168.2.2;

        location / {
            root   html;
            index index.html index.htm;

        }
        location ~ .*\.(jpg|gif|png)$ {    #添加一个location区域
            allow 192.168.2.1;             #只允许 192.168.2.1访问
            deny all;                      #拒绝所有ip地址
            root html;

        }
....
..
保存
c7--01上不需要多大修改;这里没有修改配置文件
[root@C7--01 ~]# vim /usr/local/nginx/conf/nginx.conf
worker_processes 1;
events {
worker_connections 1024;
}
http {
include mime.types;
default_type application/octet-stream;
sendfile on;
keepalive_timeout 65;
server {
listen 80;
server_name localhost;
location /aaa {
root html;
index index.html index.htm;
proxy_pass http://192.168.2.2:8080/aaa;
proxy_redirect http://192.168.2.2:8080/aaa /aaa;
proxy_set_header Host $host;
proxy_set_header X-Real-IP $remote_addr;
proxy_set_header X-Forwarded-For $proxy_add_x_forwarded_for;
}
error_page 500 502 503 504 /50x.html;
location = /50x.html {
root html;
}
}
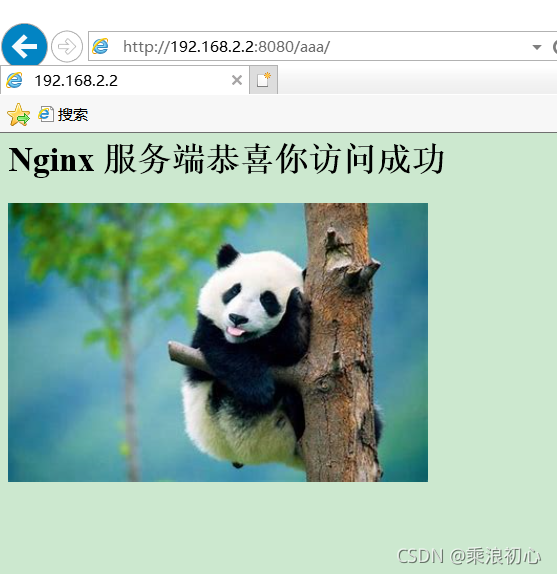
}访问测试:直接访问 192.168.2.2:8080/aaa/
我们的配置生效了
在浏览器里面设置代理服务器的地址及端口80
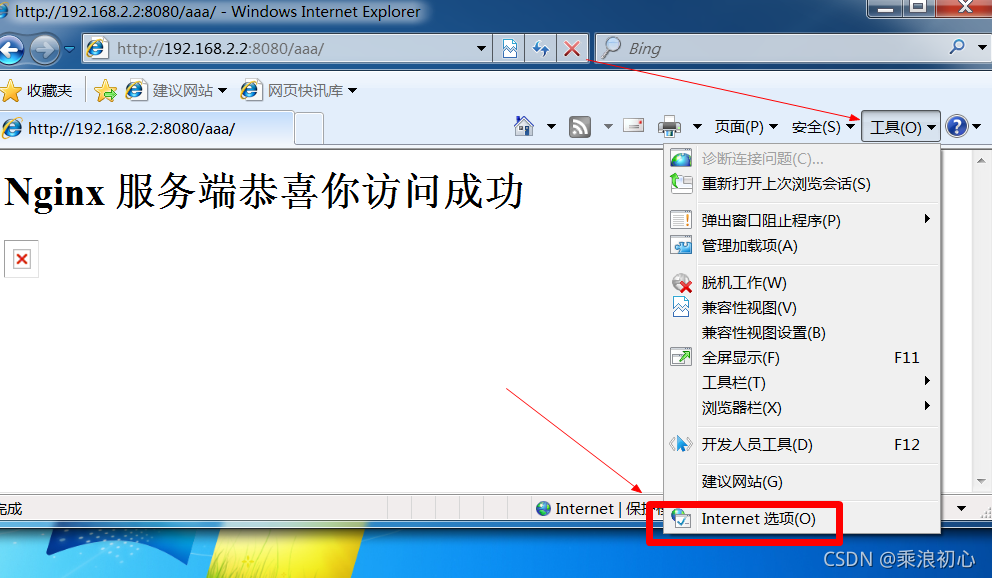
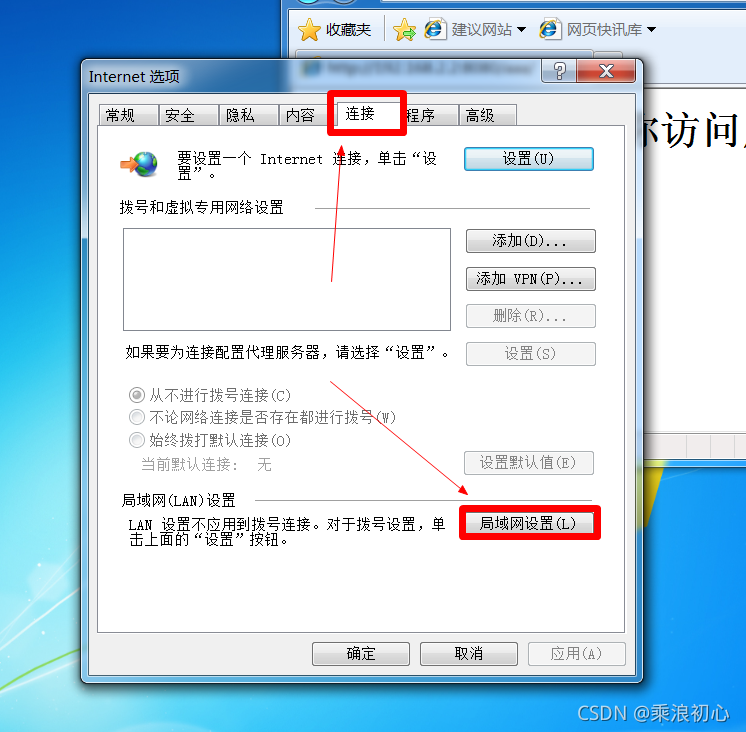
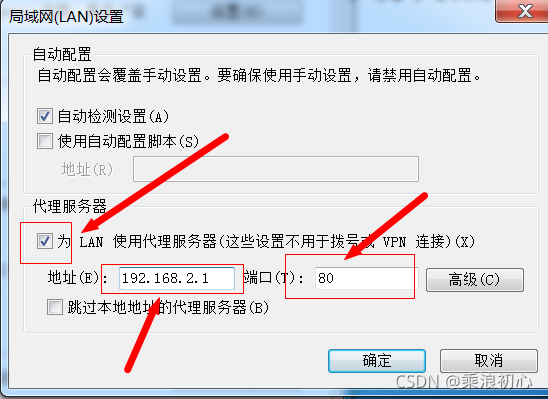
设置为192.168.2.1的代理服务器地址
配置完成
[root@C7--02 ~]# tail -f /usr/local/nginx/logs/access.log

"192.168.2.100" 192.168.2.1 - - [23/Nov/2021:09:52:20 +0800] "GET /aaa/1.jpg HTTP/1.0" 304 0 "http://192.168.2.2:8080/aaa/" "Mozilla/4.0 (compatible; MSIE 8.0; Windows NT 6.1; WOW64; Trident/4.0; SLCC2; .NET CLR 2.0.50727; .NET CLR 3.5.30729; .NET CLR 3.0.30729; Media Center PC 6.0)"
(三)、反向代理
在公司内部
客户端------>代理<------>服务端
在c7--01配置
[root@C7--01 ~]# vim /usr/local/nginx/conf/nginx.conf
......
...
    server {
        listen       80;
        server_name  localhost;


          location /aaa {
            root   html;
            index index.html index.htm;
            proxy_pass http://192.168.2.2:8080/aaa;              #保留

            proxy_redirect http://192.168.2.2:8080/aaa  /aaa;    #保留
        }
        error_page   500 502 503 504  /50x.html;
        location = /50x.html {
            root   html;
        }
   }
 }

保存

[root@C7--01 ~]# nginx -s reload
在c7--02配置
[root@C7--02 ~]# vim /usr/local/nginx/conf/nginx.conf
.....
..
    server {
        listen       8080;
        server_name  192.168.2.2;

        location / {
            root   html;                           #删除之前的配置
            index index.html index.htm;

        }
.......
...

保存


[root@C7--02 ~]# nginx -s reload
正向代理和反向代理的区别
1、区别在于代理的对象不一样
2、正向代理代理的对象是客户端
3、反向代理代理的对象是服务端
二、nginx负载均衡
可以参考以前的论文:六章——LVS负载均衡群集(应用——linux防护与群集)
提高应用系统的响应能力和容灾;并获得高并发、高负载
Nginx 负载均衡模块upstream 需要跟nginx反向代理模块proxy_pass结合起来使用
Nginx 实现负载均衡用到了proxy_pass代理模块核心配置,将客户端请求代理转发至一 组 upstream 虚拟服务池GSLB(全局负载均衡) 和SLB(负载均衡 )
nginx 是一个典型的七层 SLB
LVS:四层的负载均衡
Haproxy:即支持四层又支持七层普及知识
7层负载均衡:用的7层http协议
4层负载均衡:用的是tcp协议加端口号做的负载均衡
[root@C7--01 ~]# cat /usr/src/nginx-1.18.0/auto/options |grep "HTTP_PROXY=YES"            #反向代理模块proxy_pass
HTTP_PROXY=YES


[root@C7--01 ~]# cat /usr/src/nginx-1.18.0/auto/options |grep "HTTP_UPSTREAM_"|grep "YES"               #UPSTREAM的相关模块
HTTP_UPSTREAM_HASH=YES
HTTP_UPSTREAM_IP_HASH=YES
HTTP_UPSTREAM_LEAST_CONN=YES
HTTP_UPSTREAM_RANDOM=YES
HTTP_UPSTREAM_KEEPALIVE=YES
HTTP_UPSTREAM_ZONE=YES
1、SLB网络负载均衡
准备工作:4台nginx服务器 全部安装并且可以访问
| 机器名称 | ip地址 | 场景 |
| C7--01 | 192.168.2.1 | 代理服务器 |
| C7--02 | 192.168.2.2 | 服务器1 |
| C7--03 | 192.168.2.3 | 服务器2 |
| C7--04 | 192.168.2.4 | 服务器3 |
-------#c7--02复制到c7-03服务器上

[root@C7--02 local]# nginx -s stop    #停止服务
[root@C7--02 ~]# cd /usr/local/
[root@C7--02 local]# scp -r nginx root@192.168.2.3://usr/local/
.......
....
..


-----------#在c7--03上配置

[root@C7--03 ~]# useradd -M -s /sbin/nologin nginx
[root@C7--03 ~]# ln -s /usr/local/nginx/sbin/nginx /usr/local/sbin/
[root@C7--03 ~]# nginx
[root@C7--03 ~]# netstat -auptn |grep 80
tcp        0      0 0.0.0.0:80              0.0.0.0:*               LISTEN      112227/nginx: maste
c7--04同上
设置index.html网页省略……
访问:
[root@C7--01 ~]# curl http://192.168.2.1/
<h1>C7--01 服务器服务你</h1>
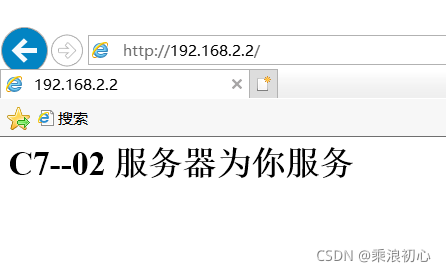
[root@C7--01 ~]# curl http://192.168.2.2/
<h1>C7--02 服务器为你服务</h2>
[root@C7--01 ~]# curl http://192.168.2.3/
<h1>C7--03 服务器为你服务</h2>
[root@C7--01 ~]# curl http://192.168.2.4/
<h1>C7--04 服务器为你服务</h2>在c7--01上配置ngin.con文件
[root@C7--01 conf]# vim nginx.conf
worker_processes 1;
events {
worker_connections 1024;
}
http {
include mime.types;
default_type application/octet-stream;
sendfile on;
keepalive_timeout 65;
upstream a { #一组虚拟服务池 a 为池的名称
server 192.168.2.2:80 weight=1; #weight加权轮询为1
server 192.168.2.3:80 weight=1; #weight加权轮询为1 这样是为了可以看出效果
server 192.168.2.4:80 weight=1; #weight加权轮询为1
}
server {
listen 80;
server_name localhost;
location / {
proxy_pass http://a; #代理http://a 池,会进行轮询的方式访问
root html;
index index.html index.htm;
}
error_page 500 502 503 504 /50x.html;
location = /50x.html {
root html;
}
}
}
保存
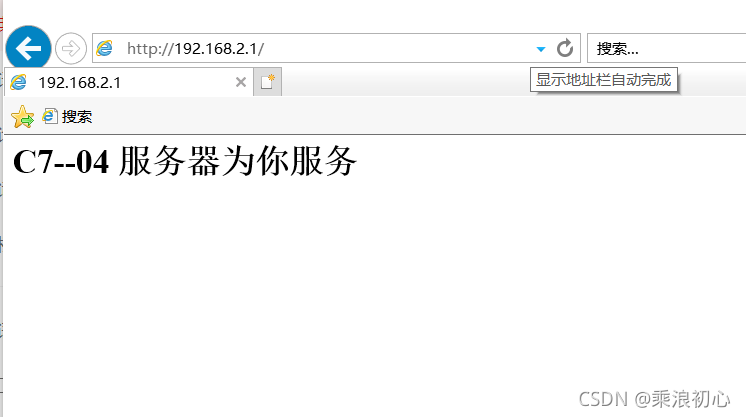
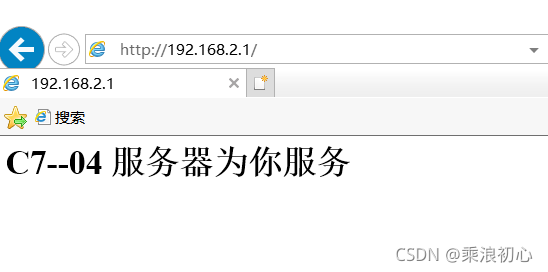
[root@C7--01 conf]# nginx -s reload访问验证:192.168.2.1
2、nginx负载均衡状态配置
后端服务器在负载均衡调度中的状态
| 状态 | 概述 |
| down | 当前的server暂时不参与负载均衡 |
| backup | 预留的备份服务器 |
| max_fails | 允许请求失败的次数 |
| fail_timeout | 经过max_fails失败后,服务暂停时间max_conns 限制最大的接收连接数 |
[root@C7--01 conf]# vim nginx.conf
......
...
.
    upstream a {
         server 192.168.2.2:80 weight=1 down;                           #不参与负载均衡
         server 192.168.2.3:80 weight=1 backup;                         #备份服务器
         server 192.168.2.4:80 weight=1 max_fails=1 fail_timeout=10s;   #经过1次失败后,服务暂停时间10s限制最大的接收连接数
    }
........
....


保存


[root@C7--01 conf]# nginx -s reload访问测试:一直刷新都不会变那是因为我们设置了不同的状态实验成功
可以删除c7--04上的index.html进行测试
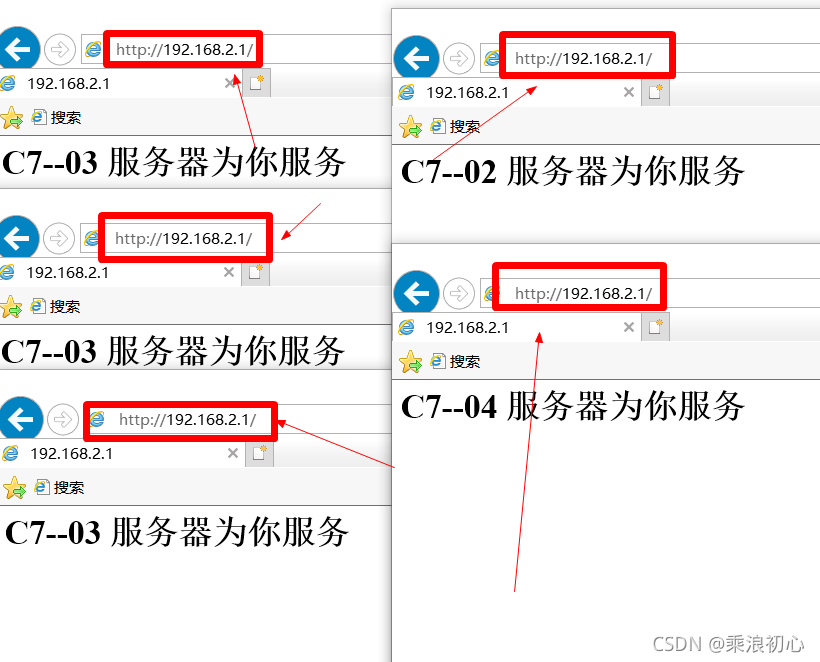
3、nginx负载均衡调度策略
| 调度算法 | 说明 |
| 轮询 | 按时间顺序逐一分配到不同的后端服务器(默认) |
| weight | 加权轮询,weight值越大,分配到的访问几率越高 |
| ip_hash | 每个请求按访问IP的hash结果分配,这样来自同一IP的固定访问一个后端服务器 如;192.168.2.1 |
| url_hash | 按照访问URL的hash结果来分配请求,是每个URL定向到同一个后端服务器 如:http://192.168.2.1/aaa/ |
| least_conn | 最少链接数,那个机器链接数少就分发 |
| hash | 关键数 hash自定义的key值 |
3.1、轮询访问
c7--01配置
[root@C7--01 conf]# vim nginx.conf

.....
..
    keepalive_timeout  65;
    upstream a {
         server 192.168.2.2:80 weight=1 ;
         server 192.168.2.3:80 weight=4 ;
         server 192.168.2.4:80 ;
    }
...
..
.


[root@C7--01 conf]# nginx -s reload
访问测试
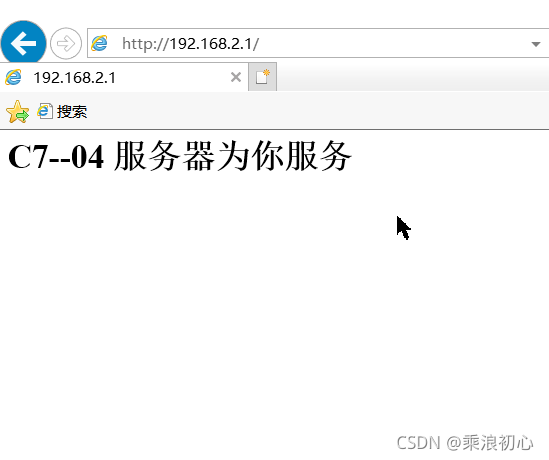
3.2、ip_hash配置
[root@C7--01 conf]# vim nginx.conf

......
...
    upstream a {
         ip_hash;
         server 192.168.2.2:80;
         server 192.168.2.3:80;
         server 192.168.2.4:80;
    }
...
.

保存


[root@C7--01 conf]# nginx -s reload
测试刷新多次都是c7--04服务器
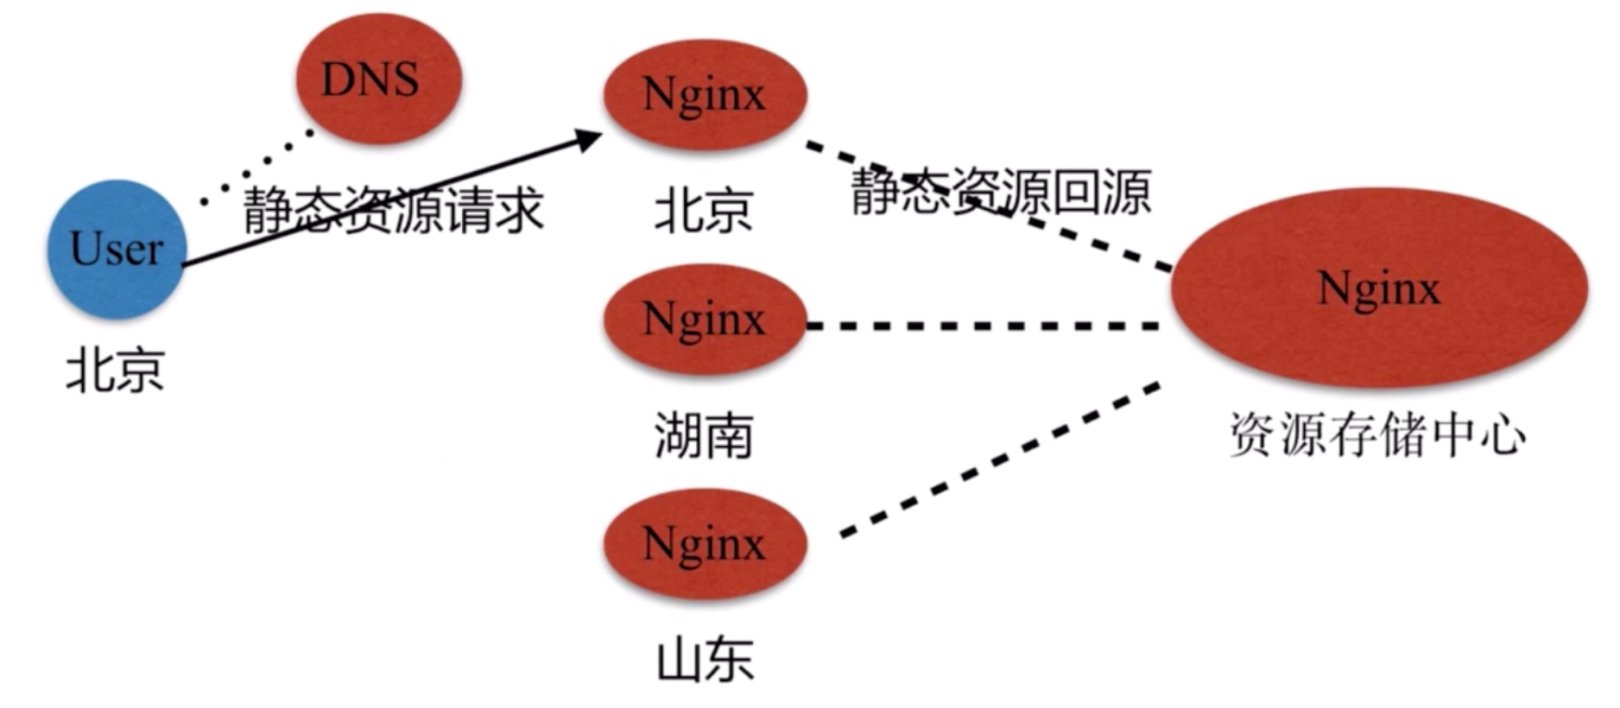
三、nginx动静分离
动静分离,通过中间件将动态请求和静态请求进行分离,分离资源,减少不必要的请求消耗,减少请求延时
好处:动静分离后,即使动态服务不可用,但静态资源不会受到影响通过中间件将动态请求和静态请求分离
| 名称 | ip | 服务 |
| C7--01 | 192.168.2.1 | proxy(代理) |
| C7--02 | 192.168.2.2 | nginx |
| C7--05 | 192.168.2.5 | tomcat |
安装tomcat参考:五章——部署Tomcat及其负载均衡(应用——linux防护与群集)
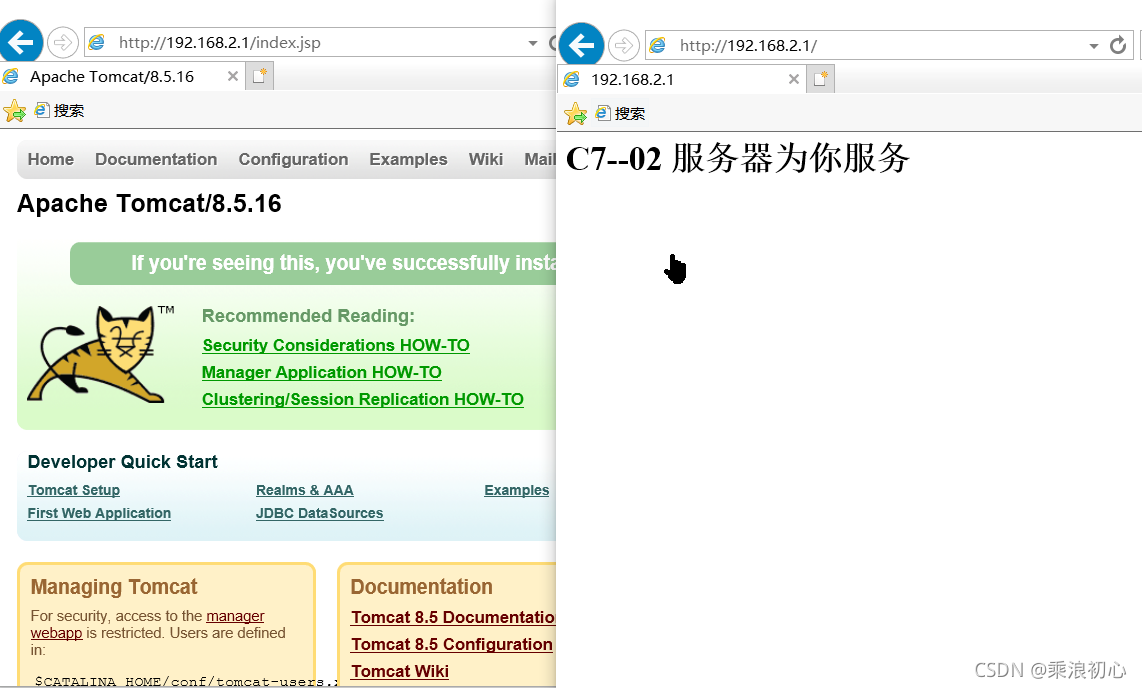
tomcat访问: 192.168.2.5:8080

在c7--01上配置nginx.conf文件
[root@C7--01 conf]# vim nginx.conf
......
..
http {
    include       mime.types;
    default_type  application/octet-stream;

    sendfile        on;

    keepalive_timeout  65;

    upstream nginx {                        #添加
        server 192.168.2.2:80 weight=2;
        }
        upstream tomcat {                   #添加
        server 192.168.2.5:8080 weight=2;
        }

    server {
        listen       80;
        server_name  localhost;
          location / {
            root   html;
            index index.html index.htm;
            proxy_pass http://nginx;       #代理到nginx区域
        }
          location ~ .*\.(jsp|gif|png|css)$ {

            proxy_pass http://tomcat;      #代理到tomcat区域
        }
        error_page   500 502 503 504  /50x.html;
        location = /50x.html {
            root   html;
        }
   }
..
.

保存

[root@C7--01 conf]# nginx -s reload
配置完成后验证:
四、nginx缓存服务
在通常情况下缓存是用来减少后端压力,将压力尽可能的往前推,减少后端压力,提高网站并发延时
缓存常见类型:服务端缓存、代理缓存,获取服务端内容进行缓存、客户端浏览器缓存、nginx 代理缓存
nginx代理缓存的原理:客户端向nginx代理请求数据;nginx代理因没有本地缓存向服务器请求数据;服务器返回给代理(nginx)数据;nginx代理返回给客户端数据
过一段时间访问:客户端再次向nginx代理请求数据;因为代理(nginx)本地已经有了数据缓存,所以不再需要向服务器请求,直接返回给客户端数据,在此过程减少了三次握手,加快了客户端的访问速度
环境准备
| 名称 | IP地址 | 服务 |
| c7--01 | 192.168.2.1 | proxy代理 |
| c7--02 | 192.168.2.2 | web服务 |
C7--01代理配置缓存
[root@C7--01 ~]# cd /usr/local/nginx/conf/
[root@C7--01 conf]# sed -i '/#/d' nginx.conf
[root@C7--01 conf]# sed -i '/^$/d' nginx.conf
[root@C7--01 conf]# mkdir -p /aaa/cache                #创建放缓存文件的目录
[root@C7--01 conf]# vim nginx.conf

worker_processes  1;
events {
    worker_connections  1024;
}
http {
    include       mime.types;
    default_type  application/octet-stream;
    sendfile        on;
    keepalive_timeout  65;
    upstream cache {                     #添加
     server 192.168.2.2:8081;
     server 192.168.2.2:8082;
     server 192.168.2.2:8083;
      }                                  #一组地址池
     proxy_cache_path /aaa/cache levels=1:2 keys_zone=code_cache:10m max_size=10g inactive=60m use_temp_path=off;     #后面有解释
    server {
        listen       80;
        server_name  localhost;
        root   html;
        index  index.html index.htm;
        location / {
          proxy_pass http://cache;                    #指定跳转,cache就是上面的负载均衡
          proxy_cache code_cache;                     #下面的内容在后面有解释
          proxy_cache_valid 200 304 12h;
          proxy_cache_valid any 10m;
          add_header Nginx-cache "$upstream_cache_status";
          proxy_next_upstream error timeout invalid_header http_500 http_502 http_503 http_504;
          #include proxy_params;

        }
        error_page   500 502 503 504  /50x.html;
        location = /50x.html {
            root   html;
        }
    }
}


保存

[root@C7--01 conf]# nginx -t
nginx: the configuration file /usr/local/nginx/conf/nginx.conf syntax is ok
nginx: configuration file /usr/local/nginx/conf/nginx.conf test is successful

[root@C7--01 conf]# nginx -s reload
解释: proxy_cache_path /aaa/cache levels=1:2 keys_zone=code_cache:10m max_size=10g inactive=60m use_temp_path=off;
| /aaa/cache | 指定缓存数据存放目录,在配置之前要先创建好 |
| levels=1:2 | 按照两层目录分级去存放缓存数据,也就是数据会分两层目录进行存放 |
| keys_zone=code_cache:10m | 开辟缓存空间的名称,10m表示大小,1m可以存放8000key |
| max_size=10g | 限制缓存数据最大的大小,超过指定大小后Nginx会清除时间最远的缓存数据 |
| inactive=60m | 表示保存的缓存60分钟内没有被访问的话就会被清除 |
| use_temp_path=off | 临时文件,会影响性能,建议关闭,不关的话Nginx默认是有一个存放缓存的目录的,关了可以指定缓存的目录 |
| proxy_cache code_cache | 开启缓存,后面跟的是区域的名称,就是 proxy_cache_path中keys_zone指定的区域 |
| proxy_cache_valid 200 304 12h | 表示状态码是200和304的页面缓存12个小时 |
| proxy_cache_valid any 10m | 其他的所有状态码缓存10分钟 |
| add_header Nginx-cache "$upstream_cache_status" | 修改头部信息,增加Nginx-cache变量的值,值为$upstream_cache_status |
proxy_next_upstream error timeout invalid_header http_500 http_502 http_503 http_504
出现500、502、503、504状态码的页面直接交给后端服务器处理,不进行缓存
c7--02的准备工作:
[root@C7--02 ~]# mkdir -p /aaa/A/
[root@C7--02 ~]# mkdir -p /aaa/B/
[root@C7--02 ~]# mkdir -p /aaa/C/
[root@C7--02 ~]# echo "A" > /aaa/A/A1.html
[root@C7--02 ~]# echo "B" > /aaa/B/B1.html
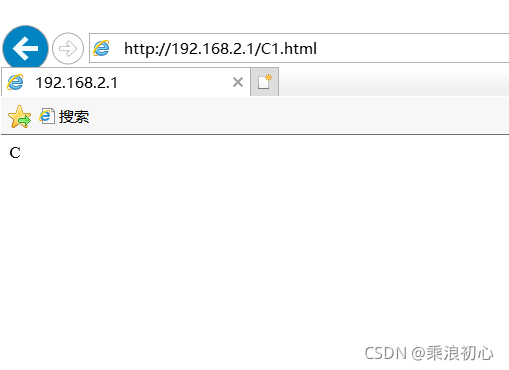
[root@C7--02 ~]# echo "C" > /aaa/C/C1.html
[root@C7--02 ~]# vim /usr/local/nginx/conf/nginx.conf
worker_processes 1;
events {
worker_connections 1024;
}
http {
include mime.types;
default_type application/octet-stream;
sendfile on;
keepalive_timeout 65;
server {
listen 8081;
root /aaa/A;
}
server {
listen 8082;
root /aaa/B;
}
server {
listen 8083;
root /aaa/C;
}
}
保存
[root@C7--02 ~]# nginx -t
nginx: the configuration file /usr/local/nginx/conf/nginx.conf syntax is ok
nginx: configuration file /usr/local/nginx/conf/nginx.conf test is successful
[root@C7--02 conf]# nginx -s reload
[root@C7--02 ~]# netstat -anpt | grep nginx
tcp 0 0 0.0.0.0:8081 0.0.0.0:* LISTEN 18345/nginx: master
tcp 0 0 0.0.0.0:8082 0.0.0.0:* LISTEN 18345/nginx: master
tcp 0 0 0.0.0.0:8083 0.0.0.0:* LISTEN 18345/nginx: master
使用客户端访问测试
使用本机查看是否有缓存,注意选项是大写的i
[root@C7--01 conf]# curl -s -I http://192.168.2.1/A1.html |grep "Nginx-cache"
Nginx-cache: HIT          #HIT就是有缓存,没有缓存会显示MISS
如
[root@C7--01 ~]# rm -rf /aaa/cache/*
[root@C7--01 ~]# curl -s -I http://192.168.2.1/A1.html |grep "Nginx-cache"
Nginx-cache: MISS
2、配置指定页面不进行缓存
在c7--01上配置
[root@C7--01 ~]# vim /usr/local/nginx/conf/nginx.conf

worker_processes  1;
events {
    worker_connections  1024;
}
http {
    include       mime.types;
    default_type  application/octet-stream;
    sendfile        on;
    keepalive_timeout  65;
    upstream cache {
     server 192.168.2.2:8081;
     server 192.168.2.2:8082;
     server 192.168.2.2:8083;
      }
     proxy_cache_path /aaa/cache levels=1:2 keys_zone=code_cache:10m max_size=10g inactive=60m use_temp_path=off;
    server {
        listen       80;
        server_name  localhost;
        if ($request_uri ~ ^/(A1|login|register|password)) {    #添加if 判断
        set $cookie_nocache 1;                                  #设置不将序列的值进行缓存
        }
        root   html;
        index  index.html index.htm;
        location / {
          proxy_pass http://cache;
          proxy_cache code_cache;
          proxy_cache_valid 200 304 12h;
          proxy_cache_valid any 10m;
          proxy_cache_key $host$uri$is_args$args;               #定义生成缓存的键
          proxy_no_cache $cookie_nocache $arg_nocache $arg_comment $http_pargma $http_authorization;                  #定义nginx不将响应写入缓存的条件;如果至少一个字符串条件非空而且非“0”,nginx就不将响应存入缓存
          add_header Nginx-cache "$upstream_cache_status";
          proxy_next_upstream error timeout invalid_header http_500 http_502 http_503 http_504;
          #include proxy_params;

        }
        error_page   500 502 503 504  /50x.html;
        location = /50x.html {
            root   html;
        }
    }
}

保存

[root@C7--01 ~]# nginx -t
nginx: the configuration file /usr/local/nginx/conf/nginx.conf syntax is ok
nginx: configuration file /usr/local/nginx/conf/nginx.conf test is successful
[root@C7--01 ~]# nginx -s reload
测试访问:
[root@C7--01 ~]# rm -rf /aaa/cache/*          #先清除缓存
[root@C7--01 ~]# curl -s -I http://192.168.2.1/A1.html |grep "Nginx-cache"
Nginx-cache: MISS
[root@C7--01 ~]# curl -s -I http://192.168.2.1/A1.html |grep "Nginx-cache"
[root@C7--01 ~]# curl -s -I http://192.168.2.1/A1.html |grep "Nginx-cache"
[root@C7--01 ~]# curl -s -I http://192.168.2.1/A1.html |grep "Nginx-cache"
Nginx-cache: MISS
[root@C7--01 ~]# curl -s -I http://192.168.2.1/A1.html |grep "Nginx-cache"
[root@C7--01 ~]# curl -s -I http://192.168.2.1/A1.html |grep "Nginx-cache"
[root@C7--01 ~]# curl -s -I http://192.168.2.1/A1.html |grep "Nginx-cache"
Nginx-cache: MISS
3、统计缓存日志
修改c7--01配置文件
[root@C7--01 ~]# touch /usr/local/nginx/logs/proxy_cache.log     #创建缓存日志路;径要写对要不然会报错

[root@C7--01 ~]# vim /usr/local/nginx/conf/nginx.conf

worker_processes  1;
events {
    worker_connections  1024;
}
http {
    include       mime.types;
    default_type  application/octet-stream;
    sendfile        on;
    keepalive_timeout  65;
    upstream cache {
     server 192.168.2.2:8081;
     server 192.168.2.2:8082;
     server 192.168.2.2:8083;
      }
      log_format  main  '$http_user_agent' '$request_uri' '$remote_addr - $remote_user [$time_local] "$request" '     #添加内容
                        '$status $body_bytes_sent "$http_referer" '
                        '"$http_user_agent" "$http_x_forwarded_for"' '"$upstream_cache_status"';

     access_log logs/proxy_cache.log main;         #指定相对路径(URI)的proxy_cache.log文件
     proxy_cache_path /aaa/cache levels=1:2 keys_zone=code_cache:10m max_size=10g inactive=60m use_temp_path=off;
    server {
        listen       80;
        server_name  localhost;
        if ($request_uri ~ ^/(A1|login|register|password)) {
        set $cookie_nocache 1;
        }
        root   html;
        index  index.html index.htm;
        location / {
          proxy_pass http://cache;
          proxy_cache code_cache;
          proxy_cache_valid 200 304 12h;
          proxy_cache_valid any 10m;
          proxy_cache_key $host$uri$is_args$args;
          proxy_no_cache $cookie_nocache $arg_nocache $arg_comment $http_pargma $http_authorization;
          add_header Nginx-cache "$upstream_cache_status";
          proxy_next_upstream error timeout invalid_header http_500 http_502 http_503 http_504;
          #include proxy_params;

        }
        error_page   500 502 503 504  /50x.html;
        location = /50x.html {
            root   html;
        }
    }
}
保存

[root@C7--01 ~]# nginx -s reload查看文件proxy_cache.log 最后面会有 MISS 和 HIT
[root@C7--01 ~]# tail -10 /usr/local/nginx/logs/proxy_cache.log
curl/7.29.0/A1.html192.168.2.1 - - [24/Nov/2021:06:47:25 +0800] "HEAD /A1.html HTTP/1.1" 200 0 "-" "curl/7.29.0" "-""MISS"
curl/7.29.0/A1.html192.168.2.1 - - [24/Nov/2021:06:47:28 +0800] "HEAD /A1.html HTTP/1.1" 404 0 "-" "curl/7.29.0" "-""MISS"
curl/7.29.0/B1.html192.168.2.1 - - [24/Nov/2021:06:48:06 +0800] "HEAD /B1.html HTTP/1.1" 200 0 "-" "curl/7.29.0" "-""HIT"
curl/7.29.0/B1.html192.168.2.1 - - [24/Nov/2021:06:48:08 +0800] "HEAD /B1.html HTTP/1.1" 200 0 "-" "curl/7.29.0" "-""HIT"
curl/7.29.0/B1.html192.168.2.1 - - [24/Nov/2021:06:48:09 +0800] "HEAD /B1.html HTTP/1.1" 200 0 "-" "curl/7.29.0" "-""HIT"
五、nginx静态资源
(一)、静态资源类型
Nginx作为静态资源 web 服务器部署配置,传输非常的高效,常常用于静态
资源处理,请求,动静分离
非服务器动态运行生成的文件属于静态资源
| 类型 | 种类 |
| 浏览器端渲染 | HTML、CSS、JS |
| 图片 | JPEG、GIF、PNG |
| 视频 | FLV、MP4 |
| 文件 | TXT 任意下载文件 |
(二)静态资源场景
静态资源传输延迟最小化
(三)、静态资源配置语法
| 文件读取高效sendfile |
| sendfile on | off; 如:sendfile off; |
| 可使用区域:http、server、location、if in location |
| 提高网络传输效率 nopush |
| tcp_ncpush on | off; 如:tcp_nopush off; |
| 可使用区域:http、server、location |
| 作用:sendfile开启清况下,提高网络念的‘传输效率' |
| 与tcp_nopush 之对应的配置tcp_nodelay |
| tcp_nodelay on |off; 如:tcp_nodelay on; |
| 可使用区域:http、server、location |
| 作用:在keepalive连接下,提高网络的传输’实时性 |
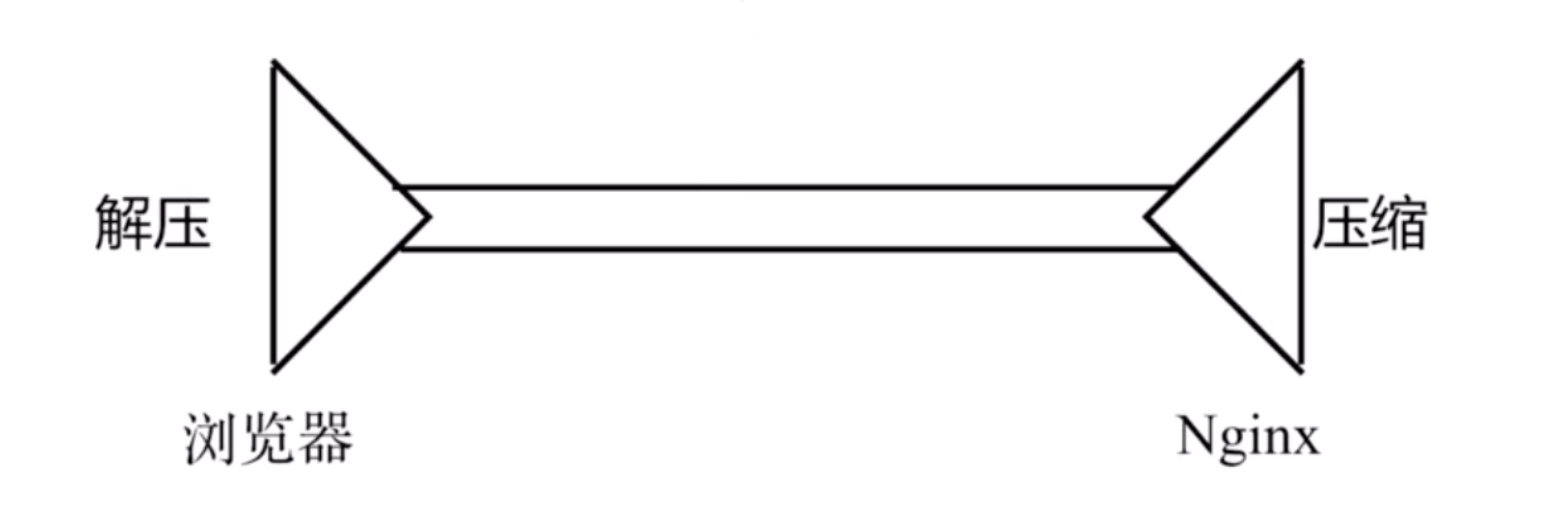
(四)、静态资源文件压缩
Nginx 将响应报⽂发送⾄客户端之前可以启⽤压缩功能,这能够有效地节约带宽,并提⾼响应⾄ 客户端的速度
| gzip 压缩配置语法 |
| gzip on | off; 如:gzip off; |
| 可使用区域:http、server、location、if in location |
| 作用:传输压缩 |
| gzip 压缩比率配置语法 |
| gzip_comp_level level; level(数量) 如:gzip_comp_level 1; |
| 可使用区域:http、server、location |
| 作用:压缩本身比较精费服务端性能 |
| gzip压缩协议版本 |
| gzip_http_version 1.0|1.1; 如:gzip_http_version 1.1; |
| 可使用区域:http、server、location |
| 作用:压缩使用在http那个协议,主流版本1.1 |
| gzip扩展压缩模块 |
| gzip_static on | off│always; 如:gzip_static off |
| 可使用区域:http、server、location |
| 作用:预读gzip功能 |
1、图片压缩案例
准备一台服务器即可保证可以访问 :192.168.2.1

[root@C7--03 ~]# mkdir -p /soft/code/images
[root@C7--03 ~]# cd /soft/code/images/
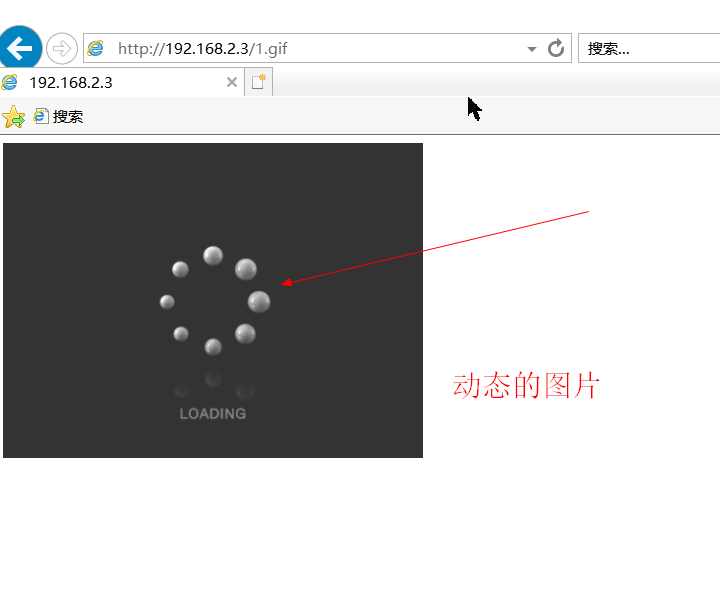
[root@C7--03 images]# ls #上传动态图片
1.gif
[root@C7--03 images]# vim /usr/local/nginx/conf/nginx.conf
worker_processes 1;
events {
worker_connections 1024;
}
http {
include mime.types;
default_type application/octet-stream;
# log_format main #'"$http_x_forwarded_for" $remote_addr - $remote_user [$time_local] "$request" '
# '$status $body_bytes_sent "$http_referer" '
# '"$http_user_agent" ';
# access_log logs/access.log main;
sendfile on;
keepalive_timeout 65;
server {
listen 80;
server_name 192.168.2.3;
location ~ .*\.(jpg|gif|png)$ { #修改
sendfile on; #⽂件读取⾼效开启
gzip_http_version 1.1; #http版本1.1
gzip_comp_level 9;
gzip_types text/plain application/json application/x-javascript application/css application/xml application/xml+rss text/javascript application/x-httpd-php image/jpeg image/gif image/png;
root /soft/code/images;
index index.html index.htm;
}
error_page 500 502 503 504 /50x.html;
location = /50x.html {
root html;
}
}
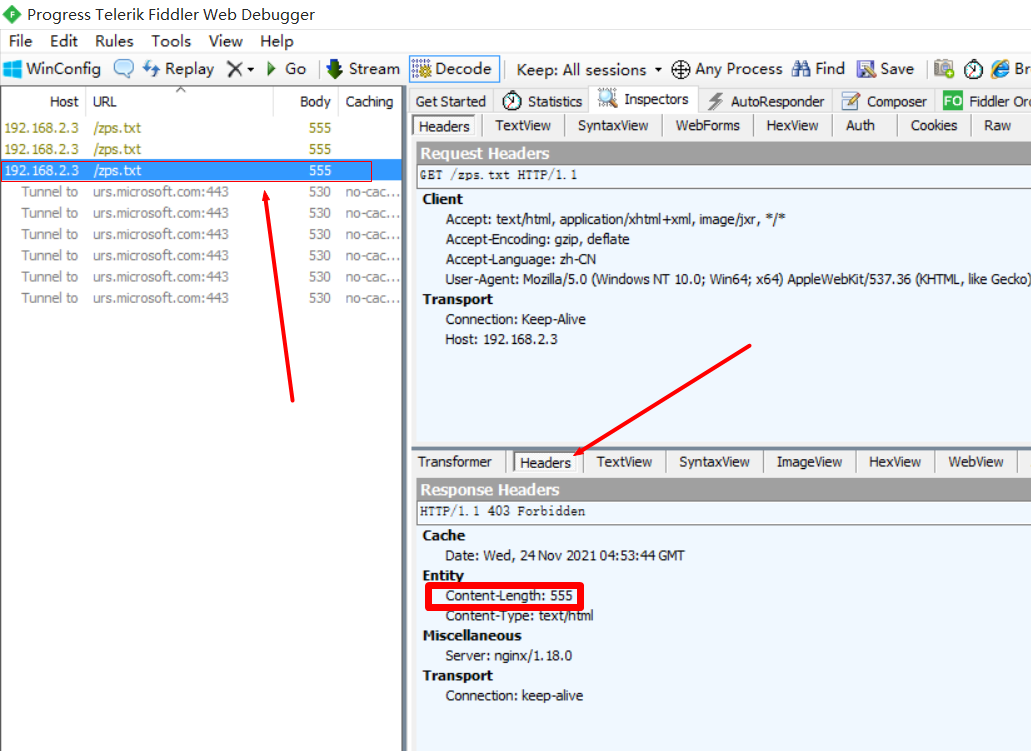
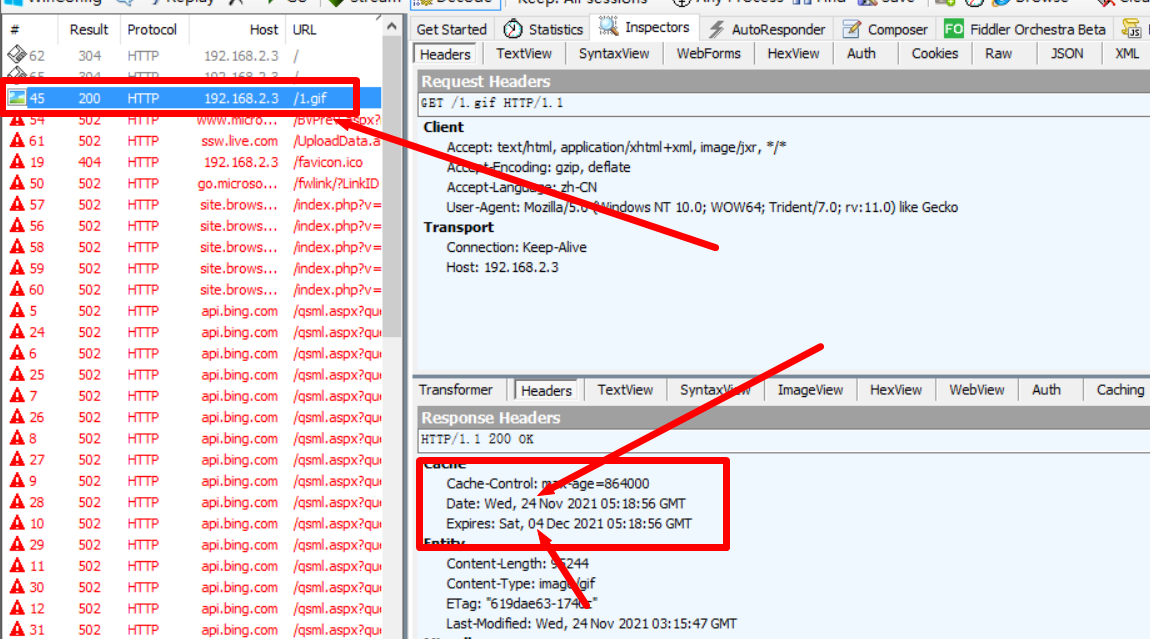
}测试访问 :192.168.2.3/1.gif
使用 Fiddler 软件进行抓包
下载Fiddler地址点击获取
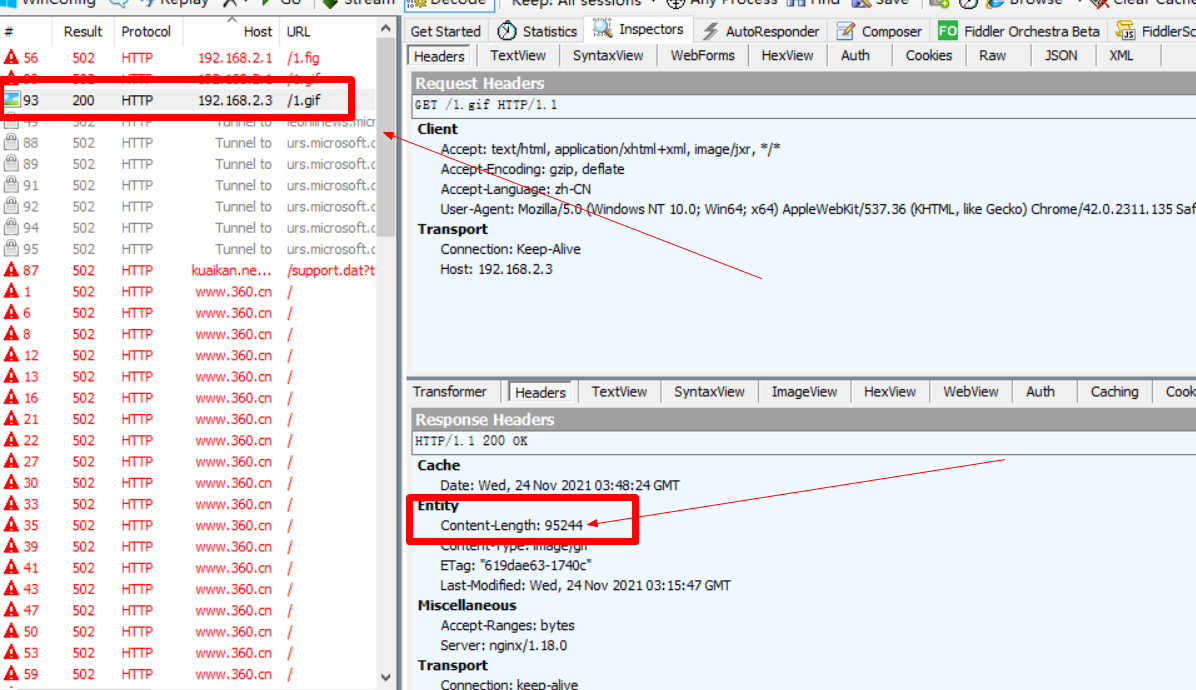
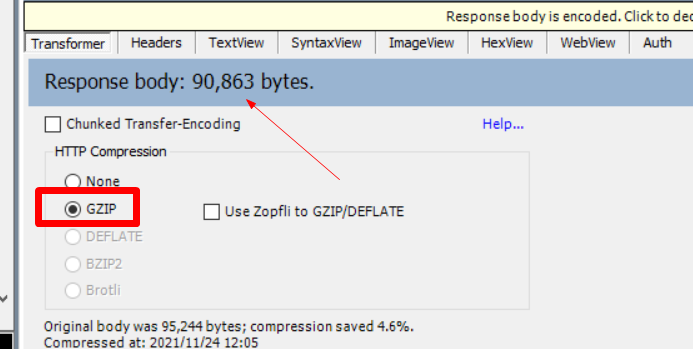
启⽤ gzip 压缩图⽚后(由于图⽚之前压缩过, 所以压缩⽐率不太明显)
没有压缩时的大小

压缩后的大小
2、文件压缩案例
创建访问文件
[root@C7--03 ~]# mkdir -p /soft/code/doc
[root@C7--03 ~]# cd /soft/code/doc
[root@C7--03 doc]# ls -lh /var/log/messages
-rw-------. 1 root root 533K 11月 24 12:35 /var/log/messages
[root@C7--03 doc]# cp /var/log/messages zps.txt
[root@C7--03 doc]# ll
总用量 536
-rw------- 1 root root 545706 11月 24 12:37 zps.txt
修改配置文件
[root@C7--03 doc]# vi /usr/local/nginx/conf/nginx.conf

worker_processes  1;
events {
    worker_connections  1024;
}
http {
    include       mime.types;
    default_type  application/octet-stream;
#    log_format  main  #'"$http_x_forwarded_for" $remote_addr - $remote_user [$time_local] "$request" '
#                      '$status $body_bytes_sent "$http_referer" '
#                      '"$http_user_agent" ';

#    access_log  logs/access.log  main;
    sendfile        on;

    keepalive_timeout  65;

    server {
        listen       80;
        server_name  192.168.2.3;
        index index.html index.htm;         #把index移动到server区域
        location ~ .*\.(txt|xml)$ {         #修改匹配后缀
            sendfile on;
            gzip_http_version 1.1;
            gzip_comp_level 9;
            gzip_types text/plain application/json application/x-javascript application/css application/xml application/xml+rss text/javascript application/x-httpd-php image/jpeg image/gif image/png;
            root   /soft/code/doc;          #修改路径


        }

        error_page   500 502 503 504  /50x.html;
        location = /50x.html {
            root   html;
        }
   }
 }

保存

[root@C7--03 doc]# nginx -s reload
访问: 192.168.2.3/zps.txt 后使用fiddler进行抓包
(五)、 静态资源浏览器缓存
HTTP协议定义的缓存机制(如: Expires; Cache-control 等)
1、浏览器⽆缓存
浏览器请求->⽆缓存->请求WEB服务器->请求响应->呈现2、浏览器有缓存
浏览器请求->有缓存->校验过期->是否有更新->呈现
校验是否过期 Expires HTTP1.0, Cache-Control(max-age) HTTP1.1
| 缓存配置语法 expires |
| expires [modified] time; 如:expires off; |
| expires epoch | max | off; |
| 可使用区域:http、server、location、if in location |
| 作⽤: 添加Cache-Control Expires头 |
准备访问页面
[root@C7--03 ~]# mkdir /soft/code/bj
[root@C7--03 ~]# cd /soft/code/bj
[root@C7--03 bj]# echo "<h1>哇哈哈哈</h1>" > index.html
编辑配置文件
[root@C7--03 bj]# vim /usr/local/nginx/conf/nginx.conf

worker_processes  1;
events {
    worker_connections  1024;
}
http {
    include       mime.types;
    default_type  application/octet-stream;
#    log_format  main  #'"$http_x_forwarded_for" $remote_addr - $remote_user [$time_local] "$request" '
#                      '$status $body_bytes_sent "$http_referer" '
#                      '"$http_user_agent" ';

#    access_log  logs/access.log  main;
    sendfile        on;

    keepalive_timeout  65;

    server {
        listen       80;
        server_name  192.168.2.3;
        index index.html index.htm;
        location ~ .*\.(bj|css|html)$ {    #修改
            root   /soft/code/bj;
            expires 2h;                    #缓存2小时
        }
        location ~ .*\.(jpg|gif|png)$ {    #修改
            root   /soft/code/images;
            expires 10d;                   #缓存10天
        }
        error_page   500 502 503 504  /50x.html;
        location = /50x.html {
            root   html;
        }
   }
 }

保存

[root@C7--03 bj]# nginx -s reload
访问:192.168.2.3/ 和 192.168.2.3/1.gif

访问后抓包

开发代码没有正式上线时, 希望静态⽂件不被缓存
修改配置文件: 取消bj css html等静态⽂件缓存
[root@C7--03 ~]# vim /usr/local/nginx/conf/nginx.conf

worker_processes  1;
events {
    worker_connections  1024;
}
http {
    include       mime.types;
    default_type  application/octet-stream;
#    log_format  main  #'"$http_x_forwarded_for" $remote_addr - $remote_user [$time_local] "$request" '
#                      '$status $body_bytes_sent "$http_referer" '
#                      '"$http_user_agent" ';

#    access_log  logs/access.log  main;
    sendfile        on;

    keepalive_timeout  65;

    server {
        listen       80;
        server_name  192.168.2.3;
        index index.html index.htm;
        location ~ .*\.(bj|css|html)$ {
            root   /soft/code/bj;
            expires 2h;
        }
        location ~ .*\.(jpg|gif|png)$ {
            root   /soft/code/images;
            expires 10d;
        }
        location ~ .*\.(css|bj|swf|json|mp4|htm|html)$ {   #添加内容
            add_header Cache-Control no-store;             ...
            add_header Pragma no-cache;                    #添加内容
        }
        error_page   500 502 503 504  /50x.html;
        location = /50x.html {
            root   html;
        }
   }
}访问:192.168.2.3 和 192.168.2.3/1.gif 省略。。。 然后进行抓包
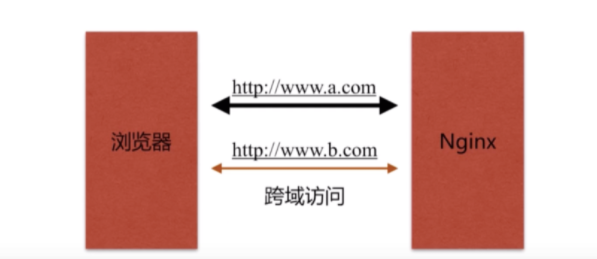
(六)静态资源跨域访问
跨域,指的是浏览器不能执行其他网站的脚本。它是由浏览器的同源策略造成的,是浏览器施加的安全限制
所谓同源是指,域名,协议,端口均相同
http://www.123.com/index.html 调用 http://www.123.com/server.php (非跨域)

http://www.123.com/index.html 调用 http://www.456.com/server.php (主域名不同:123/456,跨域)

http://abc.123.com/index.html 调用 http://def.123.com/server.php (子域名不同:abc/def,跨域)

http://www.123.com:8080/index.html 调用 http://www.123.com:8081/server.php (端口不同:8080/8081,跨域)

http://www.123.com/index.html 调用 https://www.123.com/server.php (协议不同:http/https,跨域)

请注意:localhost和127.0.0.1虽然都指向本机,但也属于跨域
浏览器禁⽌跨域访问, 主要不安全, 容易出现 CSRF 攻击
| Nginx 跨域访问配置 |
| add_header name value [always]; |
| — |
| 可使用区域:http, server, location, if in location |
| 作⽤:Access-Control-Allow-Origin |
| add_header ‘Access-Control-Allow-Origin’ ‘*’; #允许来自所有的访问地址 |
案例
1、准备工作
[root@C7--03 ~]# mkdir -p /web/benet
[root@C7--03 ~]# vim /web/benet/index.html

<!DOCTYPE html>
<html>
<head>
<script src="http://libs.baidu.com/jquery/2.0.0/jquery.min.js"></script>
<script>
    $.get('https://www.baidu.com', {}, function (res) {
        console.log(res);
    });
</script>
</head>
<body>
</body>
</html>


保存
2、修改配置文件
[root@C7--03 ~]# vim /usr/local/nginx/conf/nginx.conf


worker_processes  1;
events {
    worker_connections  1024;
}
http {
    include       mime.types;
    default_type  application/octet-stream;
    sendfile        on;

    keepalive_timeout  65;

    server {
        listen       80;
        server_name  www.benet.com;
        index index.html index.htm;
        location / {
           root /web/benet;
             if ($request_method = 'OPTIONS') {
                add_header 'Access-Control-Allow-Origin' '*';
                add_header 'Access-Control-Allow-Methods' 'GET, POST, OPTIONS';
                add_header 'Access-Control-Allow-Headers' 'DNT,User-Agent,X-Requested-With,If-Modified-Since,Cache-Control,Content-Type,Range';
                add_header 'Access-Control-Max-Age' 1728000;
                add_header 'Content-Type' 'text/plain; charset=utf-8';
                add_header 'Content-Length' 0;
                return 204;
             }
             if ($request_method = 'POST') {
                add_header 'Access-Control-Allow-Origin' '*';
                add_header 'Access-Control-Allow-Methods' 'GET, POST, OPTIONS';
                add_header 'Access-Control-Allow-Headers' 'DNT,User-Agent,X-Requested-With,If-Modified-Since,Cache-Control,Content-Type,Range';
                add_header 'Access-Control-Expose-Headers' 'Content-Length,Content-Range';
             }
            if ($request_method = 'GET') {
                add_header 'Access-Control-Allow-Origin' '*';
                add_header 'Access-Control-Allow-Methods' 'GET, POST, OPTIONS';
                add_header 'Access-Control-Allow-Headers' 'DNT,User-Agent,X-Requested-With,If-Modified-Since,Cache-Control,Content-Type,Range';
                add_header 'Access-Control-Expose-Headers' 'Content-Length,Content-Range';
             }
             proxy_pass http://www.baidu.com/;
             proxy_redirect off;
}
        error_page   500 502 503 504  /50x.html;
        location = /50x.html {
            root   html;
        }
   }
 }

保存

[root@C7--03 conf]# nginx -s reload注:服务器必须有网 才可以成功跳转到www.baidu.com
修改本机的hosts文件 添加内容
192.168.2.3 www.benet.com访问 www.benet.com 会跳转到 https://www.baidu.com/
图片省略。。。。。
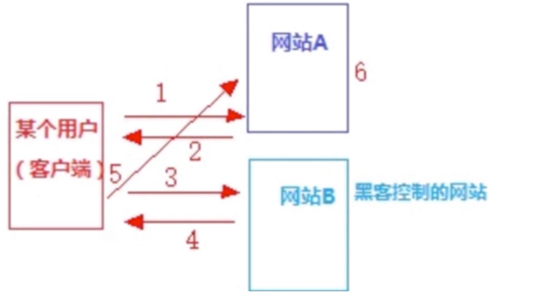
(七)静态资源防盗链
盗链指的是在⾃⼰的界⾯展示不在⾃⼰服务器上的内容,通过技术⼿段获得他⼈服务器的资源地 址,绕过别⼈资源展示页⾯,在⾃⼰页⾯向⽤户提供此内容,从⽽减轻⾃⼰服务器的负担,因为 真实的空间和流量来⾃别⼈服务器 防盗链设置思路: 区别哪些请求是⾮正常⽤户请求
[root@C7--01 ~]# cat /usr/src/nginx-1.18.0/auto/options |grep "HTTP_REFERER=YES"
HTTP_REFERER=YES| 基于 http_refer的语法 |
| valid_referers none | blocked | server_names | string …; |
| — |
| 可使用区域:server, location |
| 防盗链:是通过location + rewrite实现的 |
location ~* .(wma|wmv|asf|mp3|mmf|zip|rar|jpg|gif|png|swf|flv)$ {
valid_referers none blocked .linuxfan.cn linuxfan.cn;
if ($invalid_referer) {
rewrite ^/ http://www.linuxfan.cn/error.jpg;


第一行: wma|wmv|asf|mp3|mmf|zip|rar|jpg|gif|png|swf|flv 表示对这些后缀的文件进行防盗链

第二行:valid_referers表示被允许的URL,none表示浏览器中 referer(Referer 是 header 的一部分,当浏览器向 web 服务器发送请求的时候,一般会带上 Referer,告诉服务器我是从哪个页面链接过来的,服务器基此可以获得一些信息用于处理;既先前网页的地址) 为空的情况,就直接在浏览器访问图片,blocked referer 不为空的情况,但是值被代理或防火墙删除了,这些值不以http://或 https://开头,.linuxfan是匹配URL的域名

• none : 允许没有http_refer的请求访问资源;

• blocked : 允许不是http://开头的,不带协议的请求访问资源;

第三行:if{}判断如果是来自于invalid_referer(不被允许的URL)链接,即不是来自第二行指定的URL,就强制跳转到错误页面,当然直接返回 404 (return 404)也是可以的,也可以是图片
注意:防盗链测试时,不要和expires配置一起使用
准备两台机器
| c7--01(真) | 192.168.2.1 |
| c7--03(假) | 192.168.2.3 |
------------在c7--01上配置index.html文件

[root@C7--01 conf]# ls ../html/     #上传一个动态的图片
1.gif  index.html

[root@C7--01 conf]# vim ../html/index.html

<h1>www.baidu.com</h1>
<img src="1.gif" />


------------在c7--03上配置index.html文件

[root@C7--03 conf]# vim ../html/index.html
<h1>C7--03333333   服务器为你服务</h2>
<img src="http://www.benet.com/1.gif" />
配置文件可以正常访问就可以
-----############----           c7--01配置nginx.html


worker_processes  1;
events {
    worker_connections  1024;
}
http {
    include       mime.types;
    default_type  application/octet-stream;
    sendfile        on;
    keepalive_timeout  65;

      log_format  main  '$http_user_agent' '$request_uri' '$remote_addr - $remote_user [$time_local] "$request" '
                        '$status $body_bytes_sent "$http_referer" '
                        '"$http_user_agent" "$http_x_forwarded_for"' '"$upstream_cache_status"';


    server {
        listen       80;
        server_name  localhost;


        location / {
        root   html;
        index  index.html index.htm;
        }
        error_page   500 502 503 504  /50x.html;
        location = /50x.html {
            root   html;
        }
    }
}

[root@C7--01 conf]# nginx -s reload


------###############---          c7--03配置nginx.html

[root@C7--03 ~]# vim /usr/local/nginx/conf/nginx.conf

worker_processes  1;
events {
    worker_connections  1024;
}
http {
    include       mime.types;
    default_type  application/octet-stream;
    sendfile        on;

    keepalive_timeout  65;

    server {
        listen       80;
        server_name  www.du.com;
        index index.html index.htm;
        location / {
           root html;
}
        error_page   500 502 503 504  /50x.html;
        location = /50x.html {
            root   html;
        }
   }
 }

[root@C7--03 ~]# nginx -s reload修改:本机的hosts文件、c7--01、c7--03都需要添加否则会出错
添加以下内容
192.168.2.1 www.benet.com
192.168.2.3 www.du.com

我们看到c7--03可以盗取c7--01的网页图片;为了不让他盗取我们需要修改c7--01的配置文件
[root@C7--01 conf]# ls ../html/      #上传2.png图片
1.gif  2.png  aaa  index.html

[root@C7--01 conf]# vim nginx.conf

worker_processes  1;
events {
    worker_connections  1024;
}
http {
    include       mime.types;
    default_type  application/octet-stream;
    sendfile        on;
    keepalive_timeout  65;

      log_format  main  '$http_user_agent' '$request_uri' '$remote_addr - $remote_user [$time_local] "$request" '
                        '$status $body_bytes_sent "$http_referer" '
                        '"$http_user_agent" "$http_x_forwarded_for"' '"$upstream_cache_status"';


    server {
        listen       80;
        server_name  localhost;


        location / {
        root   html;
        index  index.html index.htm;
        }
        location ~* \.(wma|wmv|asf|mp3|mmf|zip|rar|jpg|gif|swf|flv|jpeg) {          #添加匹配后缀为括号里面的
           root html                                                                #指定路径
           valid_referers none blocked *.benet.com benet.com;                       #只允许*.benet.com benet.com  直接访问
           if ($invalid_referer){
           rewrite ^/ http://www.benet.com/2.png;                                   #设置跳转到2.png图片
           }
        }
        error_page   500 502 503 504  /50x.html;
        location = /50x.html {
            root   html;
        }
    }
}


[root@C7--01 conf]# nginx -s reload
我们可以看到c7--03没盗取到c7--01的图片反而盗用了另一张图片:结果设置防盗链成功