SpringBoot启动源码详解(一)【万字长文】
- 1.首先大run!
- 2.new(初始化实例)
- 3.正式开始run
- 4.一步一步来
- 4.1首先进行计时监控
- 4.2 然后进行初始上下文和configureHeadlessProperty
- 4.3.然后来到了我们一个深入点
- 4.4.开始默认初始化参数,--XX JAR这种,本测试为null
- 4.5.根据运行监听器和应用参数来准备spring环境
- 4.5.打印Banner类
1.首先大run!

main方法作为程序的入口,执行SpringApplication.run(),传入参数是启动类的class对象@SpringBootApplication注解

点进来之后,我们发现有两部分,先new,后run,那我们的本文的逻辑就大致出来了
2.new(初始化实例)
//创建一个新的实例,这个应用程序的上下文将要从指定的来源加载Bean
public SpringApplication(ResourceLoader resourceLoader, Class<?>... primarySources) {
//给变量赋默认值,后续我们都会接触到
this.sources = new LinkedHashSet();
this.bannerMode = Mode.CONSOLE;
this.logStartupInfo = true;
this.addCommandLineProperties = true;
this.addConversionService = true;
this.headless = true;
this.registerShutdownHook = true;
this.additionalProfiles = Collections.emptySet();
this.isCustomEnvironment = false;
this.lazyInitialization = false;
this.applicationContextFactory = ApplicationContextFactory.DEFAULT;
this.applicationStartup = ApplicationStartup.DEFAULT;
//从这里开始有意思了,首先给资源初始化资源加载器,默认为null
this.resourceLoader = resourceLoader;
//断言,就是资源类不允许为null
Assert.notNull(primarySources, "PrimarySources must not be null");
//利用LinkedHashSet有序和去重,最资源进行去重
this.primarySources = new LinkedHashSet(Arrays.asList(primarySources));
//根据jar包推断当前 WEB 应用类型,一共有三种:NONE,SERVLET,REACTIVE(这个方法可以点进去看看)
//根据有无javax.servlet.Servlet的jar(servelt)和spring-boot-starter-webflux的jar包,则会启动Reactive模式
//这里是SERVLET
this.webApplicationType = WebApplicationType.deduceFromClasspath();
this.bootstrapRegistryInitializers = this.getBootstrapRegistryInitializersFromSpringFactories();
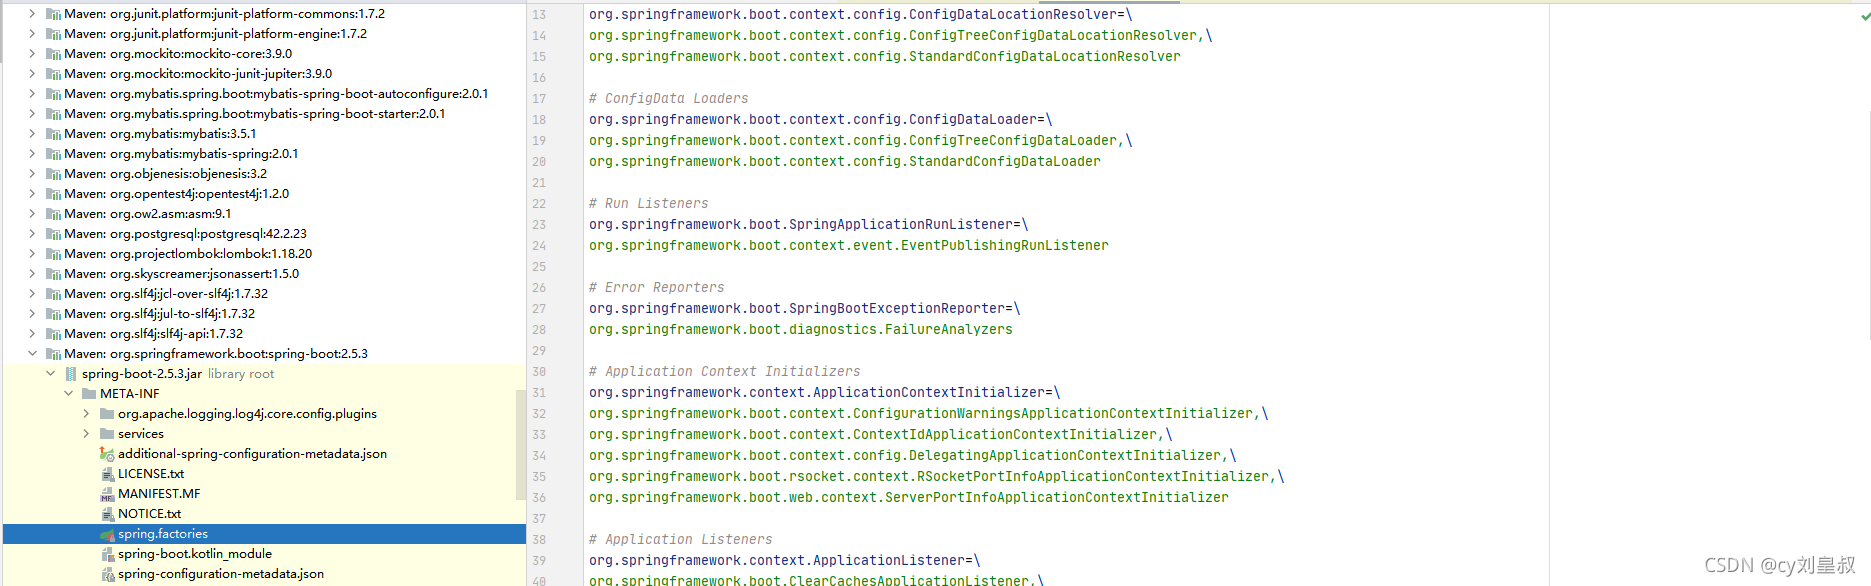
//设置应用上线文初始化器,从"META-INF/spring.factories"读取ApplicationContextInitializer类的实例名称集合并去重(springboot的第一个jar包),并进行set去重。(一共7个)
this.setInitializers(this.getSpringFactoriesInstances(ApplicationContextInitializer.class));
//设置监听器,从"META-INF/spring.factories"读取ApplicationListener类的实例名称集合并去重,并进行set去重。(一共11个)
this.setListeners(this.getSpringFactoriesInstances(ApplicationListener.class));
//栈操作获取最终实例化对象
this.mainApplicationClass = this.deduceMainApplicationClass();
}
初始化读取的配置文件全类名
getSpringFactoriesInstances()里面create实例的操作的核心代码逻辑
private <T> List<T> createSpringFactoriesInstances(Class<T> type, Class<?>[] parameterTypes, ClassLoader classLoader, Object[] args, Set<String> names) {
		//实例集合,从上一层的loader中获取,也就是从上面图片中的配置文件中获取
        List<T> instances = new ArrayList(names.size());
        Iterator var7 = names.iterator();

        while(var7.hasNext()) {
            String name = (String)var7.next();

            try {
            	//变量,然后基本反射操作,构造方法获取对象
                Class<?> instanceClass = ClassUtils.forName(name, classLoader);
                Assert.isAssignable(type, instanceClass);
                Constructor<?> constructor = instanceClass.getDeclaredConstructor(parameterTypes);
                T instance = BeanUtils.instantiateClass(constructor, args);
                //添加,然后return
                instances.add(instance);
            } catch (Throwable var12) {
                throw new IllegalArgumentException("Cannot instantiate " + type + " : " + name, var12);
            }
        }

        return instances;
    }
跟踪栈操作
    private Class<?> deduceMainApplicationClass() {
        try {
            StackTraceElement[] stackTrace = (new RuntimeException()).getStackTrace();
            StackTraceElement[] var2 = stackTrace;
            int var3 = stackTrace.length;

            for(int var4 = 0; var4 < var3; ++var4) {
                StackTraceElement stackTraceElement = var2[var4];
                //栈操作,比较相等,反射方式创建对象
                if ("main".equals(stackTraceElement.getMethodName())) {
                    return Class.forName(stackTraceElement.getClassName());
                }
            }
        } catch (ClassNotFoundException var6) {
        }

        return null;
    }
3.正式开始run
    public ConfigurableApplicationContext run(String... args) {
    	//计时器,监控操作
        StopWatch stopWatch = new StopWatch();
        stopWatch.start();
        // 创建启动上下文对象
        DefaultBootstrapContext bootstrapContext = this.createBootstrapContext();
        ConfigurableApplicationContext context = null;
        this.configureHeadlessProperty();
        //创建所有spring运行监听器并发布应用启动事件,简单说的话就是获取SpringApplicationRunListener类型的实例(EventPublishingRunListener对象),
        //并封装进SpringApplicationRunListeners对象,然后返回这个SpringApplicationRunListeners对象。说的再简单点,getRunListeners就是准备好了运行时监听器EventPublishingRunListener。
        SpringApplicationRunListeners listeners = this.getRunListeners(args);
        listeners.starting(bootstrapContext, this.mainApplicationClass);

        try {
        	//初始化默认参数
            ApplicationArguments applicationArguments = new DefaultApplicationArguments(args);
            //准备环境
            ConfigurableEnvironment environment = this.prepareEnvironment(listeners, bootstrapContext, applicationArguments);
            //开启忽略
            this.configureIgnoreBeanInfo(environment);
            //初始化打印的banner类
            Banner printedBanner = this.printBanner(environment);
            //创建上下文
            context = this.createApplicationContext();
            context.setApplicationStartup(this.applicationStartup);
            //准备上下文
            this.prepareContext(bootstrapContext, context, environment, listeners, applicationArguments, printedBanner);
            //开始刷新
            this.refreshContext(context);
            //应用上下文刷新后置处理,做一些扩展功能
            this.afterRefresh(context, applicationArguments);
            //监控计时停止
            stopWatch.stop();
            //日志输入类信息,时间等等
            if (this.logStartupInfo) {
                (new StartupInfoLogger(this.mainApplicationClass)).logStarted(this.getApplicationLog(), stopWatch);
            }
			//正式开始监控和执行Runner
            listeners.started(context);
            this.callRunners(context, applicationArguments);
        } catch (Throwable var10) {
            this.handleRunFailure(context, var10, listeners);
            throw new IllegalStateException(var10);
        }

        try {
        	//发布上下文
            listeners.running(context);
            //大工告成,开始返回上下文
            return context;
        } catch (Throwable var9) {
            this.handleRunFailure(context, var9, (SpringApplicationRunListeners)null);
            throw new IllegalStateException(var9);
        }
    }
4.一步一步来
4.1首先进行计时监控
public void start(String taskName) throws IllegalStateException {
//创建并启动计时监控类,可以看到记录当前任务的名称,默认是空字符串,
//然后记录当前springboot应用启动的开始时间。
    if (this.currentTaskName != null) {
        throw new IllegalStateException("Can't start StopWatch: it's already running");
    }
    this.currentTaskName = taskName;
    this.startTimeNanos = System.nanoTime();
}
4.2 然后进行初始上下文和configureHeadlessProperty
private void configureHeadlessProperty() {
    System.setProperty("java.awt.headless", System.getProperty("java.awt.headless", Boolean.toString(this.headless)));
}
用于运行headless服务器,进行简单的图像处理,多用于在缺少显示屏、键盘或者鼠标时的系统配置,很多监控工具如jconsole 需要将该值设置为true
4.3.然后来到了我们一个深入点
        SpringApplicationRunListeners listeners = this.getRunListeners(args);
        listeners.starting(bootstrapContext, this.mainApplicationClass);、
为了防止之后看得混乱,我们先理一理,现在我们可以知道spring.factory得到了SpringApplicationRunListener的实现类
EventPublishingRunListener(有且只要一个,这个类很重要,因为事件监听的实现是这个类里面的方法包括strat,environmentPrepared等等),而我们读取spring.factory(比如那ApplicationListener的11个实现类,
这些都是new里面的准备工作,我们需要全部串起来)是在SpringApplication这个类里面,
而我们注意我们starting确是在SpringApplicationRunListeners这个类调用的,所以对于的实现类是怎么传输过来的呢?
如果可以的话我们可以带着这个疑问来看接下来的源码。因为我们需要关注一下各个类之间的关系,
所以我们从最外层一步一步开始分析
private SpringApplicationRunListeners getRunListeners(String[] args) {
        Class<?>[] types = new Class[]{SpringApplication.class, String[].class};
        return new SpringApplicationRunListeners(logger, this.getSpringFactoriesInstances(SpringApplicationRunListener.class, types, this, args), this.applicationStartup);
    }
我们不点进去都可以看到大致逻辑,通过getSpringFactoriesInstances得到一个SpringApplicationRunListeners的实例对象
private <T> Collection<T> getSpringFactoriesInstances(Class<T> type, Class<?>[] parameterTypes, Object... args) {
        ClassLoader classLoader = this.getClassLoader();
        Set<String> names = new LinkedHashSet(SpringFactoriesLoader.loadFactoryNames(type, classLoader));
        List<T> instances = this.createSpringFactoriesInstances(type, parameterTypes, classLoader, args, names);
        AnnotationAwareOrderComparator.sort(instances);
        return instances;
    }
我们可以一路点到其中的其中的createSpringFactoriesInstances这个方法
    private <T> List<T> createSpringFactoriesInstances(Class<T> type, Class<?>[] parameterTypes, ClassLoader classLoader, Object[] args, Set<String> names) {
        List<T> instances = new ArrayList(names.size());
        Iterator var7 = names.iterator();

        while(var7.hasNext()) {
            String name = (String)var7.next();

            try {
                Class<?> instanceClass = ClassUtils.forName(name, classLoader);
                Assert.isAssignable(type, instanceClass);
                //反射操作,我们debug可以发现
                Constructor<?> constructor = instanceClass.getDeclaredConstructor(parameterTypes);
                T instance = BeanUtils.instantiateClass(constructor, args);
                instances.add(instance);
            } catch (Throwable var12) {
                throw new IllegalArgumentException("Cannot instantiate " + type + " : " + name, var12);
            }
        }

        return instances;
    }

    }
我们可以看到这里经典反射构造方法构造函数,但是我们debug可以发现构造的正是我们factory里面的 EventPublishingRunListener这个类。所以我们来看看这个类的构造方法

构造方法可以看出,将SpringAppliction传过来了,而且将其放进了其中的成员变量initalMuticaster,这也为后面启动做了铺垫

2.1 listeners.starting(bootstrapContext, this.mainApplicationClass);
到这里开始启动了

//此处的监听器可以看出是事件发布监听器,主要用来发布启动事件
@Override
public void starting() {
    //这里是创建application事件‘applicationStartingEvent’
    this.initialMulticaster.multicastEvent(new ApplicationStartingEvent(this.application, this.args));
}
//applicationStartingEvent是springboot框架最早执行的监听器,在该监听器执行started方法时,会继续发布事件,主要是基于spring的事件机制
     public void multicastEvent(ApplicationEvent event, @Nullable ResolvableType eventType) {
        ResolvableType type = eventType != null ? eventType : this.resolveDefaultEventType(event);
         //获取线程池,如果为空则同步处理。这里线程池为空,还未初始化
        Executor executor = this.getTaskExecutor();
        Iterator var5 = this.getApplicationListeners(event, type).iterator();

        while(var5.hasNext()) {
            ApplicationListener<?> listener = (ApplicationListener)var5.next();
            if (executor != null) {
                executor.execute(() -> {
                 //异步发送事件
                    this.invokeListener(listener, event);
                });
            } else {
               //同步发送事件
                this.invokeListener(listener, event);
            }
        }

    }
这里有一个方法可以再进去看看,我个人觉得挺有意思的getApplicationListeners,我们知道11个监听器,每个监听器各司其职,不可能匹配所以事件,那么这个过滤操作在哪完成的呢?
从getApplicationListeners-》retrieveApplicationListeners-》supportsEvent
    protected boolean supportsEvent(Class<?> listenerType, ResolvableType eventType) {
    	//查看子父类关系,进行过滤操作
        ResolvableType declaredEventType = GenericApplicationListenerAdapter.resolveDeclaredEventType(listenerType);
        return declaredEventType == null || declaredEventType.isAssignableFrom(eventType);
    }
4.4.开始默认初始化参数,–XX JAR这种,本测试为null
ApplicationArguments applicationArguments = new DefaultApplicationArguments(args);
public DefaultApplicationArguments(String... args) {
    Assert.notNull(args, "Args must not be null");
    this.source = new Source(args);
    this.args = args;
}
4.5.根据运行监听器和应用参数来准备spring环境
private ConfigurableEnvironment prepareEnvironment(SpringApplicationRunListeners listeners,
													   DefaultBootstrapContext bootstrapContext, ApplicationArguments applicationArguments) {
		 // 获取或者创建应用环境
		ConfigurableEnvironment environment = getOrCreateEnvironment();
		// 配置应用环境,配置propertySource和activeProfiles
		configureEnvironment(environment, applicationArguments.getSourceArgs());
		// 开始广播ApplicationEnvironmentPreparedEvent
		ConfigurationPropertySources.attach(environment);
		listeners.environmentPrepared(bootstrapContext, environment);
		DefaultPropertiesPropertySource.moveToEnd(environment);
		// 根据命令行参数中spring.profiles.active属性配置Environment对象中的activeProfile(比如dev、prod、test)
		configureAdditionalProfiles(environment);
		// 绑定环境中spring.main属性绑定到SpringApplication对象中
		bindToSpringApplication(environment);
		// 如果用户使用spring.main.web-application-type属性手动设置了webApplicationType
		if (!this.isCustomEnvironment) {
			// 类型判断,类型转换
			environment = new EnvironmentConverter(getClassLoader()).convertEnvironmentIfNecessary(environment,
					deduceEnvironmentClass());
		}
		ConfigurationPropertySources.attach(environment);
		return environment;
	}
点进去之后的详细代码getOrCreateEnvironment创建环境(根据环境类型)
// 应用程序的类型可以分为servlet环境、标准环境(特殊的非web环境)和响应式环境
private ConfigurableEnvironment getOrCreateEnvironment() {
    //存在return
        if (this.environment != null) {
            return this.environment;
        }
    //根据类型创建对应的Environment
        switch (this.webApplicationType) {
        case SERVLET:
            return new StandardServletEnvironment();
        case REACTIVE:
            return new StandardReactiveWebEnvironment();
        default:
            return new StandardEnvironment();
        }
    }
  //配置应用环境
protected void configureEnvironment(ConfigurableEnvironment environment, String[] args) {
    if (this.addConversionService) {
        ConversionService conversionService = ApplicationConversionService.getSharedInstance();
        environment.setConversionService((ConfigurableConversionService) conversionService);
    }
    //配置property sources
    configurePropertySources(environment, args);
    //配置profiles
    configureProfiles(environment, args);
}
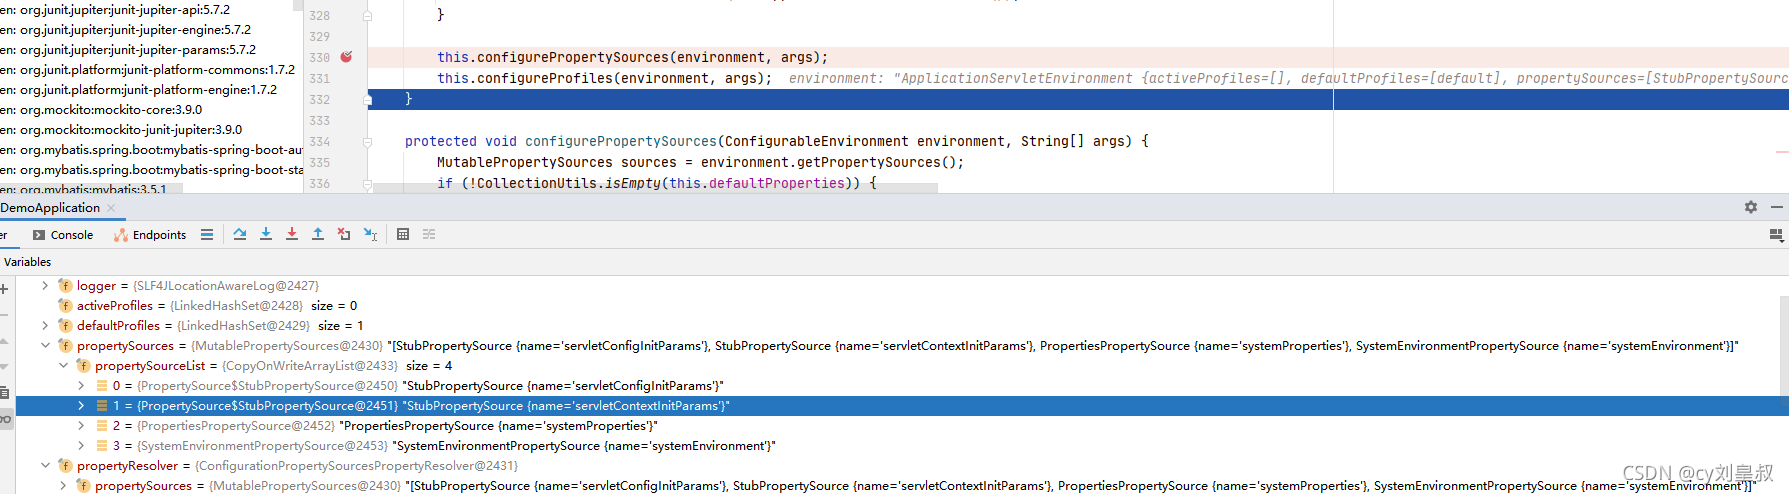
从 propertySourceList里面可以看到,
StubPropertySource {name=‘servletConfigInitParams’},
StubPropertySource {name=‘servletContextInitParams’},两个servelt的核心成功读取到了
4.5.打印Banner类
private Banner printBanner(ConfigurableEnvironment environment) {
		// console、log、off,根据类型打印不同的banner
		if (this.bannerMode == Banner.Mode.OFF) {
			return null;
		}
		ResourceLoader resourceLoader = (this.resourceLoader != null) ? this.resourceLoader
				: new DefaultResourceLoader(null);
		SpringApplicationBannerPrinter bannerPrinter = new SpringApplicationBannerPrinter(resourceLoader, this.banner);
		if (this.bannerMode == Mode.LOG) {
			return bannerPrinter.print(environment, this.mainApplicationClass, logger);
		}
		return bannerPrinter.print(environment, this.mainApplicationClass, System.out);
	}
这个比较简单就是打印banner类。至此终于可以看到我们的springboot了!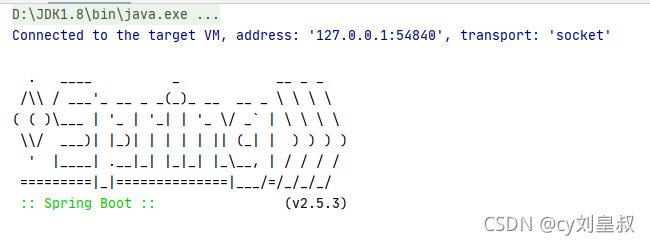
笔者也是一个学习记录,后续的启动源码也会在第二篇源码博客更新,谢谢大家了!