rt-thread 学习(二)外部中断 添加头文件 延时函数
- 设置按键外部中断
- 开启硬件定时器
- 初始化配置部分
- 延时函数
- 添加头文件
设置按键外部中断
#include <rtthread.h>
#include <rtdevice.h>
#include "board.h"
#define DBG_TAG "main"
#define DBG_LVL DBG_LOG
#include <rtdbg.h>
#define B1_PIN_NUM            GET_PIN(B,1)
/* 中断回调函数 */
void B1_IRQ_CB(void *args)
{
    rt_kprintf("enter B1_IRQ_CB!\r\n");

    rt_pin_write(B1_PIN_NUM, PIN_HIGH);
}
static void pin_beep_sample(void)
{
    /* 按键0引脚为输入模式 */
    rt_pin_mode(B1_PIN_NUM, PIN_MODE_INPUT_PULLUP);
    /* 绑定中断,下降沿模式,回调函数名为beep_on */
    rt_pin_attach_irq(B1_PIN_NUM, PIN_IRQ_MODE_FALLING, B1_IRQ_CB, RT_NULL);
    /* 使能中断 */
    rt_pin_irq_enable(B1_PIN_NUM, PIN_IRQ_ENABLE);
    /* 脱离中断回调函数 */
   // rt_pin_detach_irq(B1_PIN_NUM);
}
int main(void)
{
    pin_beep_sample();
    return RT_EOK;
}
开启硬件定时器
初始化配置部分
/** if you want to use hardware timer you can use the following instructions.
 *
 * STEP 1, open hwtimer driver framework support in the RT-Thread Settings file
 *
 * STEP 2, define macro related to the hwtimer
 *                 such as     #define BSP_USING_TIM  and
 *                             #define BSP_USING_TIM1
 *
 * STEP 3, copy your hardwire timer init function from stm32xxxx_hal_msp.c generated by stm32cubemx to the end of board.c file
 *                 such as     void HAL_TIM_Base_MspInit(TIM_HandleTypeDef* htim_base)
 *
 * STEP 4, modify your stm32xxxx_hal_config.h file to support hardwere timer peripherals. define macro related to the peripherals
 *                 such as     #define HAL_TIM_MODULE_ENABLED
 *
 */

#define BSP_USING_TIM
#ifdef BSP_USING_TIM
#define BSP_USING_TIM3

void HAL_TIM_Base_MspInit(TIM_HandleTypeDef* htim_base)
{

  if(htim_base->Instance==TIM3)
  {
  /* USER CODE BEGIN TIM3_MspInit 0 */

  /* USER CODE END TIM3_MspInit 0 */
    /* Peripheral clock enable */
    __HAL_RCC_TIM3_CLK_ENABLE();
  /* USER CODE BEGIN TIM3_MspInit 1 */

  /* USER CODE END TIM3_MspInit 1 */
  }

}
硬件定时器设备的具体使用方式可以参考如下示例代码,示例代码的主要步骤如下:
首先根据定时器设备名称 “timer3” 查找设备获取设备句柄。
以读写方式打开设备 “timer3” 。
设置定时器超时回调函数。
设置定时器模式为周期性定时器,并设置超时时间为 5 秒,此时定时器启动。
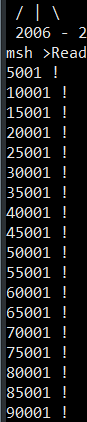
延时 3500ms 后读取定时器时间,读取到的值会以秒和微秒的形式显示。
#include <rtthread.h>
#define DBG_TAG "main"
#define DBG_LVL DBG_LOG
#include <rtdbg.h>
#include <rtdevice.h>
#define HWTIMER_DEV_NAME "timer3" /* 定时器名称 */
/* 定时器超时回调函数 */
static rt_err_t timeout_cb(rt_device_t dev, rt_size_t size)
{
rt_kprintf("this is hwtimer timeout callback fucntion!\n");
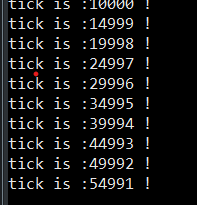
rt_kprintf("tick is :%d !\n", rt_tick_get());
return 0;
}
static int hwtimer_sample(void)
{
rt_err_t ret = RT_EOK;
rt_hwtimerval_t timeout_s; /* 定时器超时值 */
rt_device_t hw_dev = RT_NULL; /* 定时器设备句柄 */
rt_hwtimer_mode_t mode; /* 定时器模式 */
mode = HWTIMER_MODE_PERIOD;
timeout_s.sec = 5; /* 秒 */
timeout_s.usec = 0; /* 微秒 */
/* 查找定时器设备 */
/* 以读写方式打开设备 */
/* 设置超时回调函数 */
/* 设置模式为周期性定时器 */
/* 设置定时器超时值为5s并启动定时器 */
hw_dev = rt_device_find(HWTIMER_DEV_NAME);
ret = rt_device_open(hw_dev, RT_DEVICE_OFLAG_RDWR);
rt_device_set_rx_indicate(hw_dev, timeout_cb);
ret = rt_device_control(hw_dev, HWTIMER_CTRL_MODE_SET, &mode);
rt_device_write(hw_dev, 0, &timeout_s, sizeof(timeout_s));
return ret;
}
/* 导出到 msh 命令列表中 */
MSH_CMD_EXPORT(hwtimer_sample, hwtimer sample);
int main(void) {
hwtimer_sample();
return RT_EOK;
}
内部,外部都是这样
然后把 字符全删了就正常了
延时函数
rt_thread_delay延时的单位是系统节拍,如果每秒系统节拍数这个配置不是1000,延时数值的单位就不是毫秒,
rt_thread_mdelay可以直接使用,单位就是毫秒,无需考虑转换
添加头文件
右键工程,属性-------c/c++常规-----路径与符号-------添加,就可以把头文件路径添加到工程
