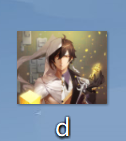
首先将网上搜集到的图片保存在桌面,并复制该图片。

成功复制该图片后,进入AndroidStudio中。找到res文件夹下的drawable文件夹,将先前复制的图片粘贴到该文件夹下。

而后便会出现“选择目标目录”,一般来说我们直接选择粘贴到drawable文件夹就好了。

接下来给图片改个名,最好将图片的名字改成a~z的小写字母或组合(大写不行),或者1~9的数字或组合。

那么就粘贴完成了。

而后将视线移到右侧,点击下图中右上角的Design按钮,进入设计界面。

而后点击左侧Palette栏中的Common栏,再点击imageView按钮。将其直接拖动到下方的Component Tree栏中。

随后便会出现“Pick a Resources”窗口,从中选择我们先前粘贴到res文件夹中的图片。

选择后点击确定,右侧的UI设计界面中便会出现我们所需的图片。

成功放置图片后,一般来说我们并不能直接控制图片在UI中的大小 位置之类的数据(直接控制指的是在上图中拖动图片放缩之类的,这是不行的),我们只能在activity main.xml中进行编程,来控制图片的大小以及位置(通过编程可以进行其他更多设置),如下:
<?xml version="1.0" encoding="utf-8"?>
<LinearLayout xmlns:android="http://schemas.android.com/apk/res/android"
    xmlns:app="http://schemas.android.com/apk/res-auto"
    xmlns:tools="http://schemas.android.com/tools"
    android:layout_width="match_parent"
    android:layout_height="match_parent"
    android:orientation="vertical"
    android:padding="8dp">

    <Button
        android:id="@+id/btn_one"
        android:layout_width="match_parent"
        android:layout_height="wrap_content"
        android:text="按钮1"/>

    <Button
        android:id="@+id/btn_two"
        android:layout_width="match_parent"
        android:layout_height="wrap_content"
        android:onClick="click"
        android:text="按钮2" />

    <Button
        android:id="@+id/btn_three"
        android:layout_width="match_parent"
        android:layout_height="wrap_content"
        android:text="按钮3" />

    <ImageView
        android:id="@+id/imageView"
        android:layout_width="match_parent"
        android:layout_height="wrap_content"
        app:srcCompat="@drawable/d" />

</LinearLayout>
——仅供个人学习笔记之用