1)事件监听
什么是“事件监听”
DOM允许我们书写JavaScript代码以让HTML元素对事件作出反应。
什么是“事件”:用户与网页的交互动作
- 当用户点击元素时
- 当鼠标移动到元素上时
- 当文本框的内容被改变时
- 当键盘在文本框中被按下时
- 当网页已加载完毕时
- ……
- “监听”,顾名思义,就是让计算机随时能够发现这个事件发生了,从而执行程序员预先编写的一些程序。
- 设置事件监听的方法主要有onxxx和addEventListener()两种。
最简单的设置事件监听的方法
- 最简单的给元素设置事件监听的方法就是设置它们的onxxx属性,像这样:
常见的鼠标事件监听
事件名
事件描述
onclick
当鼠标单击某个对象
ondblclick
当鼠标双击某个对象
onmousedown
当某个鼠标按键在某个对象上被按下
onmouseup
当某个鼠标按键在某个对象上被松开
onmousemove
当某个鼠标按键在某个对象上被移动
onmouseenter
当鼠标进入某个对象(相似事件onmouseover)
onmouseleave
当鼠标离开某个对象(相似事件onmouseout)
<!DOCTYPE html>
<html lang="en">

<head>
    <meta charset="UTF-8">
    <meta name="viewport" content="width=device-width, initial-scale=1.0">
    <title>Document</title>
    <style>
        #box1 {
            width: 300px;
            height: 300px;
            background-color: #000;
        }
    </style>
</head>

<body>
    <div id="box1"></div>

    <script>
        var box1 = document.getElementById('box1');
        // 当鼠标单击某个对象
        box1.onclick = function() {
            console.log('鼠标单击');
        }

        // 当鼠标双击某个对象
        box1.ondblclick = function() {
            console.log('鼠标双击');
        }

        // 当某个鼠标按键在某个对象上被按下
        box1.onmousedown = function() {
            console.log('鼠标被按下');
        }

        // 当某个鼠标按键在某个对象上被松开
        box1.onmouseup = function() {
            console.log('鼠标被松开');
        }

        // 当某个鼠标按键在某个对象上被移动
        box1.onmousemove = function() {
            console.log('鼠标被移动');
        }

        // 当鼠标进入某个对象(相似事件onmouseover)
        box1.onmouseenter = function() {
            console.log('鼠标进入');
        }

        // 当鼠标离开某个对象(相似事件onmouseout)
        box1.onmouseleave = function() {
            console.log('鼠标离开');
        }
    </script>
</body>

</html>
常见的键盘事件监听
事件名
事件描述
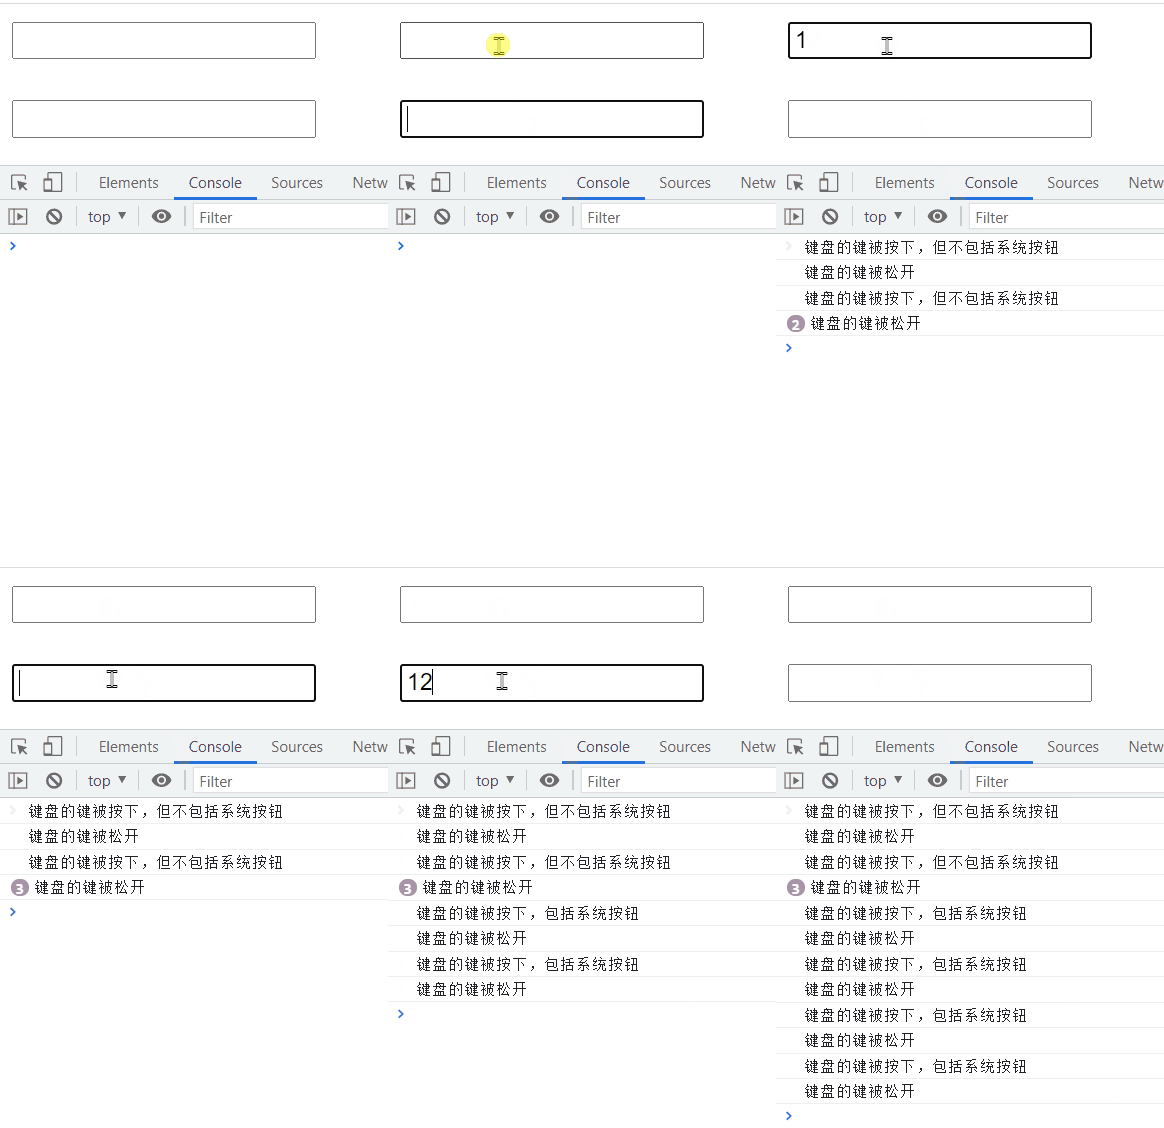
onkeypress
当某个键盘的键被按下(系统按钮如箭头键和功能键无法得到识别)
onkeydown
当某个键盘的键被按下(系统按钮可以识别,并且会先于onkeypress发生)
onkeyup
当某个键盘的键被松开
<!DOCTYPE html>
<html lang="en">

<head>
    <meta charset="UTF-8">
    <meta name="viewport" content="width=device-width, initial-scale=1.0">
    <title>Document</title>
</head>

<body>
    <input type="text" id="box1"><br><br>
    <input type="text" id="box2">

    <script>
        var box1 = document.getElementById('box1');
        var box2 = document.getElementById('box2');

        // 当某个键盘的键被按下(系统按钮如箭头键和功能键无法得到识别)
        box1.onkeypress = function() {
            console.log('键盘的键被按下,但不包括系统按钮');
        }

        // 当某个键盘的键被按下(系统按钮可以识别,并且会先于onkeypress发生)
        box2.onkeydown = function() {
            console.log('键盘的键被按下,包括系统按钮');
        }


        // 当某个键盘的键被松开
        box1.onkeyup = function() {
            console.log('键盘的键被松开');
        }
        box2.onkeyup = function() {
            console.log('键盘的键被松开');
        }
    </script>
</body>

</html>
常见的表单事件监听
事件名
事件描述
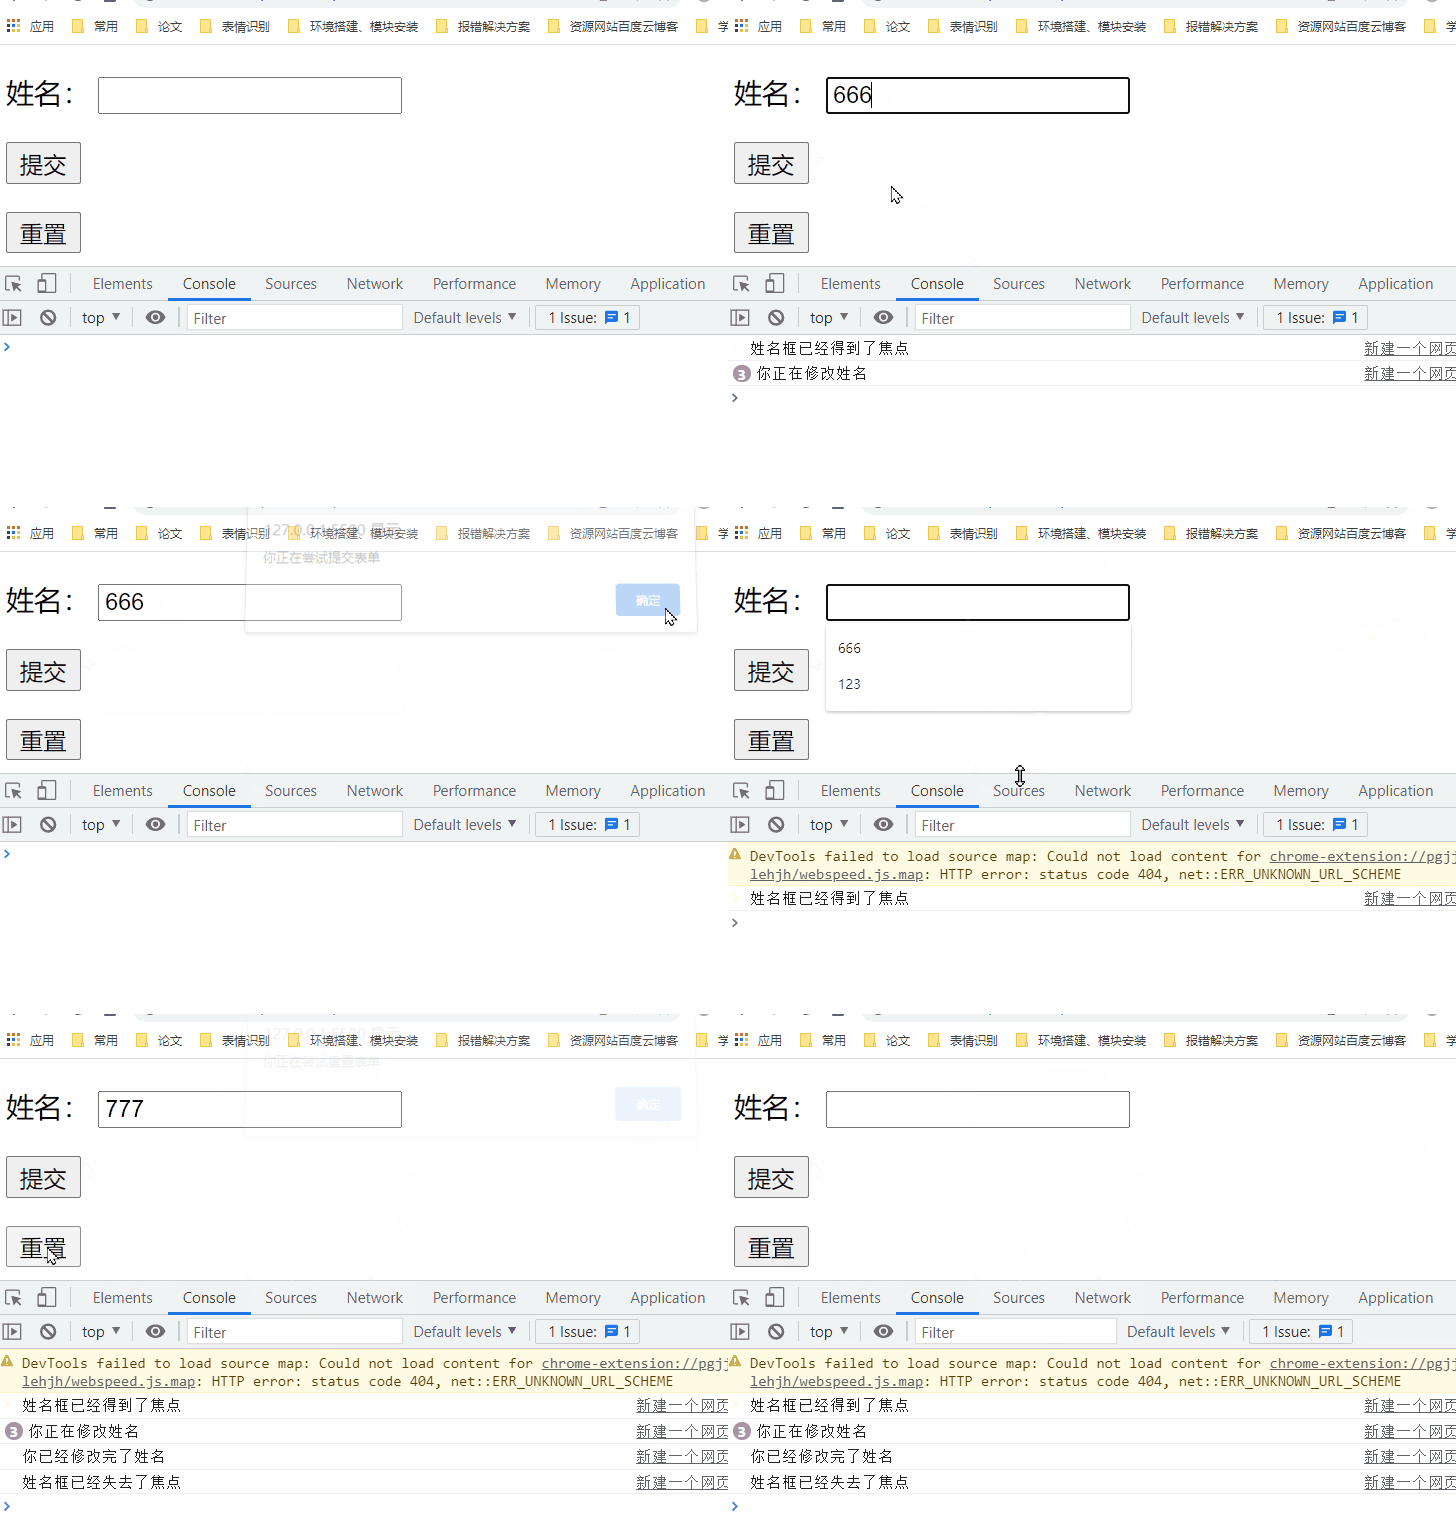
onchange
当用户改变域的内容
onfocus
当某元素获得焦点(比如tab键或鼠标点击)
onblur
当某元素失去焦点
onsubmit
当表单被提交
onreset
当表单被重置
<!DOCTYPE html>
<html lang="en">

<head>
    <meta charset="UTF-8">
    <meta name="viewport" content="width=device-width, initial-scale=1.0">
    <title>Document</title>
</head>

<body>
    <form id="myform">
        <p>
            姓名:
            <input type="text" name="nameField">
        </p>
        <p>
            <input type="submit">
        </p>
        <p>
            <input type="reset">
        </p>
    </form>

    <script>
        var myform = document.getElementById('myform');
        var nameField = myform.nameField;

        nameField.onchange = function() {
            console.log('你已经修改完了姓名');
        }

        nameField.oninput = function() {
            console.log('你正在修改姓名');
        }

        nameField.onfocus = function() {
            console.log('姓名框已经得到了焦点');
        }

        nameField.onblur = function() {
            console.log('姓名框已经失去了焦点');
        }

        myform.onsubmit = function() {
            alert('你正在尝试提交表单');
        }

        myform.onreset = function() {
            alert('你正在尝试重置表单');
        }
    </script>
</body>

</html>
常见的页面事件监听
事件名
事件描述
onload
当页面或图像被完成加载
onunload
当用户退出页面
2)事件传播
- 实际上,事件的传播是:先从外到内,然后再从内到外。
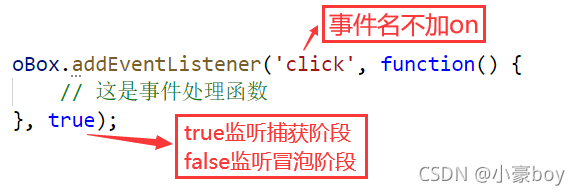
- onxxx这样的写法只能监听冒泡阶段。
addEventListener()方法
- DOM0级事件监听:只能监听冒泡阶段。
- DOM2级事件监听:
注意事项
- 最内部元素不再区分捕获和冒泡阶段,会先执行写在前面的监听,然后执行后写的监听。
<!DOCTYPE html>
<html lang="en">

<head>
    <meta charset="UTF-8">
    <meta name="viewport" content="width=device-width, initial-scale=1.0">
    <title>Document</title>
    <style>
        #box1 {
            width: 202px;
            height: 202px;
            border: 1px solid #000;
            padding: 50px;
        }

        #box2 {
            width: 100px;
            height: 100px;
            border: 1px solid #000;
            padding: 50px;
        }

        #box3 {
            width: 100px;
            height: 100px;
            border: 1px solid #000;
        }
    </style>
</head>

<body>
    <div id="box1">
        <div id="box2">
            <div id="box3"></div>
        </div>
    </div>
    <script>
        var oBox1 = document.getElementById('box1');
        var oBox2 = document.getElementById('box2');
        var oBox3 = document.getElementById('box3');


        oBox2.addEventListener('click', function() {
            console.log('我是box2的冒泡阶段');
        }, false);


        oBox3.addEventListener('click', function() {
            console.log('我是box3的捕获阶段');
        }, true);

        oBox3.addEventListener('click', function() {
            console.log('我是box3的冒泡阶段');
        }, false);

        oBox3.onclick = function() {
            console.log('我是box3的onclick');
        };

        oBox1.addEventListener('click', function() {
            console.log('我是box1的冒泡阶段');
        }, false);

        oBox2.addEventListener('click', function() {
            console.log('我是box2的捕获阶段');
        }, true);

        oBox1.addEventListener('click', function() {
            console.log('我是box1的捕获阶段');
        }, true);

        oBox1.onclick = function() {
            console.log('我是box1的onclick');
        };

        oBox2.onclick = function() {
            console.log('我是box2的onclick');
        };
    </script>
</body>

</html>
- 如果给元素设置相同的两个或多个同名事件,则DOM0级写法后面写的会覆盖先写的;而DOM2级会按顺序执行。
<!DOCTYPE html>
<html lang="en">

<head>
    <meta charset="UTF-8">
    <meta name="viewport" content="width=device-width, initial-scale=1.0">
    <title>Document</title>
    <style>
        #box2 {
            width: 100px;
            height: 100px;
            border: 1px solid #000;
            padding: 50px;
        }
    </style>
</head>

<body>
    <div id="box2"></div>
    <script>
        var oBox2 = document.getElementById('box2');

        oBox2.onclick = function() {
            console.log('A');
        };

        oBox2.onclick = function() {
            console.log('B');
        };

        oBox2.addEventListener('click', function() {
            console.log('C');
        }, false);

        oBox2.addEventListener('click', function() {
            console.log('D');
        }, false);
    </script>
</body>

</html>
3)事件对象
什么是事件对象
- 事件处理函数提供一个形式参数,它是一个对象,封装了本次事件的细节。
- 这个参数通常用单词event或字母e来表示。
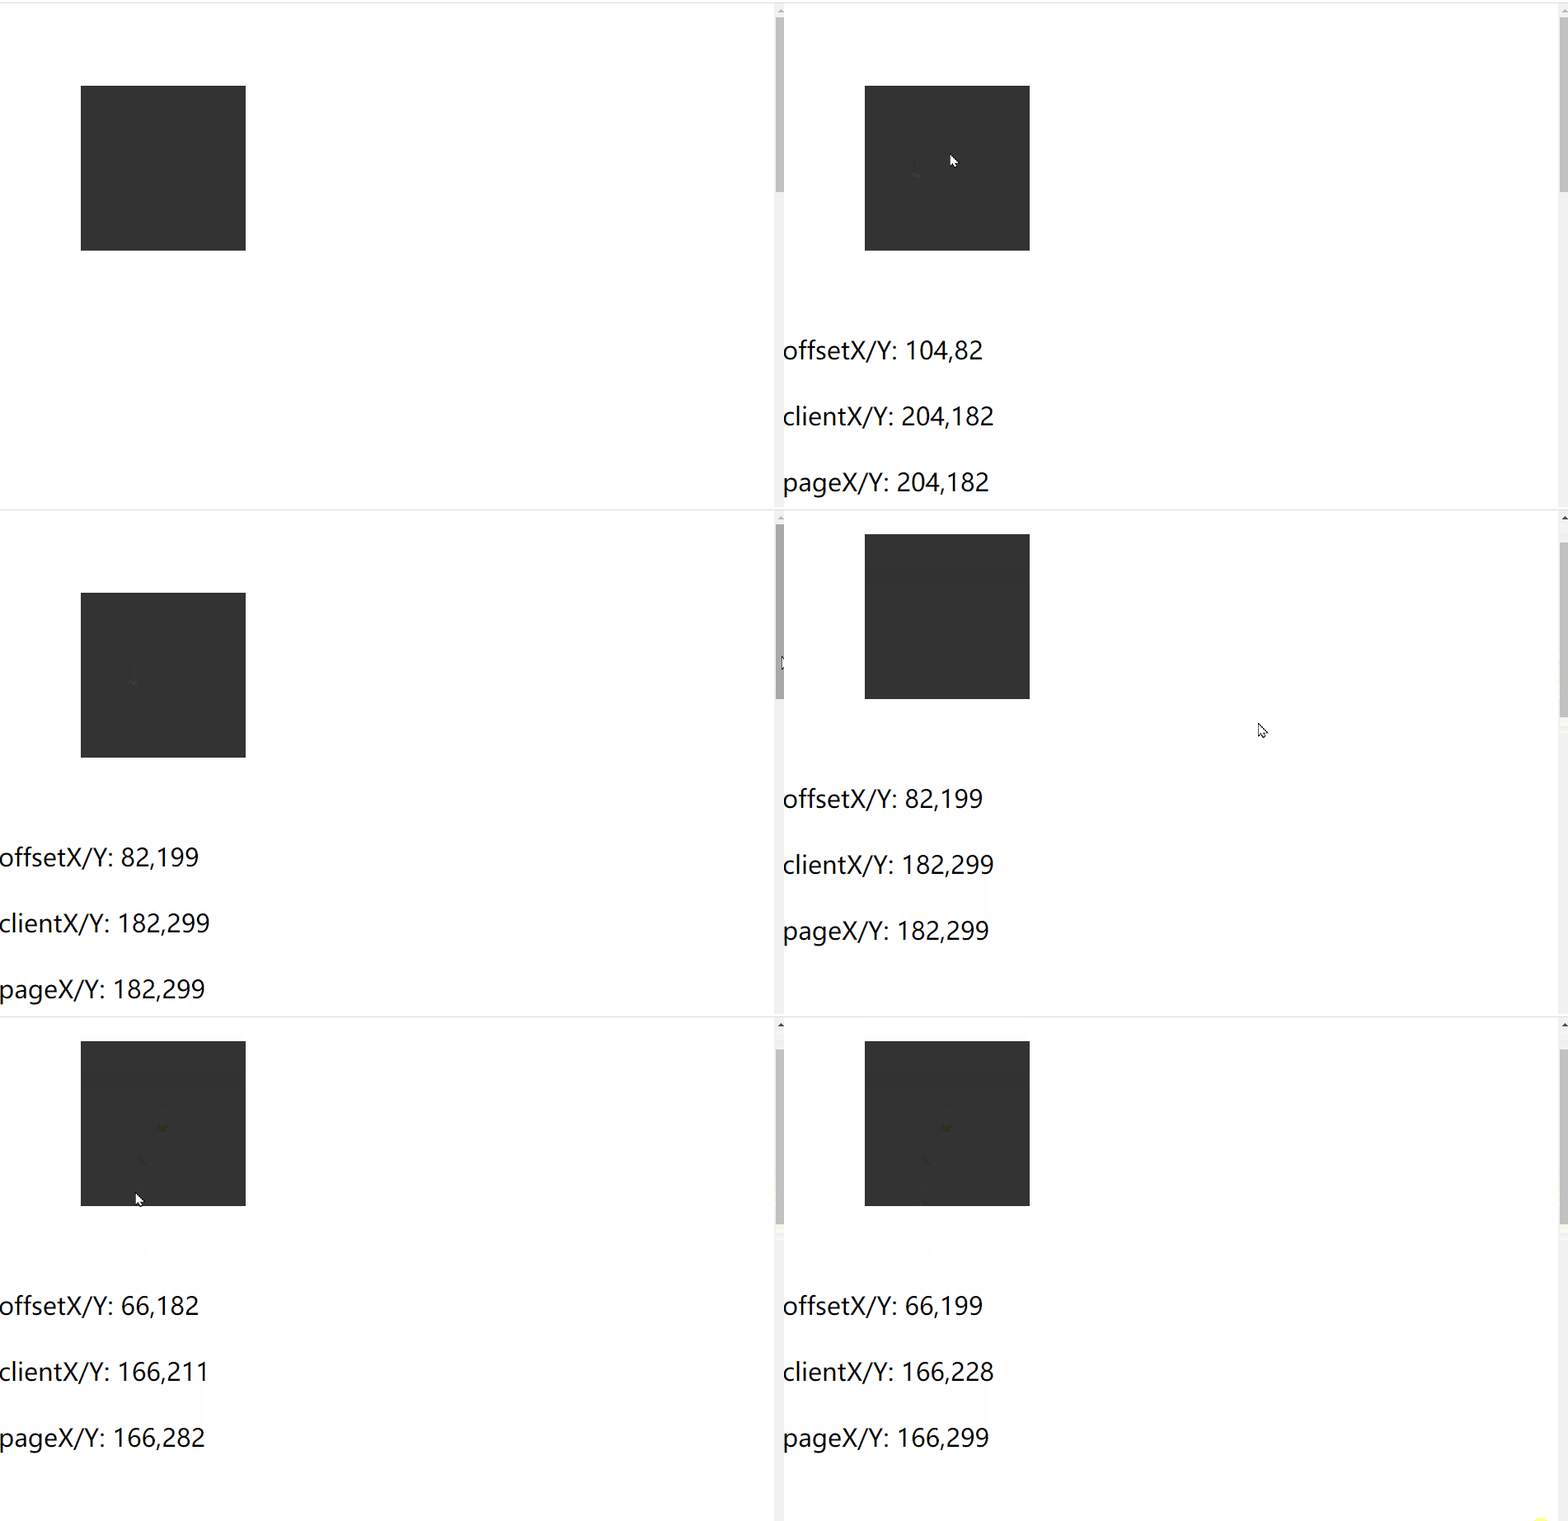
鼠标位置
属性
属性描述
clientX
鼠标指针相对于浏览器的水平坐标
clientY
鼠标指针相对于浏览器的垂直坐标
pageX
鼠标指针相对于整张网页的水平坐标
pageY
鼠标指针相对于整张网页的垂直坐标
offsetX
鼠标指针相对于事件源元素的水平坐标
offsetY
鼠标指针相对于事件源元素的垂直坐标
<!DOCTYPE html>
<html lang="en">

<head>
    <meta charset="UTF-8">
    <meta name="viewport" content="width=device-width, initial-scale=1.0">
    <title>Document</title>
    <style>
        * {
            margin: 0;
            padding: 0;
        }

        #box {
            width: 200px;
            height: 200px;
            background-color: #333;
            margin: 100px;
        }

        body {
            height: 2000px;
        }

        #info {
            font-size: 30px;
        }
    </style>
</head>

<body>
    <div id="box"></div>
    <div id="info"></div>

    <script>
        var oBox = document.getElementById('box');
        var oInfo = document.getElementById('info');

        oBox.onmousemove = function(e) {
            oInfo.innerHTML = 'offsetX/Y: ' + e.offsetX + ',' + e.offsetY + '<br><br>' +
                'clientX/Y: ' + e.clientX + ',' + e.clientY + '<br><br>' +
                'pageX/Y: ' + e.pageX + ',' + e.pageY;
        }
    </script>
</body>

</html>
e.charCode和e.keyCode属性
- e.charCode属性通常用于onkeypress事件中,表示用户输入的字符的“字符码”。
字符
字符码
数字0 ~ 数字9
48 ~ 57
大写字母A ~ Z
65 ~ 90
小写字母a ~ z
97 ~ 122
- e.keyCode属性通常用于onkeydown事件和onkeyup中,表示用户按下的按键的“键码”。
按键
键码
数字0 ~ 数字9
48 ~ 57(同charCode键码完全相同)
字母不分大小a ~ z
65 ~ 90(同charCode键码的大写字母A ~ Z,而keyCode不分大小写,一律为65 ~ 90)
四个方向键← ↑ → ↓
37,38,39,40
回车键
13
空格键
32
小案例
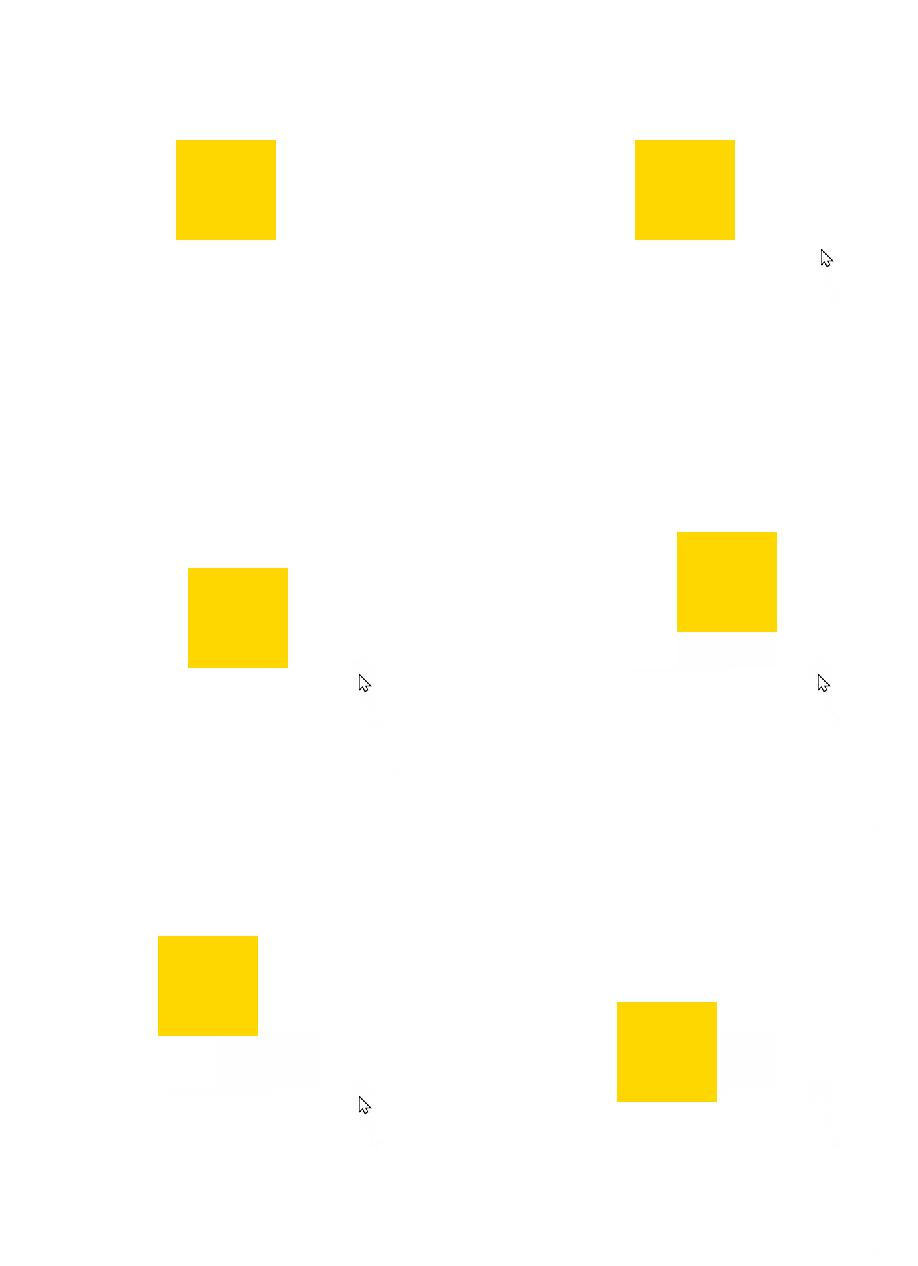
- 制作一个特效:按方向键可以控制页面上的盒子移动。
<!DOCTYPE html>
<html lang="en">

<head>
    <meta charset="UTF-8">
    <meta name="viewport" content="width=device-width, initial-scale=1.0">
    <title>Document</title>
    <style>
        #box {
            position: absolute;
            top: 200px;
            left: 200px;
            width: 100px;
            height: 100px;
            background-color: gold;
        }
    </style>
</head>

<body>
    <div id="box"></div>

    <script>
        var oBox = document.getElementById('box');

        // 全局变量t、l,分别表示盒子的top属性值和left属性值
        var t = 200;
        var l = 200;

        // 监听document对象的键盘按下事件监听,表示当用户在整个网页上按下按键的时候
        document.onkeydown = function(e) {
            switch (e.keyCode) {
                case 37:
                    // 左
                    l -= 6;
                    break;
                case 38:
                    // 上
                    t -= 6;
                    break;
                case 39:
                    // 右
                    l += 6;
                    break;
                case 40:
                    // 下
                    t += 6;
                    break;
            }

            // 更改样式
            oBox.style.left = l + 'px';
            oBox.style.top = t + 'px';
        }
    </script>
</body>

</html>
e.preventDefault()方法
- e.preventDefault()方法用来阻止事件产生的“默认动作”。
- 一些特殊的业务需求,需要阻止事件的“默认动作”。
小案例1
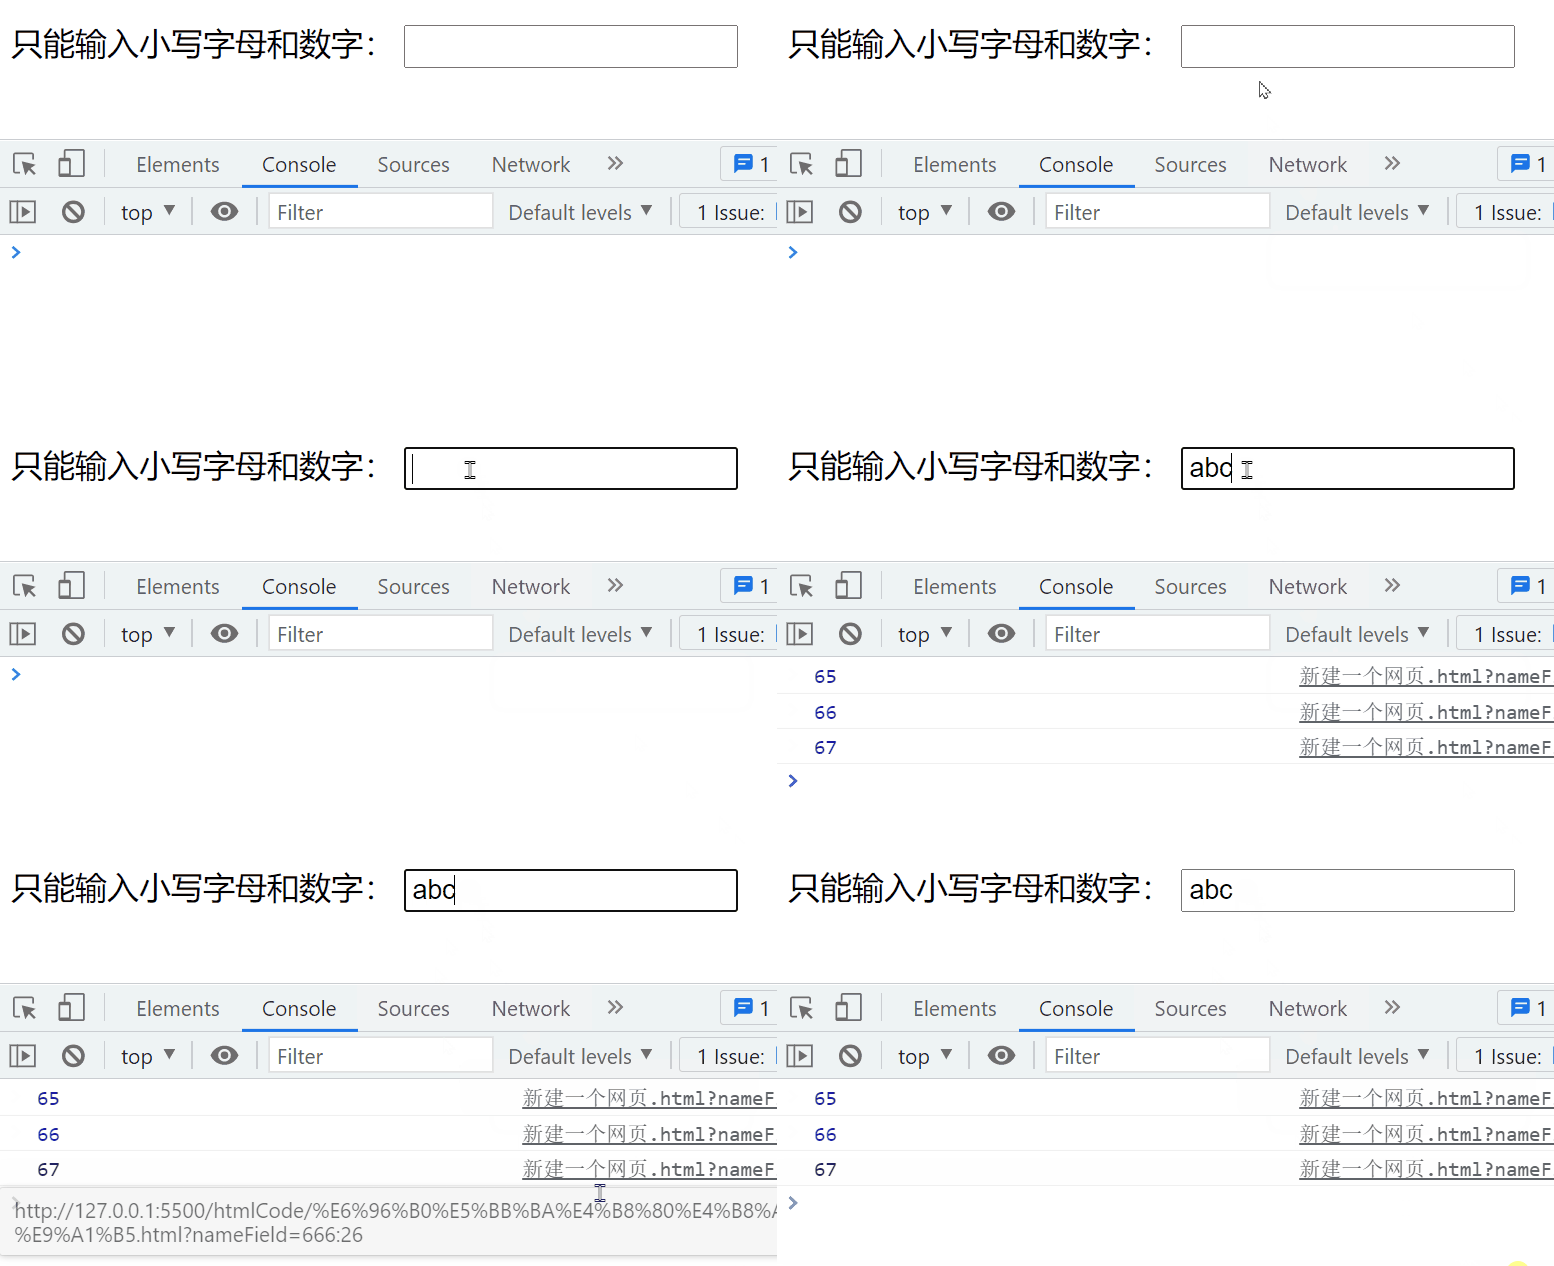
- 制作一个文本框,只能让用户在其中输入小写字母和数字,其他字符输入没有效果。
<!DOCTYPE html>
<html lang="en">

<head>
    <meta charset="UTF-8">
    <meta name="viewport" content="width=device-width, initial-scale=1.0">
    <title>Document</title>
</head>

<body>
    <p>
        只能输入小写字母和数字:
        <input type="text" id="field">
    </p>
    <script>
        var oField = document.getElementById('field');

        oField.onkeypress = function(e) {
            // 根据用户输入的字符的字符码(e.charCode)
            // 数字0~9,字符码48~57
            // 小写字母a~z,字符码97~122
            if (!(e.charCode >= 48 && e.charCode <= 57 || e.charCode >= 97 && e.charCode <= 122)) {
                // 阻止浏览器的默认行为
                e.preventDefault();
                // 输出无法输入字符的字符码
                console.log(e.charCode);
            }
        }
    </script>
</body>

</html>
小案例2
- 制作鼠标滚轮事件:当鼠标在盒子中向下滚动时,数字加1;反之,数字减1 。
- 鼠标滚轮事件是onmousewheel,它的事件对象e提供deltaY属性表示鼠标滚动方向,向下滚动时返回正值,向上滚动时返回负值。
<!DOCTYPE html>
<html lang="en">

<head>
    <meta charset="UTF-8">
    <meta name="viewport" content="width=device-width, initial-scale=1.0">
    <title>Document</title>
    <style>
        #box {
            width: 200px;
            height: 200px;
            background-color: #333;
        }

        body {
            height: 2000px;
        }
    </style>
</head>

<body>
    <div id="box"></div>
    <h1 id="info">0</h1>

    <script>
        var oBox = document.getElementById('box');
        var oInfo = document.getElementById('info');

        // 全局变量就是info中显示的数字
        var a = 0;

        // 给box盒子添加鼠标滚轮事件监听
        oBox.onmousewheel = function(e) {
            // 阻止默认事件:就是说当用户在盒子里面滚动鼠标滚轮的时候,此时不会引发页面的滚动条的滚动
            e.preventDefault();

            if (e.deltaY > 0) {
                a++;
            } else if (e.deltaY < 0) {
                a--;
            }
            oInfo.innerText = a;
        }
    </script>
</body>

</html>
e. stopPropagation()方法
- e.stopPropagation()方法用来阻止事件继续传播。
- 在一些场合,非常有必要切断事件继续传播,否则会造成页面特效显示出bug。
小案例
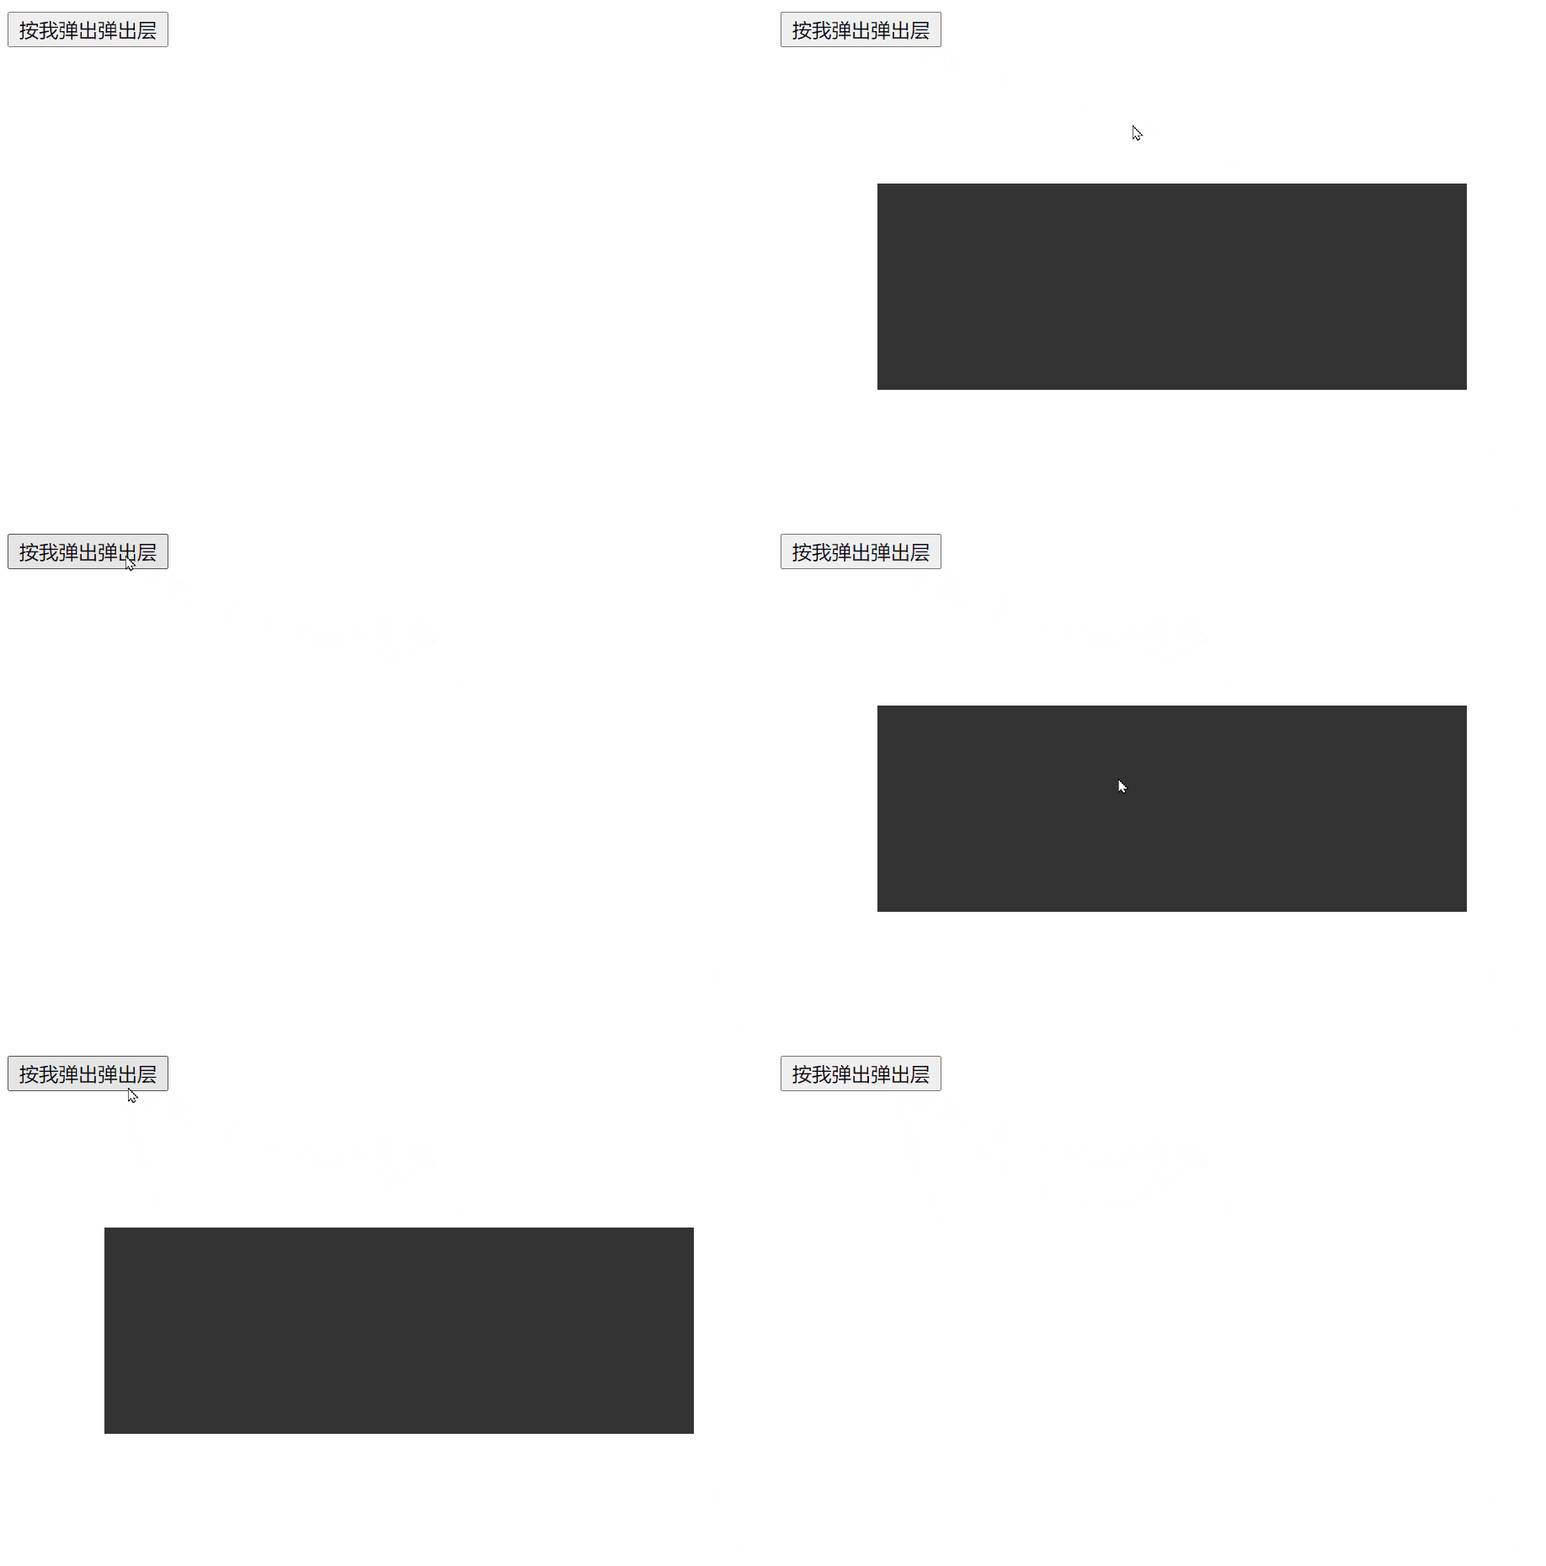
- 制作一个弹出层:点击按钮显示弹出层,点击网页任意地方,弹出层关闭。
<!DOCTYPE html>
<html lang="en">

<head>
    <meta charset="UTF-8">
    <meta name="viewport" content="width=device-width, initial-scale=1.0">
    <title>Document</title>
    <style>
        .modal {
            width: 400px;
            height: 140px;
            background-color: #333;
            position: absolute;
            top: 50%;
            left: 50%;
            margin-top: -70px;
            margin-left: -200px;
            display: none;
        }
    </style>
</head>

<body>
    <button id="btn">按我弹出弹出层</button>
    <div class="modal" id="modal"></div>

    <script>
        var oBtn = document.getElementById('btn');
        var oModal = document.getElementById('modal');

        // 点击按钮的时候,弹出层显示
        oBtn.onclick = function(e) {
            // 阻止事件继续传播到document身上
            e.stopPropagation();
            oModal.style.display = 'block';
        }

        // 点击页面任何部分的时候,弹出层关闭
        document.onclick = function() {
            oModal.style.display = 'none';
        }


        // 点击弹出层内部的时候,不能关闭弹出层的,所以应该阻止事件继续传播
        oModal.onclick = function(e) {
            e.stopPropagation();
            oModal.style.display = 'block';
        }
    </script>
</body>

</html>
4)事件委托
批量添加事件监听
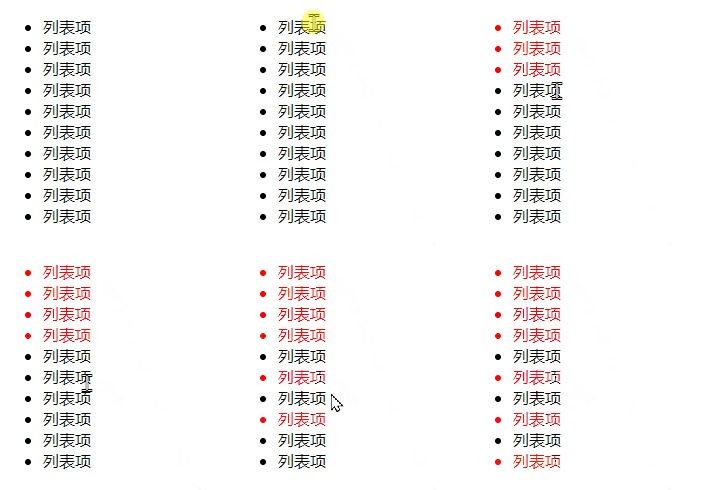
- 题目:页面上有一个无序列表<ul>,它内部共有10个<li>元素,请批量给它们添加点击事件监听,实现效果:点击哪个<li>元素,哪个<li>元素就变红。
<!DOCTYPE html>
<html lang="en">

<head>
    <meta charset="UTF-8">
    <meta name="viewport" content="width=device-width, initial-scale=1.0">
    <title>Document</title>
</head>

<body>
    <ul id="list">
        <li>列表项</li>
        <li>列表项</li>
        <li>列表项</li>
        <li>列表项</li>
        <li>列表项</li>
        <li>列表项</li>
        <li>列表项</li>
        <li>列表项</li>
        <li>列表项</li>
        <li>列表项</li>
    </ul>

    <script>
        var oList = document.getElementById('list');
        var lis = oList.getElementsByTagName('li');

        // 书写循环语句,批量给元素添加监听
        for (var i = 0; i < lis.length; i++) {
            lis[i].onclick = function() {
                // 在这个函数中,this表示点击的这个元素
                this.style.color = 'red';
            };
        }
    </script>
</body>

</html>
批量添加事件监听的性能问题
- 每一个事件监听注册都会消耗一定的系统内存,而批量添加事件会导致监听数量太多,内存消耗会非常大。
- 实际上,每个<li>的事件处理函数都是不同的函数,这些函数本身也会占用内存。
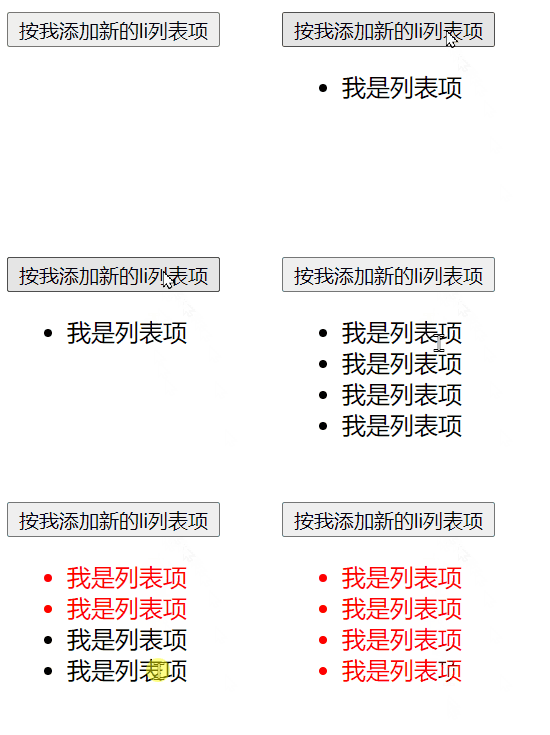
新增元素动态绑定事件
- 题目:页面上有一个无序列表<ul>,它内部没有<li>元素,请制作一个按钮,点击这个按钮就能增加一个<li>元素。并且要求每个增加的<li>元素也要有点击事件监听,实现效果点击哪个<li>元素,哪个<li>元素就变红。
<!DOCTYPE html>
<html lang="en">

<head>
    <meta charset="UTF-8">
    <meta name="viewport" content="width=device-width, initial-scale=1.0">
    <title>Document</title>
</head>

<body>
    <button id="btn">按我添加新的li列表项</button>
    <ul id="list"></ul>

    <script>
        var oBtn = document.getElementById('btn');
        var oList = document.getElementById('list');
        var lis = oList.getElementsByTagName('li');

        // 按钮的点击事件
        oBtn.onclick = function () {
            // 创建一个新的li列表项,孤儿节点
            var oLi = document.createElement('li');
            oLi.innerHTML = '我是列表项';
            // 上树
            oList.appendChild(oLi);
            // 给新创建的这个li节点添加onclick事件监听
            oLi.onclick = function () {
                this.style.color = 'red';
            };
        };
    </script>
</body>

</html>
动态绑定事件的问题
- 新增元素必须分别添加事件监听,不能自动获得事件监听。
- 大量事件监听、大量事件处理函数都会产生大量消耗内存。
事件委托
- 利用事件冒泡机制,将后代元素事件委托给祖先元素。
e.target和e.currentTarget属性
- 事件委托通常需要结合使用e.target属性。
属性
属性描述
target
触发此事件的最早元素,即“事件源元素”
currentTarget
事件处理程序附加到的元素
事件委托的使用场景
- 当有大量类似元素需要批量添加事件监听时,使用事件委托可以减少内存开销。
<!DOCTYPE html>
<html lang="en">

<head>
    <meta charset="UTF-8">
    <meta name="viewport" content="width=device-width, initial-scale=1.0">
    <title>Document</title>
</head>

<body>
    <ul id="list">
        <li>列表项</li>
        <li>列表项</li>
        <li>列表项</li>
        <li>列表项</li>
        <li>列表项</li>
        <li>列表项</li>
        <li>列表项</li>
        <li>列表项</li>
        <li>列表项</li>
        <li>列表项</li>
    </ul>

    <script>
        var oList = document.getElementById('list');
        oList.onclick = function(e) {
            // e.target表示用户真正点击的那个元素
            e.target.style.color = 'red';
        }
    </script>
</body>

</html>
- 当有动态元素节点上树时,使用事件委托可以让新上树的元素具有事件监听。
<!DOCTYPE html>
<html lang="en">

<head>
    <meta charset="UTF-8">
    <meta name="viewport" content="width=device-width, initial-scale=1.0">
    <title>Document</title>
</head>

<body>
    <button id="btn">按我创建一个新列表项</button>
    <ul id="list"></ul>
    <script>
        var oList = document.getElementById('list');
        var oBtn = document.getElementById('btn');

        oList.onclick = function(e) {
            // e.target表示用户真正点击的那个元素
            e.target.style.color = 'red';
        };

        oBtn.onclick = function() {
            // 创建新的li元素
            var oLi = document.createElement('li');
            // 写内容
            oLi.innerText = '我是新来的';
            // 上树
            oList.appendChild(oLi);
        };
    </script>
</body>

</html>
使用事件委托时需要注意的事项
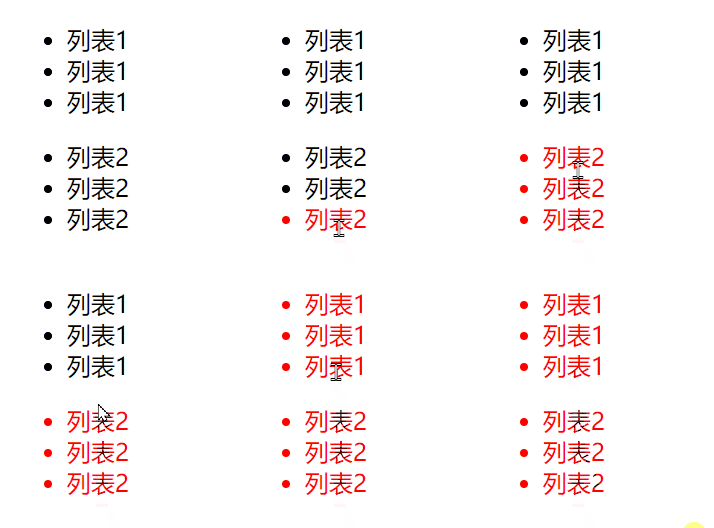
- onmouseenter和onmouseover都表示“鼠标进入”,它们有什么区别呢?
- 答:onmouseenter不冒泡,onmouseover冒泡。
- 使用事件委托时要注意:不能委托不冒泡的事件给祖先元素。
<!DOCTYPE html>
<html lang="en">

<head>
    <meta charset="UTF-8">
    <meta name="viewport" content="width=device-width, initial-scale=1.0">
    <title>Document</title>
</head>

<body>
    <ul id="list1">
        <li>列表1</li>
        <li>列表1</li>
        <li>列表1</li>
    </ul>

    <ul id="list2">
        <li>列表2</li>
        <li>列表2</li>
        <li>列表2</li>
    </ul>

    <script>
        var oList1 = document.getElementById('list1');
        var oList2 = document.getElementById('list2');

        // oList1使用onmouseenter不冒泡
        oList1.onmouseenter = function(e) {
            // e.target表示用户真正点击的那个元素
            e.target.style.color = 'red';
        }

        // oList2使用onmouseover冒泡
        oList2.onmouseover = function(e) {
            // e.target表示用户真正点击的那个元素
            e.target.style.color = 'red';
        }
    </script>
</body>

</html>
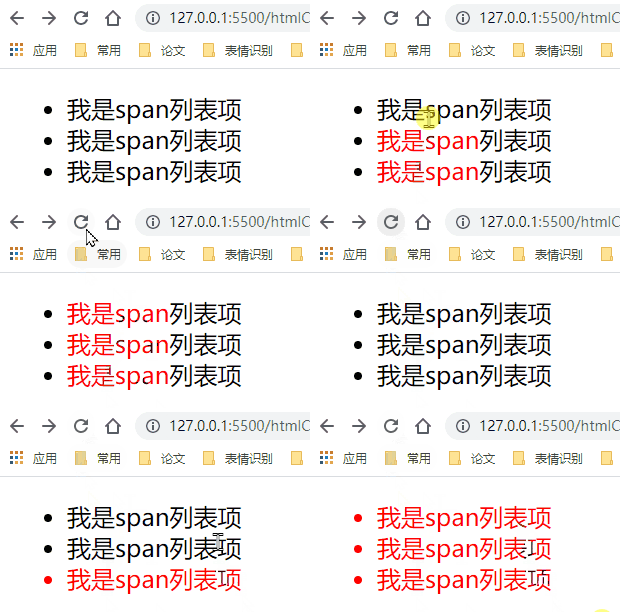
- 最内层元素不能再有额外的内层元素了,比如:
<!DOCTYPE html>
<html lang="en">

<head>
    <meta charset="UTF-8">
    <meta name="viewport" content="width=device-width, initial-scale=1.0">
    <title>Document</title>
</head>

<body>
    <ul id="list">
        <li><span>我是span</span>列表项</li>
        <li><span>我是span</span>列表项</li>
        <li><span>我是span</span>列表项</li>
    </ul>

    <script>
        var oList = document.getElementById('list');
        oList.onclick = function(e) {
            // e.target表示用户真正点击的那个元素
            e.target.style.color = 'red';
        }
    </script>
</body>

</html>


