文章目录
- 1. 安装 docker
- 2. 编写代码
- 3. 编写 Dockerfile
- 4. 上传镜像
- 5. 修改镜像
learn from 《深入剖析Kubernetes》
1. 安装 docker
在 WSL2 中安装 docker https://www.runoob.com/docker/ubuntu-docker-install.html
会报错:
# Executing docker install script, commit: 93d2499759296ac1f9c510605fef85052a2c32be

WSL DETECTED: We recommend using Docker Desktop for Windows.
Please get Docker Desktop from https://www.docker.com/products/docker-desktop


You may press Ctrl+C now to abort this script.
+ sleep 20
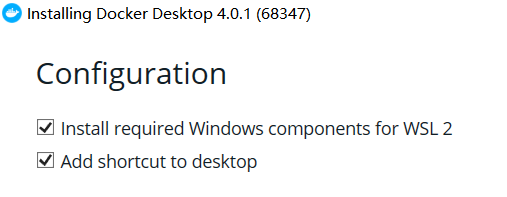
去下载安装 windows 下的 docker


2. 编写代码
使用 Flask 框架启动了一个 Web 服务器,而它唯一的功能是:如果当前环境中有 “NAME” 这个环境变量,就把它打印在 “Hello” 后,否则就打印 “Hello world”,最后再打印出当前环境的 hostname
import os
from flask import Flask
import socket
from gevent import pywsgi
app = Flask(__name__)

@app.route('/')
def hello():
    html = "<h3>Hello {name}!</h3>" \
    "<b>Hostname:</b> {hostname}<br/>"
    return html.format(name=os.getenv("NAME", "world"), hostname=socket.gethostname())

if __name__ == "__main__":
    server = pywsgi.WSGIServer(('0.0.0.0', 12345), app)
    server.serve_forever()
导出依赖包
pip freeze >requirements.txt
Flask==2.0.1
gevent==21.8.0
greenlet==1.1.1
itsdangerous==2.0.1
Jinja2==3.0.1
MarkupSafe==2.0.1
Werkzeug==2.0.1
zope.event==4.5.0
zope.interface==5.4.0
3. 编写 Dockerfile
# 使用官方提供的 Python 开发镜像作为基础镜像
FROM python:3.8-slim

# 将工作目录切换为 /app
WORKDIR /app

# 将当前目录下的所有内容复制到 /app 下

ADD . /app

# 使用 pip 命令安装这个应用所需要的依赖
# RUN pip install --trusted-host pypi.python.org -r requirements.txt
RUN pip install --trusted-host https://pypi.tuna.tsinghua.edu.cn/simple -r requirements.txt
# 国内的源更快

# 允许外界访问容器的 12345 端口
EXPOSE 12345

# 设置环境变量
ENV NAME World

# 设置容器进程为:python app.py,即:这个 Python 应用的启动命令
CMD ["python", "app.py"]
# CMD 前面 隐式的包含了 ENTRYPOINT , /bin/sh -c

在 WSL 里操作 :
- 让 docker 制作镜像,-t 加 tag,自动加载 Dockerfile,执行里面的语句
docker build -t helloworld .
[+] Building 17.4s (10/10) FINISHED
 => [internal] load build definition from Dockerfile                                                       0.1s
 => => transferring dockerfile: 757B                                                                       0.0s
 => [internal] load .dockerignore                                                                          0.1s
 => => transferring context: 2B                                                                            0.0s
 => [internal] load metadata for docker.io/library/python:3.8-slim                                         2.9s
 => [auth] library/python:pull token for registry-1.docker.io                                              0.0s
 => [1/4] FROM docker.io/library/python:3.8-slim@sha256:4dd66d1ccaddaa0587851cb92b365bf3090dccb41393c6f8b  0.0s
 => [internal] load build context                                                                          0.1s
 => => transferring context: 813B                                                                          0.0s
 => CACHED [2/4] WORKDIR /app                                                                              0.0s
 => [3/4] ADD . /app                                                                                       0.1s
 => [4/4] RUN pip install --trusted-host https://pypi.tuna.tsinghua.edu.cn/simple -r requirements.txt     13.6s
 => exporting to image                                                                                     0.6s
 => => exporting layers                                                                                    0.6s
 => => writing image sha256:390d32b9f7a20ccd347361bd31450807d3e63d052e334865cf8460968ffceff4               0.0s
 => => naming to docker.io/library/helloworld                                                              0.0s

Use 'docker scan' to run Snyk tests against images to find vulnerabilities and learn how to fix them
- 查看镜像
(k8s)PC:/mnt/d/gitcode/k8s$ docker image ls
REPOSITORY   TAG       IMAGE ID       CREATED              SIZE
helloworld   latest    390d32b9f7a2   About a minute ago   169MB
- 启动容器
docker run -p 4000:12345 helloworld
因为在 Dockerfile 中已经指定了 CMD。否则,就得把进程的启动命令加在后面 python app.py
- 查看容器启动
(base) $ docker ps
CONTAINER ID   IMAGE        COMMAND           CREATED         STATUS         PORTS                                         NAMES
f6e051d1af6b   helloworld   "python app.py"   2 minutes ago   Up 2 minutes   0.0.0.0:4000->12345/tcp, :::4000->12345/tcp   upbeat_elion
通过 -p 4000:12345 告诉 Docker,把容器内的 12345 端口映射在宿主机的 4000 端口上
这样做的目的是,只要访问宿主机的 4000 端口,就可以看到容器里应用 返回的结果
curl http://localhost:4000
# <h3>Hello World!</h3><b>Hostname:</b> dc1c1343e366<br/>
使用容器完成了一个应用的开发与测试
4. 上传镜像
注册 docker hub,docker login 命令登录
docker tag helloworld kobe24o/helloworld:v0
kobe24o 是账号名(镜像仓库),helloworld 镜像名,v0自己分配的版本号
docker push kobe24o/helloworld:v0
(k8s) $ docker push kobe24o/helloworld:v0
The push refers to repository [docker.io/kobe24o/helloworld]
931022d457d6: Pushing [================>                                  ]  16.07MB/47.27MB
c76dc68917fc: Pushed
047ca6dfe9ab: Pushed
d82f4c466b47: Mounted from library/python
5aa75f4e55e7: Mounted from library/python
74d6903a940b: Mounted from library/python
2f9c2b8e82bd: Mounted from library/python
ba5a5fe43301: Mounted from library/python

5. 修改镜像
(base) $ docker ps
CONTAINER ID   IMAGE        COMMAND           CREATED         STATUS         PORTS
           NAMES
dd3bf057cb09   helloworld   "python app.py"   7 seconds ago   Up 5 seconds   0.0.0.0:4000->12345/tcp, :::4000->12345/tcp   compassionate_carver

(base) $ docker exec -it dd3bf057cb09 /bin/sh
# pwd
/app
# touch newfile.txt
# ls
Dockerfile  app.py  newfile.txt  requirements.txt
# exit

(base) $ docker commit dd3bf057cb09 kobe24o/helloworld:v1
sha256:ca8880f84040f9bdd7ef13763b9c64f8bd4a513a74bc2b095be06aae5b60268a
上面操作,新加了一个文件到镜像里,commit 保存
docker inspect --format '{{ .State.Pid}}' dd3bf057cb09
1763
# 查看正在运行的容器的进程号 PID
通过查看宿主机的 proc 文件,看到这个 进程的所有 Namespace 对应的文件
root:/# ls -l /proc/{PID}/ns/
total 0
lrwxrwxrwx 1 root root 0 Sep 14 11:15 cgroup -> 'cgroup:[4026531835]'
lrwxrwxrwx 1 root root 0 Sep 14 11:15 ipc -> 'ipc:[4026532220]'
lrwxrwxrwx 1 root root 0 Sep 14 09:49 mnt -> 'mnt:[4026532218]'
lrwxrwxrwx 1 root root 0 Sep 14 11:15 net -> 'net:[4026531992]'
lrwxrwxrwx 1 root root 0 Sep 14 11:15 pid -> 'pid:[4026532221]'
lrwxrwxrwx 1 root root 0 Sep 14 11:15 pid_for_children -> 'pid:[4026532221]'
lrwxrwxrwx 1 root root 0 Sep 14 11:15 user -> 'user:[4026531837]'
lrwxrwxrwx 1 root root 0 Sep 14 11:15 uts -> 'uts:[4026532219]'
一个进程,可以选择 加入 到某个进程已有的 Namespace 当中,从而达到 “进入” 这个进程所在容器的目的,这正是 docker exec 的实现原理
- push 到 hub
(base) $ docker push kobe24o/helloworld:v1
The push refers to repository [docker.io/kobe24o/helloworld]
dfee38b42dbb: Pushed
931022d457d6: Layer already exists
c76dc68917fc: Layer already exists
047ca6dfe9ab: Layer already exists
d82f4c466b47: Layer already exists
5aa75f4e55e7: Layer already exists
74d6903a940b: Layer already exists
2f9c2b8e82bd: Layer already exists
ba5a5fe43301: Layer already exists
v1: digest: sha256:7af7ff571ea9fd70d48abeaa2b38a1ed1c1a4e5a933b722d82af25d3e889f84e size: 2206
