目录
前言
Gradio.NET
Gradio.NET 使用
1、创建项目
2、安装 Gradio.Net
3、示例代码
Gradio.NET 示例
1、Layout
2、Form
3、Media
4、Chatbot
5、Progress
Gradio.NET 应用
项目地址
总结
最后
前言
Gradio.NET 是 Gradio 在 .NET 平台上的移植版本。Gradio 是一个开源的 Python 包,用于快速构建机器学习模型、API 或任意 Python 函数的演示或 Web 应用程序。
Gradio.NET 继承了 Gradio 的核心理念,以.NET 开发习惯和熟悉的方式进行Web应用开发,其主要特点包括:
易用性:只需几行 .NET 代码即可创建功能完善的用户界面。
灵活性:支持多种类型的输入和输出,包括文本、图像、音频等。
一键分享:轻松生成访问链接,方便进行测试和使用。
集成支持:能够无缝集成到主流的 .NET 框架和库中,如 ASP.NET Core 和 Entity Framework,加速开发和部署流程。
总而言之,Gradio.NET 是一个强大的工具,极大地简化了创建和分享界面的过程,使我们能够专注于业务逻辑而无需担心复杂的前端开发工作。
Gradio.NET
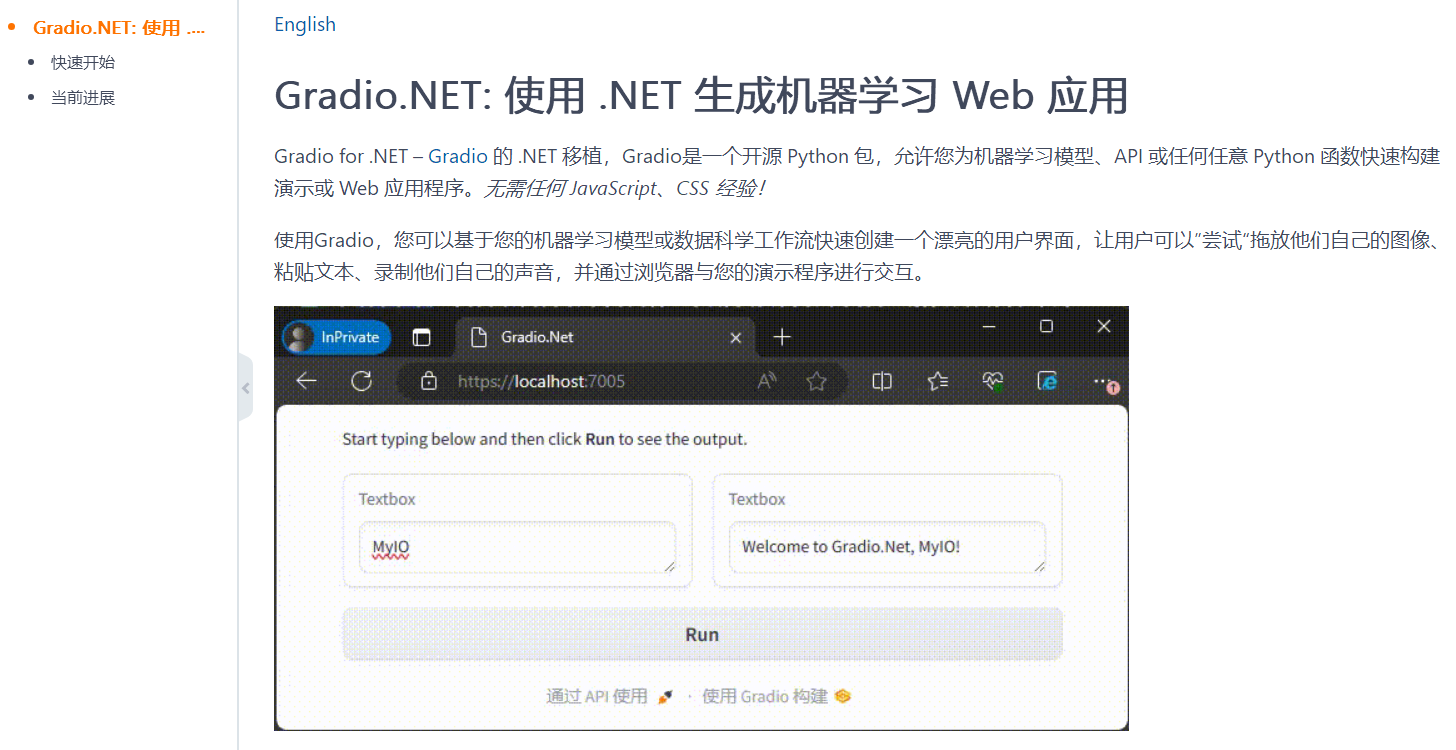
Gradio.NET 是一个基于 Gradio 的 .NET 实现,我们无需掌握任何前端技术(如 JavaScript、CSS 或 HTML),仅用几行 .NET 代码就能快速构建机器学习模型、API 或任意函数的演示或 Web 应用程序。
通过 Gradio.NET,可以轻松创建美观的交互式 Web 界面,无需前端开发经验。
Gradio.NET 使用
1、创建项目
创建一个新的 .NET 8 WebAPI 标准项目,选择启用 OpenAPI 支持和使用控制器;
dotnet new webapi -n ManageCore.Apicd ManageCore.Api2、安装 Gradio.Net
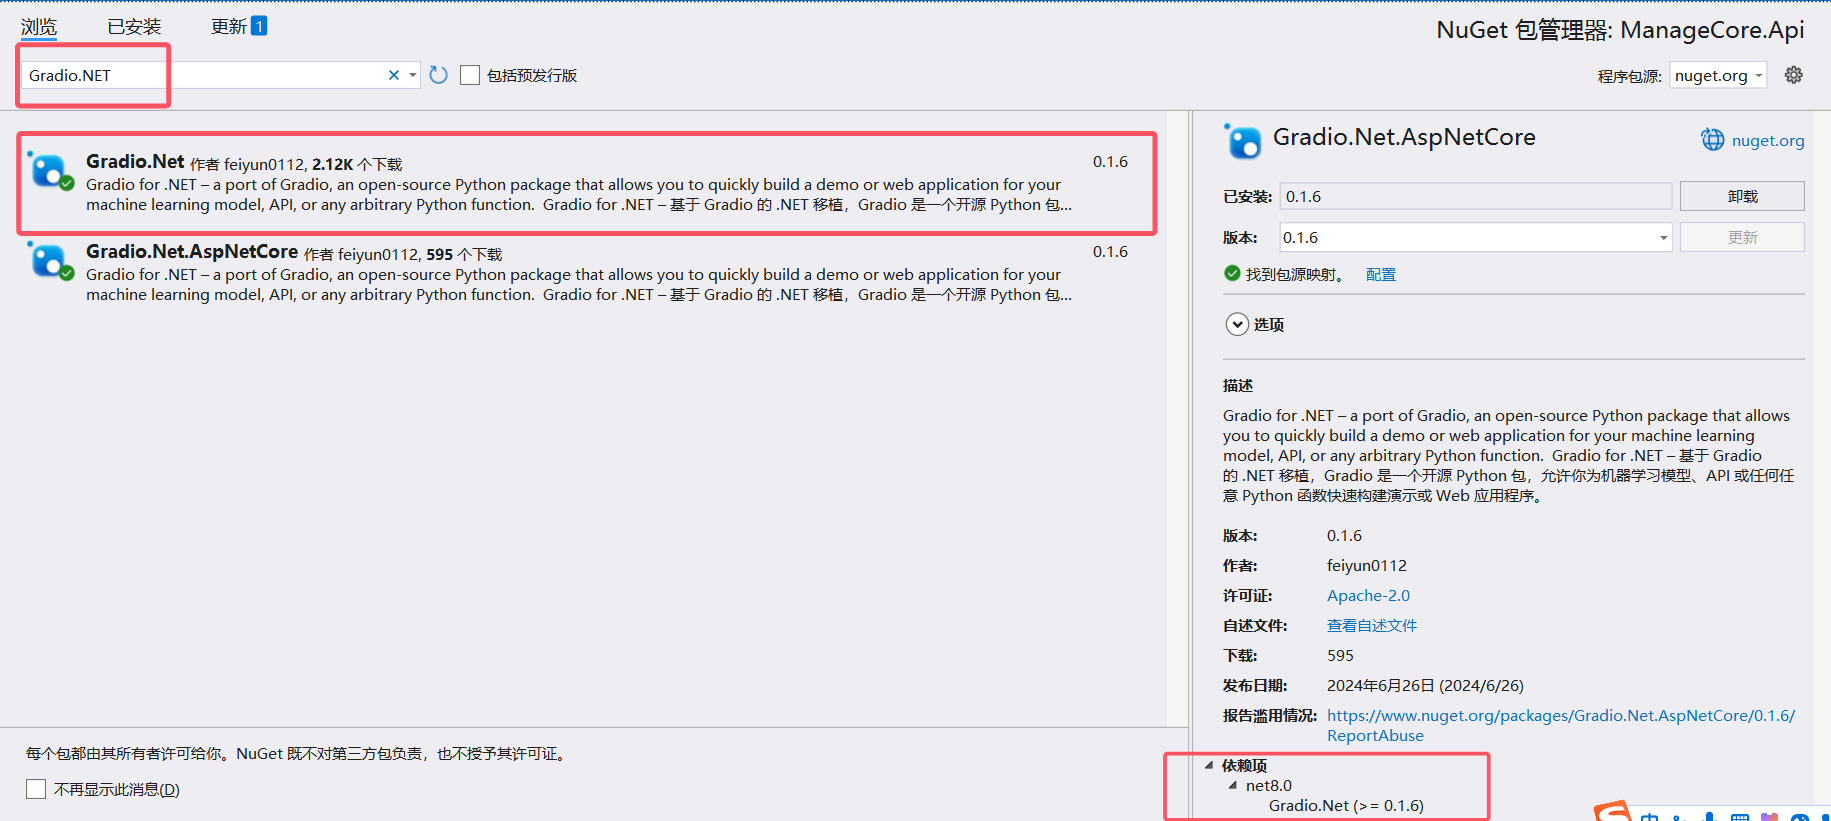
安装 NuGet 包 Gradio.Net.AspNetCore 这个包。
3、示例代码
在 Program.cs 中输入以下示例代码:
App.Launch(await CreateBlocks());async Task<Blocks> CreateBlocks(){ using (var blocks = gr.Blocks()) { gr.Markdown("开始在下面键入,然后点击**运行** 查看输出结果."); Textbox input, output; using (gr.Row()) { input = gr.Textbox(placeholder: "你叫什么名字?"); output = gr.Textbox(); } var btn = gr.Button("运行"); await btn.Click(fn: async (input) => gr.Output($"欢迎使用 Gradio.Net, {input.Data[0]}!"), inputs: new[] { input }, outputs: new[] { output }); return blocks; }}运行结果如下图所示:

如果想在现有项目中使用 Gradio.NET
可以使用AddGradio和 UseGradio扩展方法:
var builder = WebApplication.CreateBuilder(args);builder.Services.AddGradio();var app = builder.Build();app.UseGradio(await CreateBlocks());app.Run();Gradio.NET 示例
1、Layout
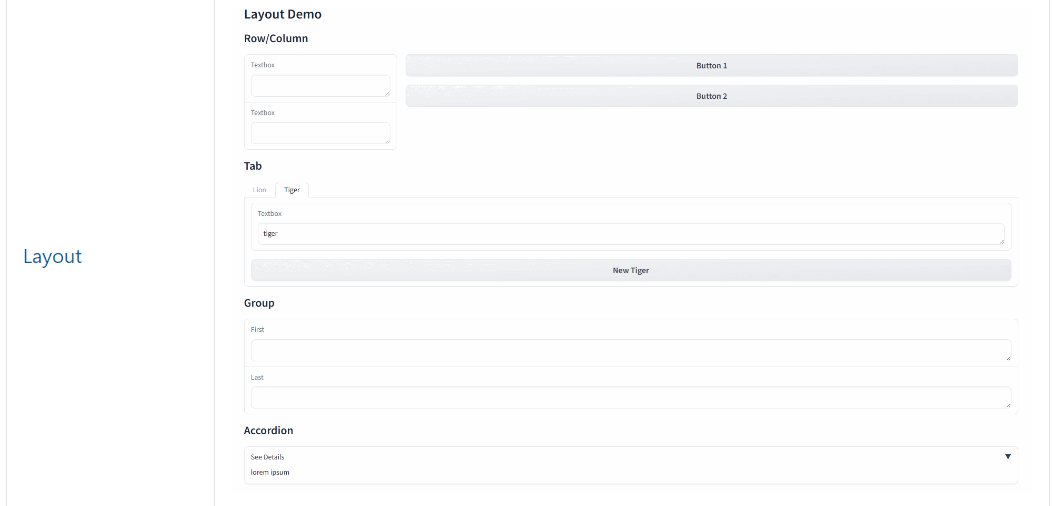
Gradio.NET 常用的布局方式都包括:Row/Column、Tab、Group、Accordion等。
示例代码
App.Launch(await CreateBlocks());async Task<Blocks> CreateBlocks(){ using (var blocks = gr.Blocks()) { gr.Markdown("# Layout Demo"); gr.Markdown("## Row/Column"); using (gr.Row()) { using (gr.Column(scale: 1)) { var text1 = gr.Textbox(); var text2 = gr.Textbox(); } using (gr.Column(scale: 4)) { var btn1 = gr.Button("Button 1"); var btn2 = gr.Button("Button 2"); } } gr.Markdown("## Tab"); using (gr.Tab("Lion")) { gr.Textbox("lion"); gr.Button("New Lion"); } using (gr.Tab("Tiger")) { gr.Textbox("tiger"); gr.Button("New Tiger"); } gr.Markdown("## Group"); using (gr.Group()) { gr.Textbox(label: "First"); gr.Textbox(label: "Last"); } gr.Markdown("## Accordion"); using (gr.Accordion("See Details")) { gr.Markdown("lorem ipsum"); } return blocks; }}示例效果
2、Form
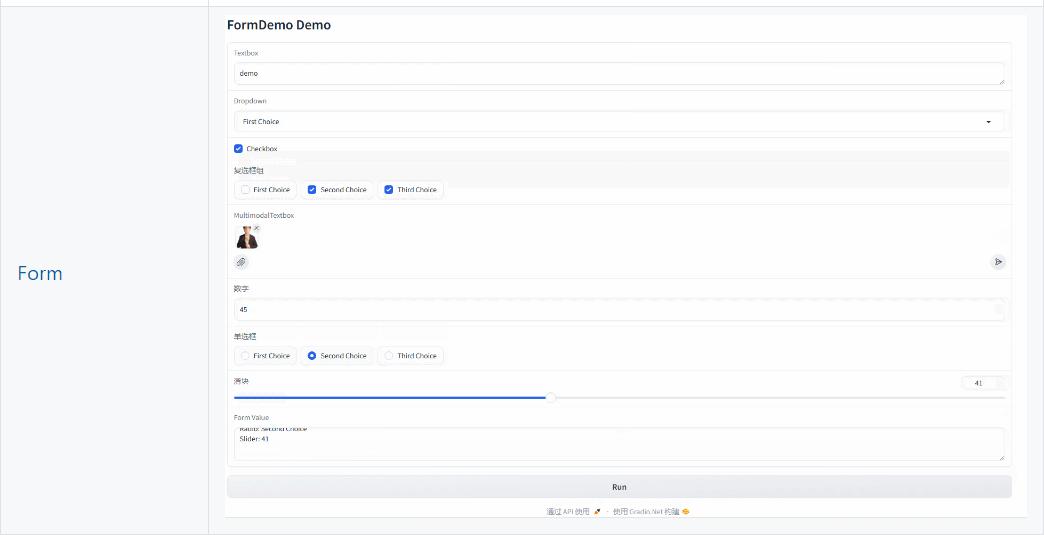
表单示例代码,具体如下:
App.Launch(await CreateBlocks());async Task<Blocks> CreateBlocks(){ using (var blocks = gr.Blocks()) { using (gr.Column()) { var text1 = gr.Textbox(); var dropdown1 = gr.Dropdown(choices: new[] { "First Choice", "Second Choice", "Third Choice" }); var checkbox1 = gr.Checkbox(); var checkboxGroup1 = gr.CheckboxGroup(choices: new[] { "First Choice", "Second Choice", "Third Choice" }); var multimodalTextbox1 = gr.MultimodalTextbox(interactive:true); var number1 = gr.Number(); var radio1 = gr.Radio(choices: ["First Choice", "Second Choice", "Third Choice"]); var slider1 = gr.Slider(); var text_Result = gr.Textbox(label:"Form Value", interactive:false); var btn = gr.Button("Run"); await btn.Click(fn: async (input) => gr.Output($@"Textbox: {Textbox.Payload(input.Data[0])}Dropdown: {string.Join(", ",Dropdown.Payload(input.Data[1]))}Checkbox: {Checkbox.Payload(input.Data[2])}CheckboxGroup: {string.Join(", ", CheckboxGroup.Payload(input.Data[3]))}MultimodalTextbox: {MultimodalTextbox.Payload(input.Data[4]).Files.FirstOrDefault()?.OrigName}Number: {Number.Payload(input.Data[5])}Radio: {string.Join(", ", Radio.Payload(input.Data[6]))}Slider: {Slider.Payload(input.Data[7])}"), inputs: new Component[] { text1, dropdown1, checkbox1, checkboxGroup1, multimodalTextbox1, number1, radio1, slider1 }, outputs: new[] { text_Result }); } return blocks; }}示例效果
3、Media
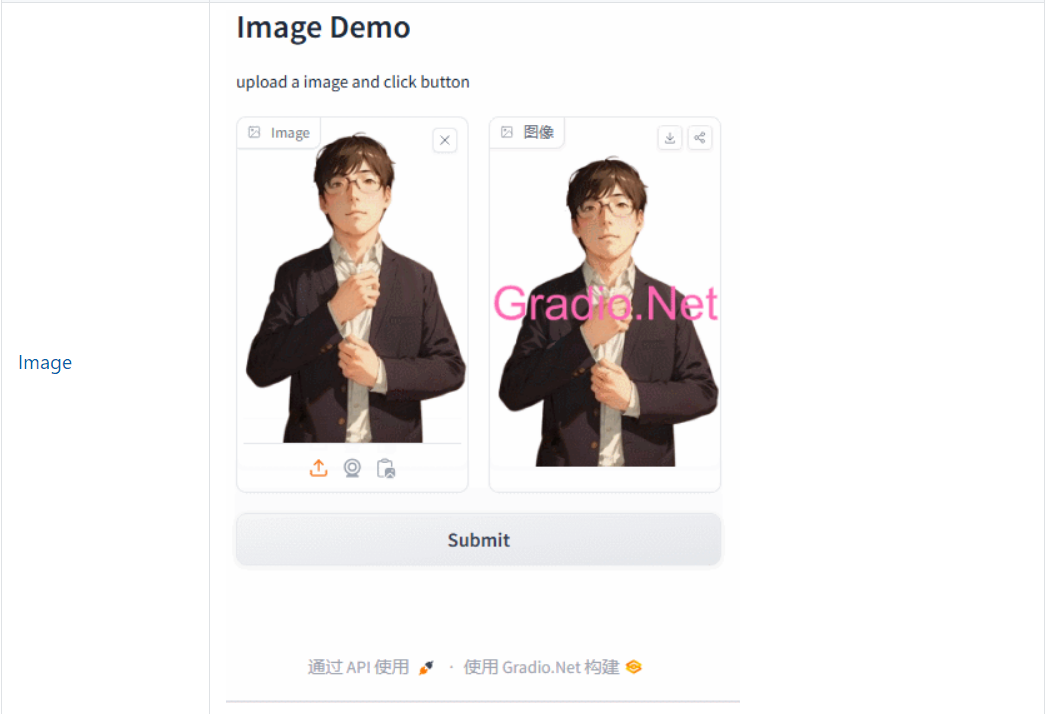
多媒体控件,具体参考代码
App.Launch(await CreateBlocks());async Task<Blocks> CreateBlocks(){ using (var blocks = gr.Blocks()) { gr.Markdown("**Image Demo** upload a image and click button"); Gradio.Net.Image input, output; using (gr.Row()) { input = gr.Image(); output = gr.Image(); } var btn = gr.Button("Submit"); await btn.Click(fn: async (input) => gr.Output(DrawWaterMarkOnImage(Gradio.Net.Image.Payload(input.Data[0]))), inputs: new[] { input }, outputs: new[] { output }); return blocks; }}static string DrawWaterMarkOnImage(string inputImageFilePath){ using (var img = SixLabors.ImageSharp.Image.Load(inputImageFilePath)) { var outputFilePath = Path.Combine(Path.GetTempPath(), Guid.NewGuid().ToString() + ".png"); Font font = SystemFonts.CreateFont("Arial", 10); // for scaling water mark size is largely ignored. using (var img2 = img.Clone(ctx => ApplyScalingWaterMarkSimple(ctx, font, "Gradio.Net", Color.HotPink, 5))) { img2.Save(outputFilePath); } return outputFilePath; }}static IImageProcessingContext ApplyScalingWaterMarkSimple(IImageProcessingContext processingContext, Font font, string text, Color color, float padding){ Size imgSize = processingContext.GetCurrentSize(); float targetWidth = imgSize.Width - (padding * 2); float targetHeight = imgSize.Height - (padding * 2); // Measure the text size FontRectangle size = TextMeasurer.MeasureSize(text, new TextOptions(font)); // Find out how much we need to scale the text to fill the space (up or down) float scalingFactor = Math.Min(targetWidth / size.Width, targetHeight / size.Height); // Create a new font Font scaledFont = new Font(font, scalingFactor * font.Size); var center = new PointF(imgSize.Width / 2, imgSize.Height / 2); var textOptions = new RichTextOptions(scaledFont) { Origin = center, HorizontalAlignment = HorizontalAlignment.Center, VerticalAlignment = VerticalAlignment.Center }; return processingContext.DrawText(textOptions, text, color);}示例效果
4、Chatbot
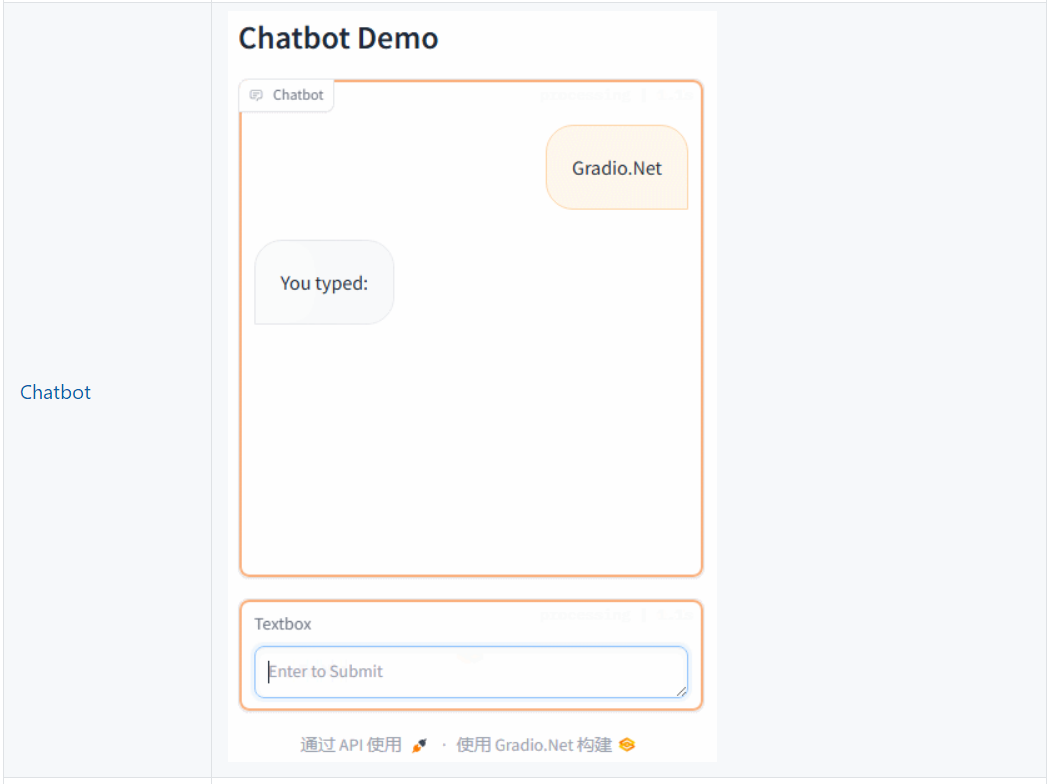
示例代码
App.Launch(await CreateBlocks());async Task<Blocks> CreateBlocks(){ using (var blocks = gr.Blocks()) { gr.Markdown("# Chatbot Demo"); var chatbot = gr.Chatbot(); var msg = gr.Textbox(placeholder:"Enter to Submit"); await msg.Submit(streamingFn: (input) => Respond(Textbox.Payload(input.Data[0]), Chatbot.Payload(input.Data[1])), inputs: new Component[] { msg, chatbot }, outputs: new Component[] { msg, chatbot }); return blocks; }}static async IAsyncEnumerable<Output> Respond(string message, IList<ChatbotMessagePair> chatHistory){ chatHistory.Add(new ChatbotMessagePair(message, "You typed: ")); for (int i = 0; i < message.Length; i++) { await Task.Delay(500); chatHistory.Last().AiMessage.TextMessage += message[i]; yield return gr.Output("", chatHistory); }}示例效果
5、Progress
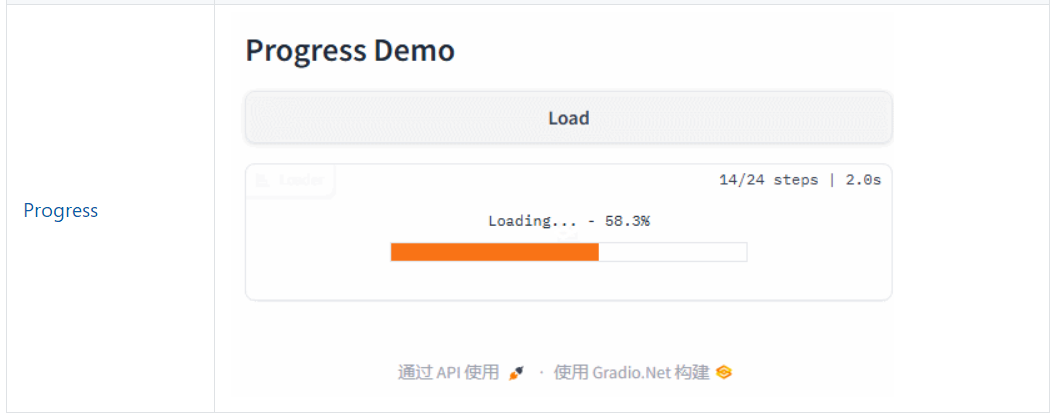
根据自己的需求,调整进度条代码,参考代码如下:
App.Launch(await CreateBlocks());async Task<Blocks> CreateBlocks(){ using (var blocks = gr.Blocks()) { gr.Markdown("# Progress Demo"); var load = gr.Button("Load"); var label = gr.Label(label: "Loader"); load.Click(LoadSet, outputs: new[] { label }); return blocks; }} static async Task<Output> LoadSet(Input input) { const int count = 24; input.Progress = gr.Progress(count); for (int i = 0; i < count; i++) { input.Progress.Report(i, desc: "Loading..."); await Task.Delay(100); } return gr.Output("Loaded"); }示例效果
还有更多示例代码,可以查看官方文档进行学习。
Gradio.NET 应用
对于 AI 的爱好者来说,Gradio.NET 提供了一个绝佳的机会,通过访问 Gradio.Net,让他们能够与通义千问开源模型进行互动。
使用 Gradio.NET 打造你的 通义千问 AI 聊天机器人,具体如下图所示:
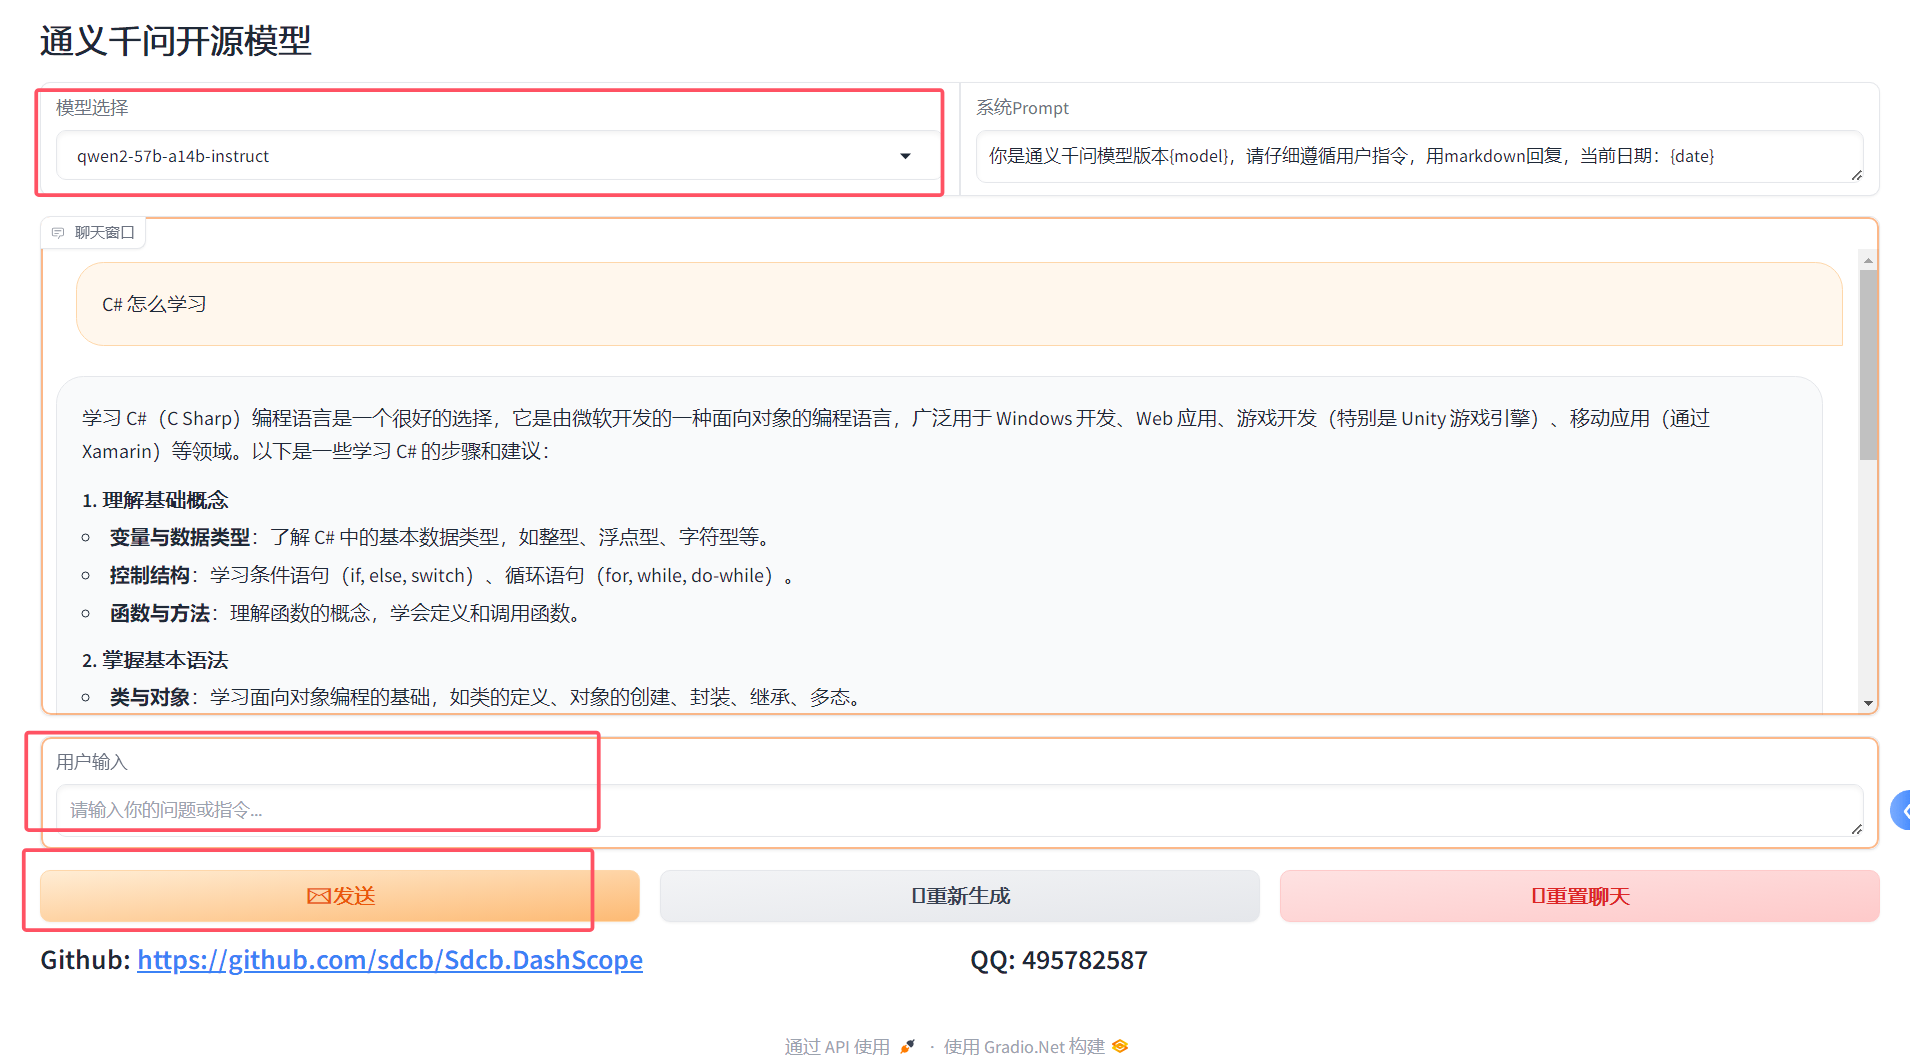
这个 Web 应用不仅用户体验流畅,还能够记住会话历史,轻松识别语义,这一切都得益于其背后的先进技术。
该项目已开源,源代码地址:GitHub - sdcb/Sdcb.DashScope: 为阿里云灵积模型服务DashScope开发的非官方.NET SDK
具体代码讲解,可以查看源码。
项目地址
Github:GitHub - feiyun0112/Gradio.Net: ⭐Gradio for .NET – a port of Gradio, an open-source Python package that allows you to quickly build a demo or web application for your machine learning model, API, or any arbitrary Python function. Gradio for .NET – 基于 Gradio 的 .NET 移植,Gradio 是一个开源 Python 包,允许你为机器学习模型、API 或任何任意 Python 函数快速构建演示或 Web 应用程序。
Demo:Gradio.Net/readme_files at main · feiyun0112/Gradio.Net · GitHub
AI聊天:GitHub - sdcb/Sdcb.DashScope: 为阿里云灵积模型服务DashScope开发的非官方.NET SDK
总结
Gradio.NET 致力于成为 .NET 开发者 构建Web 应用的首选框架。它的设计理念是简化开发过程,让每个人都能轻松参与到 Web 应用的开发中来。
如果你对创建聊天机器人感兴趣,可以试试上面这个开源项目,结合 Gradio.NET 开发自己的AI聊天,有需要的朋友们可以参考学习。
最后
如果你觉得这篇文章对你有帮助,不妨点个赞支持一下!你的支持是我继续分享知识的动力。如果有任何疑问或需要进一步的帮助,欢迎随时留言。
也可以加入