简介
什么是 QML
QML,全称为 Qt Meta-Object Language,是一种声明式语言,用于在 Qt 框架中创建用户界面(UI)。它采用了 JavaScript 的语法,并通过 Qt 的 QML 引擎来解释和执行 QML 代码。通过 QML,开发者可以快速、简单地创建现代化的用户界面,而无需太多的代码。
QML 的特点
QML 具有以下特点:
声明式语言:QML 使用声明式语言,使得开发者可以更加直观地构建 UI,无需过多关注底层实现细节。
基于 JavaScript:QML 语法基于 JavaScript,因此对于有一定 JavaScript 基础的开发者来说,学习 QML 会相对容易。
可读性高:QML 语法结构简单清晰,易于理解和维护,减少代码量和开发时间。
可定制性强:QML 中可以通过修改属性来快速定制 UI,无需编写额外代码。
与 C++ 无缝结合:QML 可以与 C++ 代码进行无缝结合,提供了更多的开发灵活性和可扩展性。
QML 的用途
移动应用程序的 UI 开发,如手机应用等。
桌面应用程序的 UI 开发,如计算器等。
嵌入式系统的 UI 开发,如车载导航、工业自动化等。
同时,QML 也可用于开发图形化控件、动画和过渡效果等。总之,QML 是一个功能强大的 UI 开发工具,适用于各种类型的应用程序和设备。
创建第一个QML实例
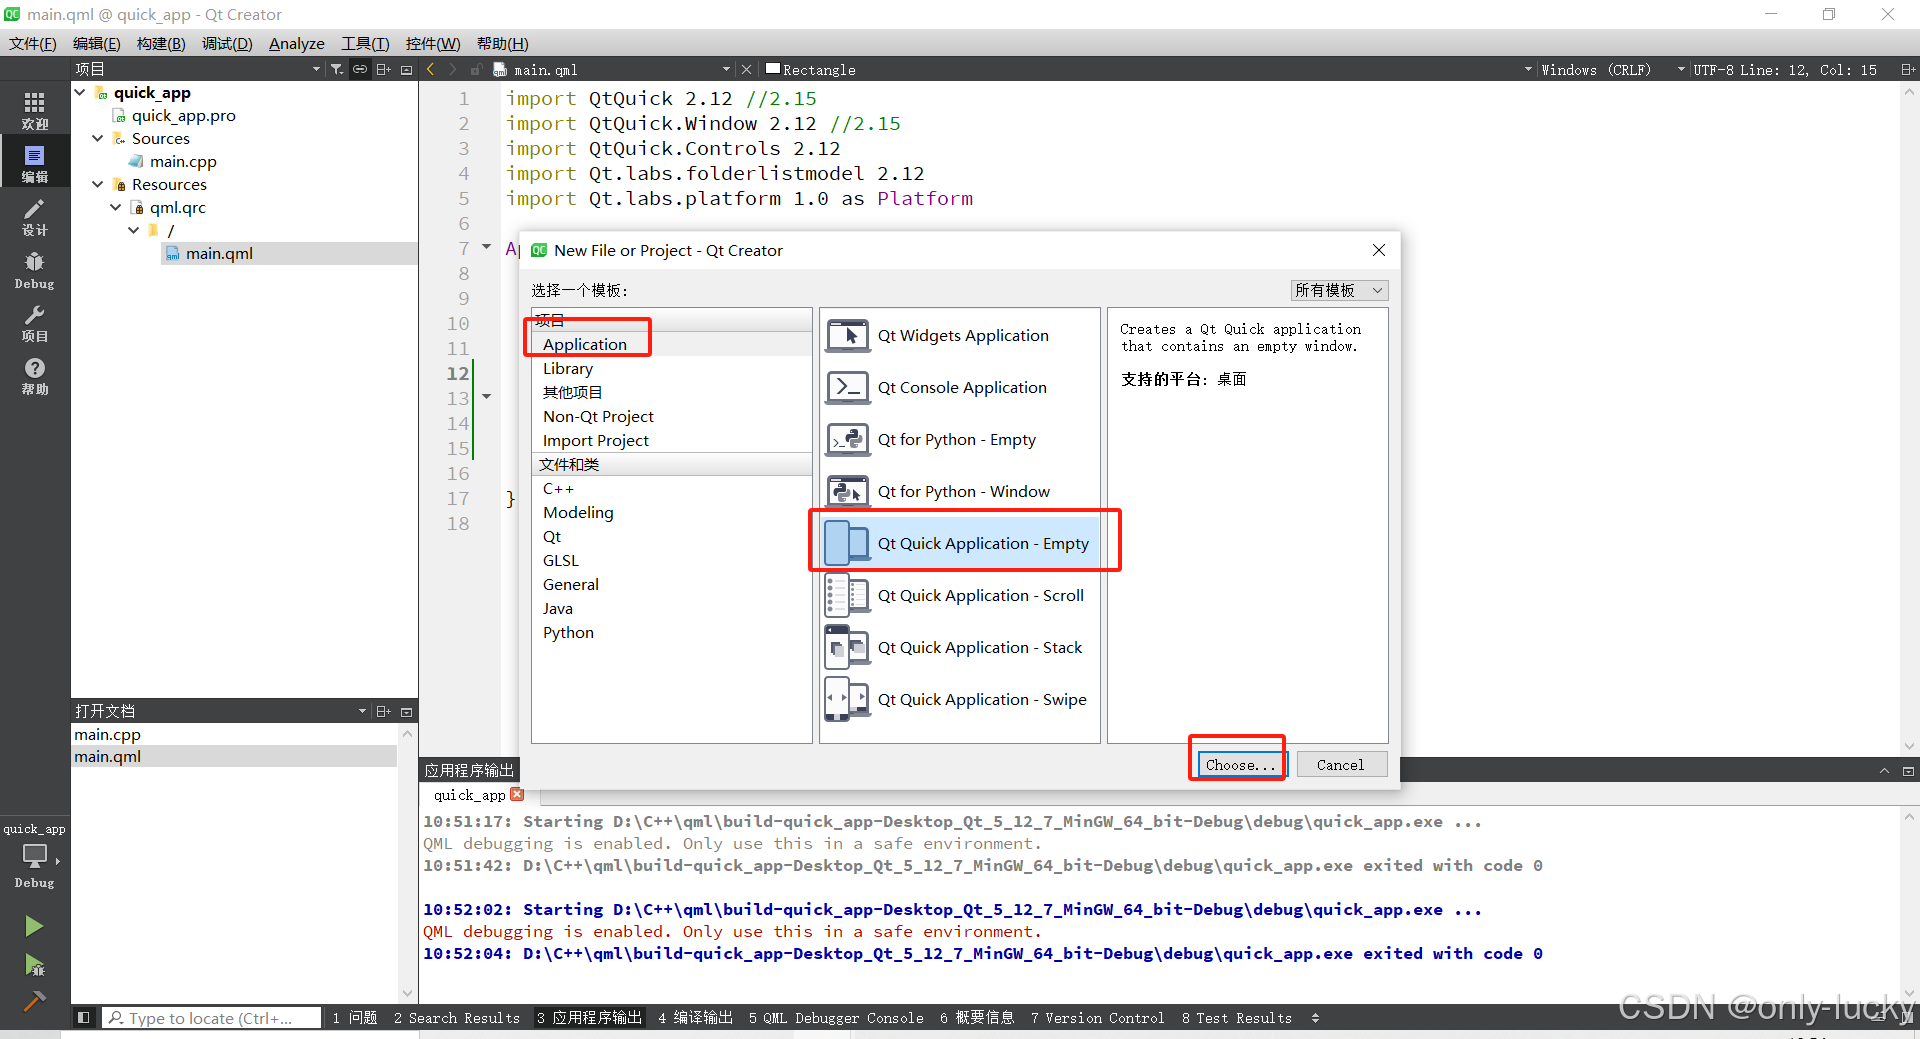
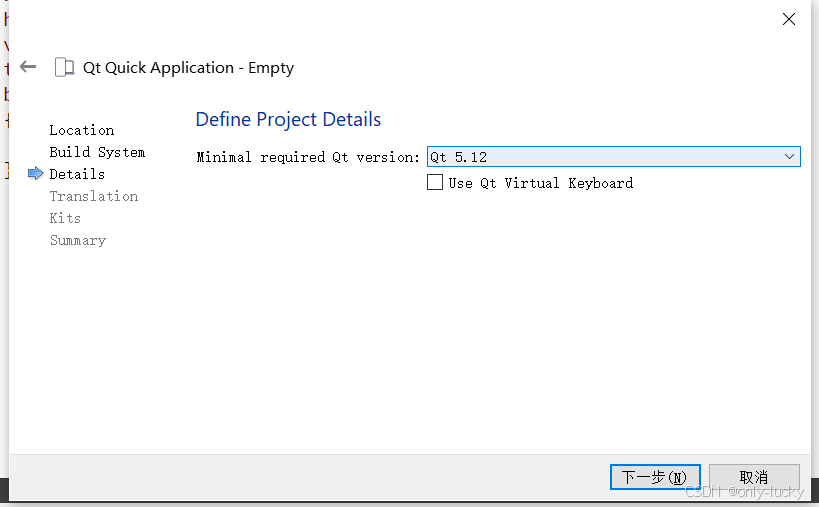
文件->选择新建文件或项目->Application->Qt Quick Application然后一路下一步即可,如果在当前电脑中装了不同版本qt程序在选择Details时可以会出现无法选中的情况,可以找一下低版本的qtcreator(qt5.12.7),本次实例都是基于qt5.12来实现。


Widget控件介绍
main.qml引入版本
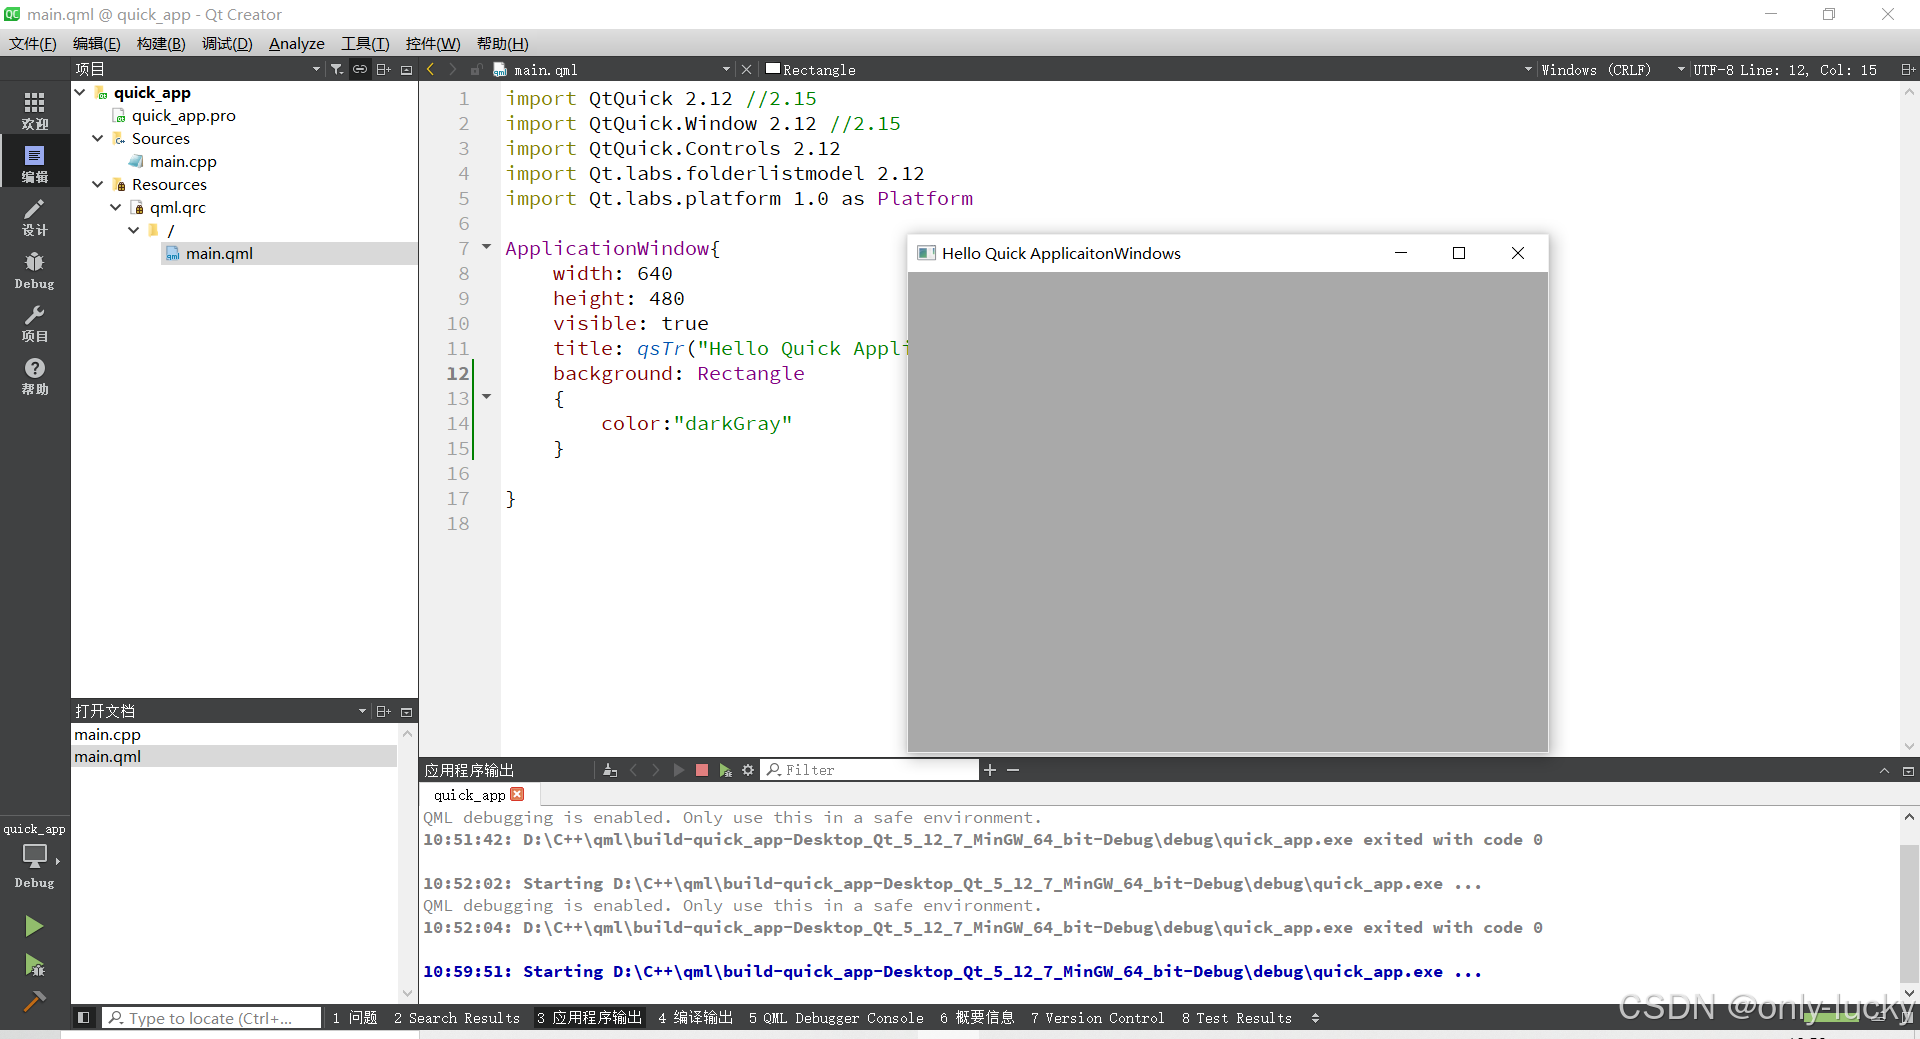
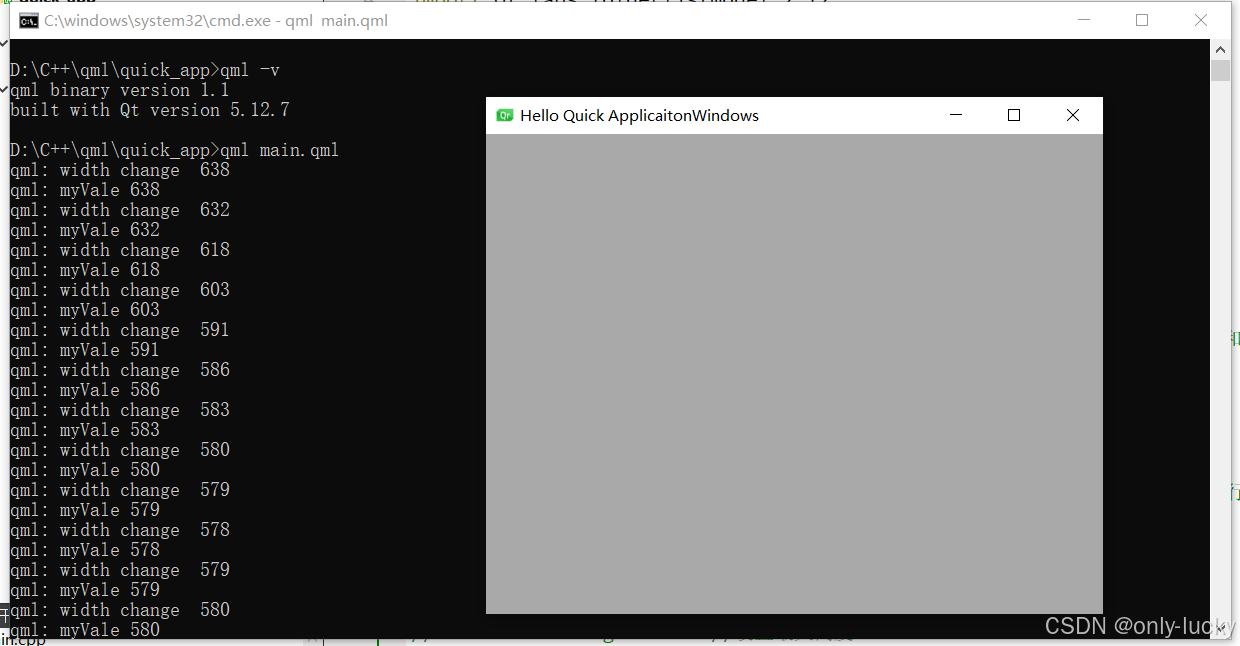
import QtQuick 2.12 //2.15import QtQuick.Window 2.12 //2.15import QtQuick.Controls 2.12import Qt.labs.folderlistmodel 2.12import Qt.labs.platform 1.0 as PlatformWindow{ //root控件 主界面 signal mySig(); //自定义一个信号 onMySig: { //触发信号所执行的函数,信号名加on,并且第一个字母大写 console.log("mySig test") } onWidthChanged: { //窗口的宽度改变时会触发这个函数 console.log("width change ",width) //打印语句,打印宽度 myValue = width; } property int myValue: 0 // 创建一个int类型的属性,他也会自动生成信号和槽 onMyValueChanged: { console.log("myVale",myValue) } width: 640 height: 480 x:500 ;y:500 // x 和y用于设置对于父控件的位置,0 0 为左上角,如果要在一行写多条语句,要用分号;隔开 visible: true //设置是否可见 title: qsTr("Hello Quick ApplicaitonWindows") //设置标题 color: "darkGray" //设置背景色为深灰色// maximumWidth: 600 //设置最大宽度// maximumHeight: 600 //设置最大高度// minimumWidth: 600 //设置最小宽度// minimumHeight: 600 // 设置最小高度// opacity: 0.5 //设置透明度 范围是0-1}以上代码因为只涉及到了qml,可以在QT中使用QtCreator来运行,也可以使用cmd命令,调出控制台窗口,输入:qml main.qml 来启动实例(需要配置环境变量)。

main.qml完整版本
import QtQuick 2.12 //2.15import QtQuick.Window 2.12 //2.15import QtQuick.Controls 2.12 //可以引入别的控件import Qt.labs.folderlistmodel 2.12import Qt.labs.platform 1.0 as PlatformWindow{ //root控件 主界面 signal mySig(); //自定义一个信号 onMySig: { //触发信号所执行的函数,信号名加on,并且第一个字母大写 console.log("mySig test") } onWidthChanged: { //窗口的宽度改变时会触发这个函数 console.log("width change ",width) //打印语句,打印宽度 myValue = width; } property int myValue: 0 // 创建一个int类型的属性,他也会自动生成信号和槽 onMyValueChanged: { console.log("myVale",myValue) } width: 640 height: 480 x:500 ;y:500 // x 和y用于设置对于父控件的位置,0 0 为左上角,如果要在一行写多条语句,要用分号;隔开 visible: true //设置是否可见 title: qsTr("Hello Quick ApplicaitonWindows") //设置标题// color: "darkGray" //设置背景色为深灰色// maximumWidth: 600 //设置最大宽度// maximumHeight: 600 //设置最大高度// minimumWidth: 600 //设置最小宽度// minimumHeight: 600 // 设置最小高度// opacity: 0.5 //设置透明度 范围是0-1 Button{ id:btn1 //提供名称,可以根据ID来访问别的控件 objectName: "btn1" width: 50 height: 50 background: Rectangle { border.color:btn1.focus?"blue":"red" //这个按钮的边框演示,如果有焦点是蓝色,否则是红色 } onClicked: { //按钮的点击时间 console.log("Btn1 click") } //块注释:注意因为是qml不是cpp所以不能使用宏编译注释 /**/ //按下键盘的Tab键,也可以切换焦点 Keys.onRightPressed: { //焦点如果在当前控件时,按下(键盘右键->)切换焦点 btn2.focus = true; } } Button{ id:btn2 //提供名称,可以根据ID来访问别的控件 x :100 width: 50 height: 50 objectName: "btn2" background: Rectangle { border.color:btn2.focus?"blue":"red" //这个按钮的边框演示,如果有焦点是蓝色,否则是红色 } onClicked: { console.log("Btn2 click") } Keys.onLeftPressed://焦点如果在当前控件时,按下(键盘左键<-)切换焦点 { btn1.focus = true; } } onActiveFocusItemChanged:{ console.log("获取焦点改变后的控件:",activeFocusItem.objectName) //item是对象,打印不出id,需要设置名称 }}Rectangle控件介绍
rectangle:英文意思为:长方形,矩阵。
main.qml引入版本
import QtQuick 2.12import QtQuick.Window 2.12Window { visible: true width: 640 height: 480 title: qsTr("Hello World") Rectangle{ id:rect1 width: 100;height: 100; rotation: 30; //设置角度 scale: 0.5; //控件缩放默认是1 antialiasing: false; //抗锯齿设置 color: "black" border.color: "red" //边框颜色 border.width: 10 //边框宽度 radius: 50;//边框圆角,控件宽度/2及为圆形 gradient: Gradient{ //坡度,用于设置渐变颜色 GradientStop{position: 0.0;color:"lightsteelblue"} GradientStop{position: 1.0;color: "blue"} }// anchors.centerIn: parent //居中与父控件 anchors.horizontalCenter: parent.horizontalCenter//水平居中 anchors.verticalCenter: parent.verticalCenter//垂直居中 } Rectangle{ id:rect2 width: 100;height: 100; color: "blue" anchors.left: rect1.right //长方形的左边对应rect1的右边 anchors.top: rect1.bottom //长方形的顶部对应rect1的底边 anchors.margins: 10 //设置间隔 }/* Rectangle{ x:100;y:100;z:1 //z轴可以设置那个控件在上面,z默认值为0 width: 100;height: 100 color: "black" focus: true;// activeFocus: //激活焦点 MouseArea{ //鼠标区域点击时触发函数 anchors.fill: parent onClicked: { console.log("click") } } Keys.onReturnPressed: //Enter回车键按下触发事件 { console.log("on return pressed") } }*/}main.qml自定义边框
自定义MyRectangle.qml文件
import QtQuick 2.0Rectangle{ id:borderRect property int myTopMargin: 0 //向外部暴露属性,可以修改内部的值 property int myBottomMargin: 0 property int myRightMargin: 0 property int myLeftMargin: 0 color: "blue" Rectangle{ id:innerRect anchors.fill: parent anchors.topMargin: myTopMargin //也可以borderRect.myTopMargin(这种更推荐) anchors.bottomMargin: borderRect.myBottomMargin //也可以myButtomMangin(这种不推荐) anchors.rightMargin: myRightMargin anchors.leftMargin: myLeftMargin color: "black" radius: width/2 }}main.qml引入自定义的文件
import QtQuick 2.12import QtQuick.Window 2.12Window { visible: true width: 640 height: 480 title: qsTr("Hello World") MyRectangle { radius: 50// objectName: "myRectagnle" id: myrect width: 100;height: 100 x:10 myTopMargin: 10 myLeftMargin: 10 myRightMargin: 10 myBottomMargin: 10 gradient: Gradient{ //坡度,用于设置渐变颜色 GradientStop{position: 0.0;color:"lightsteelblue"} GradientStop{position: 1.0;color: "blue"} } } Rectangle{ id:rect1 width: 100;height: 100; rotation: 30; //设置角度 scale: 0.5; //控件缩放默认是1 antialiasing: false; //抗锯齿设置 color: "black" border.color: "red" //边框颜色 border.width: 10 //边框宽度 radius: 50;//边框圆角,控件宽度/2及为圆形 gradient: Gradient{ //坡度,用于设置渐变颜色 GradientStop{position: 0.0;color:"lightsteelblue"} GradientStop{position: 1.0;color: "blue"} }// anchors.centerIn: parent //居中与父控件 anchors.horizontalCenter: parent.horizontalCenter//水平居中 anchors.verticalCenter: parent.verticalCenter//垂直居中 } Rectangle{ id:rect2 width: 100;height: 100; color: "blue" anchors.left: rect1.right //长方形的左边对应rect1的右边 anchors.top: rect1.bottom //长方形的顶部对应rect1的底边 anchors.margins: 10 //设置间隔 }/* Rectangle{ x:100;y:100;z:1 //z轴可以设置那个控件在上面,z默认值为0 width: 100;height: 100 color: "black" focus: true;// activeFocus: //激活焦点 MouseArea{ //鼠标区域点击时触发函数 anchors.fill: parent onClicked: { console.log("click") } } Keys.onReturnPressed: //Enter回车键按下触发事件 { console.log("on return pressed") } }*/}自定义动画效果
main.qml引入
import QtQuick 2.12import QtQuick.Window 2.12Window { visible: true width: 640 height: 480 title: qsTr("Hello World") Rectangle { id: rect width: 100; height: 100 color: "red" PropertyAnimation on x { to: 100 } //修改控件的位置,on立即触发 PropertyAnimation on y { to: 100 } PropertyAnimation on width{to:140;duration:1000} SequentialAnimation on color { //连续的动画,可以将多个动画组组合在一起。 ColorAnimation { from: rect to: "yellow" duration: 500 } ColorAnimation { from: rect to: "blue" duration: 500 } } }/* 动画效果控件 Rectangle { id: flashingblob width: 75; height: 75 color: "blue" opacity: 1.0 MouseArea { anchors.fill: parent onClicked: { animateColor.start() animateOpacity.start() animateWidth.start() } } PropertyAnimation { id: animateColor; target: flashingblob; properties: "color"; to: "green"; duration: 1000} NumberAnimation { id:animateWidth// properties: "width" //两者似乎都可以,作用的属性 property: "width" to:150 //改变后的数值 target: flashingblob //作用动画的对象 duration: 1000 //动画持续时间 easing.type: Easing.InOutQuad } NumberAnimation { id: animateOpacity target: flashingblob properties: "opacity" from: 0.1 to: 1.0 duration: 1000// loops: Animation.Infinite// easing {type: Easing.OutBack; overshoot: 500} } }*//* Rectangle { state: "blue_color" id: root width: 100; height: 100 focus: true states: [ //控件的状态,状态改变时进行不同的实现,有限状态机编程。 State{ name:"no_color" PropertyChanges {target: root;color:"white"} }, State { name: "red_color" PropertyChanges { target: root; color: "red";width:200 } }, State { name: "blue_color" PropertyChanges { target: root; color: "blue" ;height:200} } ] MouseArea{ anchors.fill: parent onPressed: { root.state = "red_color" } onReleased: { root.state = "blue_color" } } }*/}main.qml完整实例
import QtQuick 2.12import QtQuick.Window 2.12Window { visible: true width: 640 height: 480 title: qsTr("Hello World") Rectangle { id: banner width: 150; height: 100; border.color: "black" Column { anchors.centerIn: parent Text { id: code text: "Code less." opacity: 0.01 } Text { id: create text: "Create more." opacity: 0.01 } Text { id: deploy text: "Deploy everywhere." opacity: 0.01 } } MouseArea { anchors.fill: parent onPressed: playbanner.start() } SequentialAnimation { id: playbanner running: false NumberAnimation { target: code; property: "opacity"; to: 1.0; duration: 200} NumberAnimation { target: create; property: "opacity"; to: 1.0; duration: 200} NumberAnimation { target: deploy; property: "opacity"; to: 1.0; duration: 200} } } /* Rectangle { width: 75; height: 75; radius: width id: ball color: "salmon" MouseArea{ anchors.fill: parent onClicked: { ball.x+=50 ball.y+=50 } } Behavior on x { //行为 先定义行为,值改变会触发,不会立即触发 NumberAnimation { id: bouncebehavior easing { type: Easing.OutElastic //有弹性的 动画效果 amplitude: 1.0 //震动幅度 period: 0.5 //周期 } } } Behavior on y { animation: bouncebehavior } Behavior { ColorAnimation {target: ball; duration: 1000 } } }*//* Rectangle { width: 75; height: 75 id: button state: "RELEASED" MouseArea { anchors.fill: parent onPressed: button.state = "PRESSED" onReleased: button.state = "RELEASED" } states: [ State { name: "PRESSED" PropertyChanges { target: button; color: "lightblue"} }, State { name: "RELEASED" PropertyChanges { target: button; color: "lightsteelblue"} } ] transitions: [ //添加颜色的动画效果 Transition { from: "PRESSED" to: "RELEASED" ColorAnimation { duration: 1000} //省略target参数 }, Transition { from: "RELEASED" to: "PRESSED" ColorAnimation { target: button; duration: 1000} // target参数可以不写,因为上面写过了 } ] }*/ /* Rectangle { id: rect width: 100; height: 100 color: "red" PropertyAnimation on x { to: 100 } //修改控件的位置,on立即触发 PropertyAnimation on y { to: 100 } PropertyAnimation on width{to:140;duration:1000} SequentialAnimation on color { //连续的动画,可以将多个动画组组合在一起。 ColorAnimation { from: rect to: "yellow" duration: 500 } ColorAnimation { from: rect to: "blue" duration: 500 } } }*//* 动画效果控件 Rectangle { id: flashingblob width: 75; height: 75 color: "blue" opacity: 1.0 MouseArea { anchors.fill: parent onClicked: { animateColor.start() animateOpacity.start() animateWidth.start() } } PropertyAnimation { id: animateColor; target: flashingblob; properties: "color"; to: "green"; duration: 1000} NumberAnimation { id:animateWidth// properties: "width" //两者似乎都可以,作用的属性 property: "width" to:150 //改变后的数值 target: flashingblob //作用动画的对象 duration: 1000 //动画持续时间 easing.type: Easing.InOutQuad } NumberAnimation { id: animateOpacity target: flashingblob properties: "opacity" from: 0.1 to: 1.0 duration: 1000// loops: Animation.Infinite// easing {type: Easing.OutBack; overshoot: 500} } }*//* Rectangle { state: "blue_color" id: root width: 100; height: 100 focus: true states: [ //控件的状态,状态改变时进行不同的实现,有限状态机编程。 State{ name:"no_color" PropertyChanges {target: root;color:"white"} }, State { name: "red_color" PropertyChanges { target: root; color: "red";width:200 } }, State { name: "blue_color" PropertyChanges { target: root; color: "blue" ;height:200} } ] MouseArea{ anchors.fill: parent onPressed: { root.state = "red_color" } onReleased: { root.state = "blue_color" } } }*/}