一、 前端组件概述
前端组件开发在现代前端开发中占据着至关重要的地位。随着互联网的快速发展,前端应用的规模和复杂性不断增加,传统的开发方式已经难以满足需求。前端组件开发应运而生,成为提高开发效率、代码可维护性和可复用性的关键手段。
二、 组件化的重要性
通过将复杂的用户界面拆分成独立的、可复用的组件,开发者可以并行开发多个组件,避免重复劳动。
前端组件开发提高了代码的可维护性。每个组件都是一个独立的单元,具有自己的状态和行为。这使得组件可以单独进行测试和维护,降低了维护成本。当某个组件出现问题时,只需要修复该组件即可,而不需要在整个应用中进行搜索和替换。此外,组件的独立性还使得代码的可读性更高,便于其他开发者理解项目。
三、 Vue uni-app 实现三级联动自定义,省市区picker选择器
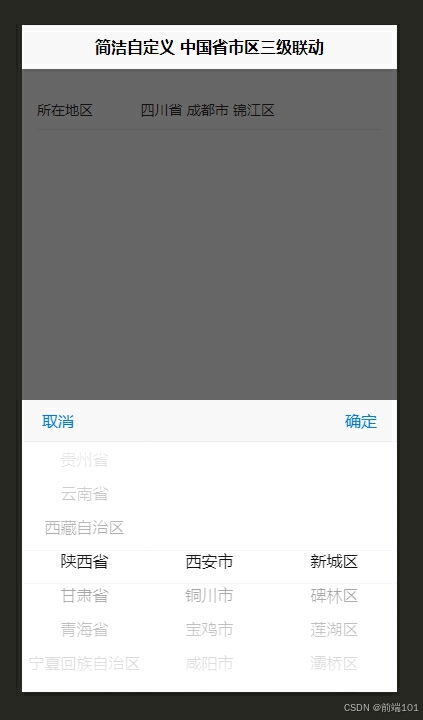
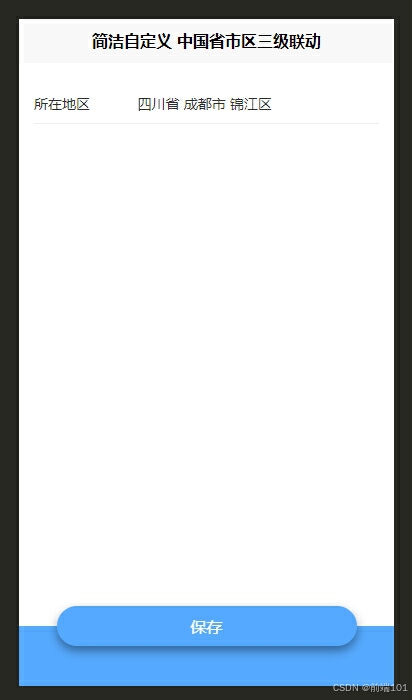
通过自定义三级联动组件,我们可以轻松实现三级联动省市区选择器,包括省市区,联动效果,可以滚动选择省市区效果。同时,通过定义事件处理函数,就能满足业务等需求。
效果如下:


使用方法:调用组件即可
<c-city :province="addressData.province" :city="addressData.city" :area="addressData.area" :show="showPicker" @updateSelection="handleUpdateSelection" @confirm="confirmSelection" @cancel="closePicker" ></c-city>组件代码实现部分
<template> <view> <view v-if="isVisible" class="overlay"></view> <view :class="['picker-container', isVisible ? 'slide-up' : 'slide-down']"> <view class="picker-actions"> <text class="btn-cancel" @tap="cancelSelection">取消</text> <text class="btn-confirm" @tap="confirmSelection">确定</text> </view> <picker-view class="picker-view" :value="pickerValue" @change="handlePickerChange"> <picker-view-column> <view v-for="(province, index) in provinces" :key="index" class="picker-item">{{ province }}</view> </picker-view-column> <picker-view-column> <view v-for="(city, index) in cities" :key="index" class="picker-item">{{ city }}</view> </picker-view-column> <picker-view-column> <view v-for="(area, index) in areas" :key="index" class="picker-item">{{ area }}</view> </picker-view-column> </picker-view> </view> </view></template><script> import AreaData from "./area.js"; export default { data() { return { provinces: [], cities: [], areas: [], pickerValue: [0, 0, 0], isVisible: false }; }, props: { province: { type: String, default: '' }, city: { type: String, default: '' }, area: { type: String, default: '' }, show: { type: Boolean, default: false } }, watch: { province: 'initializePicker', city: 'initializePicker', area: 'initializePicker', show(newVal) { this.isVisible = newVal; } }, mounted() { this.loadProvinces(); this.initializePicker(); }, methods: { loadProvinces() { this.provinces = AreaData.map(province => province.name); }, loadCities(provinceIndex) { this.cities = AreaData[provinceIndex]?.city.map(city => city.name) || []; }, loadAreas(provinceIndex, cityIndex) { this.areas = AreaData[provinceIndex]?.city[cityIndex]?.area.map(area => area.name) || []; }, initializePicker() { const provinceIndex = this.provinces.indexOf(this.province); this.loadCities(provinceIndex); const cityIndex = this.cities.indexOf(this.city); this.loadAreas(provinceIndex, cityIndex); const areaIndex = this.areas.indexOf(this.area); this.pickerValue = [provinceIndex, cityIndex, areaIndex]; }, handlePickerChange(e) { const [provinceIndex, cityIndex, areaIndex] = e.detail.value; this.loadCities(provinceIndex); this.loadAreas(provinceIndex, cityIndex); this.pickerValue = [provinceIndex, cityIndex, areaIndex]; const selectedProvince = this.provinces[provinceIndex]; const selectedCity = this.cities[cityIndex]; const selectedArea = this.areas[areaIndex]; const areaCode = AreaData[provinceIndex]?.city[cityIndex]?.area[areaIndex]?.id || ''; this.$emit('updateSelection', { province: selectedProvince, city: selectedCity, area: selectedArea, areaCode }); }, confirmSelection() { this.$emit('confirm', { province: this.provinces[this.pickerValue[0]], city: this.cities[this.pickerValue[1]], area: this.areas[this.pickerValue[2]] }); this.isVisible = false; }, cancelSelection() { this.$emit('cancel'); this.isVisible = false; } } };</script><style scoped> .overlay { width: 100%; height: 100vh; background-color: rgba(0, 0, 0, 0.6); position: fixed; top: 0; left: 0; z-index: 10; } .picker-container { width: 100%; position: fixed; bottom: 0; left: 0; background-color: #fff; transition: all 0.3s; z-index: 11; } .picker-view { height: 250px; width: 100%; } .picker-item { text-align: center; font-size: 16px; } .picker-actions { display: flex; justify-content: space-between; padding: 10px 20px; border-bottom: 1px solid #eee; background-color: #f8f8f8; } .btn-cancel, .btn-confirm { font-size: 16px; color: #007aff; cursor: pointer; } .slide-up { bottom: 0; } .slide-down { bottom: -300px; }</style>
四、结论
前端组件开发在现代前端工程中占据着至关重要的地位。通过合理的开发流程,我们能够构建出高效、可维护且可复用的前端组件。
热门的前端组件开发框架为我们提供了丰富的工具和资源,助力我们在不同的项目场景中快速实现功能。同时,注意事项中的各项原则能够引导我们避免常见的错误,提高组件的质量。
随着前端技术的不断发展,前端组件开发也将持续演进。我们应紧跟技术潮流,不断探索新的方法和技术,以更好地满足日益复杂的业务需求,为用户提供更加优质的前端体验。
阅读全文下载完整组件代码请关注