目录
一:创建工作空间并克隆OCS2
二:安装相关依赖包和依赖库
三:安装相关库
1.下载github软件包
2.安装Raisim
3.后续配置
4.下载elevation_mapping_cupy
四、编译并测试
1.编译OCS2
2.测试ocs2例程
参考链接
在安装之前,建议你的虚拟机硬盘空间大些
本人的虚拟机内存设置的8GB,硬盘内存设置的200G(目的就是方便以后,毕竟当初安装虚拟机时费了好大的劲才安装好)
一:创建工作空间并克隆OCS2
>> mkdir -p ~/ocs2_ws/src>> cd ~/ocs2_ws/src>> git clone https://github.com/leggedrobotics/ocs2.git二:安装相关依赖包和依赖库
C++ compiler with C++11 support
Eigen (v3.3)
>> sudo apt-get update>> sudo apt-get install libeigen3-devBoost C++ (v1.71)
1.从 Boost 的官方网站下载 1.71.0 版本的源代码压缩包,并解压到适当的目录
>> wget https://boostorg.jfrog.io/artifactory/main/release/1.71.0/source/boost_1_71_0.tar.bz2>> tar --bzip2 -xf boost_1_71_0.tar.bz22.进入解压后的目录,并开始准备构建 Boost
>> cd boost_1_71_0>> ./bootstrap.sh3.安装 Boost
>> sudo ./b2 install4.安装剩余依赖
sudo apt install ros-noetic-catkinsudo apt install libglpk-dev libglfw3-devsudo apt install ros-noetic-pybind11-catkinsudo apt install python3-catkin-toolssudo apt install doxygen doxygen-latexsudo apt install liburdfdom-dev liboctomap-dev libassimp-devsudo apt-get install ros-noetic-rqt-multiplotsudo apt install ros-noetic-grid-map-msgssudo apt install ros-noetic-octomap-msgssudo apt install libreadline-devsudo apt install libcgal-devsudo apt update && sudo apt install checkinstall三:安装相关库
这一部分在官方文档中是可选择依赖,但是,针对本项目是必须安装的,不安装是无法运行的
在OCS2下的工作空间中安装
>> cd ~/ocs2_ws/src1.下载github软件包
需要的软件包一次性下载到~/ocs2_ws/src目录下,一共7个(加上Boost C++,一共八个),后续步骤中对应的下载可以忽略
git clone --recurse-submodules https://github.com/leggedrobotics/pinocchio.git git clone --recurse-submodules https://github.com/leggedrobotics/hpp-fcl.git git clone https://github.com/leggedrobotics/ocs2_robotic_assets.git git clone --depth 1 https://github.com/raisimTech/raisimLib.git -b v1.1.01 git clone https://github.com/leggedrobotics/elevation_mapping_cupy.git git clone https://github.com/ANYbotics/grid_map.git git clone https://github.com/leggedrobotics/ocs2.git
2.安装Raisim
>> cd ~/ocs2_ws/src>> git clone --depth 1 https://github.com/raisimTech/raisimLib.git -b v1.1.01一定要带上后面的版本号,直接安装最新版会报错!!!
编译安装Raisim
>> cd ~/ocs2_ws/src/raisimLib>> mkdir build>> cd build>> cmake .. >> make -j4 && sudo checkinstall3.后续配置
>> cd /tmp>> wget https://github.com/microsoft/onnxruntime/releases/download/v1.7.0/onnxruntime-linux-x64-1.7.0.tgz>> tar xf onnxruntime-linux-x64-1.7.0.tgz>> mkdir -p ~/.local/bin ~/.local/include/onnxruntime ~/.local/lib ~/.local/share/cmake/onnxruntime>> rsync -a /tmp/onnxruntime-linux-x64-1.7.0/include/ ~/.local/include/onnxruntime>> rsync -a /tmp/onnxruntime-linux-x64-1.7.0/lib/ ~/.local/lib>> rsync -a ~/ocs2_ws/src/ocs2/ocs2_mpcnet/ocs2_mpcnet_core/misc/onnxruntime/cmake/ ~/.local/share/cmake/onnxruntime>> mkdir -p ~/.local/share/onnxruntime/cmake/>> rsync -a ~/ocs2_ws/src/ocs2/ocs2_mpcnet/ocs2_mpcnet_core/misc/onnxruntime/cmake/ ~/.local/share/onnxruntime/cmake/这个包的虽然很容易安装,但后续安装ocs2时,容易找不到该软件包,在.bash可以手动设置如下环境变量:
export onnxruntime_DIR=~/.local/ export LD_LIBRARY_PATH=/home/lgf/.local/lib:${LD_LIBRARY_PATH}4.下载elevation_mapping_cupy
>> cd ~/ocs2_ws/src>> git clone https://github.com/leggedrobotics/elevation_mapping_cupy.git并优先编译elevation_mapping_cupy
>> cd ~/ocs2_ws/>> catkin init>> catkin build elevation_mapping_cupy编译成功会提示8个包全部编译成功!

四、编译并测试
1.编译OCS2
执行如下命令即可
>> cd ~/ocs2_ws>> catkin init>> catkin config --extend /opt/ros/noetic>> catkin config -DCMAKE_BUILD_TYPE=RelWithDebInfo>> catkin build ocs2(最后一步非常耗时且老是编译失败,我花了好久好久才编译成功,务必耐心等待)
若编译失败,执行如下命令,意思就是反复编译,直到全部通过
>> cd ~/ocs2_ws>> catkin clean #然后输入y>> catkin init #再次编译elevation_mapping_cupy>> catkin build elevation_mapping_cupy>> catkin init #再次安装ocs2>> catkin config --extend /opt/ros/noetic>> catkin config -DCMAKE_BUILD_TYPE=RelWithDebInfo>> catkin build ocs2 终于编译成功了!!!!(有警告没关系的)
修改.bashrc文件,添加
source ~/ocs2_ws/devel/setup.bash2.测试ocs2例程
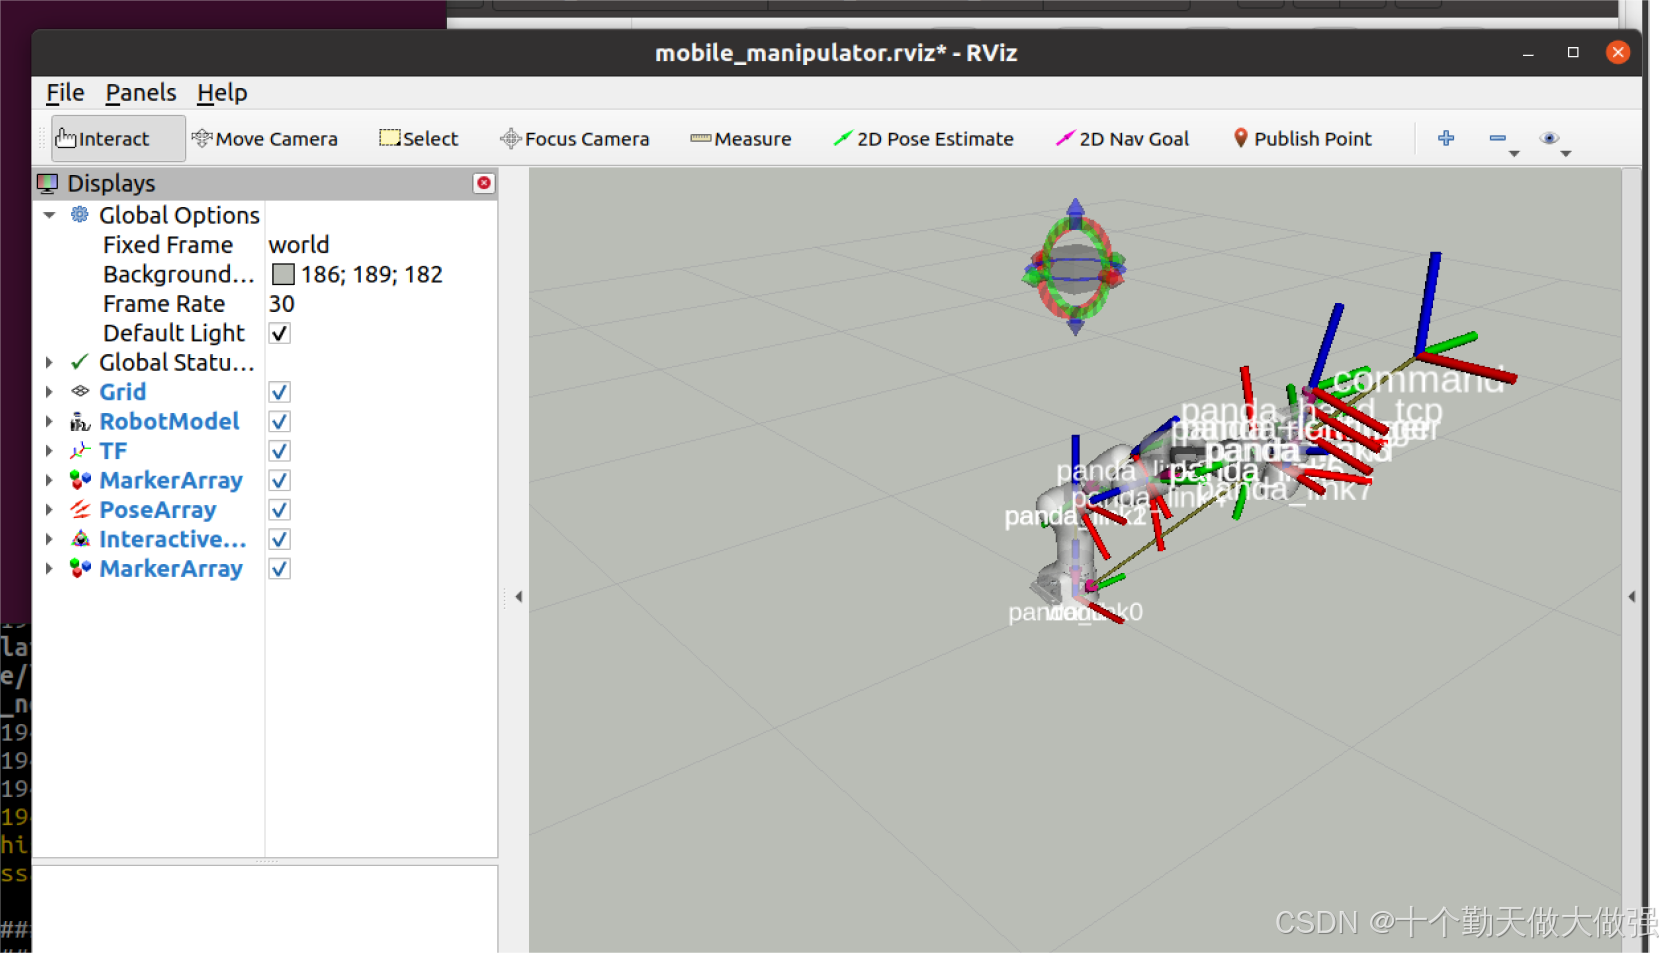
在命令行输入:
roslaunch ocs_mobile_manipulator_ros manipulator_franka.launch
OK,恭喜,ocs2已配置完成,先快速保存快照!!!后续接着搞Hunter双足机器人仿真环境配置。
参考链接
OCS2安装以及Hunter双足机器人仿真环境配置 - 知乎 (zhihu.com)
Installation — OCS2 1.0.0 documentation (leggedrobotics.github.io)
OCS2安装 - 知乎 (zhihu.com)
0-1双足机器人仿真环境搭建记录_ocs2双足机器人-CSDN博客
OCS2及hunter_bipedal_control编译 - 知乎 (zhihu.com)