文章目录
@[toc]前提条件镜像构建启动 webvirtmgr创建其他 superuser配置 nginx 反向代理和域名访问绑定 kvm 宿主机local sockettcp 连接 虚拟机创建创建快照虚拟机克隆删除虚拟机
kvm 官方提供了以下这些图形化管理,license 这块也提示了是商业版(Commercial)的还是哪个开源协议的,或者免费的范围这边主要的需求就是有个 kvm 的图形化管理工具,通过浏览器就可以访问,机器不多,也不涉及私有云,这边就选择了 WebVirtMgr,能有简单的颜值,还有 vnc 模式访问虚拟机 WebVirtMgr 是用 Python 和 Django 编写的,基于 Libvirt 的 Python 接口,将日常 kvm 的管理操作变的更加的可视化。WebVirtMgr的官网地址:http://retspen.github.io/WebVirtMgr的 github 地址:https://github.com/retspen/webvirtmgr | Name/URL | Description | UI Type | Last Updated | Notes | License |
|---|---|---|---|---|---|
| Abiquo | Abiquo is a technology-agnostic solution for enterprises and service providers who want to quickly and simply build, manage and develop public and private clouds based on their existing heterogeneous environments. | Web, REST | Active | KVM, Xen, VirtualBox, VMware, Hyper-V & XenServer support; uses libvirt | Commercial |
| Archipel | Archipel is an Open Source project that aims to bring push notifications to virtualization orchestration using XMPP. | Web | Active | KVM, Xen, Virtual Box & OpenVZ support; uses libvirt | AGPL v3 |
| AQemu | a Qt4 user interface for KVM | Desktop | 2013-05-30 | GPL v2 | |
| cloonix | cloonix is a virtualization management framework aimed at virtual networks building based on kvm. | Gui/cli | Active | KVM | RPL Licence |
| CloudStack | Cloudstack is an open source project that enables the deployment, management, and configuration of multi-tier and multi-tenant infrastructure cloud services using Xen, KVM and VMware hypervisors. | Web | Active | KVM, Xen & VMware support | Apache License v2 |
| ConVirt | ConVirt 2.0 Open Source is the leading open source product for managing Xen and KVM, enabling you to standardize and proactively manage your virtualized environment in a centralized fashion. | Web | Active | Xen & KVM; formerly known as xenman | GPL v2 |
| Enomaly | a programmable virtual cloud infrastructure for small, medium and large businesses | Web, REST | Not available as of 2010-02-08 | they have commercial and open source editions | Commercial/AGPL v3 |
| Eucalyptus | Eucalyptus is open source software for building AWS-compatible private and hybrid clouds. Eucalyptus allows IT organizations to build an on-premises Infrastructure as a Service (IaaS) cloud that pools together compute, storage, and network resources. With Eucalyptus, developers can leverage knowledge and tools around AWS APIs, including EC2, S3, EBS, IAM, Auto Scaling, Elastic Load Balancing, and CloudWatch. IT can create a flexible hybrid cloud environment so that developers can develop sooner, test more, and deploy faster while giving IT and cloud admins greater control of cloud performance, scale, and security. | Web, CLI, REST, SOAP | Active | Supports KVM and VMware. Uses libvirt. View the Eucalyptus Compatibility Matrix: http://bit.ly/QfH4Iv | GPL v3 |
| Foreman | Foreman is aimed to be a Single Address For All Machines LifeCycle Management including bare metal / vm / cloud provisioning, configuration managememnt and configureation reports/auditing using puppet | Web, REST, CLI | Active | KVM, VMWare, oVirt RHEV-M, EC2, OpenStack | GPL v3 |
| Ganeti | Ganeti is a cluster virtual server management software tool built on top of existing virtualization technologies | CLI | Active | KVM support added in Ganeti 2.0 | GPL v2 |
| GKVM | A Gnome user interface for KVM. | Desktop | 2007-08-01 | GPL v2 | |
| Karesansui | Karesansui is an open-source virtualization management application. It’s smart graphical user interface lowers your management cost, and brings a total management/audit solution for both physical and virtual servers. | Web, REST | November 2013 | KVM & Xen support; uses libvirt | LGPL v2.1/GPL v2 |
| kimchi | Kimchi is an HTML5 based management tool for KVM. It is designed to make itas easy as possible to get started with KVM and create your first guest. | WEB | Active | KVM | LGPL,Apache License v2 |
| Kubevirt | Virtualization API for Kubernetes | CLI, API | Active | Run VMs in Kubernetes | Apache License v2 |
| kvmadm | a minimalistic set of command-line tools to control multi-user utilization of KVM | CLI | 2007-09-25 | GPL v2 | |
| kvmupdown | simple, robust and no-bloat management interface. | CLI | Link broken, probably terminated project | KVM | public domain |
| kvm-admin | Python scripts for managing the guests (boot, shutdown …) and include a commandline monitor . | CLI | Active | kvm support | GPL v2 |
| kvm-wrapper | kvm-wrapper is a lightweight, simple and intended to be hackable set of shell scripts that help manage kvm virtual machines a great deal. | CLI | Active | KVM support | WTFPL (v2) |
| Mist.io | Mist.io provides a unifed dashboard / API for managing your entire infrastructure - public and private clouds, KVM and VMware hypervisors, bare metal, and containers. You can install the open-source version or use the freemium service. Try it out | Web, Mobile, REST API, CLI | Active | Uses libvirt and libcloud for VM management. Supports KVM, several public cloud providers, OpenStack, Docker and bare metal servers. | AGPL v3 for the open source version, Commercial for the service |
| Morpheus | Morpheus provides a single dashboard for managing hybrid infrastructure - KVM, Xen, VMware hypervisors, public clouds, bare metal, and containers. Learn more. | UI, API, and CLI | Active | Commercial (community licensing for testing and lab environments; up to 25 workloads and 3 clouds) | |
| nbsvm | No Bullshit VMs. No setup required. No dependencies but sudo, and LVM or ZFS. Start, stop, create and clone images and view VMs using simple chained commands. Basically applies sane (overridden by cli or file) defaults to the kvm invocation and gets out of the way. Sudo invocation is designed to allow user access controls. | CLI | February 2014 | WTFPL 2 | |
| Nimbula Director | Nimbula Director is a Cloud Operating System that enables Infrastructure as a Service using the KVM. | Web, CLI, REST | Active | KVM support | Commercial (Freemium) |
| op5 | op5 develops and delivers op5 Monitor a enterprise-class software for IT monitoring and administration of the whole IT. op5 developed a KVM plug-in to monitor KVM virtualization infrastructure that allows organizations to have better capacity planning, which enables the provisioning of usage of resources such as storage, CPU, and memory more proactively. | Web, REST | Active | Uses libvirt | GPL v2 |
| OpenNebula | an open source virtual infrastructure engine | CLI, XML-RPC | Active | cloud computing managment; uses libvirt | Apache License v2 |
| OpenNode | RHEL/CentOS based open-source server virtualization and management solution - simple bare-metal installer, providing KVM+OpenVZ host and standard libvirt, func management interfaces together with standard cli tools like virsh and vzctl. OpenNode Management Server with ajax web-based management console available - as is RPC-JSON API interface. | Web, CLI, API | Active | Bare-metal installer, KVM, OpenVZ hypervizors and variety of management tools | Unknown |
| openQRM | openQRM is the next generation, open-source Data-center management platform. | Web | Active | KVM, Xen, VMware and Linux V-Server support | GPL v2 |
| oVirt | oVirt is a virtualization management framework constisting of a small host image, the oVirt Node, that provides the libvirt service to host virtual machines, and a robust vm management software stack, controlled by a web-based management interface, the oVirt Server. | Web | Active | uses libvirt | Apache License v2 |
| Platform9 Managed OpenStack | Platform9 makes it very easy to manage a KVM environment with resource pooling and automation. Platform9’s Openstack service easily integrates with any new or existing Linux servers. KVM expertise is helpful but not required. The OpenStack service supports major Linux distributions including CentOS, RHEL & Ubuntu. See the demos for KVM. | UI, OpenStack CLI, OpenStack API & integrations (puppet, ansible, chef, vagrant, etc). | Active | Fast, Easy & Affordable for anyone familiar with Linux. See KVM Management w/ OpenStack. | Commercial. A free trial is available. |
| Proxmox VE | Proxmox Virtual Environment (Proxmox VE) is an open-source server virtualization management platform to manage VMs and containers.The Debian-based platform uses KVM as hypervisor and also provides OS-level virtualization using LXC containers. It provides enterprise-class features like clustering, high availability, networking, live migration, backup/restore, integrates a built-in firewall and come with various storage plugins such as LVM, LVM-thin, iSCSI/kernel, iSCSI/libiscsi, Ceph/RBD, Sheepdog, ZFS over iSCSI, ZFS (local), directory, NFS, CIFS, and GlusterFS. | Web, CLI, API | Active | Bare-metall ISO installer including KVM and LXC management tools | AGPL v3 |
| PVM | ( PDNSoft Virtual Machine Management System) is a hypervisor based on KVM.It provides new application stack to manage KVM virtual machines instead of using Libvirt with it’s own considerations.Cluster and user awareness is specific features in PVM design, so managing of HA and other features is done by PVM application stack that is placed directly on KVM. | Desktop,CLI | Active | Bar-metall installer | Commercial |
| Plain qemu/kvm | You can run qemu/kvm straight from the command line | CLI | Active | See man (qemu-system-x86_64 or kvm or qemu-kvm) for more info | GPL v2 |
| Red Hat Virtualization / RHV | Commercial management solution for RHEL / KVM. | Web | Active | Commercial | |
| SolusVM | The most popular control panel for commercial use. | Web | Active | KVM, Xen & OpenVZ support | Commercial |
| Stackops Openstack Distro | Stackops is an Openstack Nova distribution verified and tested for KVM. You only need to download the ISO image with the distro and install it on one or more servers. | CLI, REST | Active | KVM & QEMU (libvirt based) | Apache License v2 |
| UVMM | UCS Virtual Machine Manager (UVMM) is an easy-to-use and powerful administration tool for KVM. It virtualizes Microsoft Windows, Univention Corporate Server and other Linux distributions by providing all the necessary functions for creating and managing virtual instances (also OpenStack and Amazon EC2-based resources) and hard drives on physical servers centrally via a web-based modern interface. On AWS it also manages Virtual Private Clouds (VPC). UVMM is included in Univention Corporate Server by default, an easy-to-use and scalable Enterprise distribution with an integrated management system for the central management of heterogeneous environments. | Web, CLI | Active | Supports KVM, Uses libvirt | Free for use, AGPL v3 |
| virsh | A minimal shell around libvirt for managing VMs | CLI | Active | Uses libvirt | LGPL |
| Virtualbricks | Python-gtk GUI to manage guest and hybrid (host/guest) networks. | CLI | 2011-11-23 | kvm, qemu, ksm & VDE support | GPL v2 |
| VMM / Virtual Machine Manager | Also known as virt-manager. A desktop user interface for managing virtual machines. | Desktop | Active | Uses libvirt | GPL v2 |
| VMM’s supporting tools virt-install/clone/convert | Command line tools for provisioning new VMs, cloning existing VMs and importing / converting appliance images. | CLI | Active | Uses libvirt | GPL v2 |
| VMmanager | Software solution for virtualization management that can be used both for hosting virtual machines and building a cloud. With VMmanager you can manage not only one server, but a large cluster of hypervisors. It delivers a number of functions, such as live migration that allows for load balancing between cluster nodes, monitoring CPU, memory and I/O operation enabling to detect problematic nodes, use of local and networks storages, and many tools for efficient management. | Web, CLI, REST | Active | KVM, uses libvirt | Commercial |
| vmmaestro | vmmaestro is a tiny shell script which can start/stop/monitor KVM guests. | CLI | Active | KVM | MIT License |
| VM-King | VM-King is an Android App that allows you to manage your hypervisior remotely from your Android mobile or tablet. This app supports the following functions: Start/stop/destroy VM, restore and delete snapshots, get screenshot of running VMs, get remote display connection information (VNC/Spice). | mobile, tablet | Active | KVM | free |
| WebVirtMgr | Web service for managing VMs based on the KVM | WEB | Active | Only KVM; use libvirt | Apache License v2 |
| Witsbits | Witsbits enables you to set up your servers with virtualization and deploy virtual machines faster than ever before. It’s a complete virtualization solution with a self-upgrading hypervisor and cloud-based centralized management, reducing time spent on maintenance to a fraction of what other solutions require. The self-configuring hypervisor comes as a Live CD, delivering the fastest time-to-deployment by removing the need for spending time on installation and configuration. | Web | Active | Live CD Hypervisor with SaaS Management System | Free for 5 CPUs (full version) |
前提条件
开始这篇文章的时候,默认已经部署了 kvm,如果没有部署,可以参考我之前的博客:CentOS 7 部署 KVM 虚拟化
以下的操作环境是 centos 7 这个发行版
镜像构建
官方最后一次更新已经是2015年6月22日 了,官方也没有 docker 镜像,这边选择咱们自己构建如果你的服务器有魔法,可以直接 git clone 一下 webvirtmgr 的包,没有的话,可以和我一样,提前从 github 上下载下来,上传到机器上,然后 ADD 到容器里面这个项目已经很悠久了,只能用 2.x 的 python,这里就直接用 centos 作为基础镜像,对比过 debian 和 python 镜像,构建完都要1G多,用 centos 构建完只有 560MB FROM docker.m.daocloud.io/centos:7.6.1810ADD start.sh /start.shADD webvirtmgr-4.8.9.tar.gz /WORKDIR /webvirtmgr-4.8.9# yum 相关的依赖RUN rm -f /etc/yum.repos.d/*.repo && \ curl -o /etc/yum.repos.d/CentOS-Base.repo https://mirrors.aliyun.com/repo/Centos-7.repo && \ yum install -y epel* && \ yum install -y python-pip libvirt-python libxml2-python python-websockify gcc python-devel && \ yum clean all# python 相关的依赖RUN pip install numpy==1.16.3 -i https://mirrors.aliyun.com/pypi/simple/ && \ pip install -r requirements.txt -i https://mirrors.aliyun.com/pypi/simple/ && \ echo no | python manage.py syncdb && \ echo yes | python manage.py collectstatic# webvirtmgr 通过 tcp 连接 kvm 相关的依赖RUN yum install -y cyrus-sasl cyrus-sasl-scram cyrus-sasl-devel cyrus-sasl-md5 && \ yum clean allCMD ["/usr/bin/bash","/start.sh"]这里是 ADD 里面的启动脚本 start.sh,本地记得 chmod +x start.sh 加个执行权限
echo "from django.contrib.auth.models import User; User.objects.create_superuser('admin', 'admin@localhost', '1qaz@WSX')" | /usr/bin/python /webvirtmgr-4.8.9/manage.py shell/usr/bin/python /webvirtmgr-4.8.9/manage.py run_gunicorn --bind 0.0.0.0:8000 --log-file /webvirtmgr-4.8.9/webvirtmgr.log --daemonif [ $? -eq 0 ];then nohup /usr/bin/python /webvirtmgr-4.8.9/console/webvirtmgr-console &> /dev/null & sleep 3 tail -f /webvirtmgr-4.8.9/webvirtmgr.logfi构建镜像
docker build -t webvirtmgr:4.8.9-centos-7.6 .启动 webvirtmgr
启动参数仅供参考,里面有些配置是我本地环境相关的
如果 kvm 和 webvirtmgr 是相同机器,可以把/var/run/libvirt/libvirt-sock 文件带入到容器内,就可以实现 local socket 的方式连接 kvm 宿主机了 docker run -d \--restart=always \--network host \--memory 1024m \--name webvirtmgr \-v /var/run/libvirt/libvirt-sock:/var/run/libvirt/libvirt-sock \webvirtmgr:4.8.9-centos-7.6创建其他 superuser
进入 webvirtmgr 容器
docker exec -it webvirtmgr bash创建其他超级用户
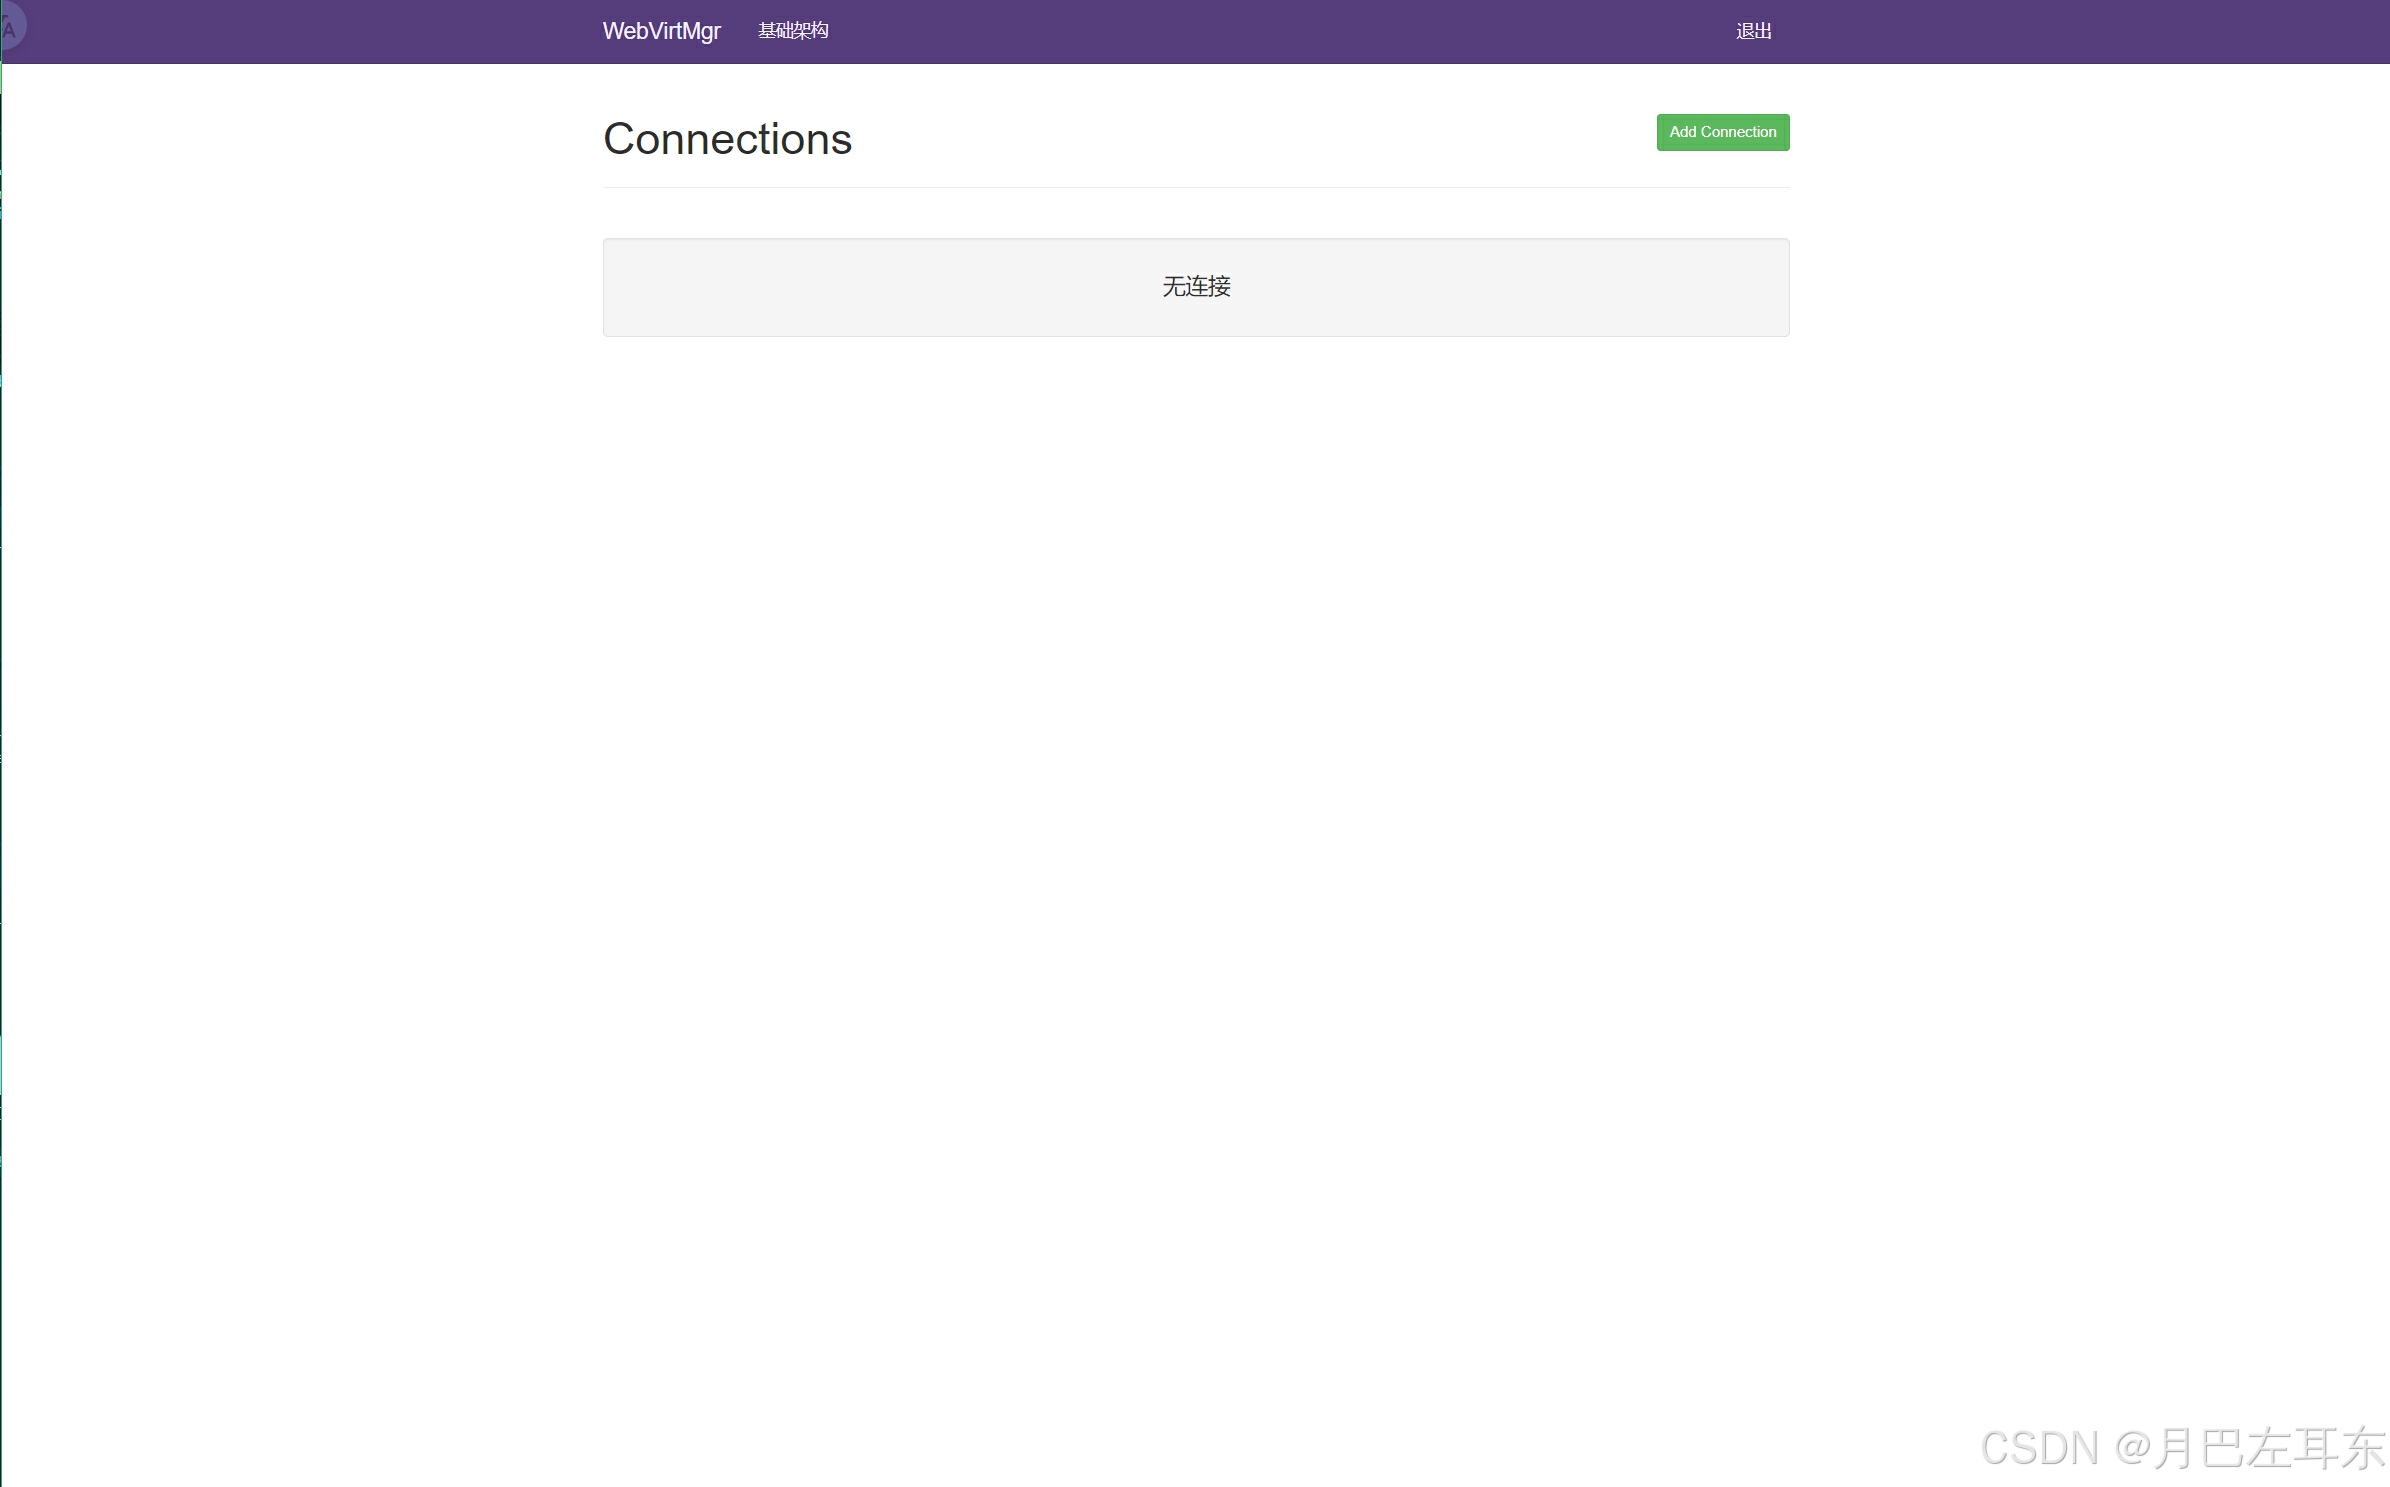
python manage.py createsuperuser浏览器访问 IP:8000 看看能不能访问到 webvirtmgr 的页面
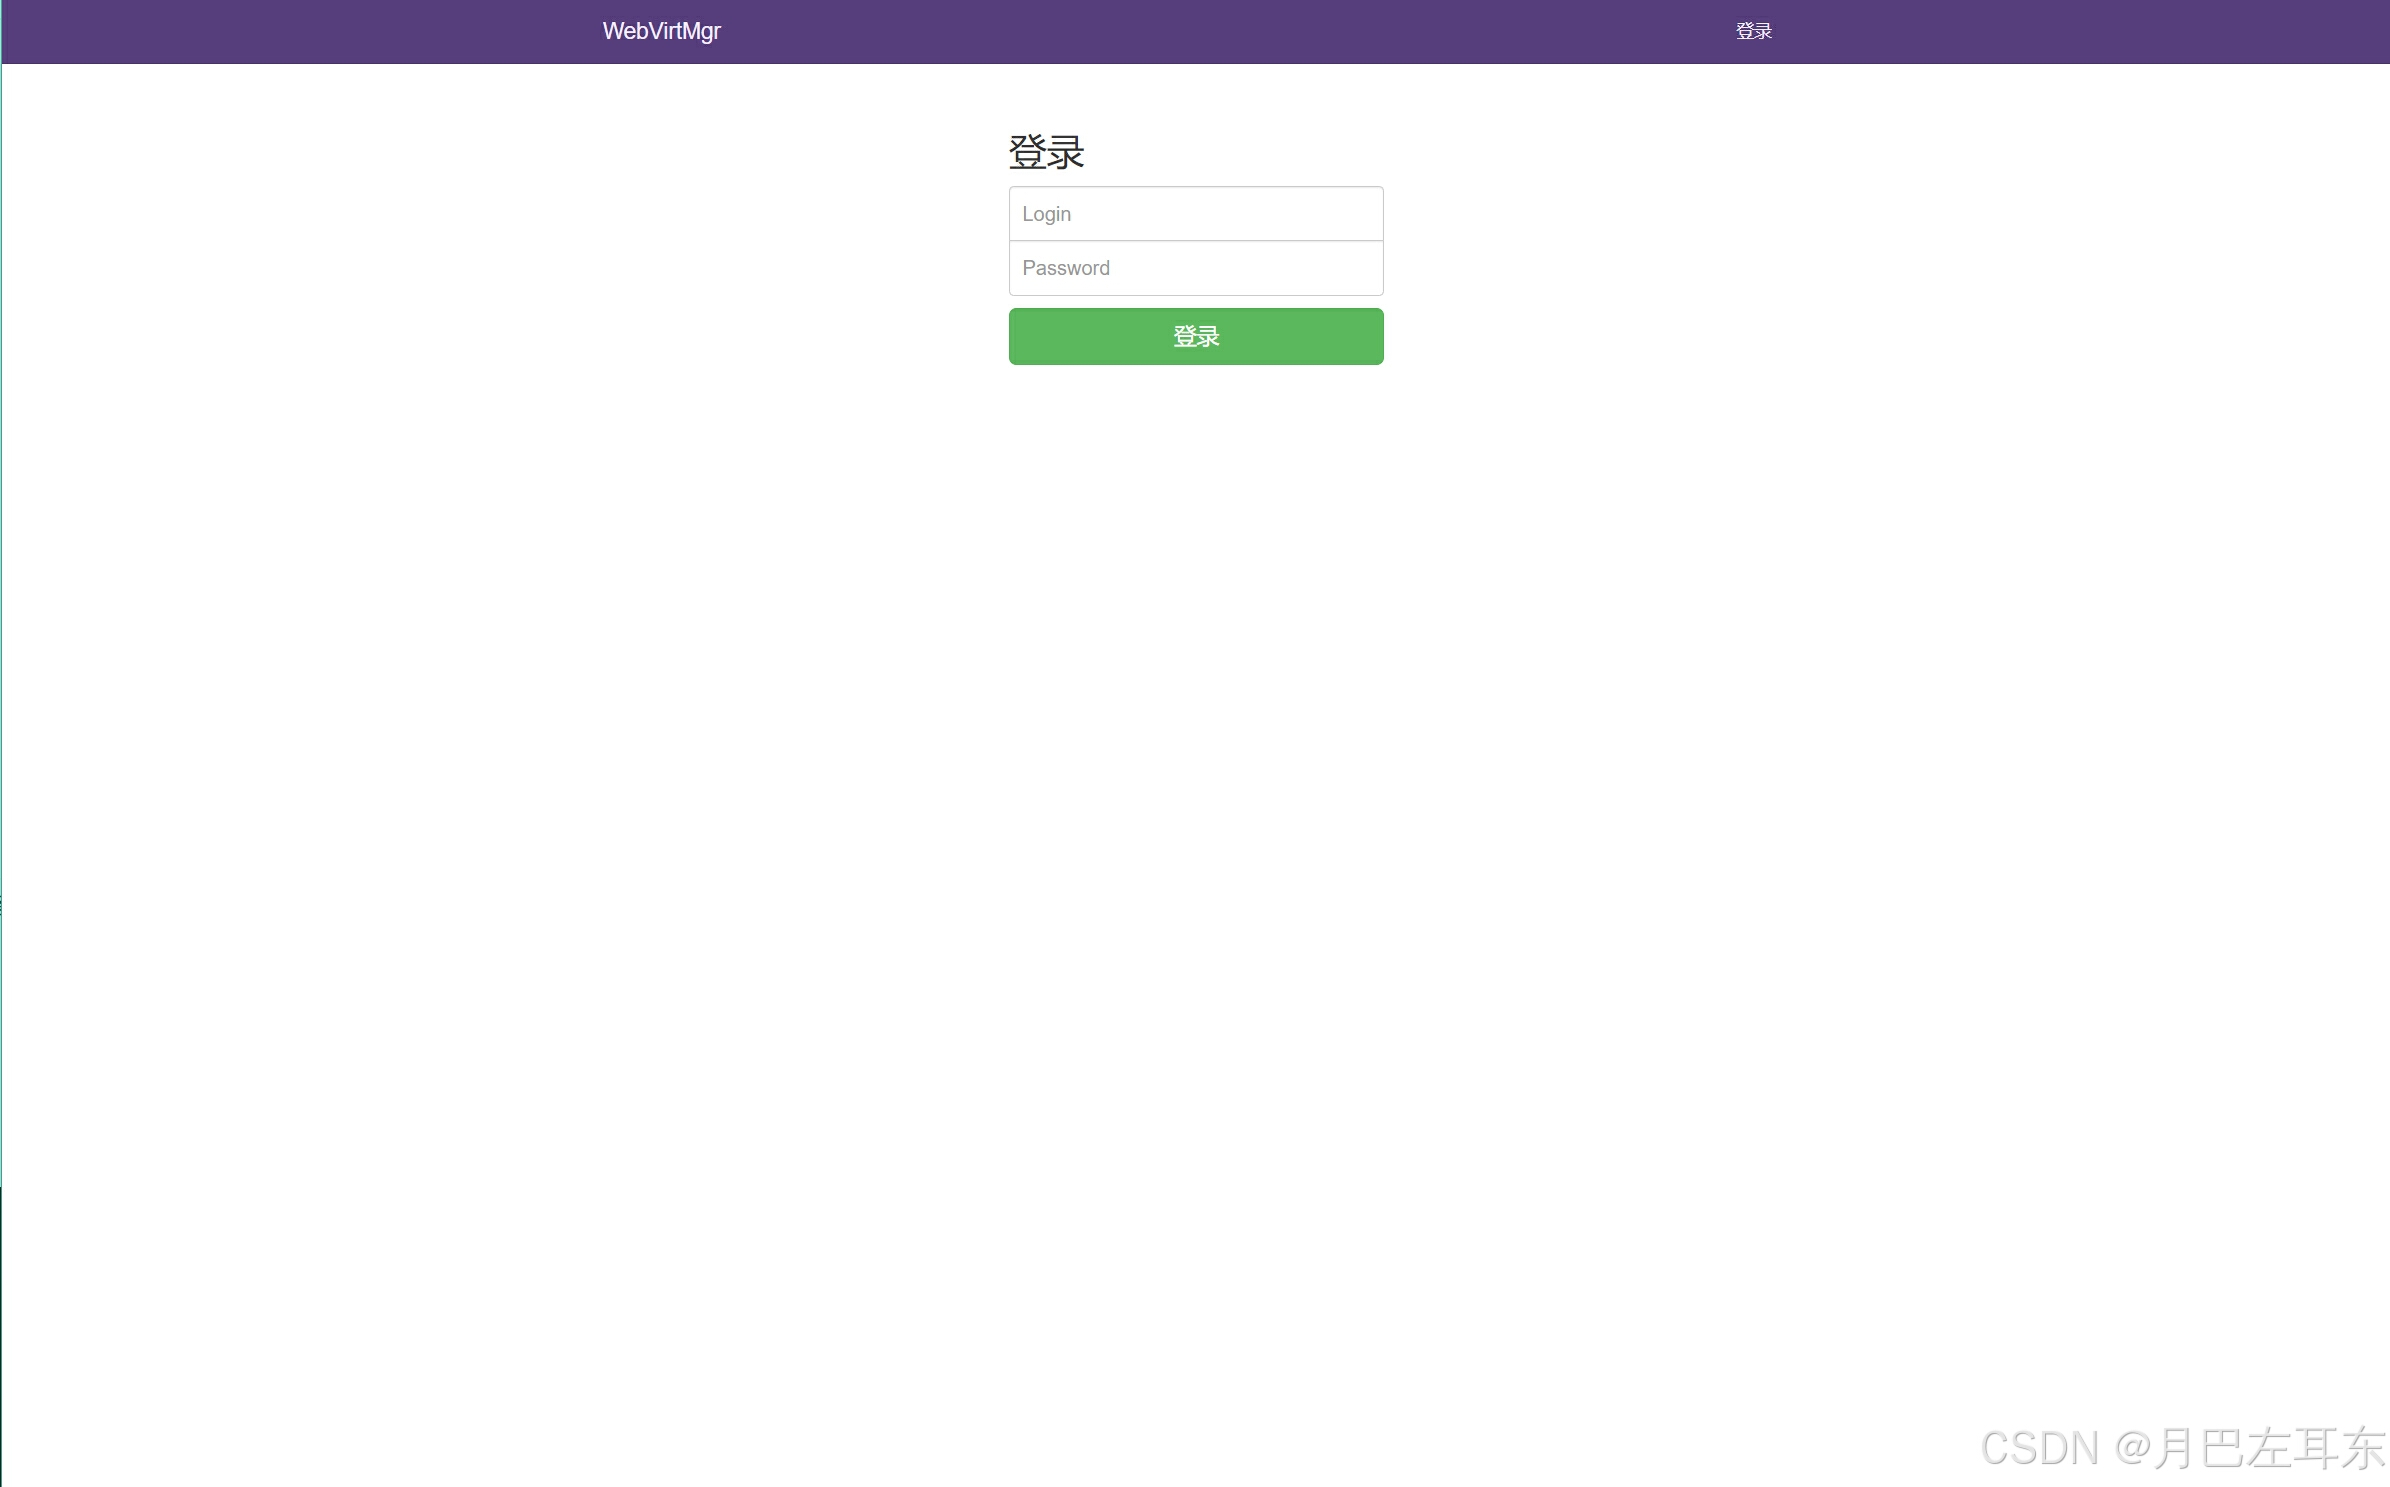
默认的用户名是 admin,密码是 1qaz@WSX,在启动脚本里面可以找到
配置 nginx 反向代理和域名访问
这一步不是必须的,有需求就做,这里也是用的 docker 容器的方式运行的,下面是需要打包到容器内的配置文件
user nginx;worker_processes auto;error_log /var/log/nginx/error.log notice;pid /var/run/nginx.pid;events { worker_connections 1024;}http { include /etc/nginx/mime.types; default_type application/octet-stream; log_format main '$remote_addr - $remote_user [$time_local] "$request" ' '$status $body_bytes_sent "$http_referer" ' '"$http_user_agent" "$http_x_forwarded_for"'; # access_log /var/log/nginx/access.log main; # sendfile on; # tcp_nopush on; keepalive_timeout 65; gzip on; server { listen 80; # 这里的域名,修改成自己的 server_name virtmgr.icu; # access_log /var/log/nginx/webvirtmgr_access_log; location / { proxy_pass http://192.168.18.222:8000; proxy_set_header X-Real-IP $remote_addr; proxy_set_header X-Forwarded-for $proxy_add_x_forwarded_for; proxy_set_header Host $host:$server_port; proxy_set_header X-Forwarded-Proto $scheme; proxy_connect_timeout 600; proxy_read_timeout 600; proxy_send_timeout 600; # 这里的配置,也可以再放大一点,这个会影响 iso 镜像的上传 ## 如果直接放到指定的 iso 目录下,那就不受影响 client_max_body_size 5120M; } location /static { proxy_pass http://192.168.18.222:8000/static; } }}下面是 Dockerfile
FROM docker.m.daocloud.io/nginx:1.26.0ADD ./nginx.conf /etc/nginx/nginx.conf构建镜像
docker build -t webvirtmgr-static:4.8.9-nginx-1.26.0 .启动镜像
docker run -d --rm \-p 80:80 \--memory 200m \--name webvirtmgr-static \webvirtmgr-static:4.8.9-nginx-1.26.0使用域名访问,域名没有 dns 解析的,可以本地自己配置一下 hosts
绑定 kvm 宿主机
local socket
在浏览器开始配置
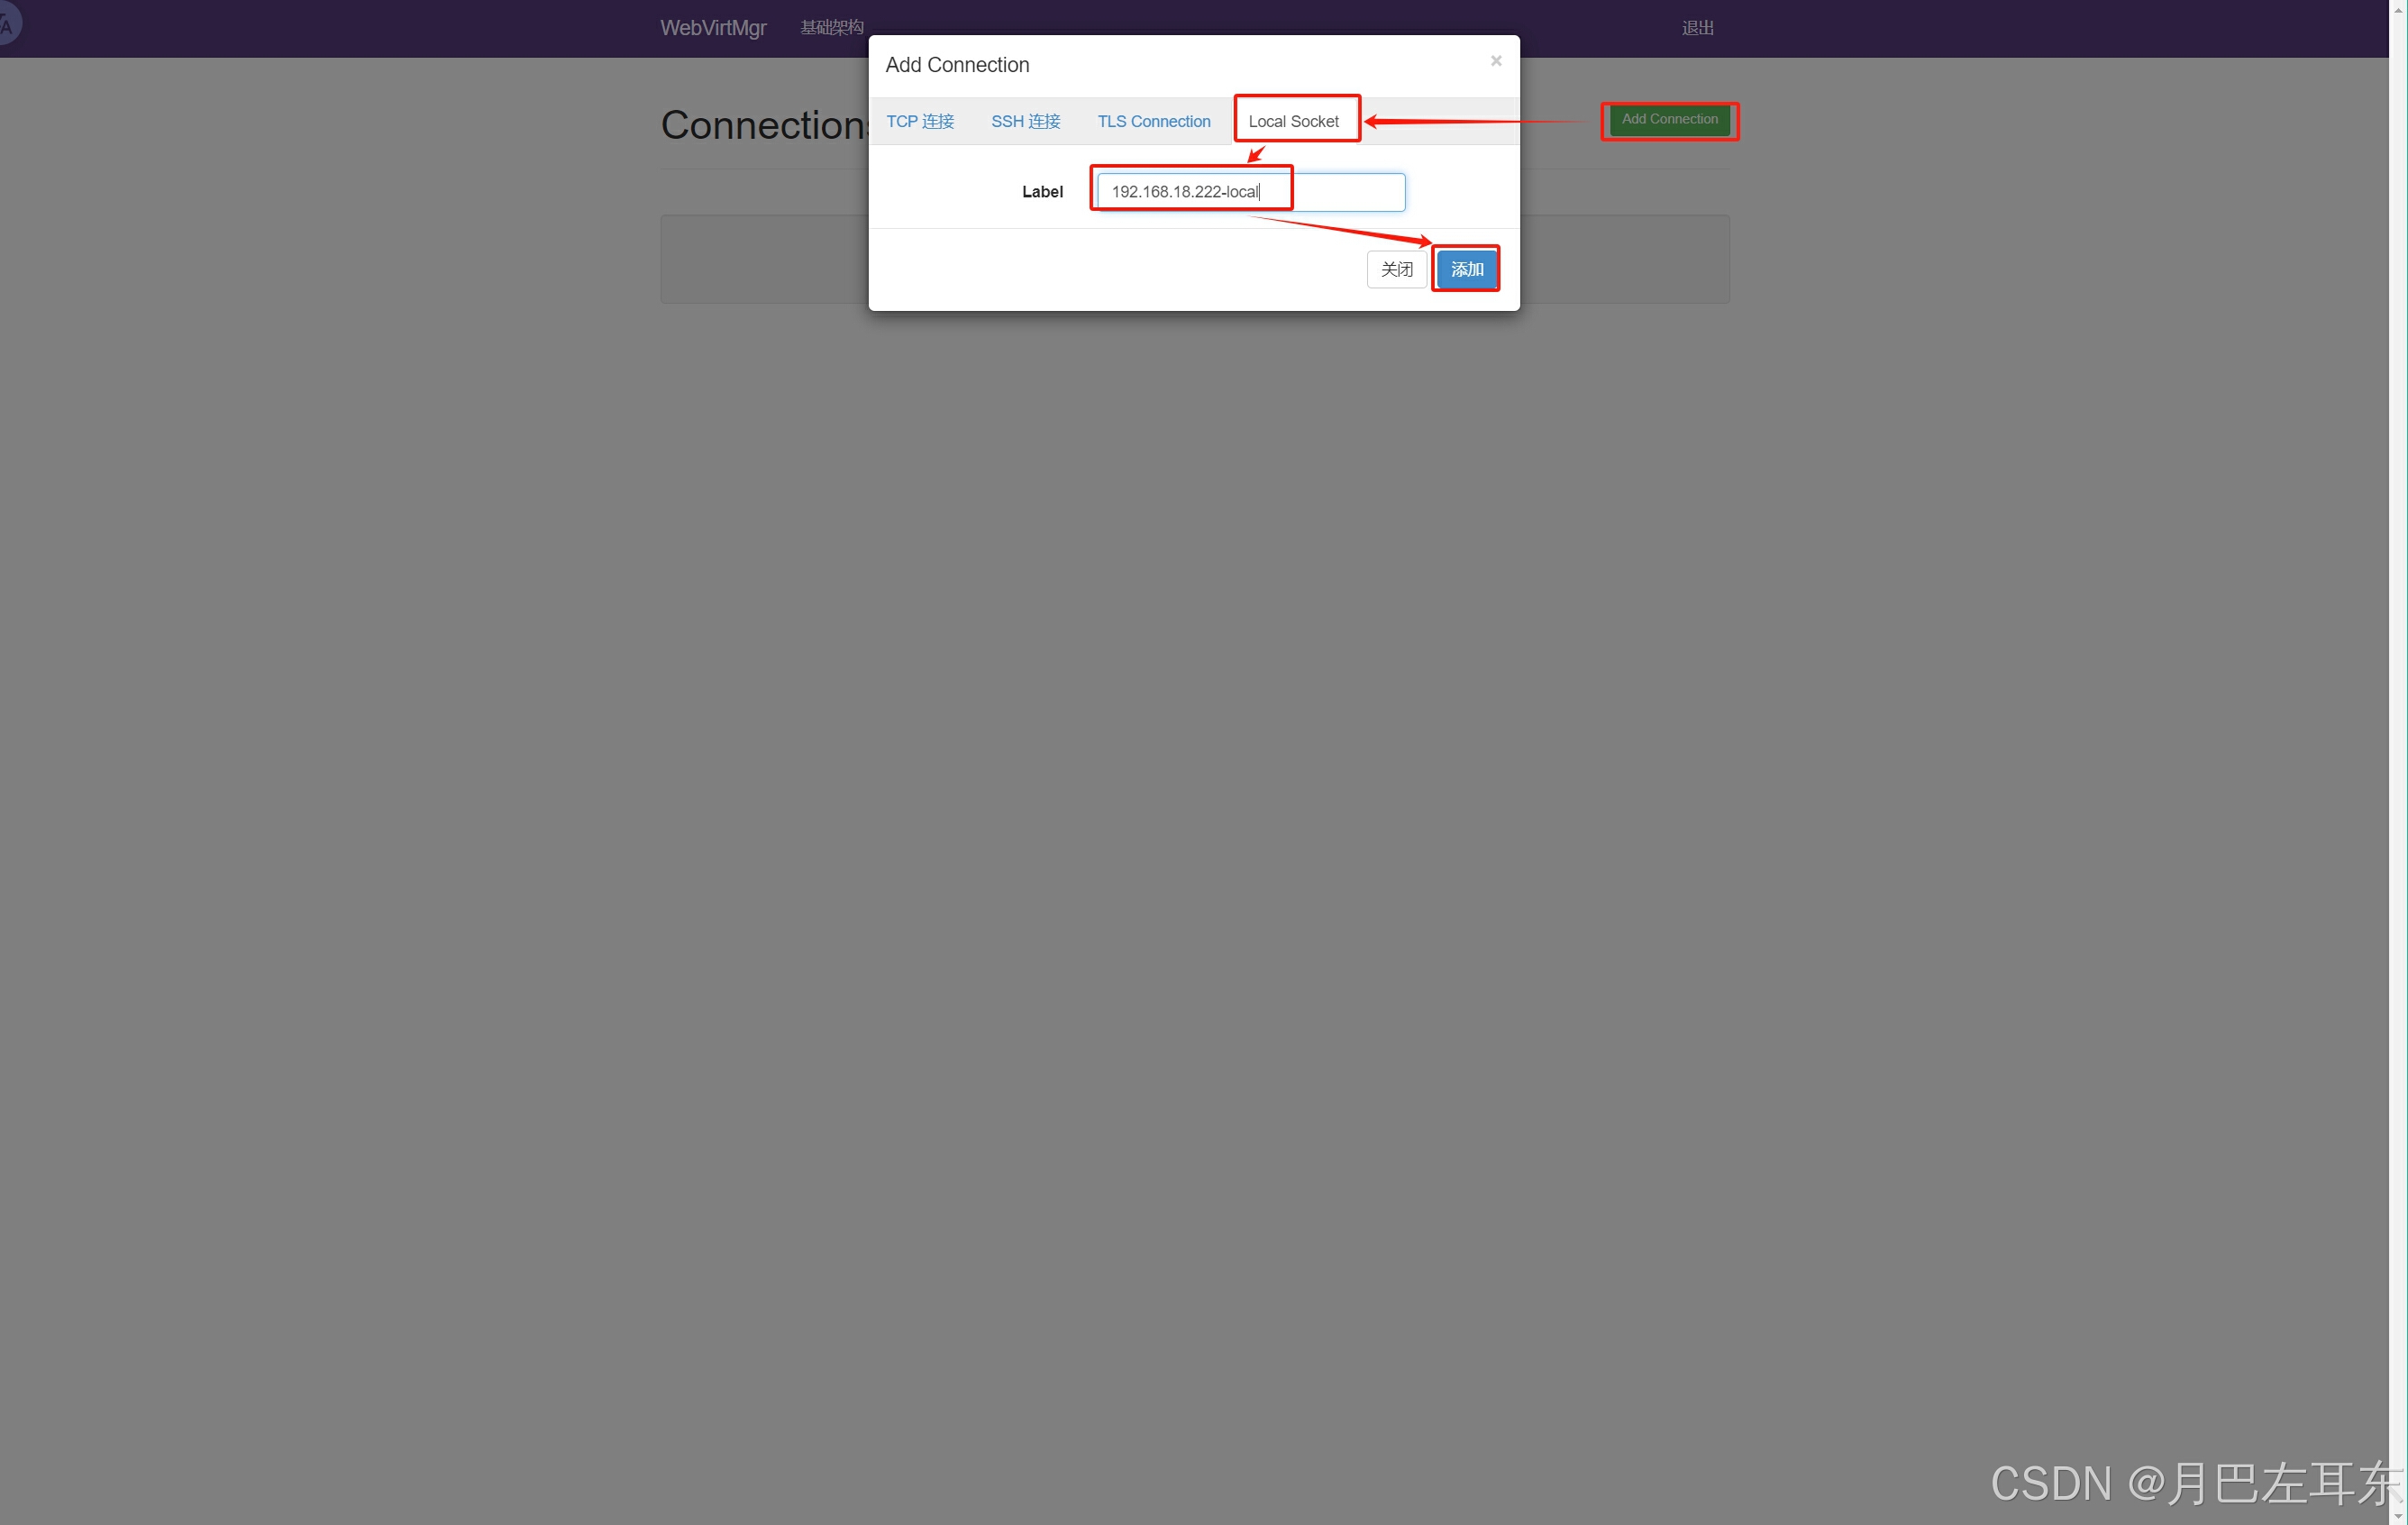
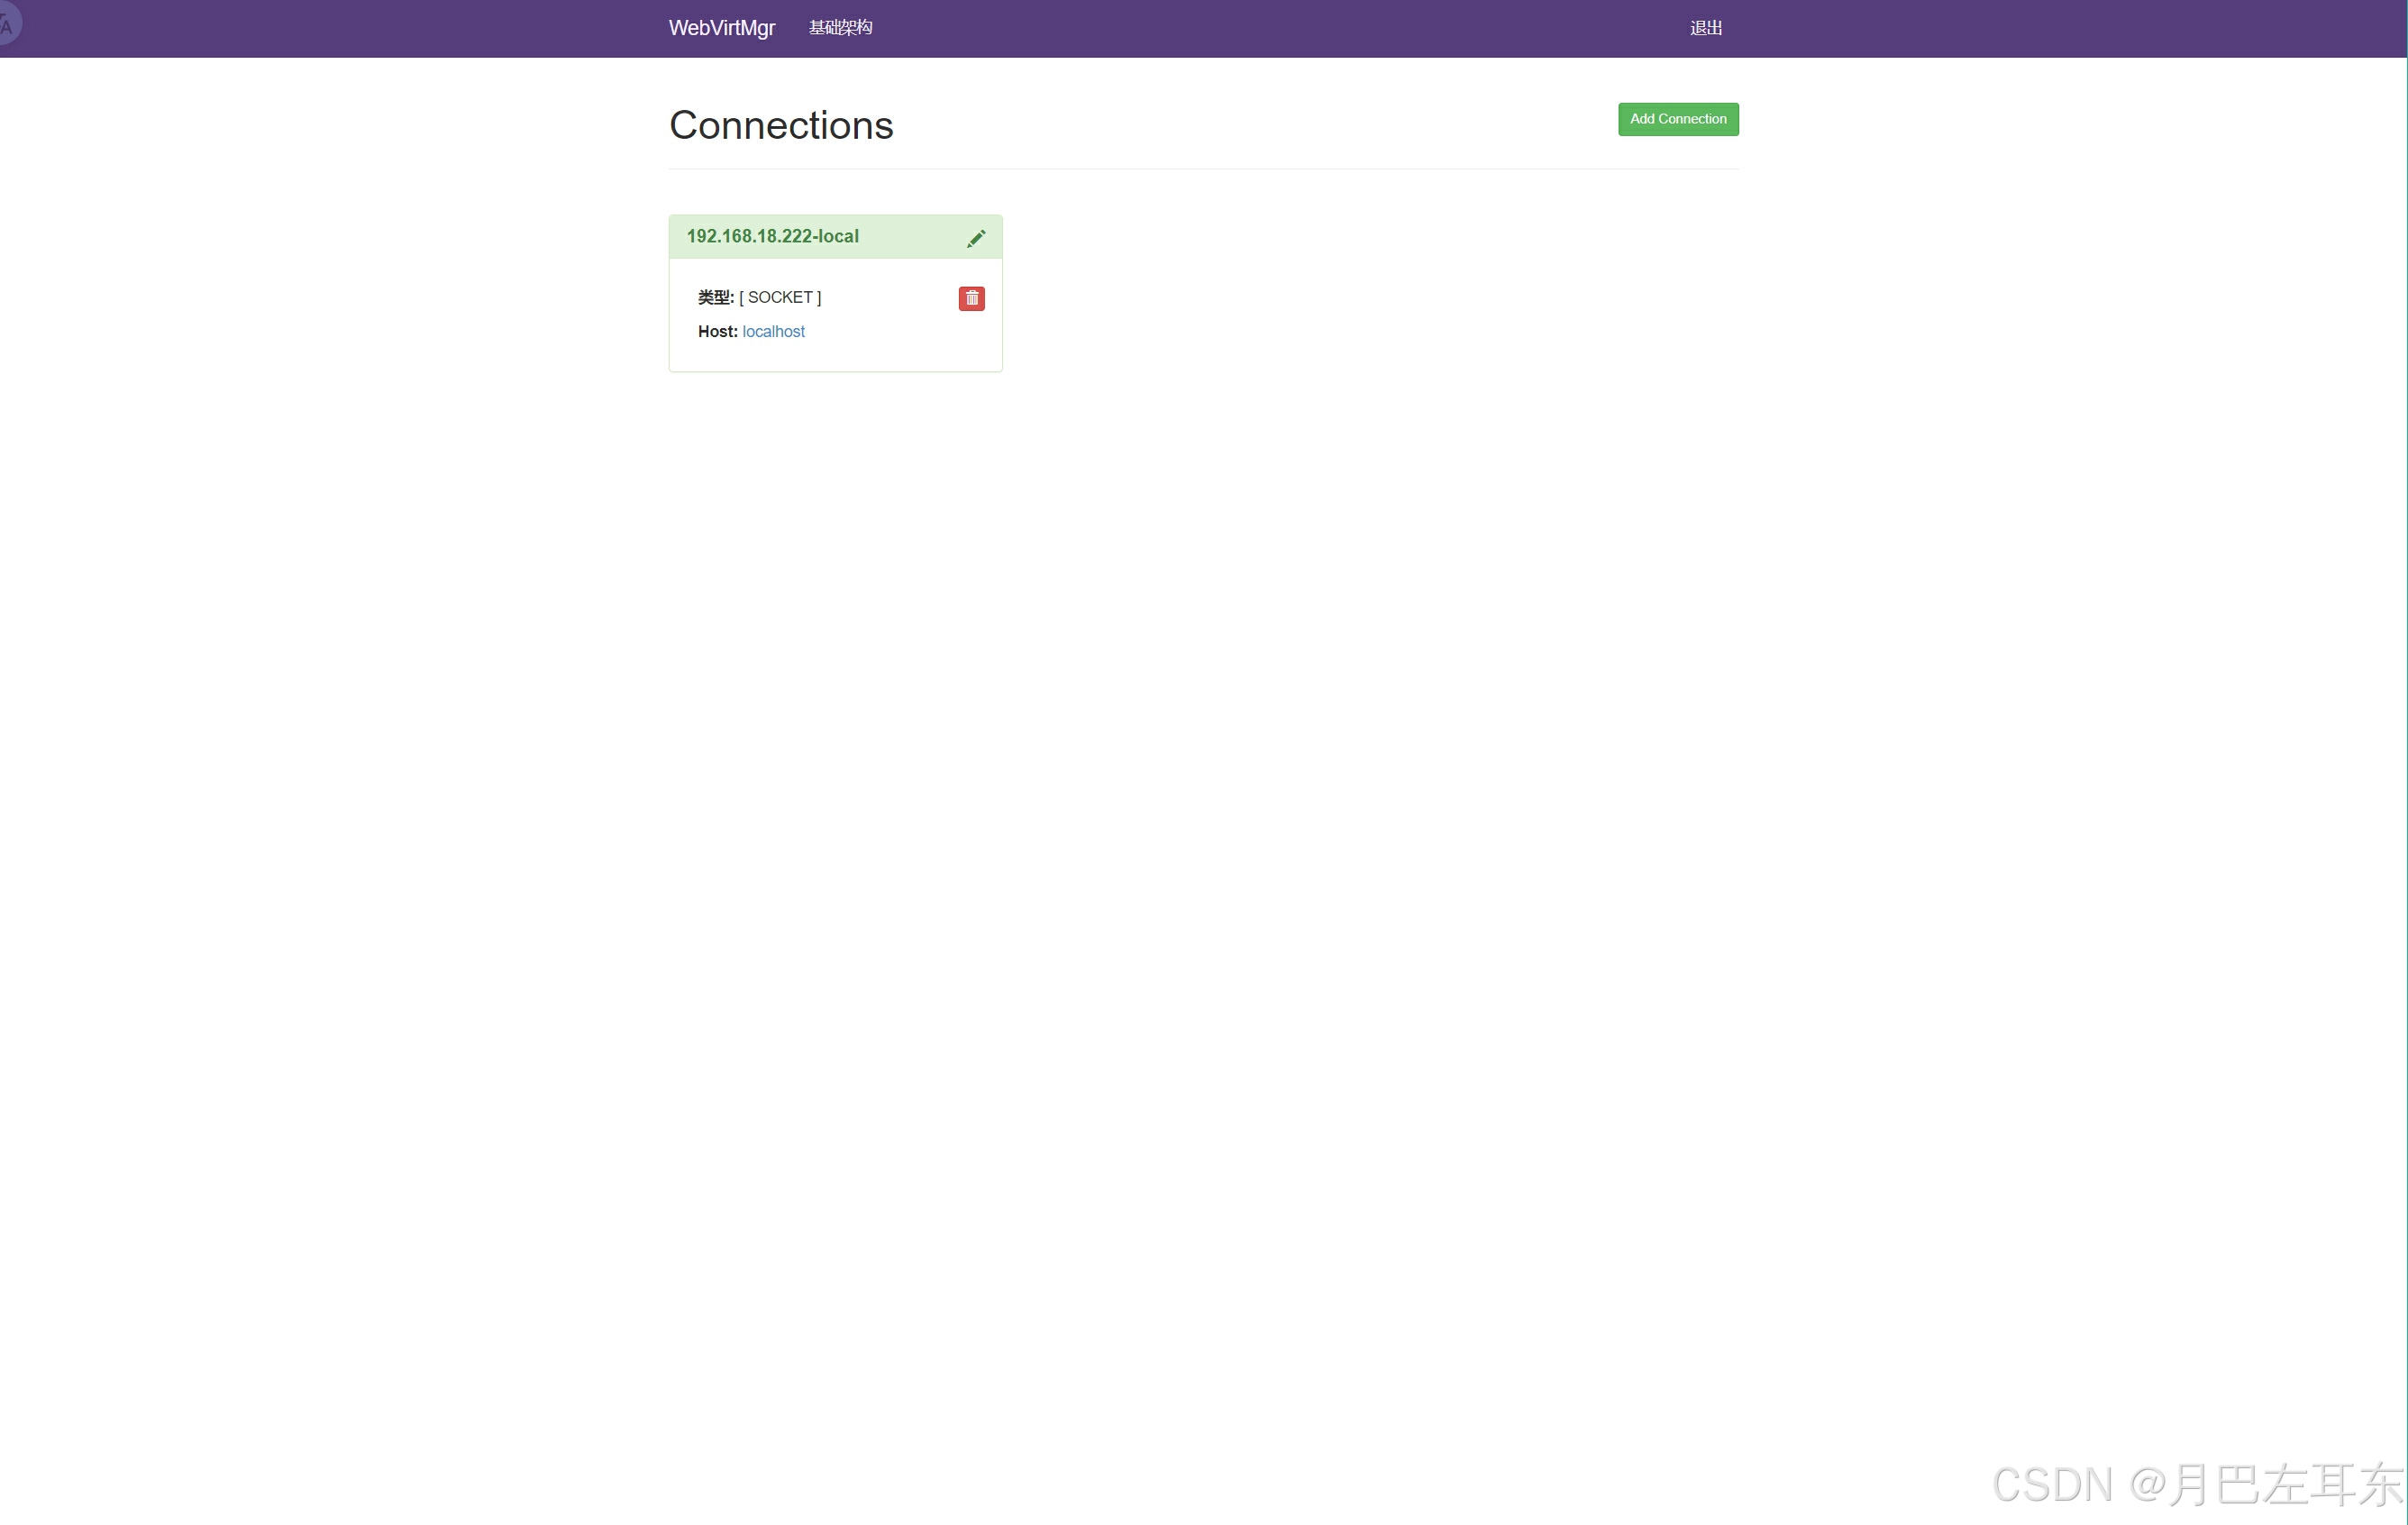
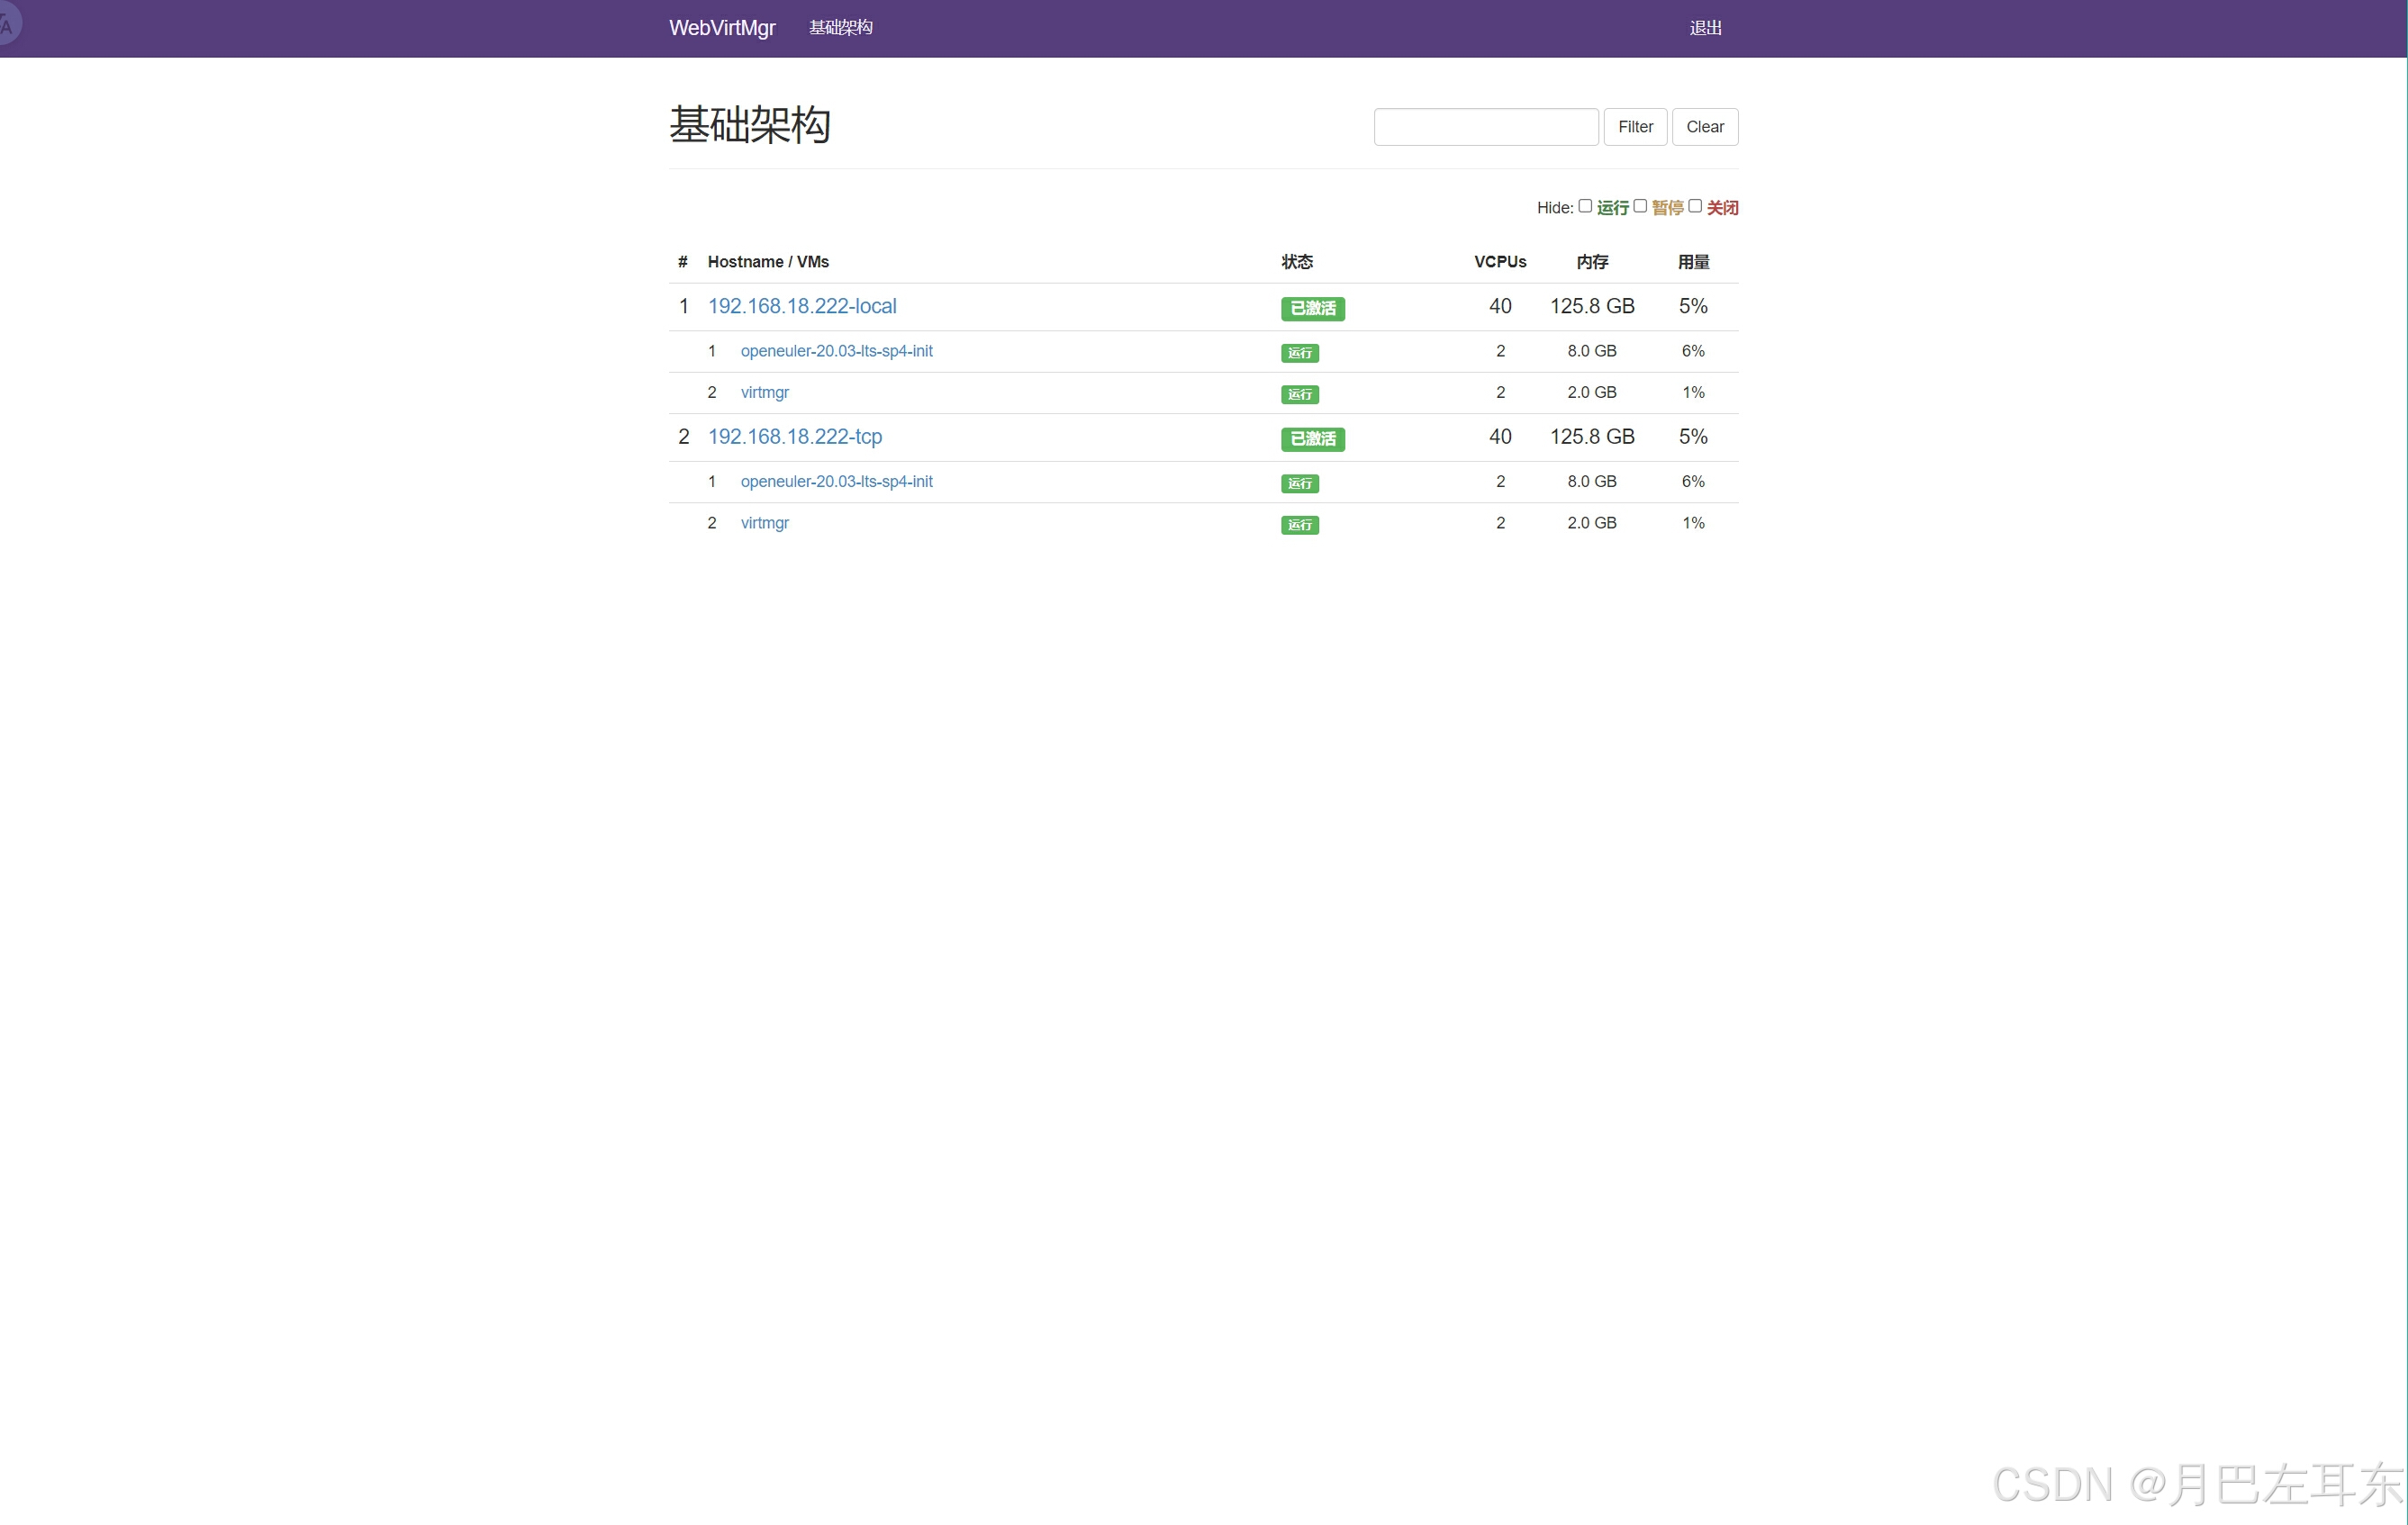
绑定后,和主机通信成功的,就是绿色的,点击 192.168.18.222-local 就可以进去管理了
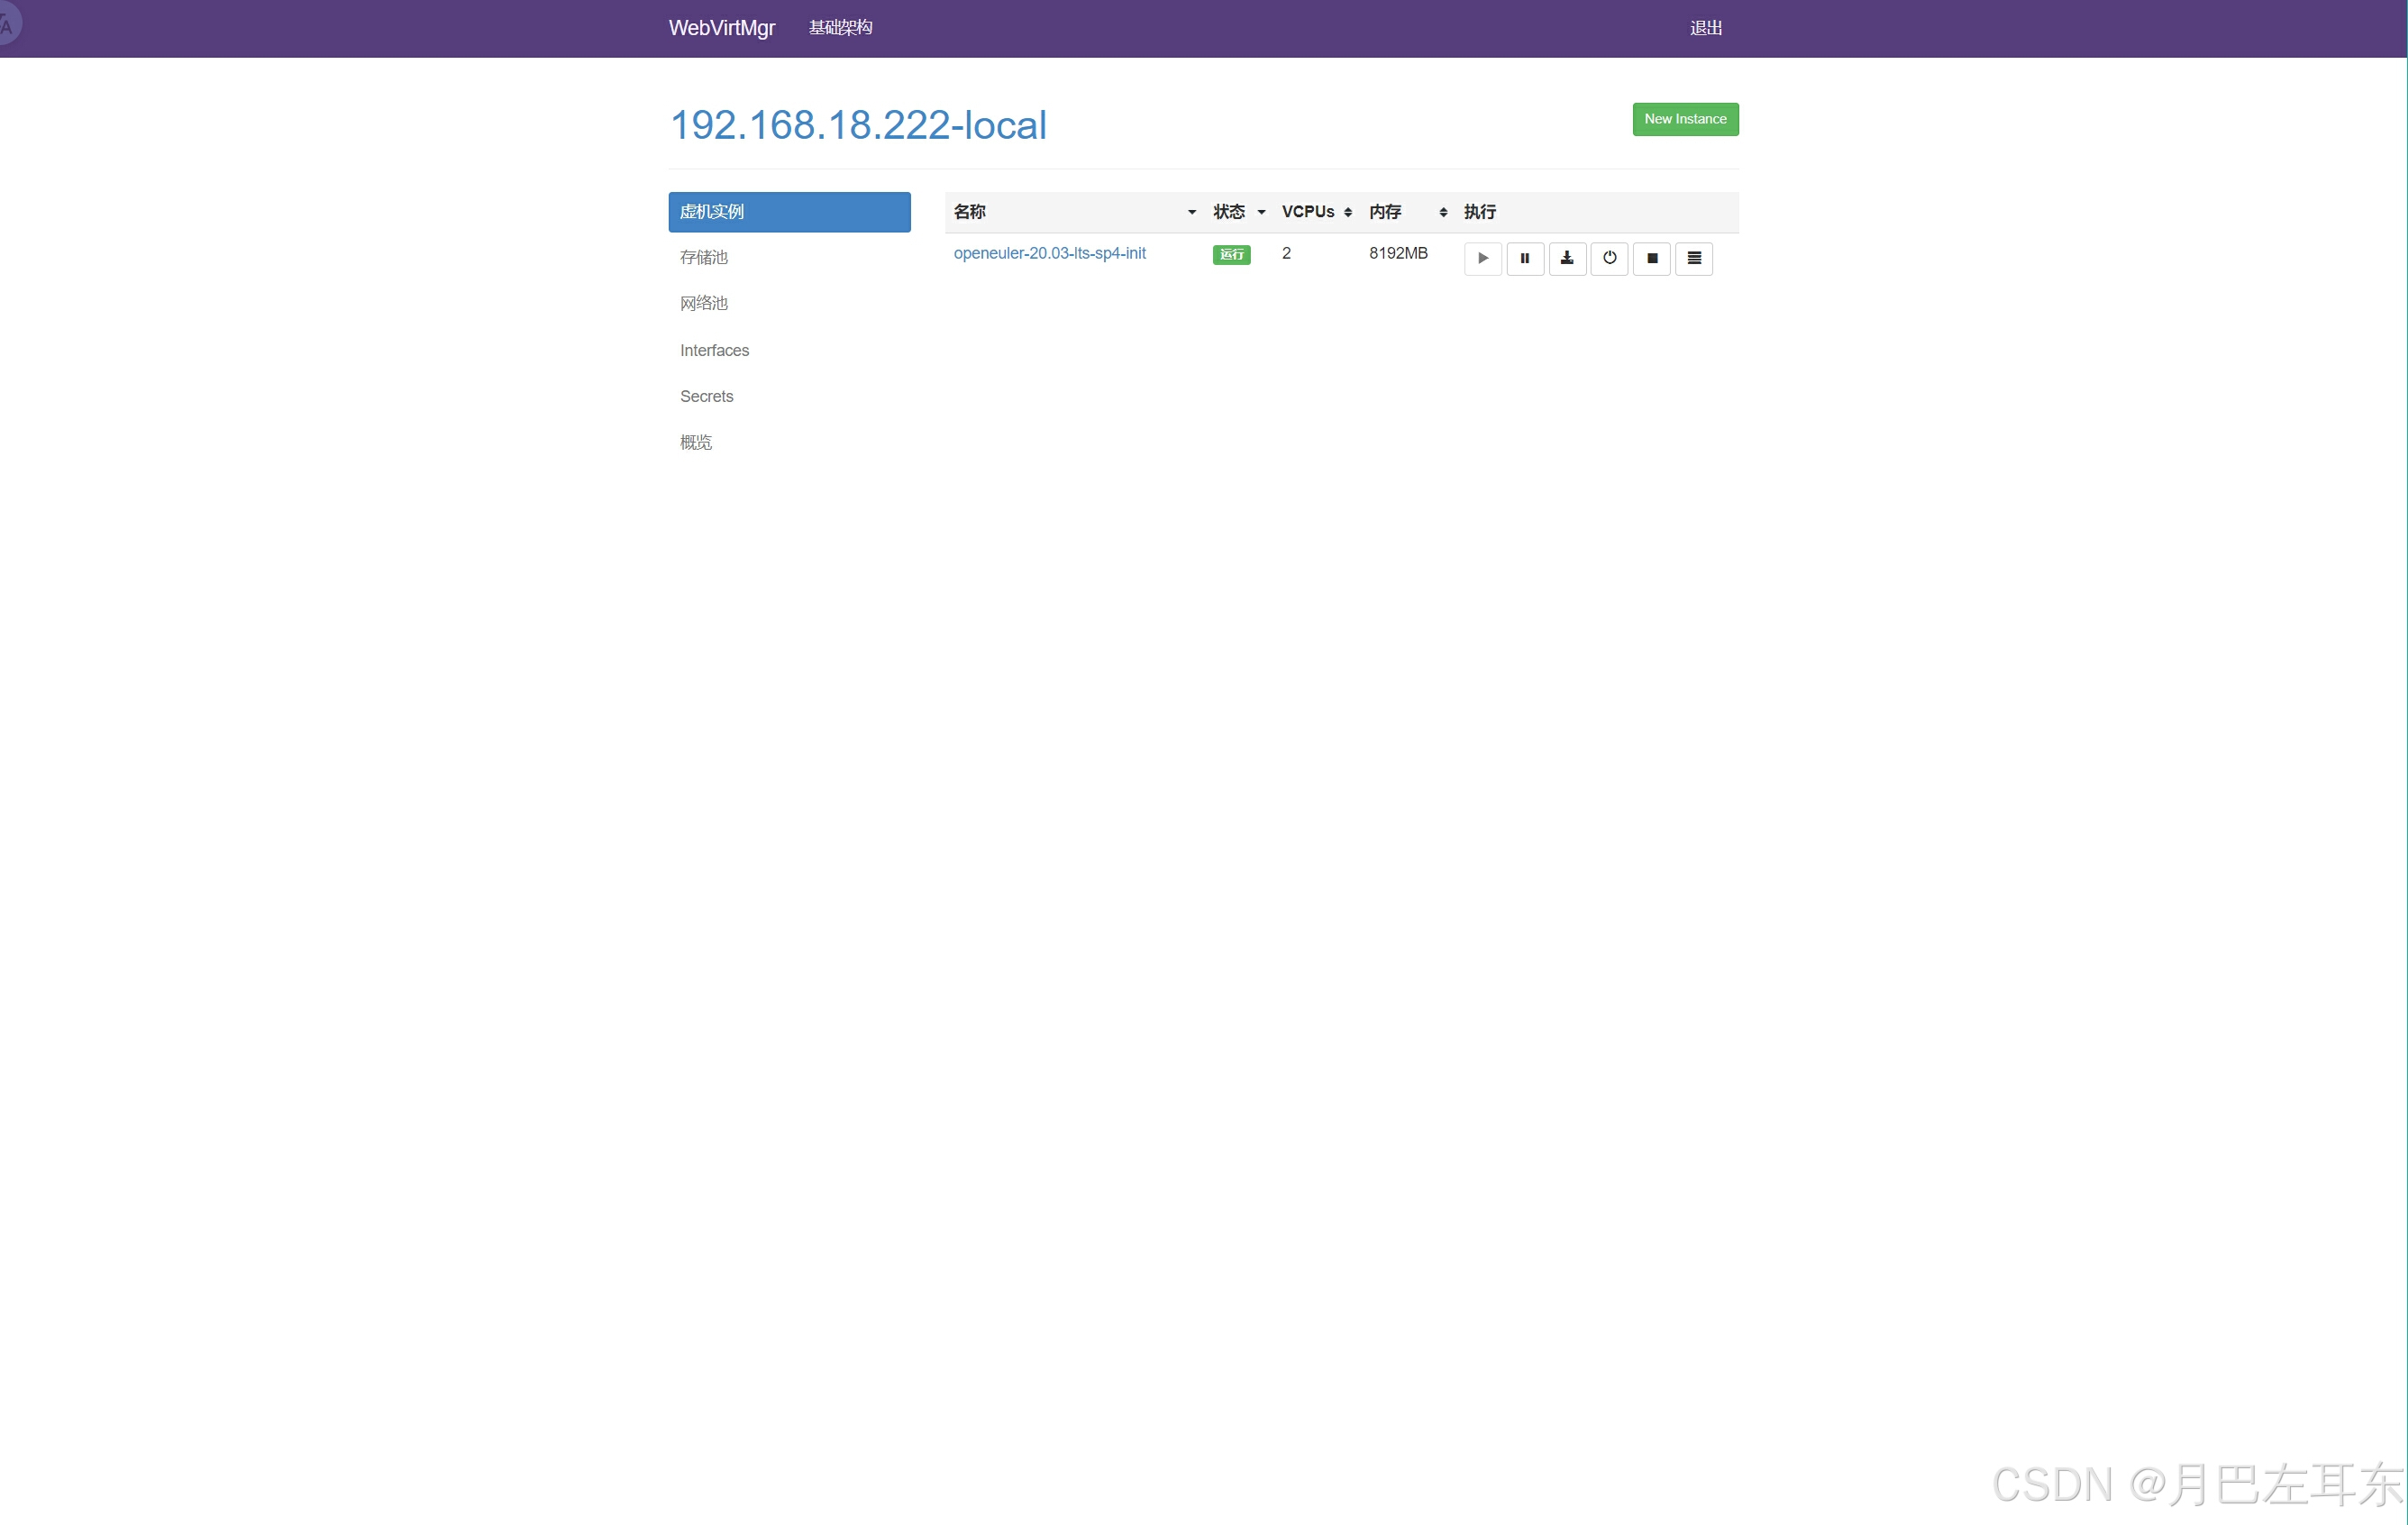
我本地用 virsh 创建过虚拟机,这里可以看到,也被展示出来了
tcp 连接
修改 kvm 配置,如果 kvm 已经有机器的,这个操作需要慎重考虑一下,或者有个环境能小规模模拟一下
/etc/libvirt/libvirtd.conf # 修改 /etc/libvirt/libvirtd.conf 文件,把下面这些参数的注释打开listen_tls = 0listen_tcp = 1tcp_port = "16509"listen_addr = "0.0.0.0"auth_tcp = "sasl"/etc/sysconfig/libvirtd # 修改 /etc/sysconfig/libvirtd 文件,把下面参数的注释打开LIBVIRTD_ARGS="--listen"/etc/sasl2/libvirt.conf # 修改 /etc/sasl2/libvirt.conf 文件,把下面参数的注释修改,注释掉之前打开的参数mech_list: DIGEST-MD5sasldb_path: /etc/libvirt/passwd.db配置用户名密码,输入两次密码回车就可以了
saslpasswd2 -a libvirt virtadmin验证授权文件
sasldblistusers2 -f /etc/libvirt/passwd.db可以看到用户名和主机名
virtadmin@dream: userPassword检查是否有 DIGEST-MD5 类型,没有该类型的话,执行 tcp 连接会有下面的报错:
error: failed to connect to the hypervisorerror: authentication failed: authentication failed pluginviewer -c | grep -i 'DIGEST-MD5'如果没有返回的话,安装一下相关的插件
yum install -y cyrus-sasl cyrus-sasl-scram cyrus-sasl-devel cyrus-sasl-md5重启 kvm
systemctl restart libvirtd测试 tcp 连接
virsh -c qemu+tcp://dream/system list提示输入用户名密码,然后能正常返回虚拟机列表
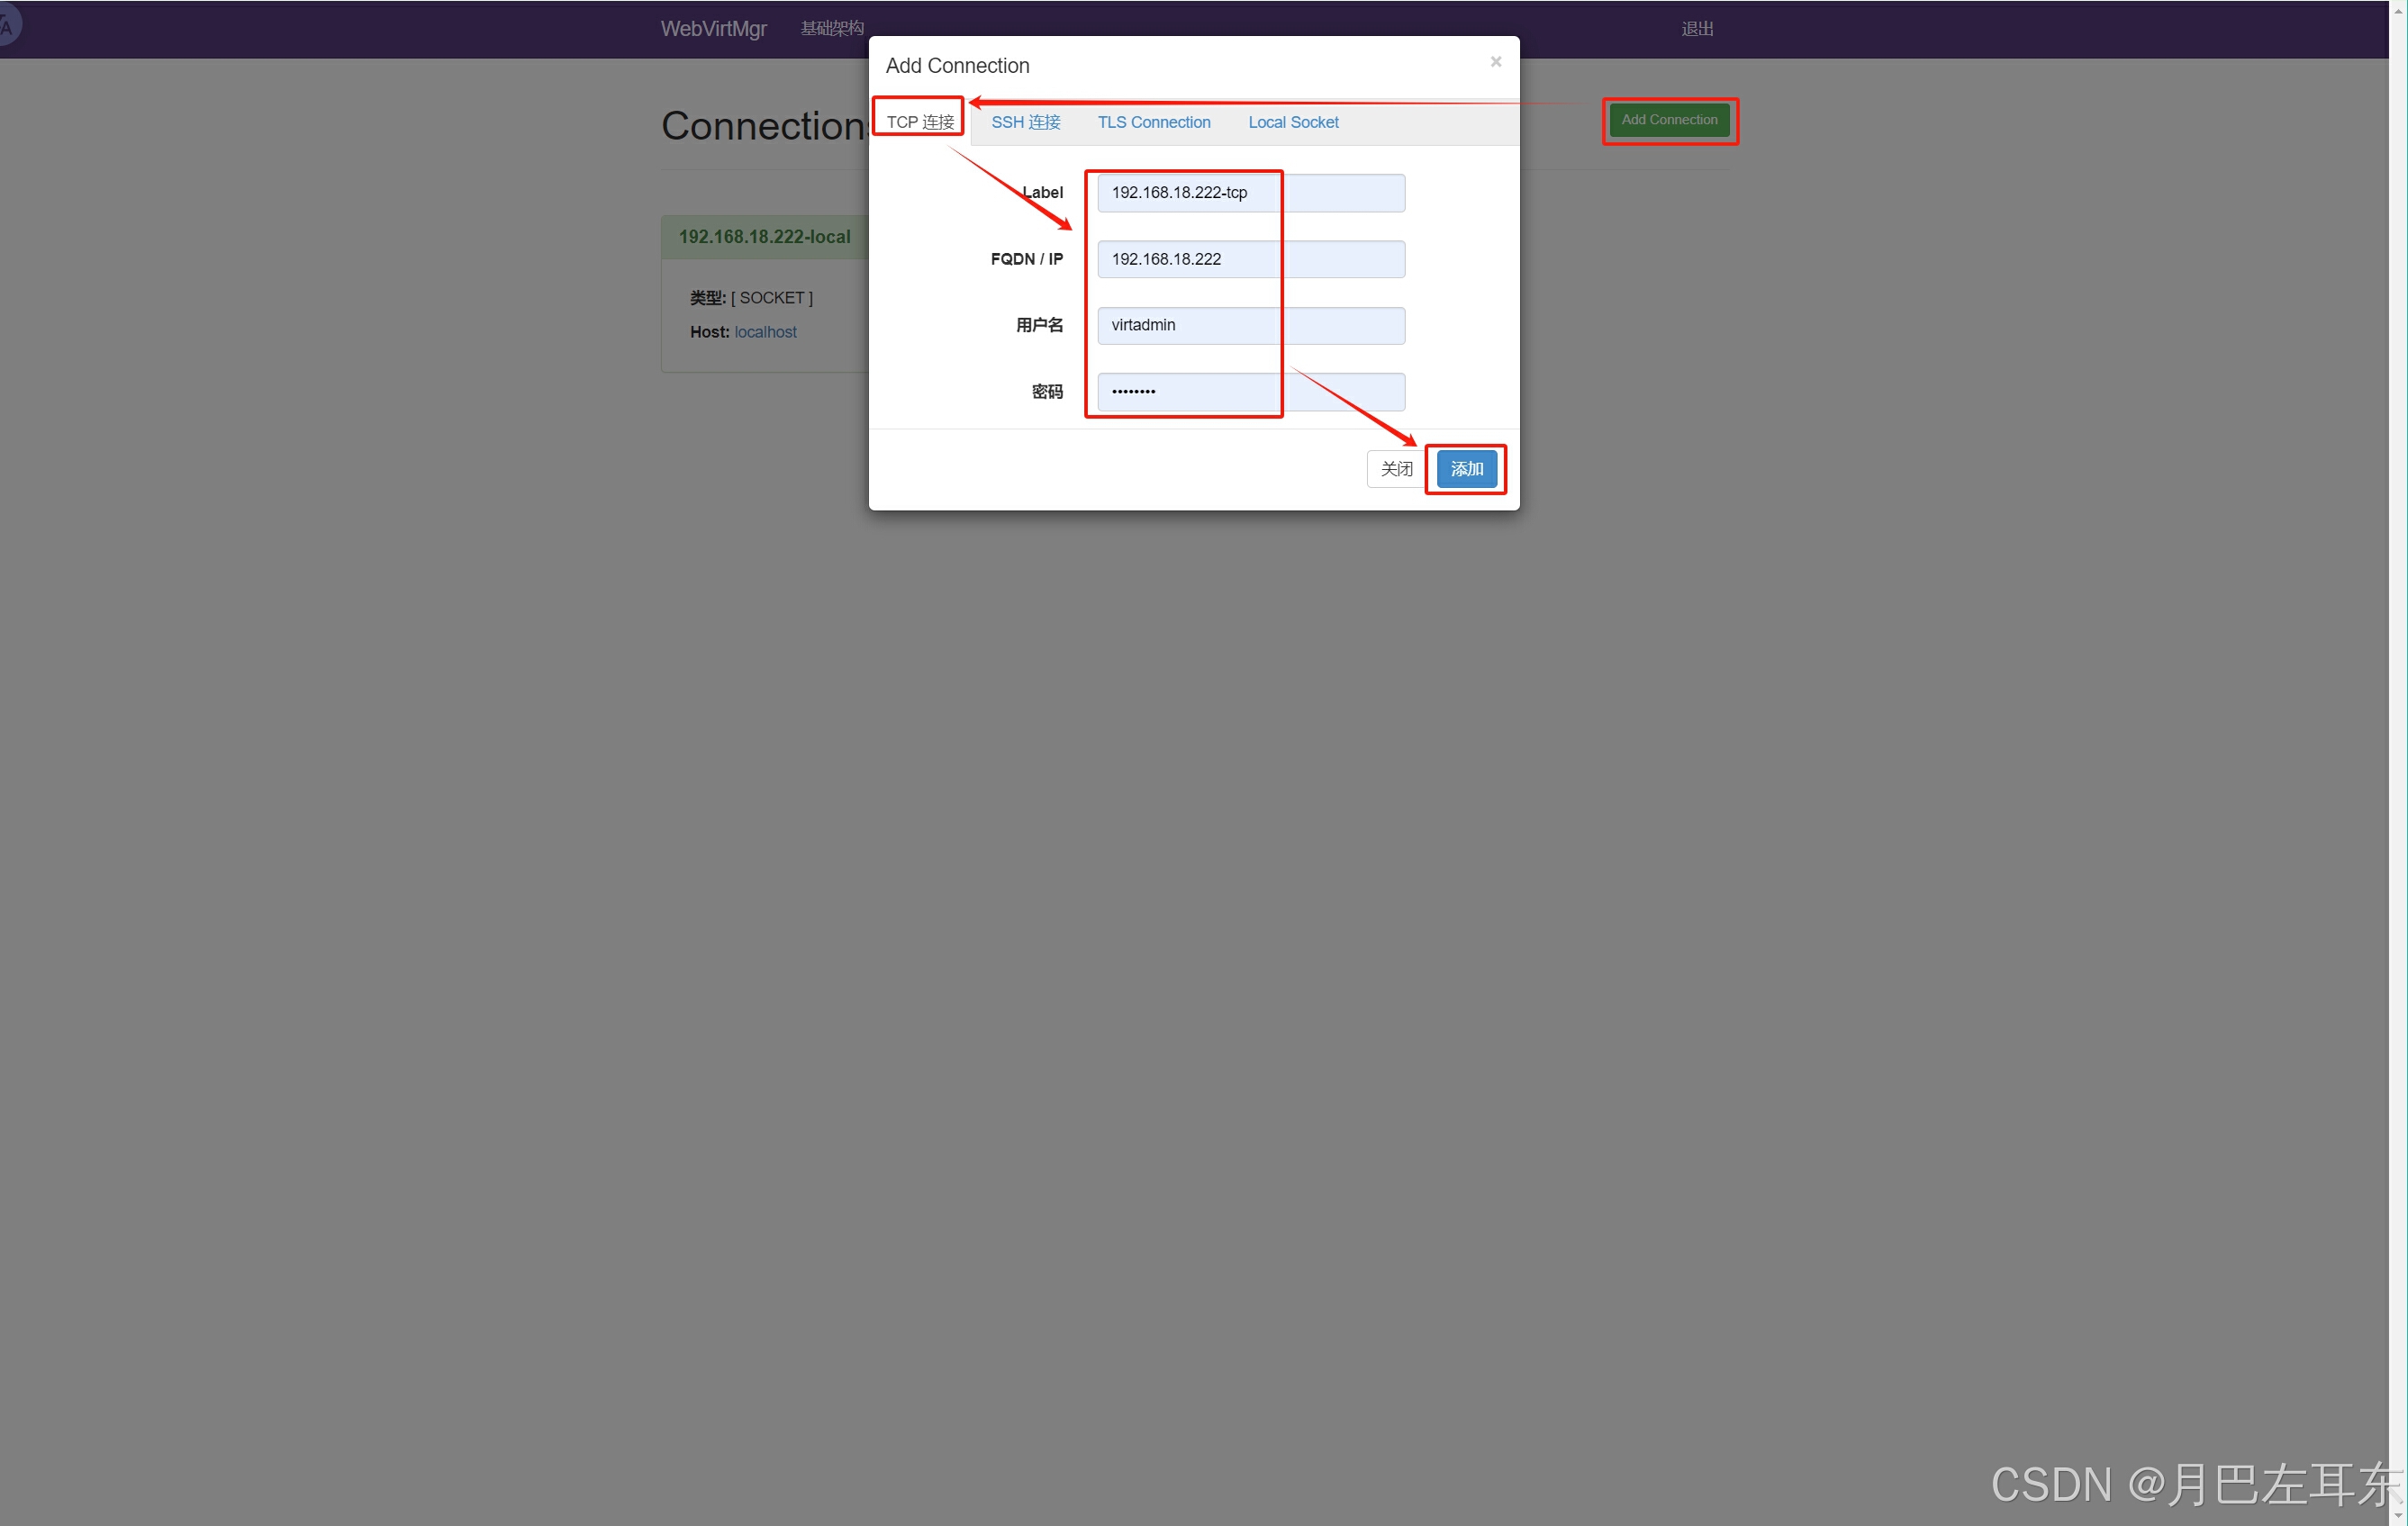
Please enter your authentication name: virtadminPlease enter your password: Id Name State---------------------------------------------------- 1 openeuler-20.03-lts-sp4-init running在 webvirtmgr 添加 tcp 连接
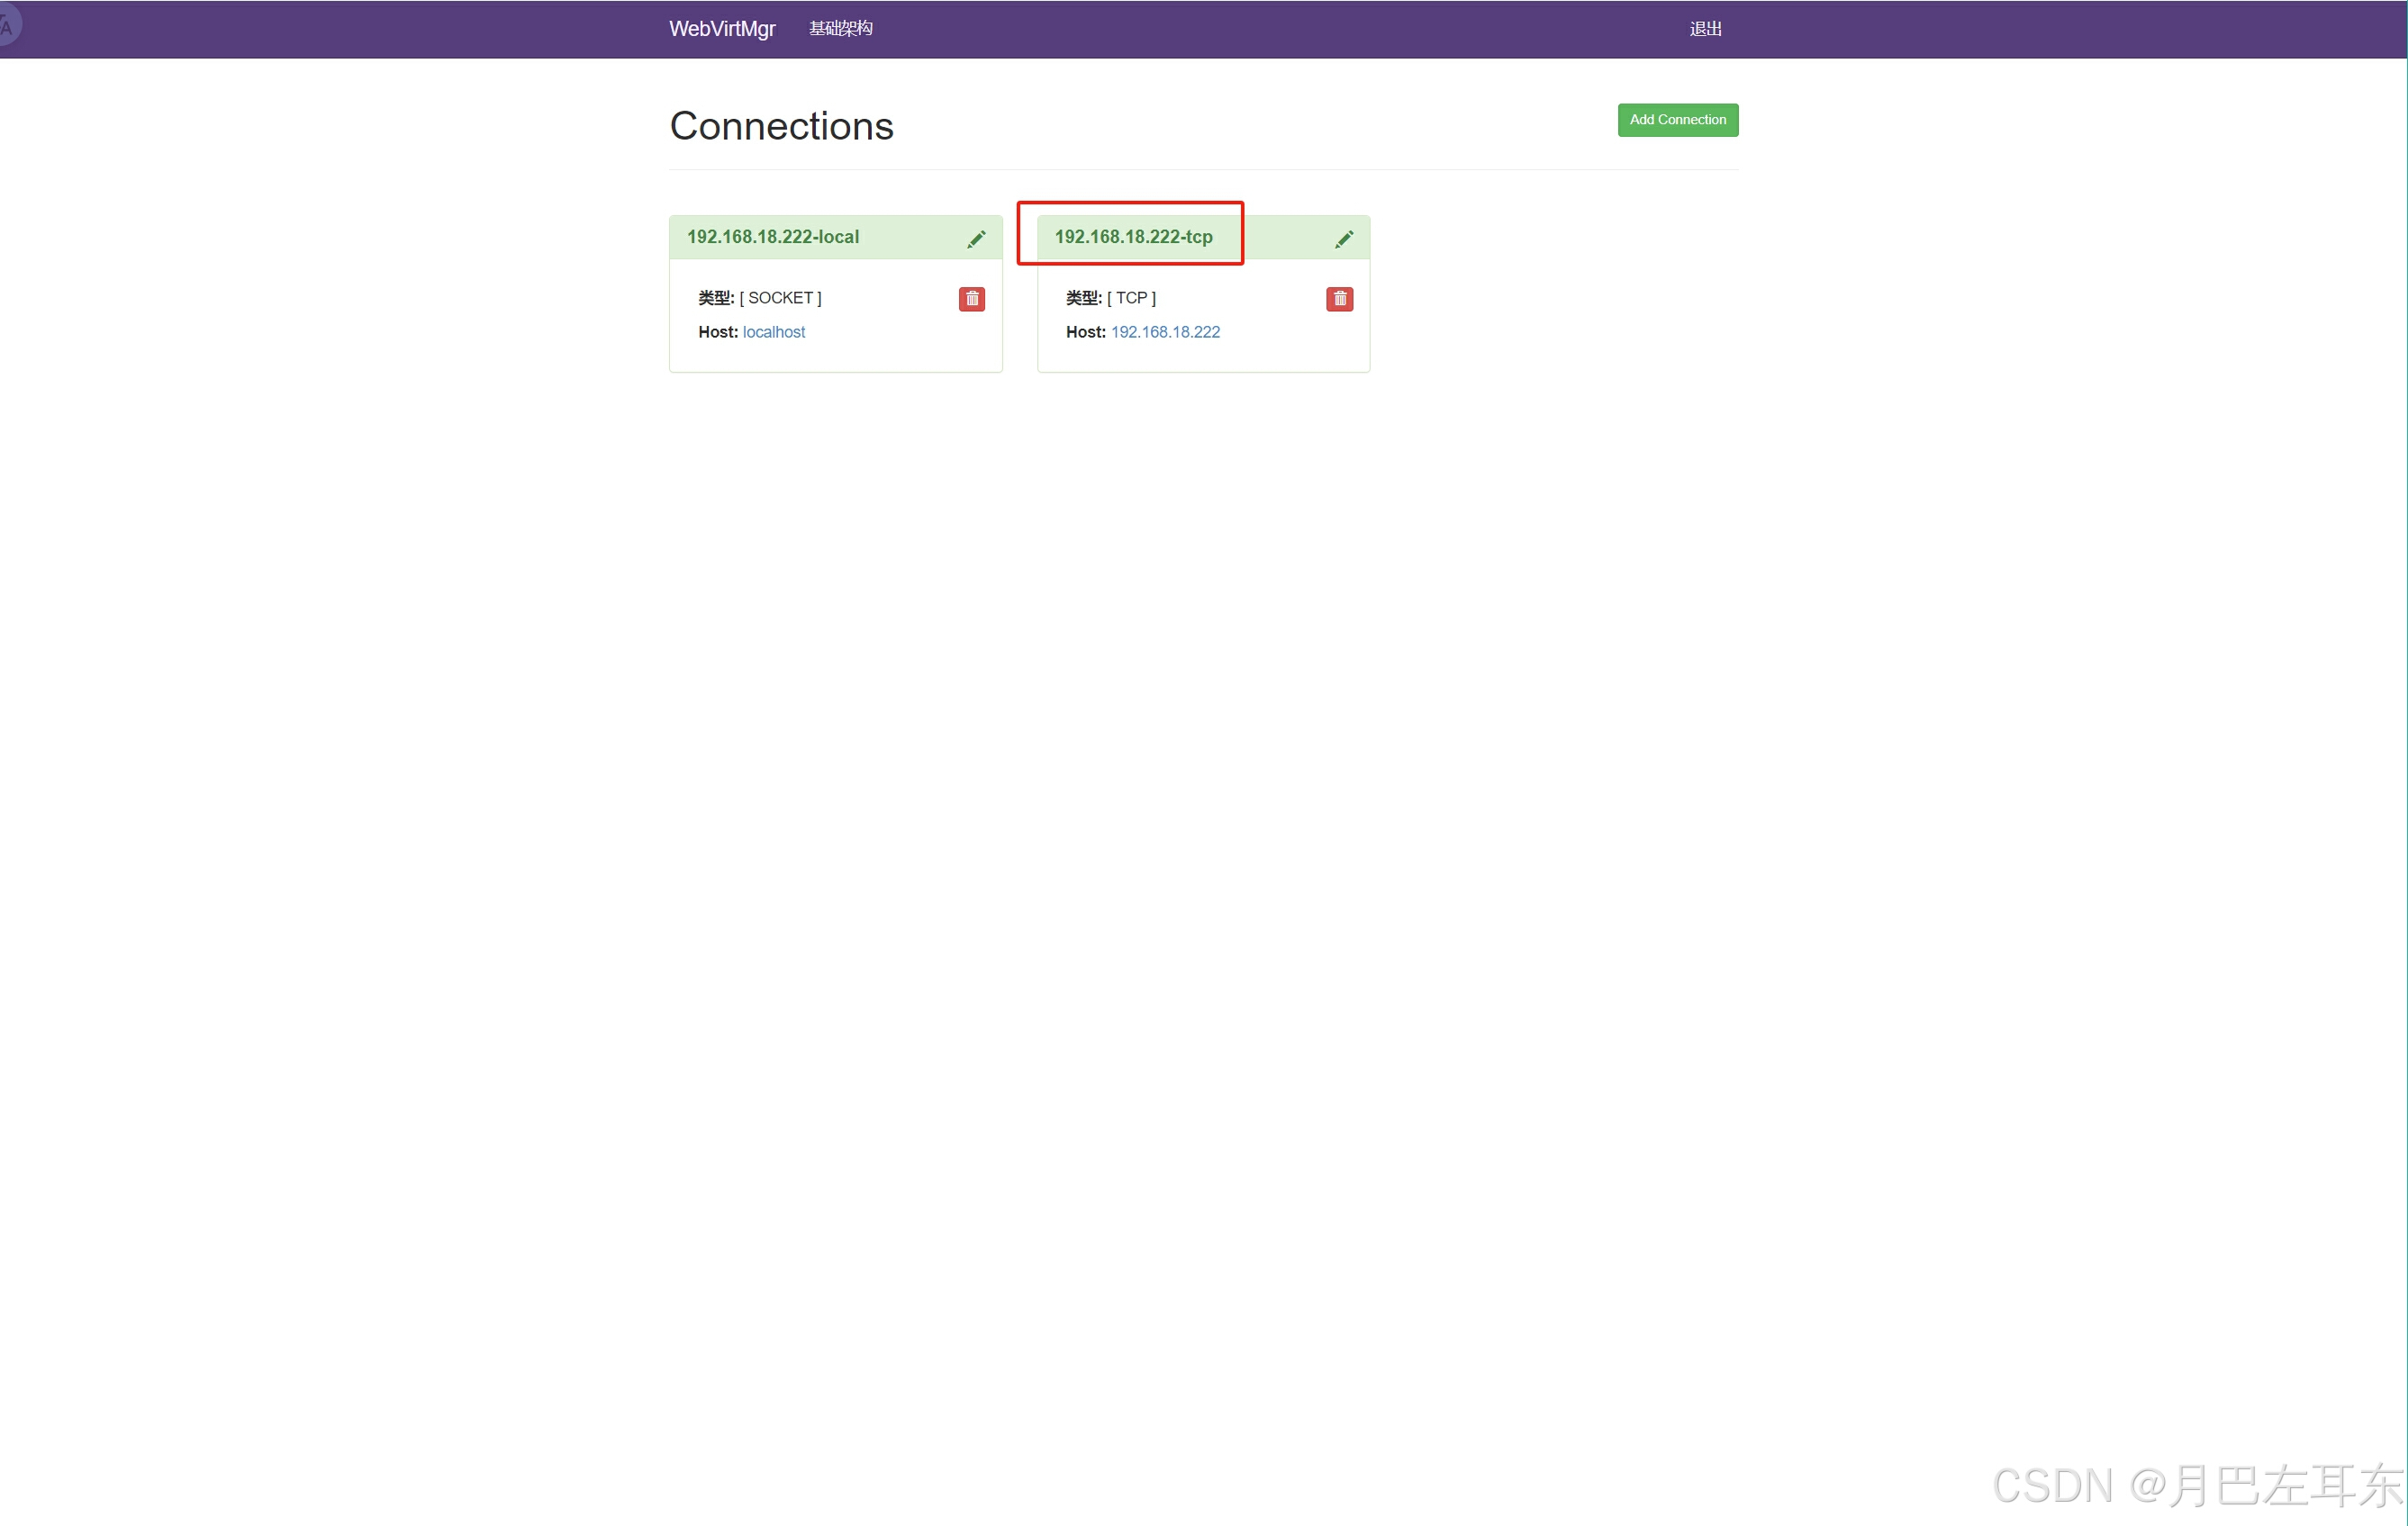
绑定后,和主机通信成功的,就是绿色的,点击 192.168.18.222-tcp 就可以进去管理了
和上面的 local socket 一样,可以看到之前创建过的虚拟机
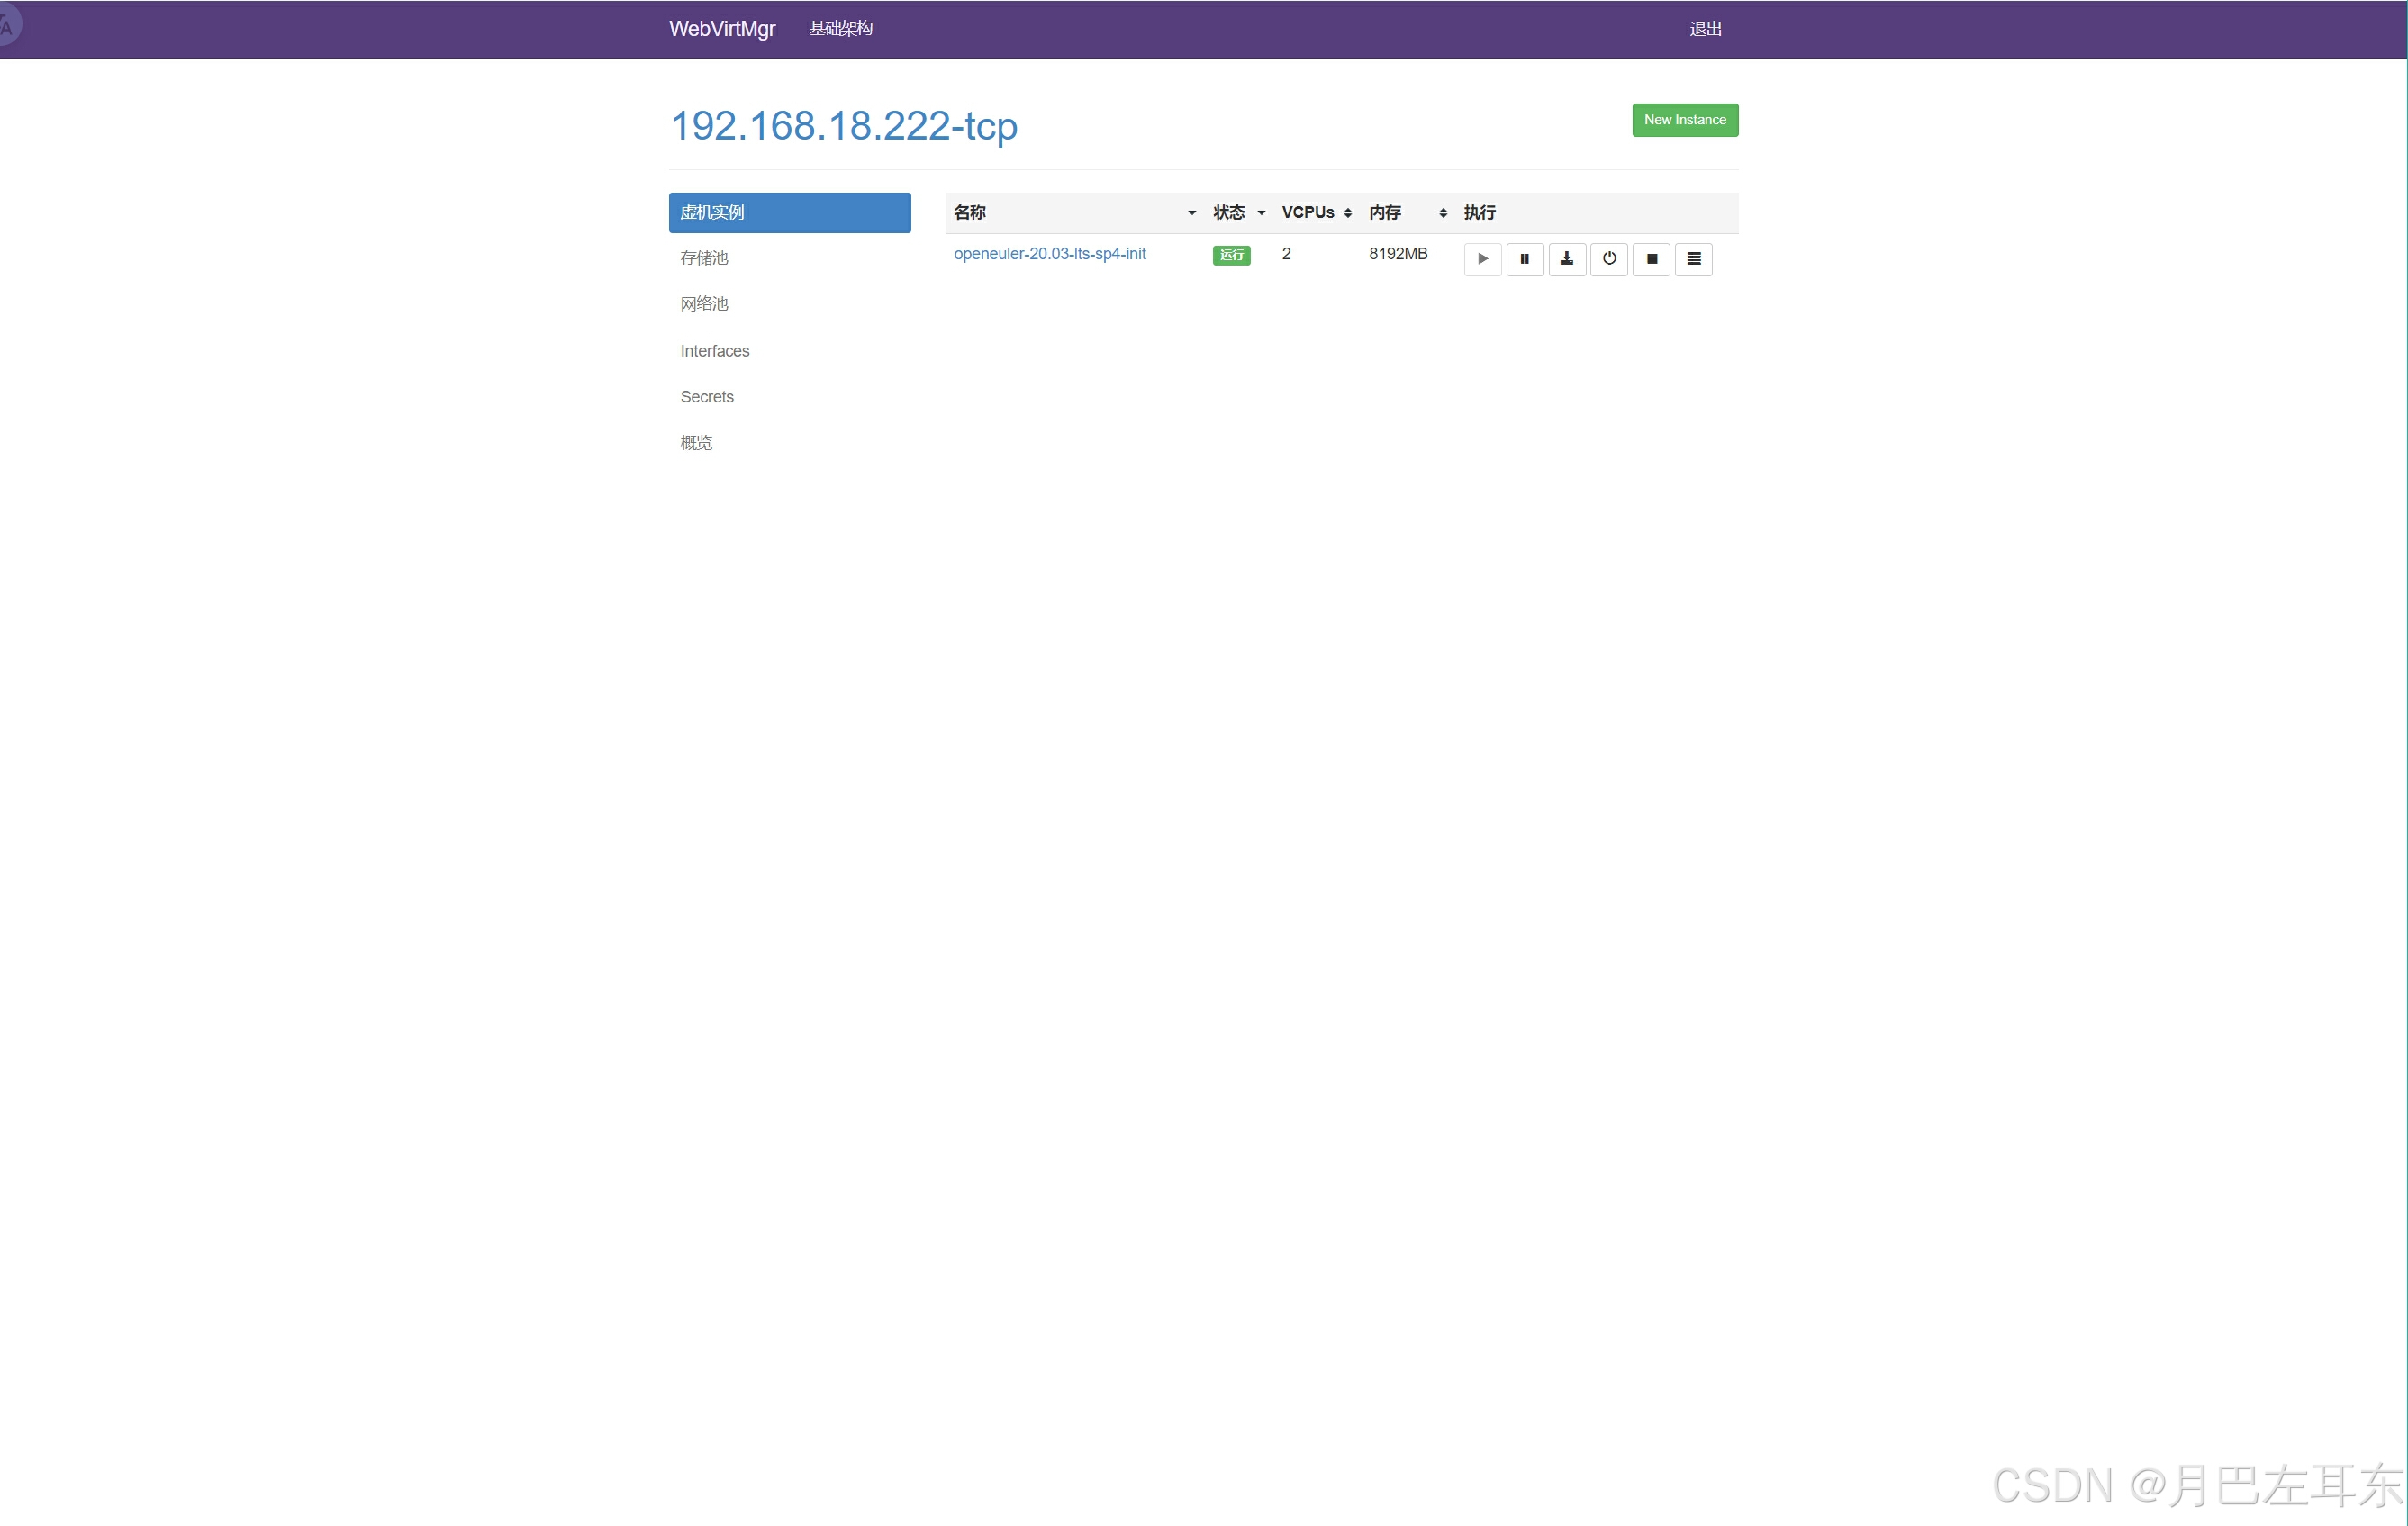
虚拟机创建
虚拟机创建这块,还是 virt-manager 相对方便点,使用 webvirtmgr 创建虚拟机,需要先去存储池创建镜像(前提是,网络这些都创建好了,因为我的是之前使用过 kvm 创建,所以相关信息也都直接带入了,就只需要创建存储池的镜像就好了)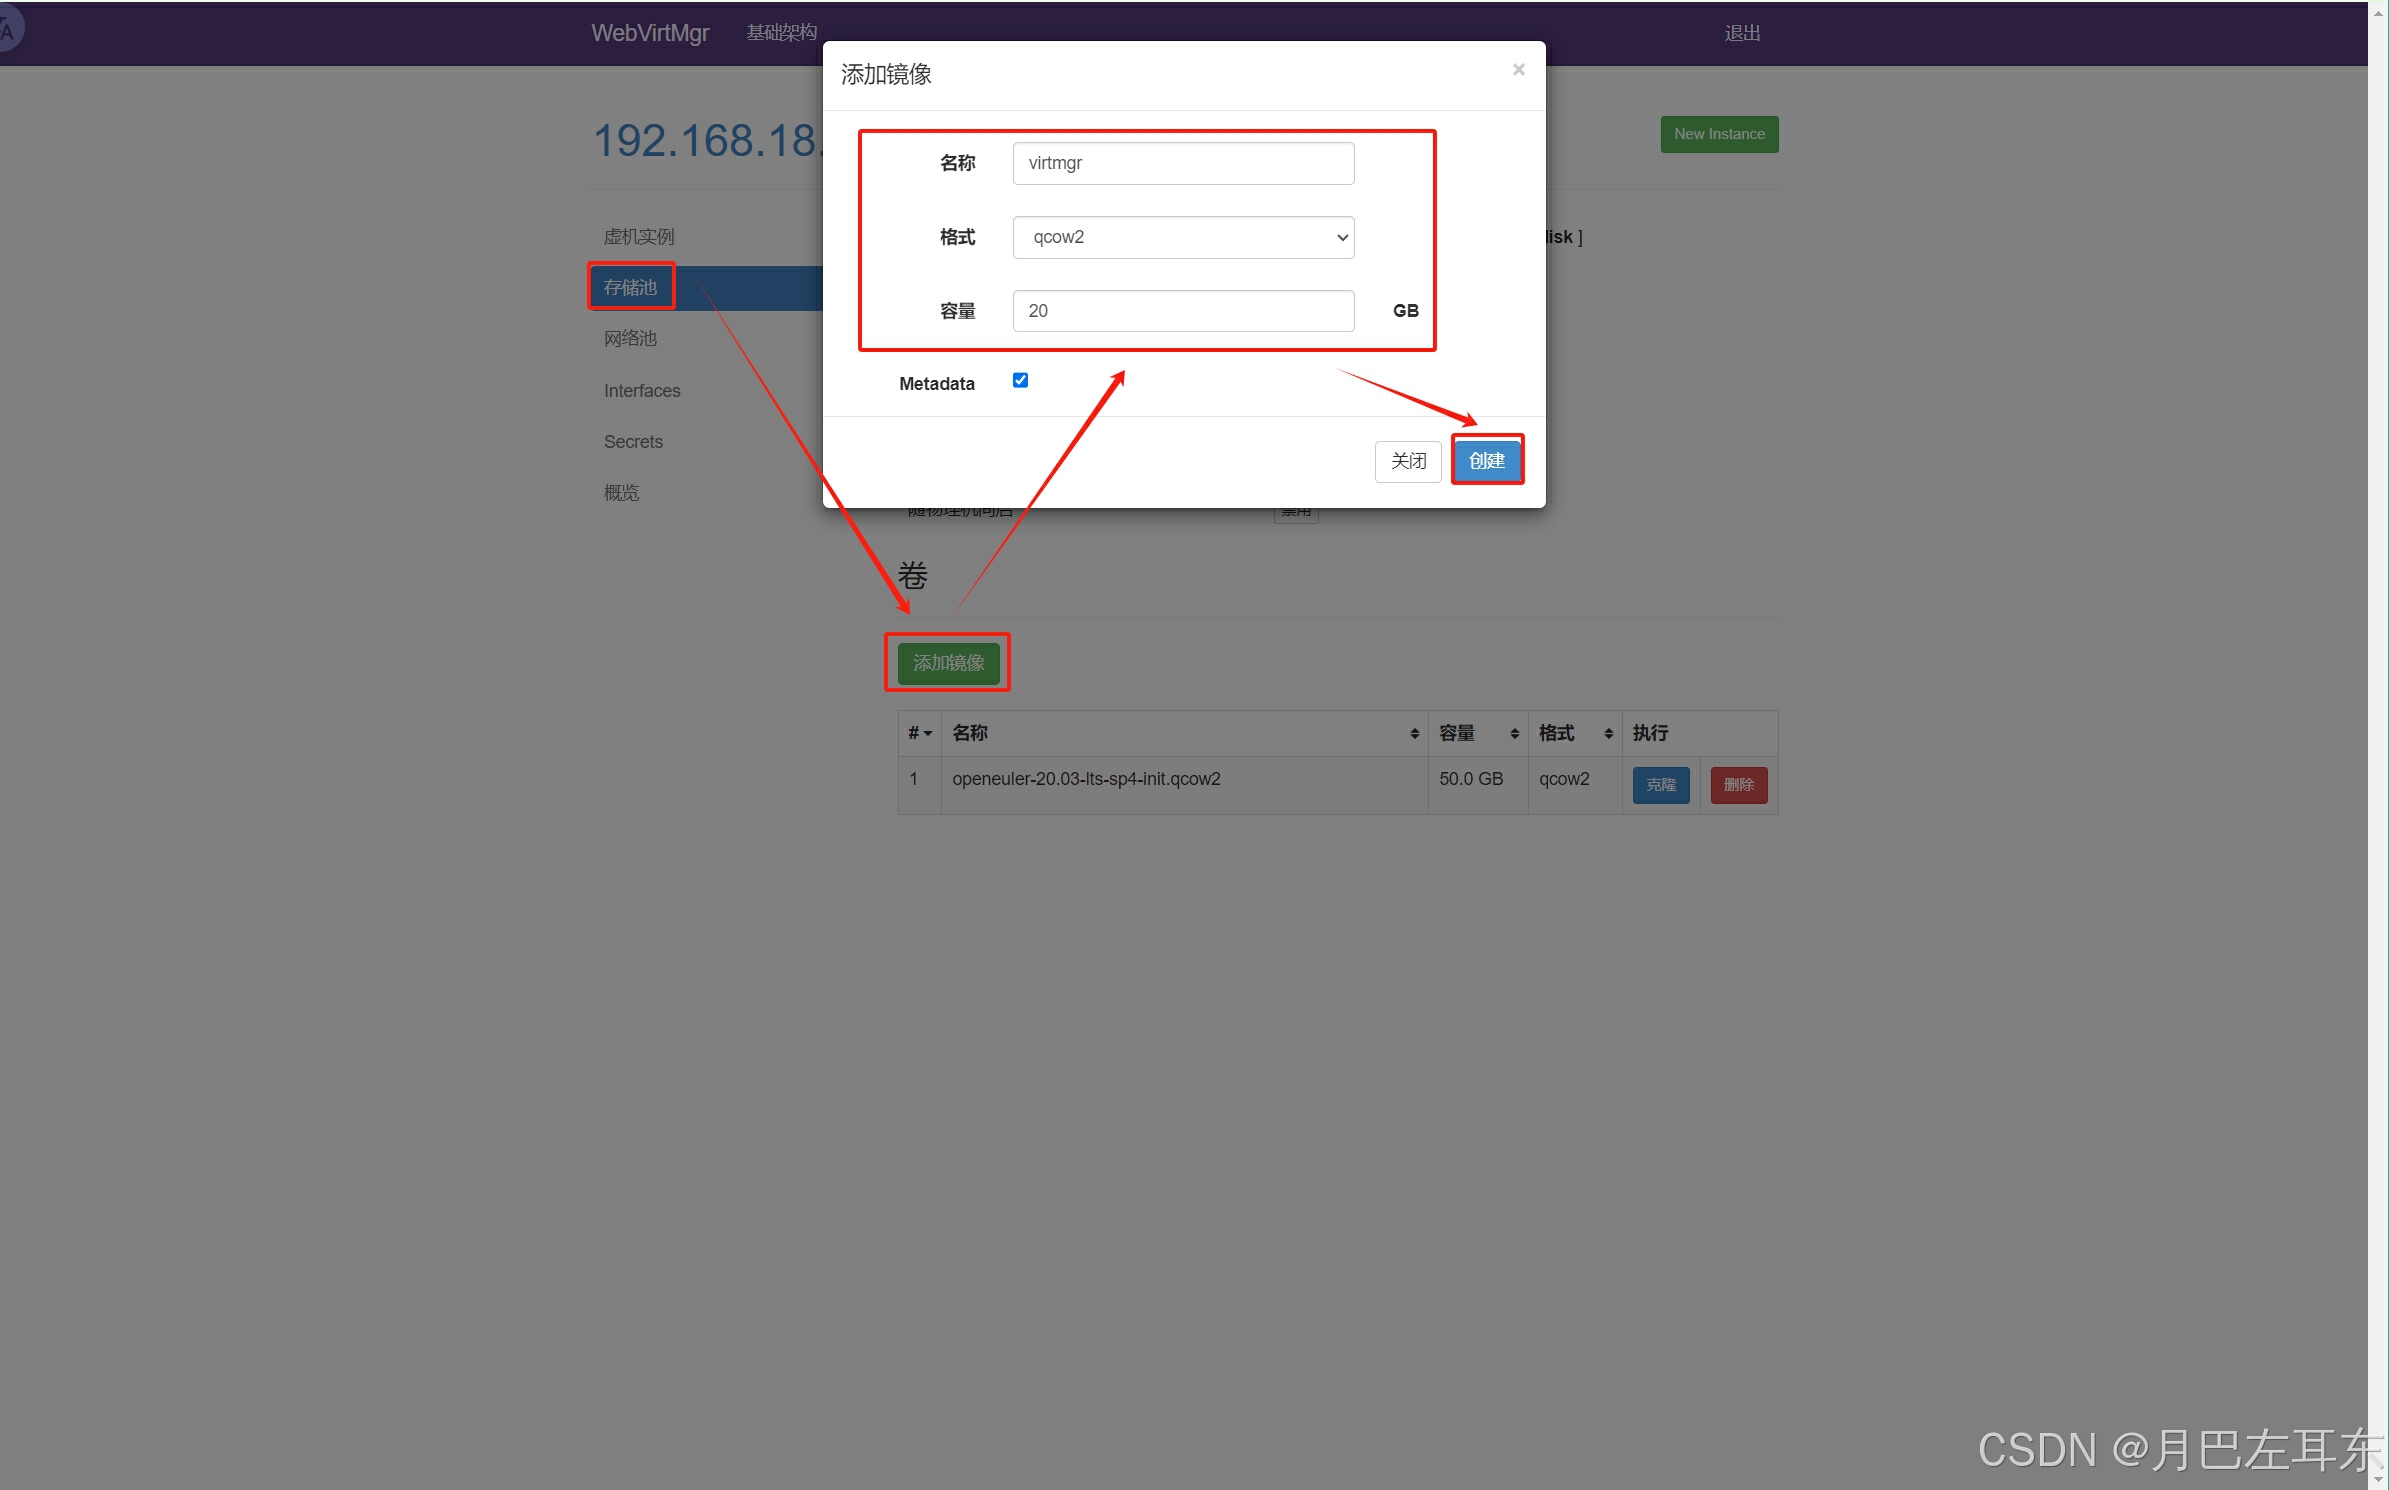
创建虚拟机
确认存储池创建了对应的镜像New Instance 创建实例Custom Instance 的方式创建配置虚拟机名称,CPU,内存资源,选择提前创建的磁盘镜像和网络网卡,关闭主机模式,点击创建在设置 -> media 里面找到需要使用的 iso 镜像,点击连接在Power里面点击启动在Access里面点击控制台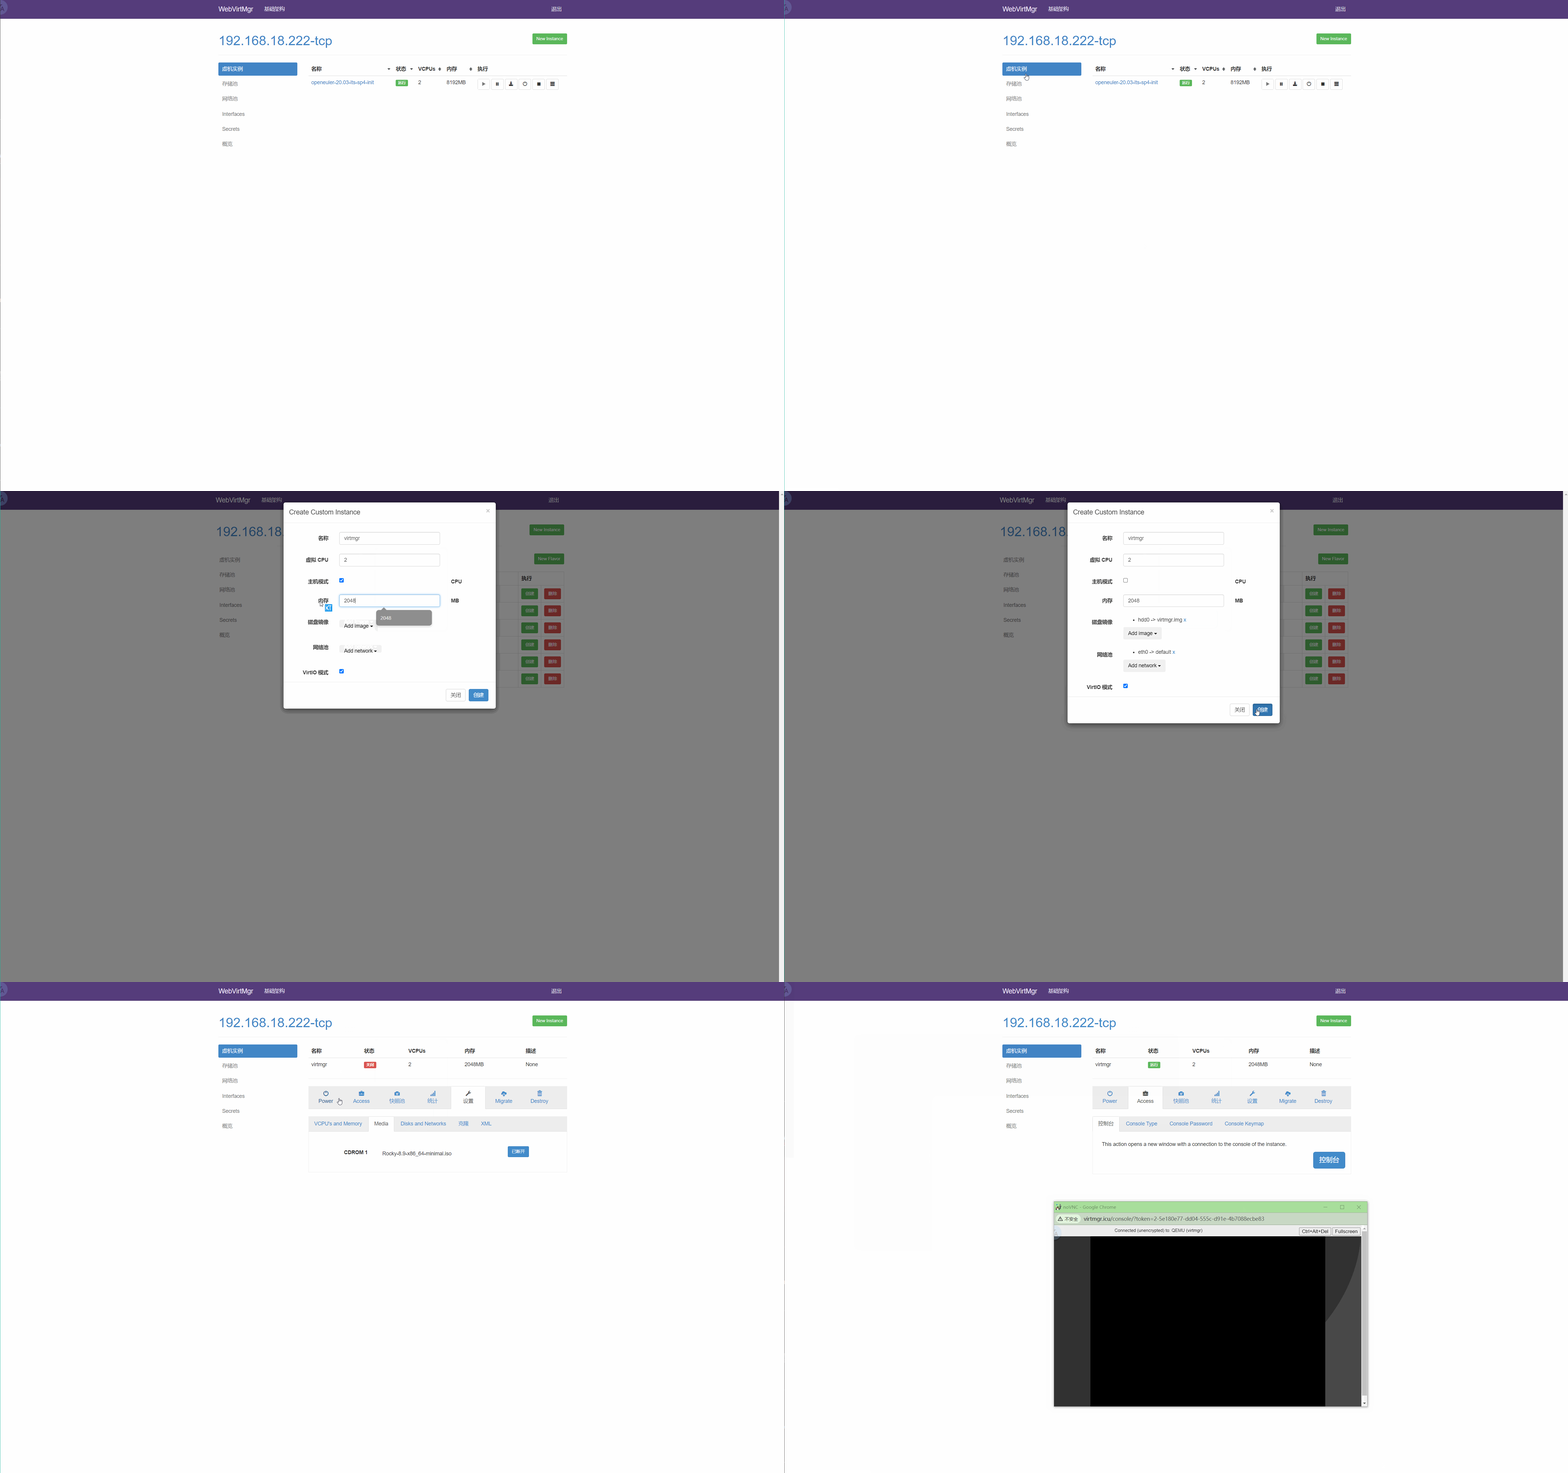
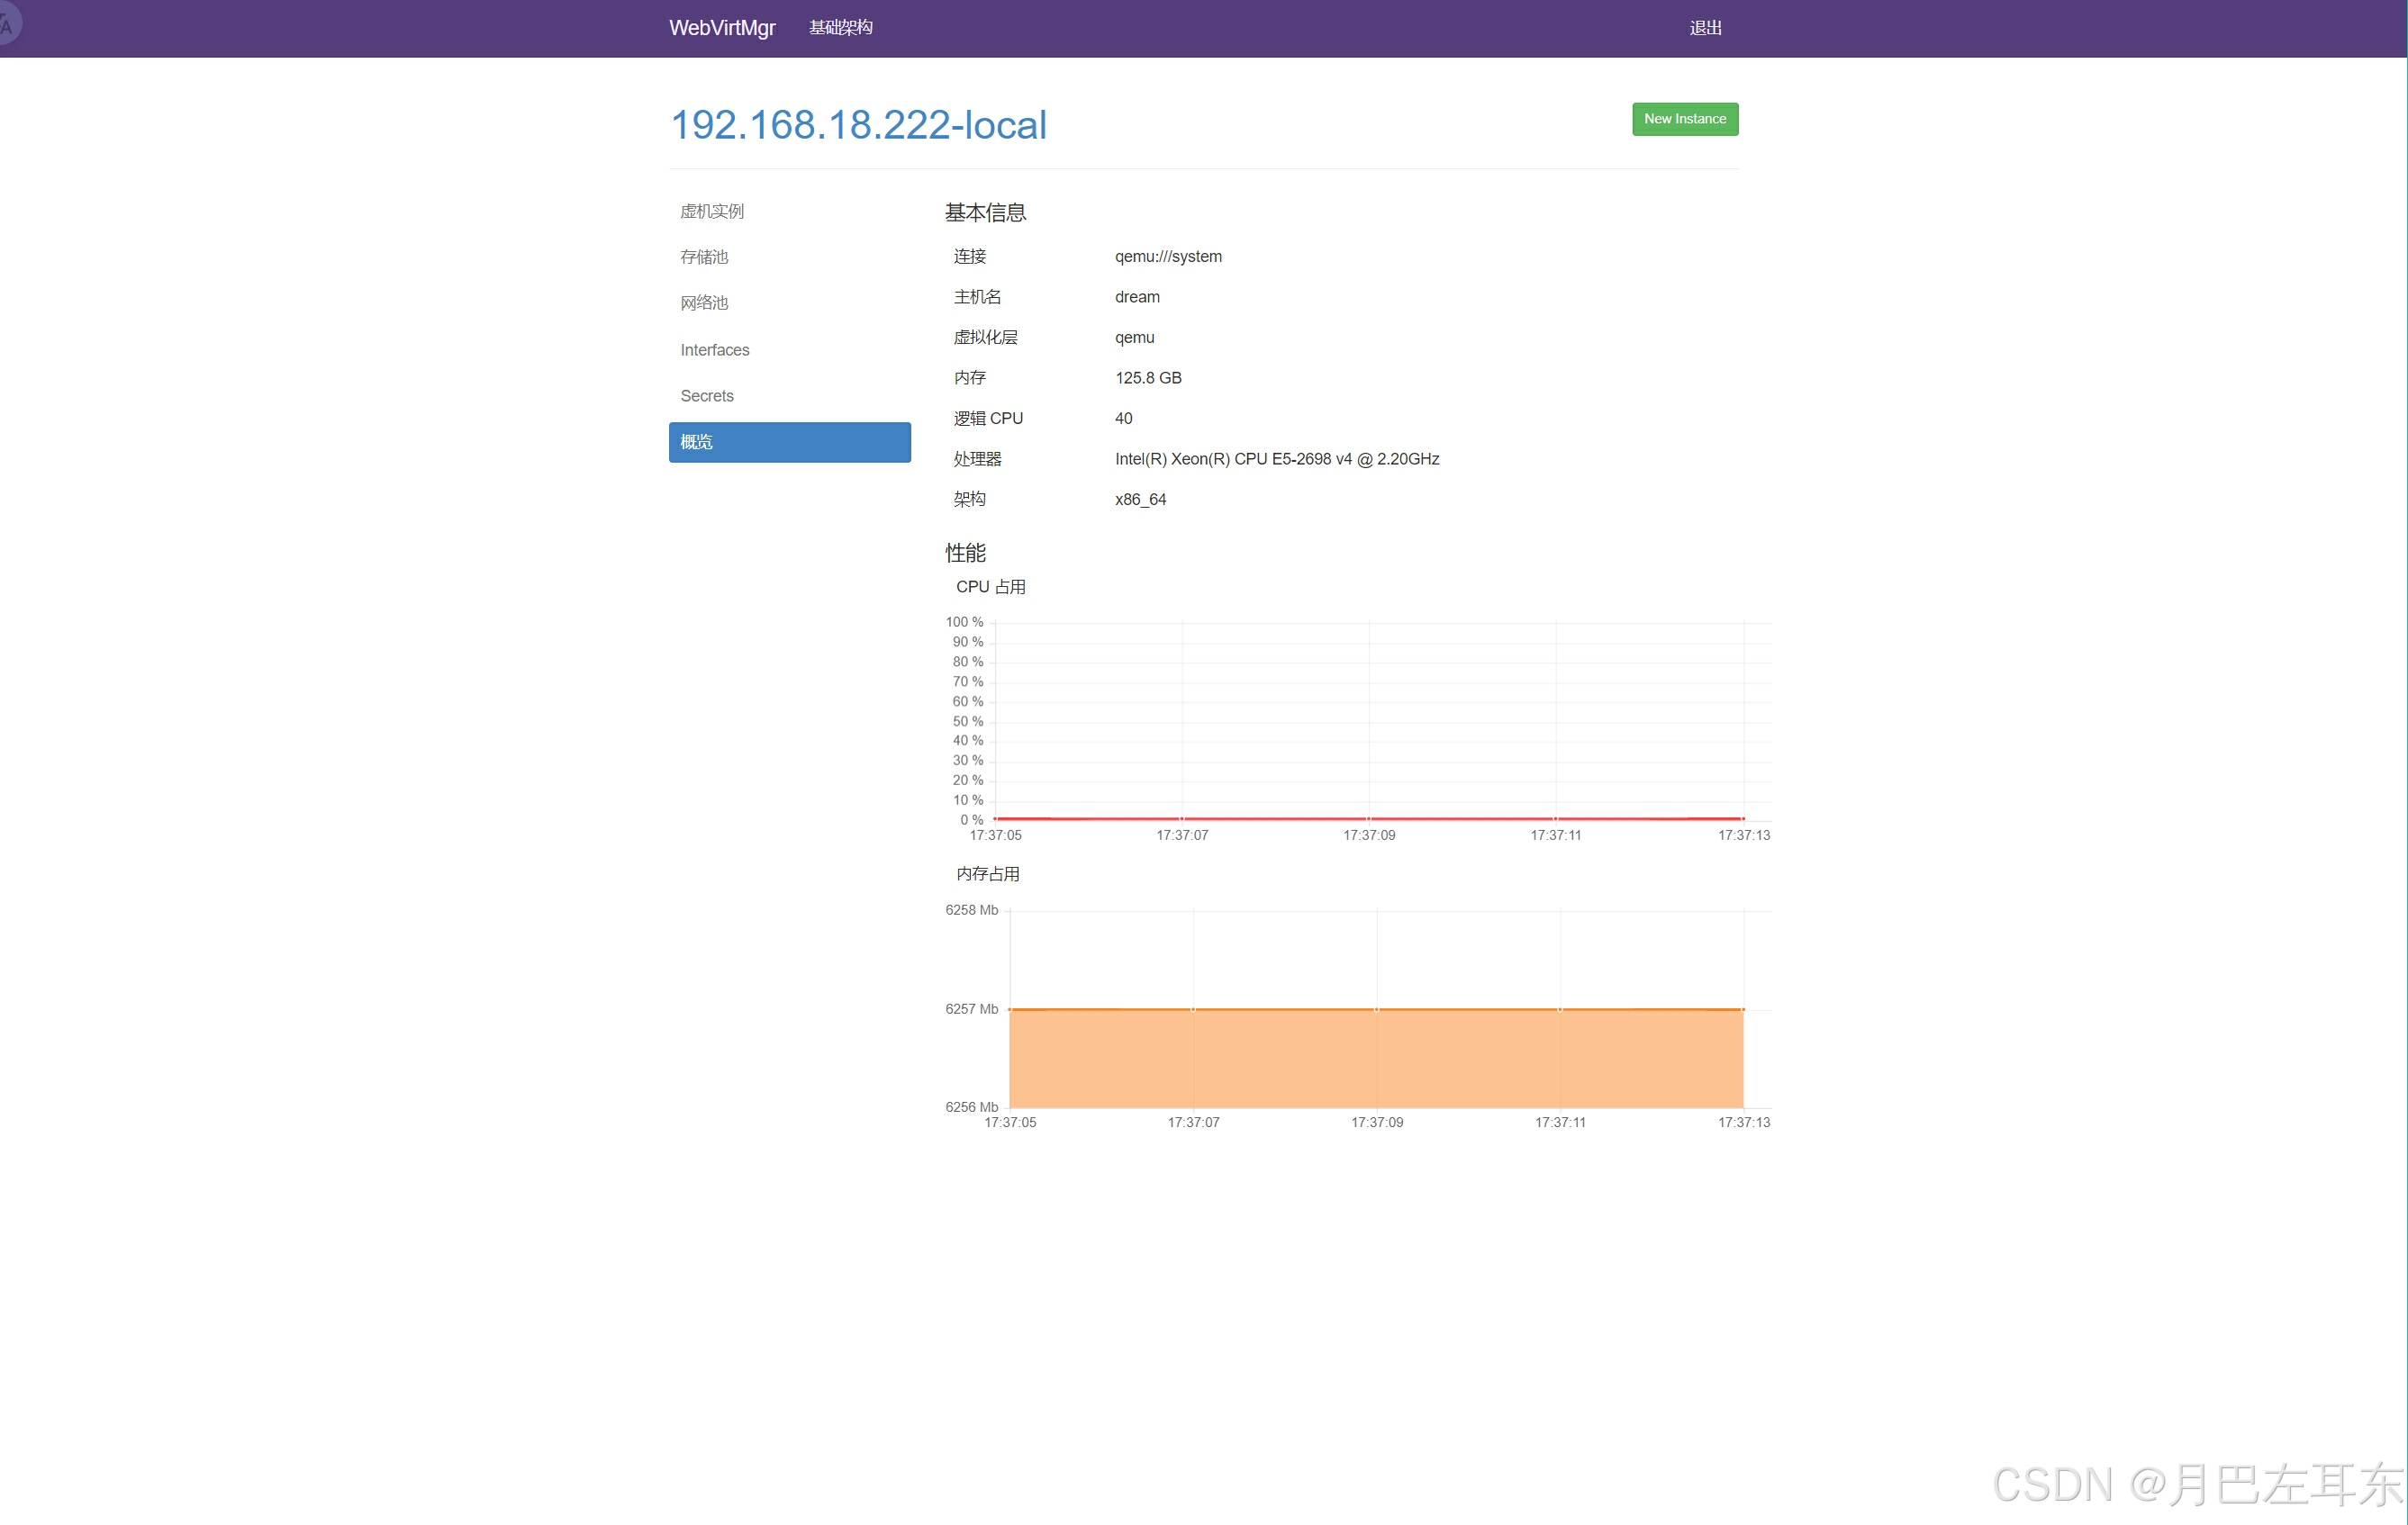
进入到指定的主机里面,点统计可以看到当前的机器资源使用情况
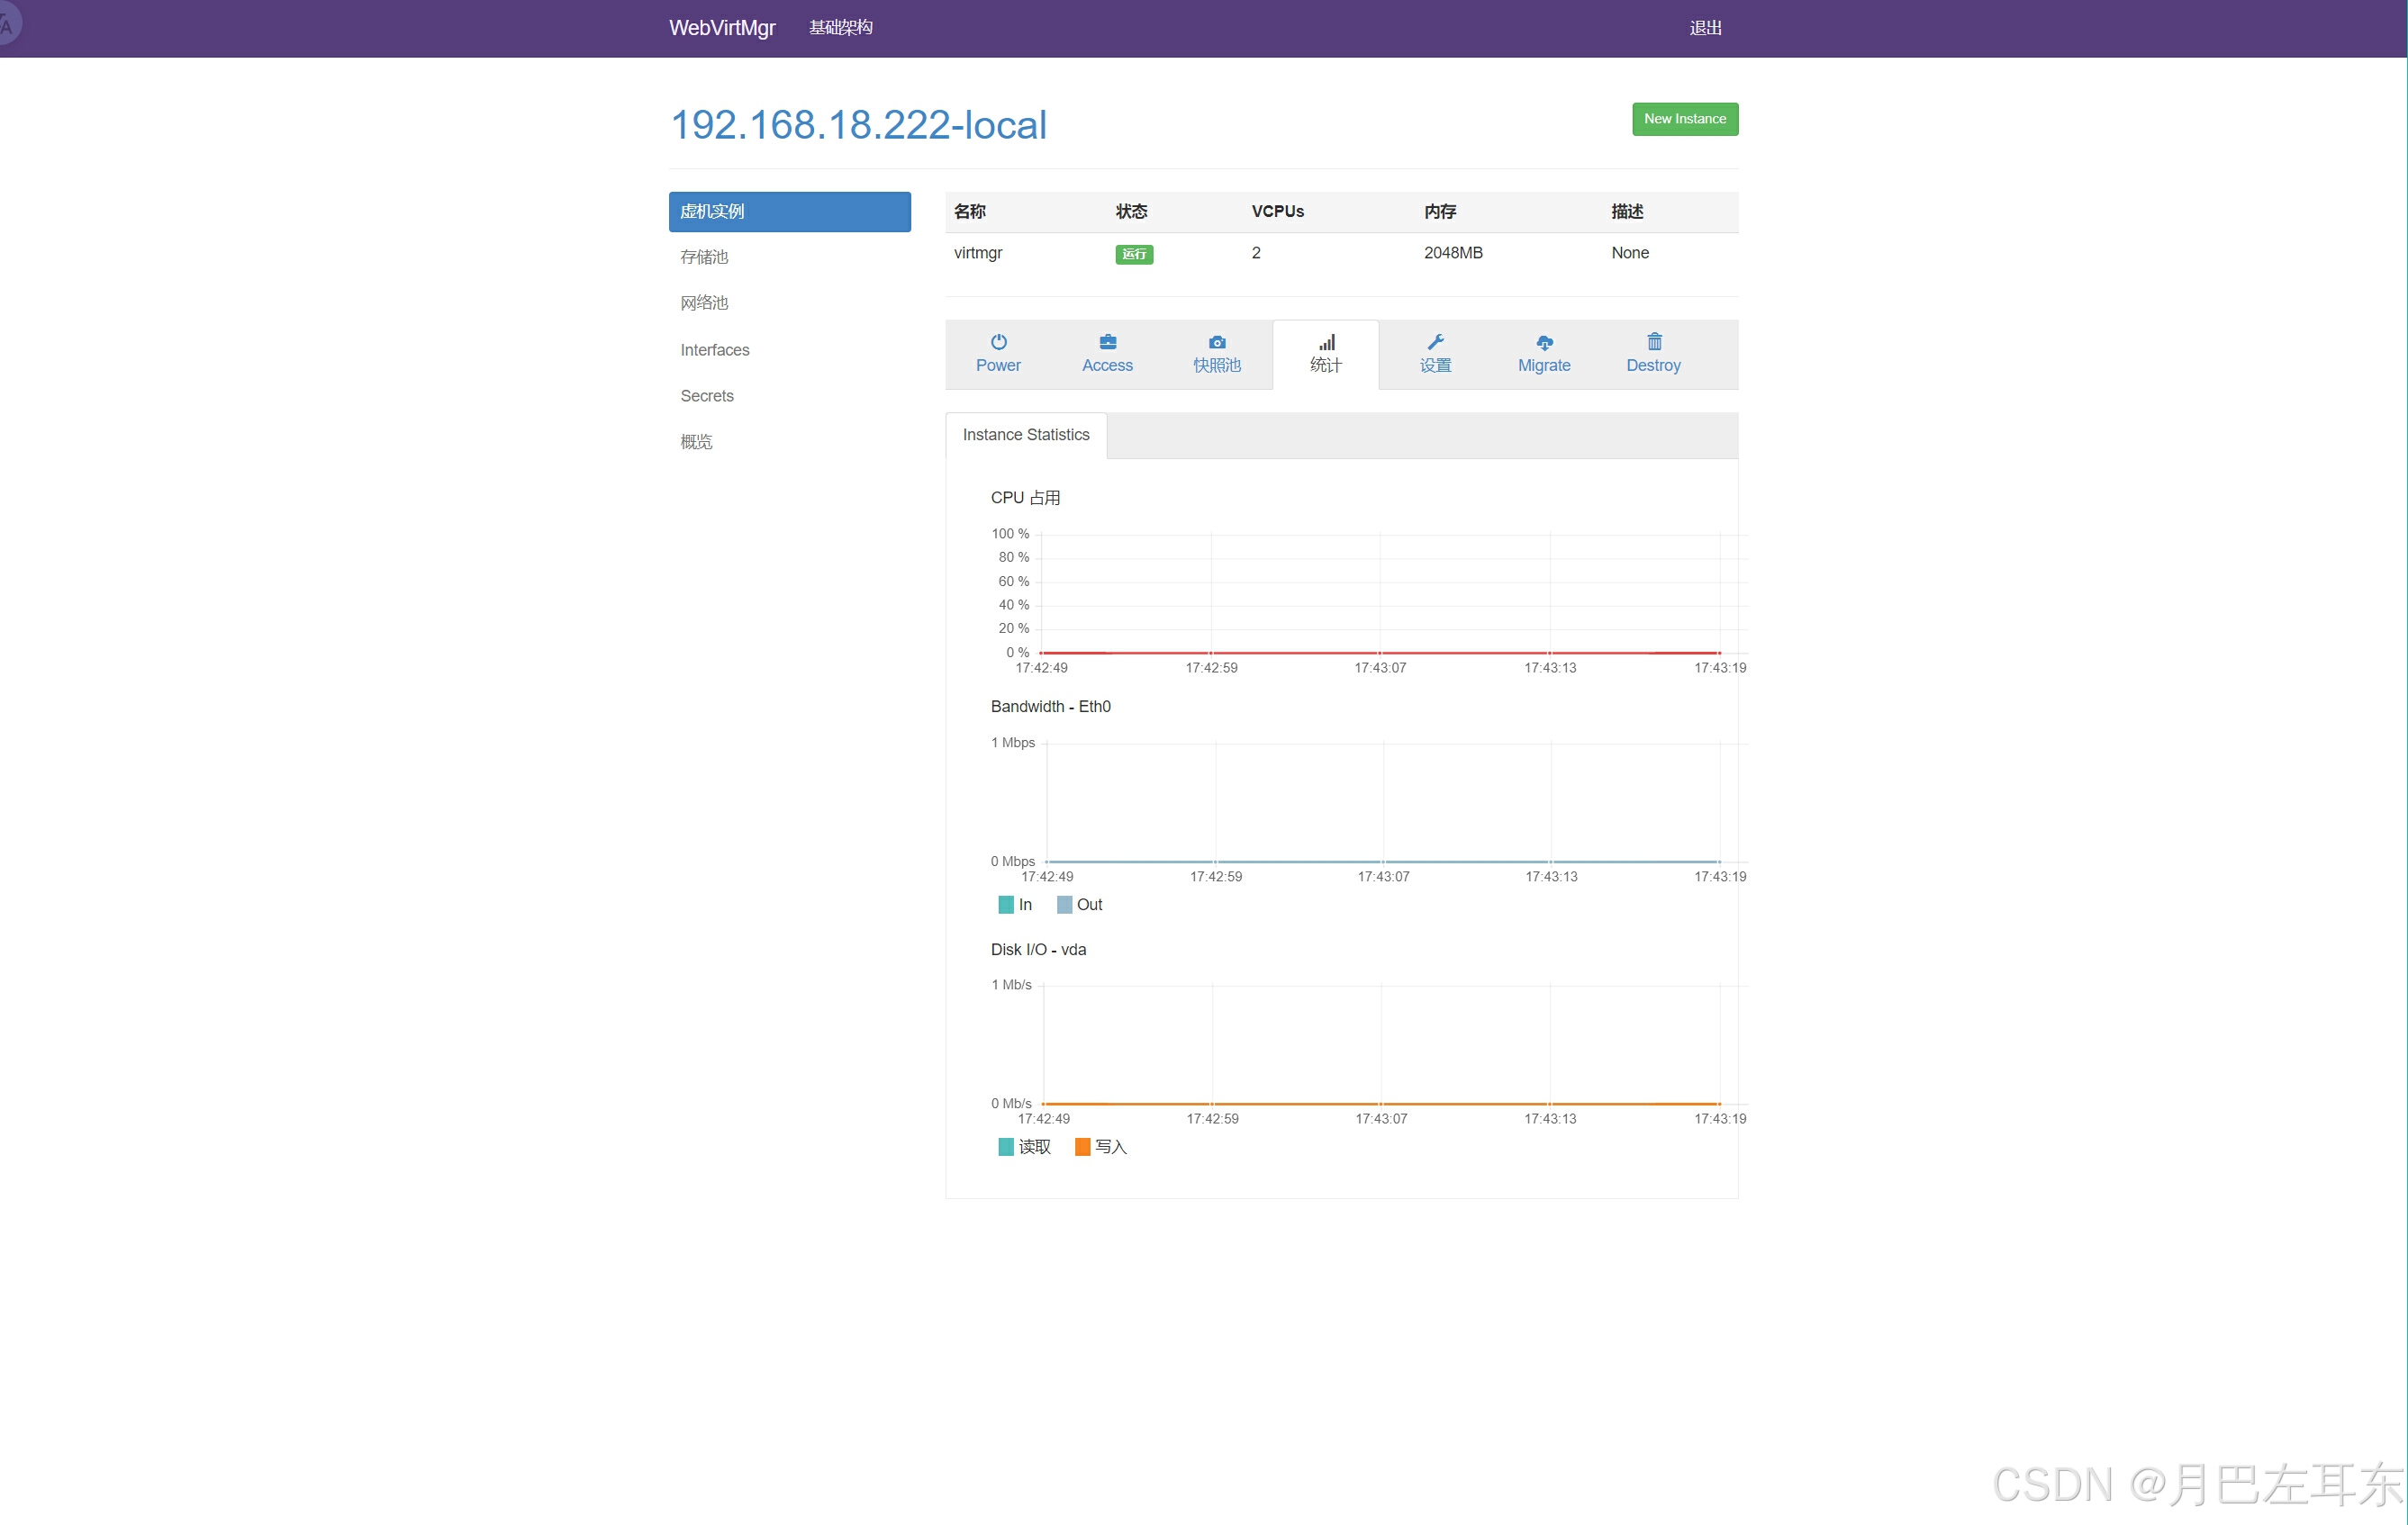
此处省略安装过程,这边可以查看一下基础架构,可以看到展示的内容都是一样的
查看 kvm 宿主机的资源使用情况
创建快照
To take a snapshot, shutdown the instance. 从快照持可以看到,快照要求先关机,暂停也不行 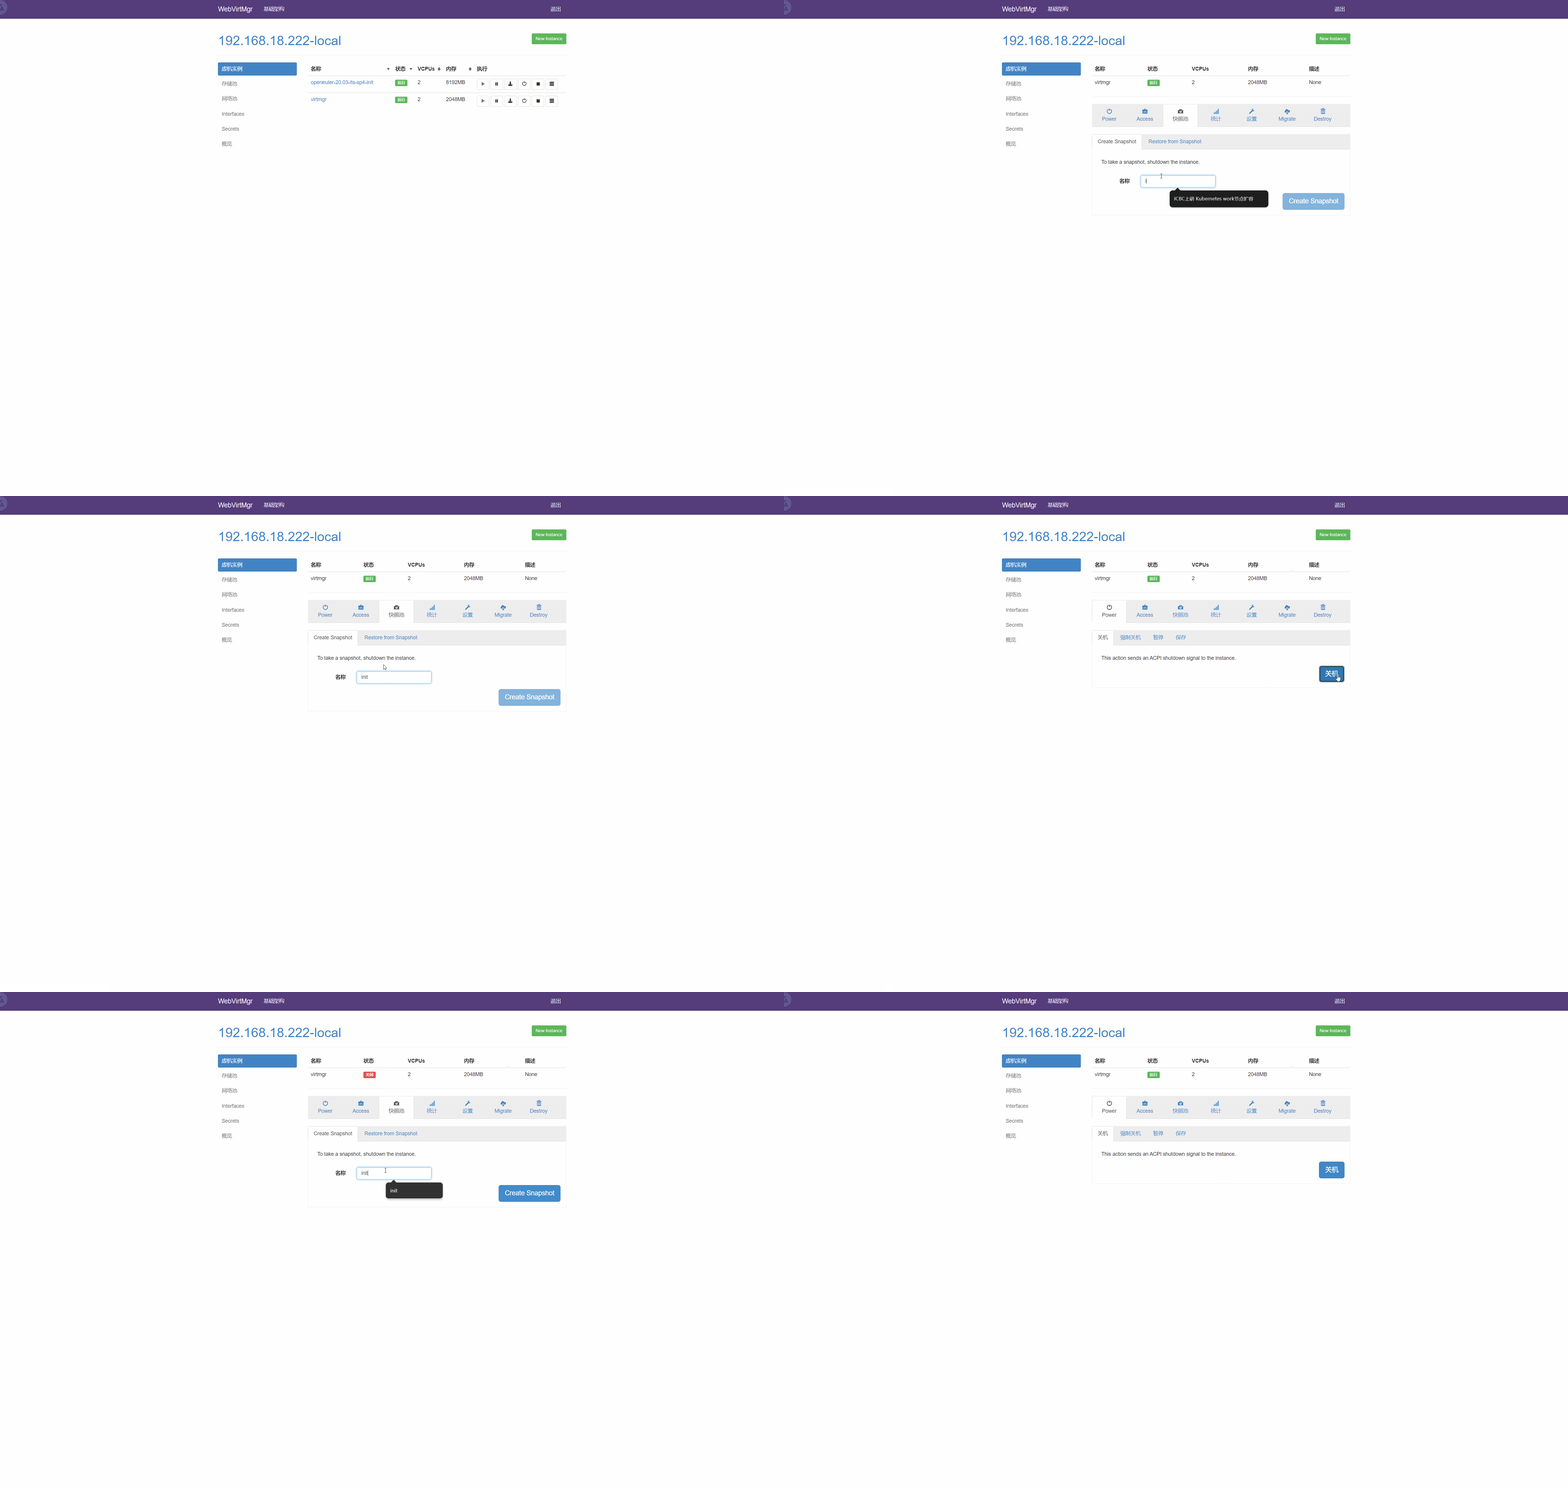
虚拟机克隆
和快照一样,克隆也需要关机
设置里面找到克隆点一下 random MAC address 获取一个随机的 MAC 地址,避免和之前的机器冲突了,导致网络不通根据情况,选择修改克隆后的机器名称和磁盘镜像名称选中 Metadata 后,点击克隆就可以了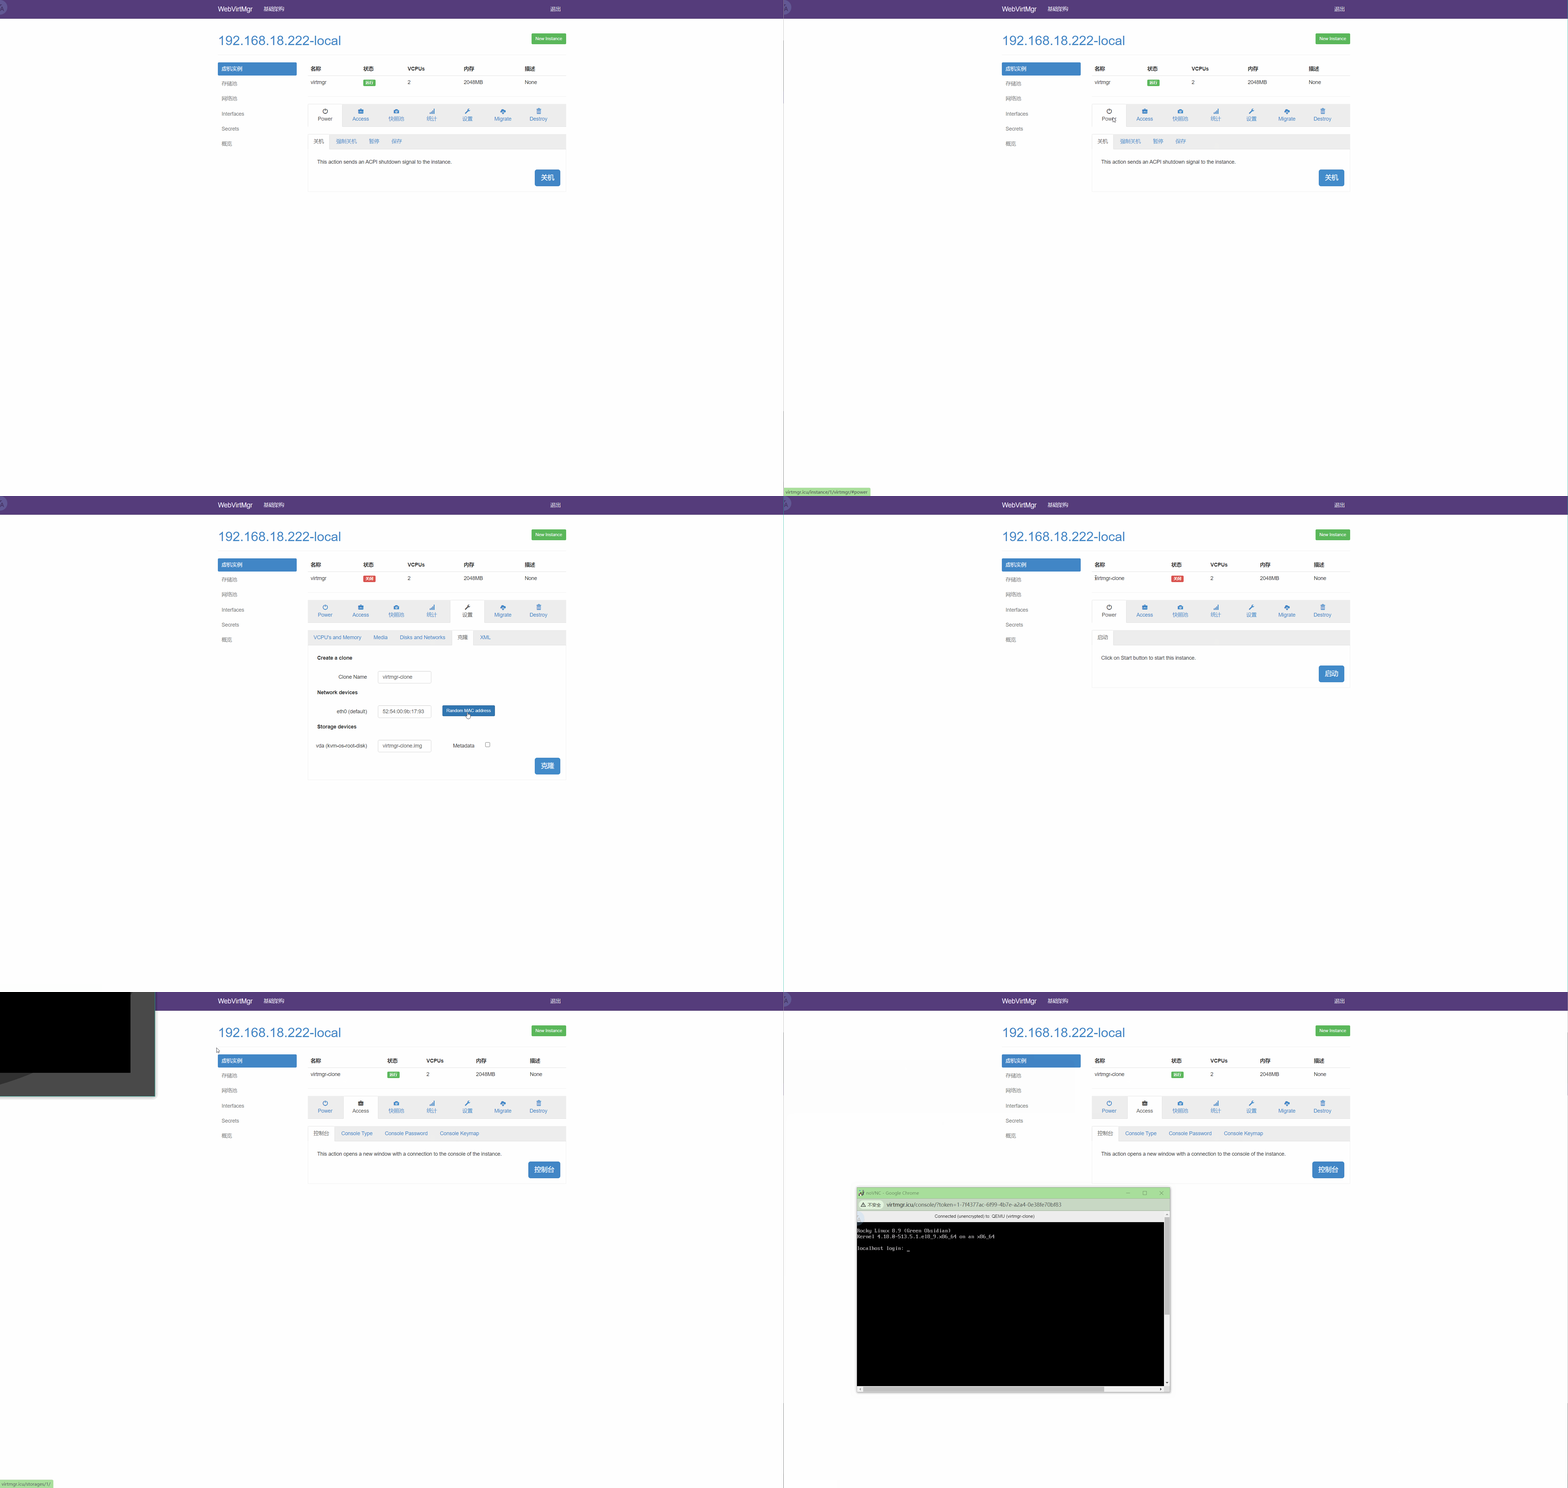
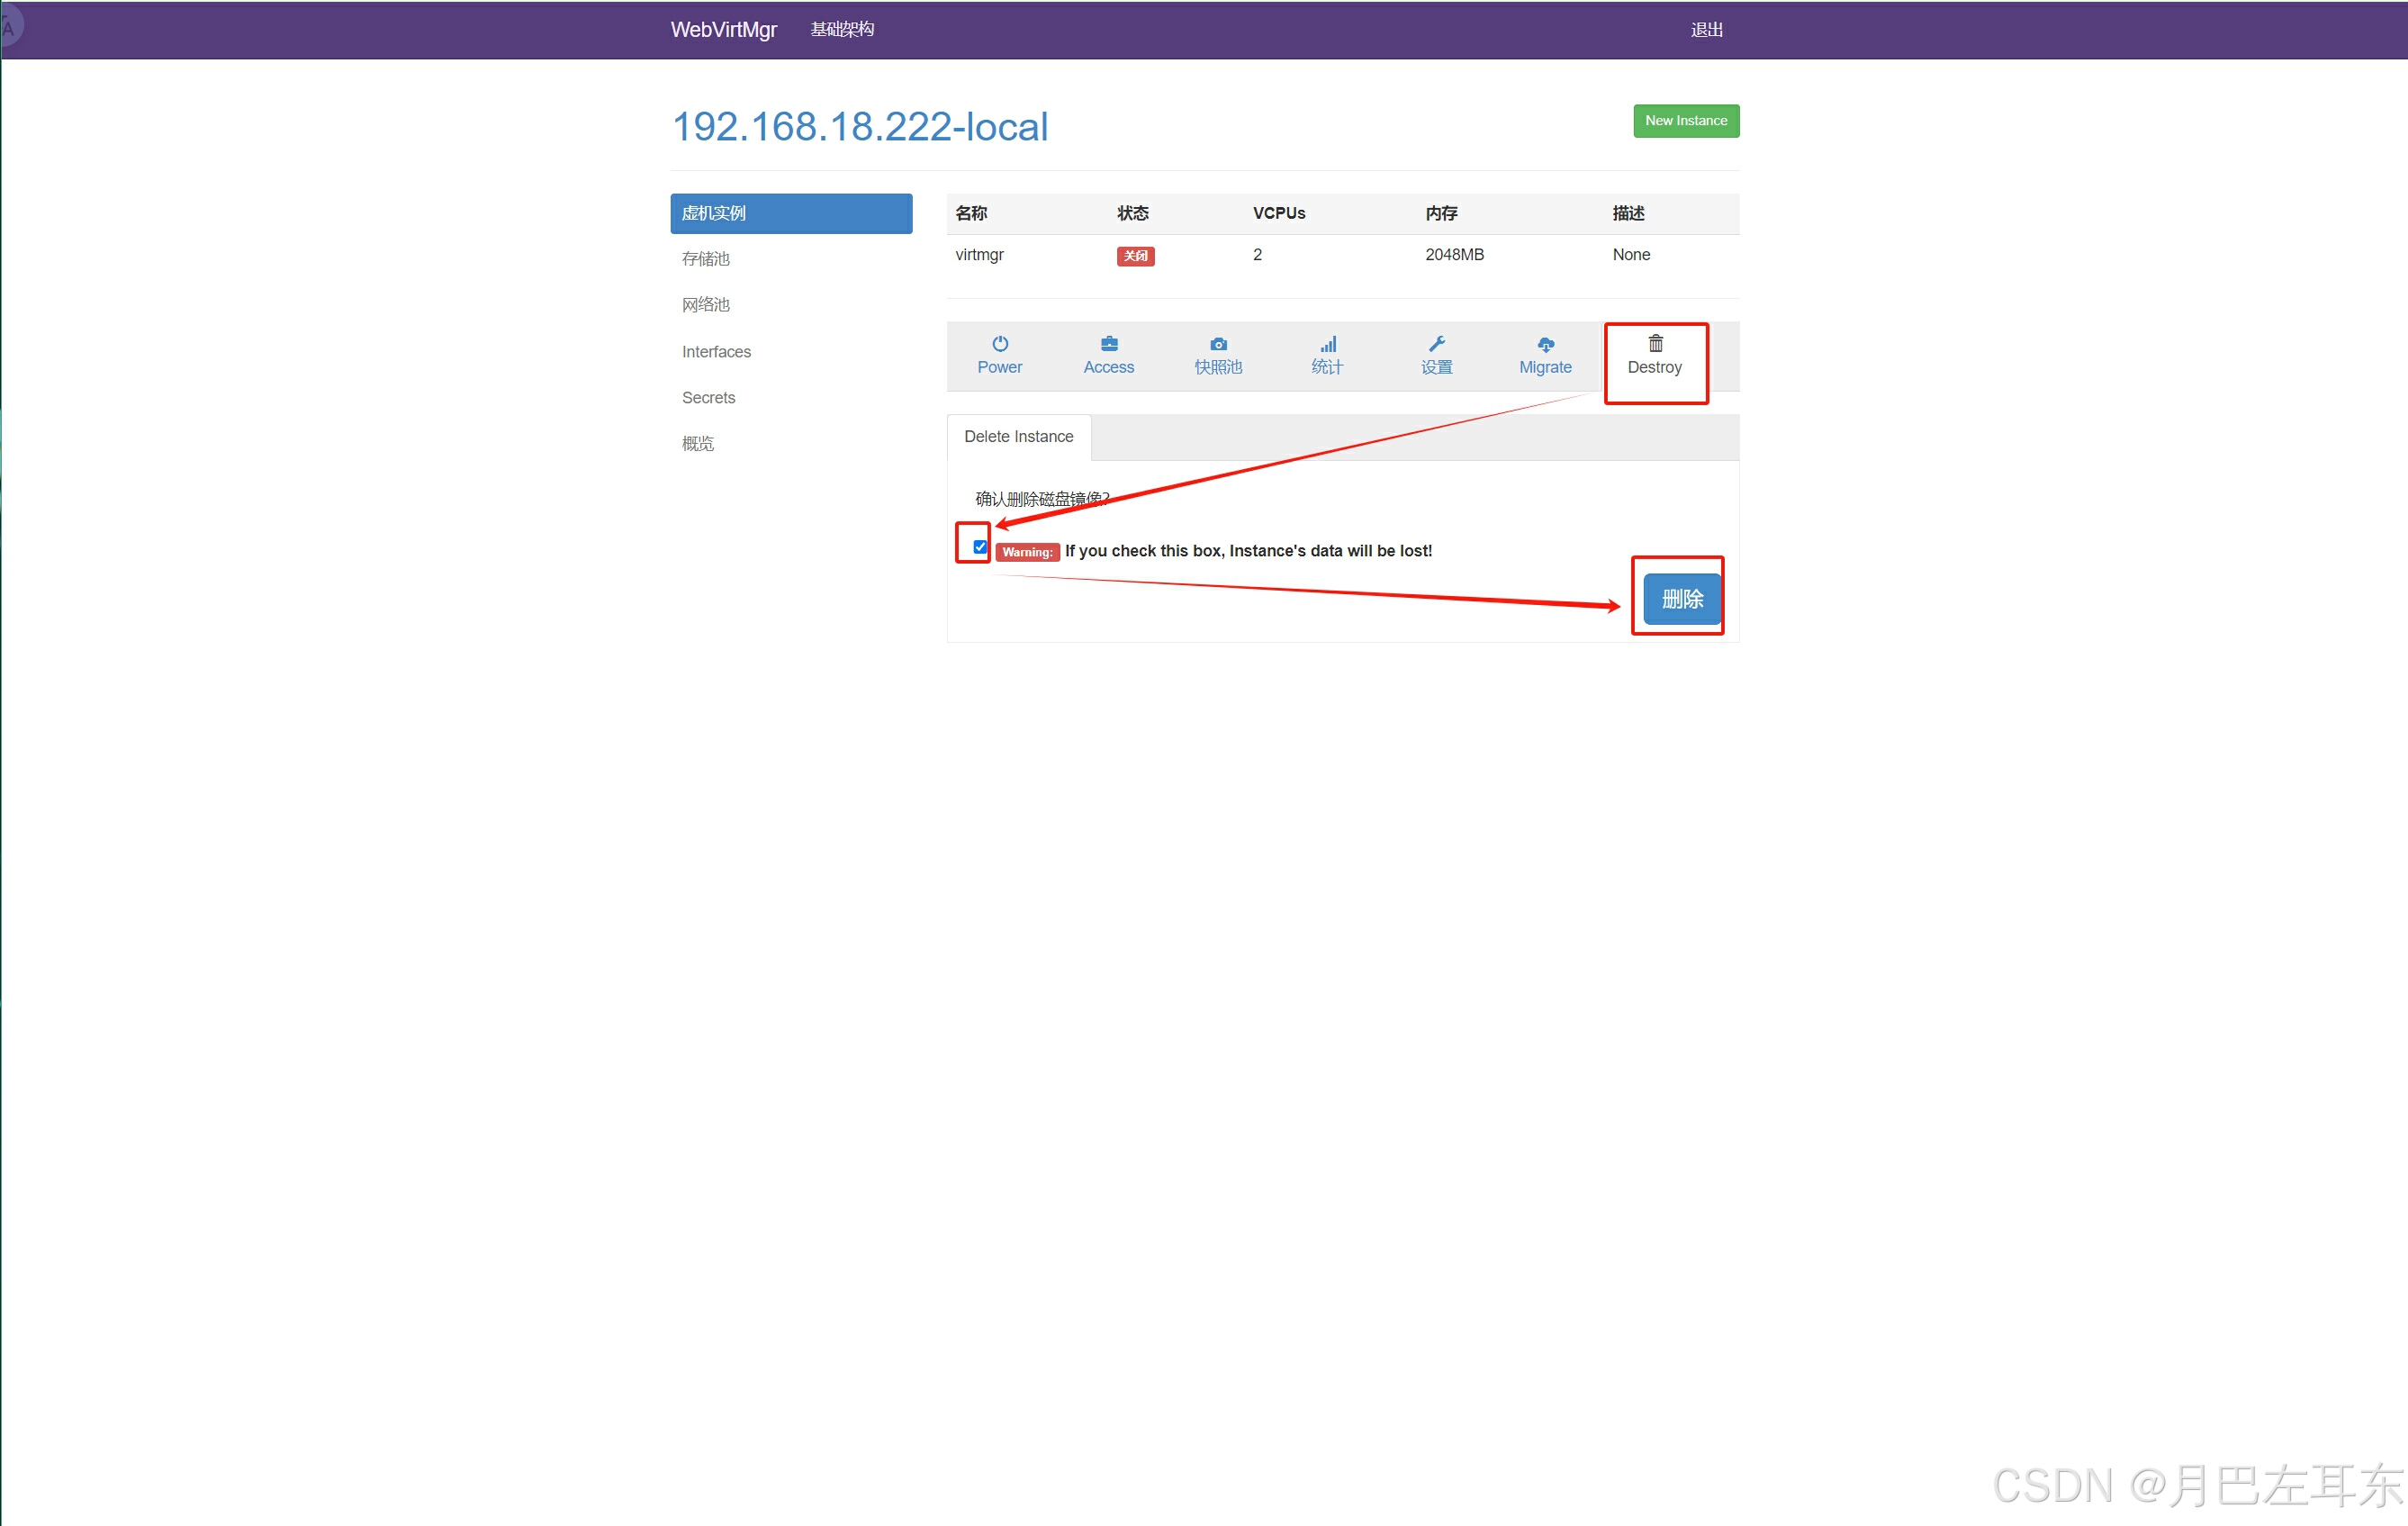
删除虚拟机
