Linux 系列教程:
VMware 安装配置 Ubuntu(最新版、超详细)FinalShell 远程连接 Linux(Ubuntu)系统Ubuntu 系统安装 VS Code 并配置 C++ 环境➡️➡️ ➡️VS Code 官方教程:Using C++ on Linux in VS Code(仅供参考,具体步骤如下)
文章目录
1. 配置 C++ 环境2. 安装 VS Code3. 项目运行4. 修改
1. 配置 C++ 环境
在 Linux(Ubuntu )中配置 C/C++ 环境非常之简单,只需按 Ctrl + Alt + T 调出终端,再按照以下步骤:
[Step 1]: 检查是否已经安装了 GCC,要验证是否正确,请输入以下命令
gcc -v
[Step 2]: 若未安装,在终端运行以下命令来更新 Ubuntu 包列表
sudo apt-get update
[Step 3]: 接下来,使用以下命令安装 GNU 编译器工具和 GDB 调试器:
sudo apt-get install build-essential gdb
[Step 4]: 再次查看各编译/调试工具是否成功安装
gcc --versiong++ --versiongdb --version
2. 安装 VS Code
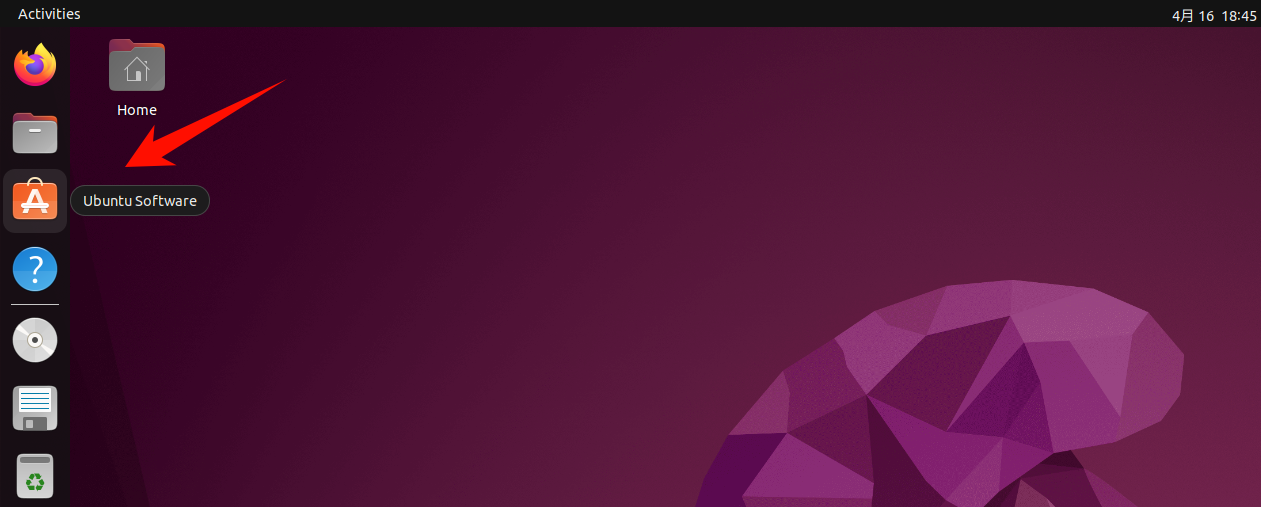
[Step 1]: 由于是在 Linux(Ubuntu)中安装,即可以直接在 Ubuntu Software 搜索,再点击 Install:


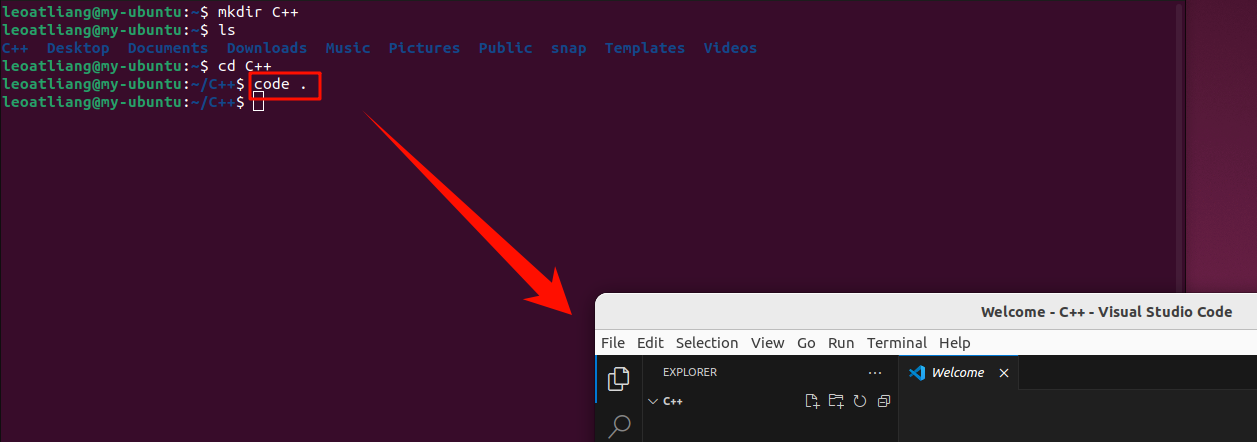
[Step 2]: 安装完成后,在终端按照如下命令所示新建项目文件夹并在 VS Code 中打开
mkdir C++ # 新建文件夹ls # 查看所有文件夹cd C++ # 进入 C++ 文件夹code . # 用 VS Code打开当前 C++ 文件夹
[Step 3]: 点击左侧扩展按钮(或快捷键 Ctrl + Shift + X),搜索栏中输入 C++ 点击查看,再点击 Install

3. 项目运行
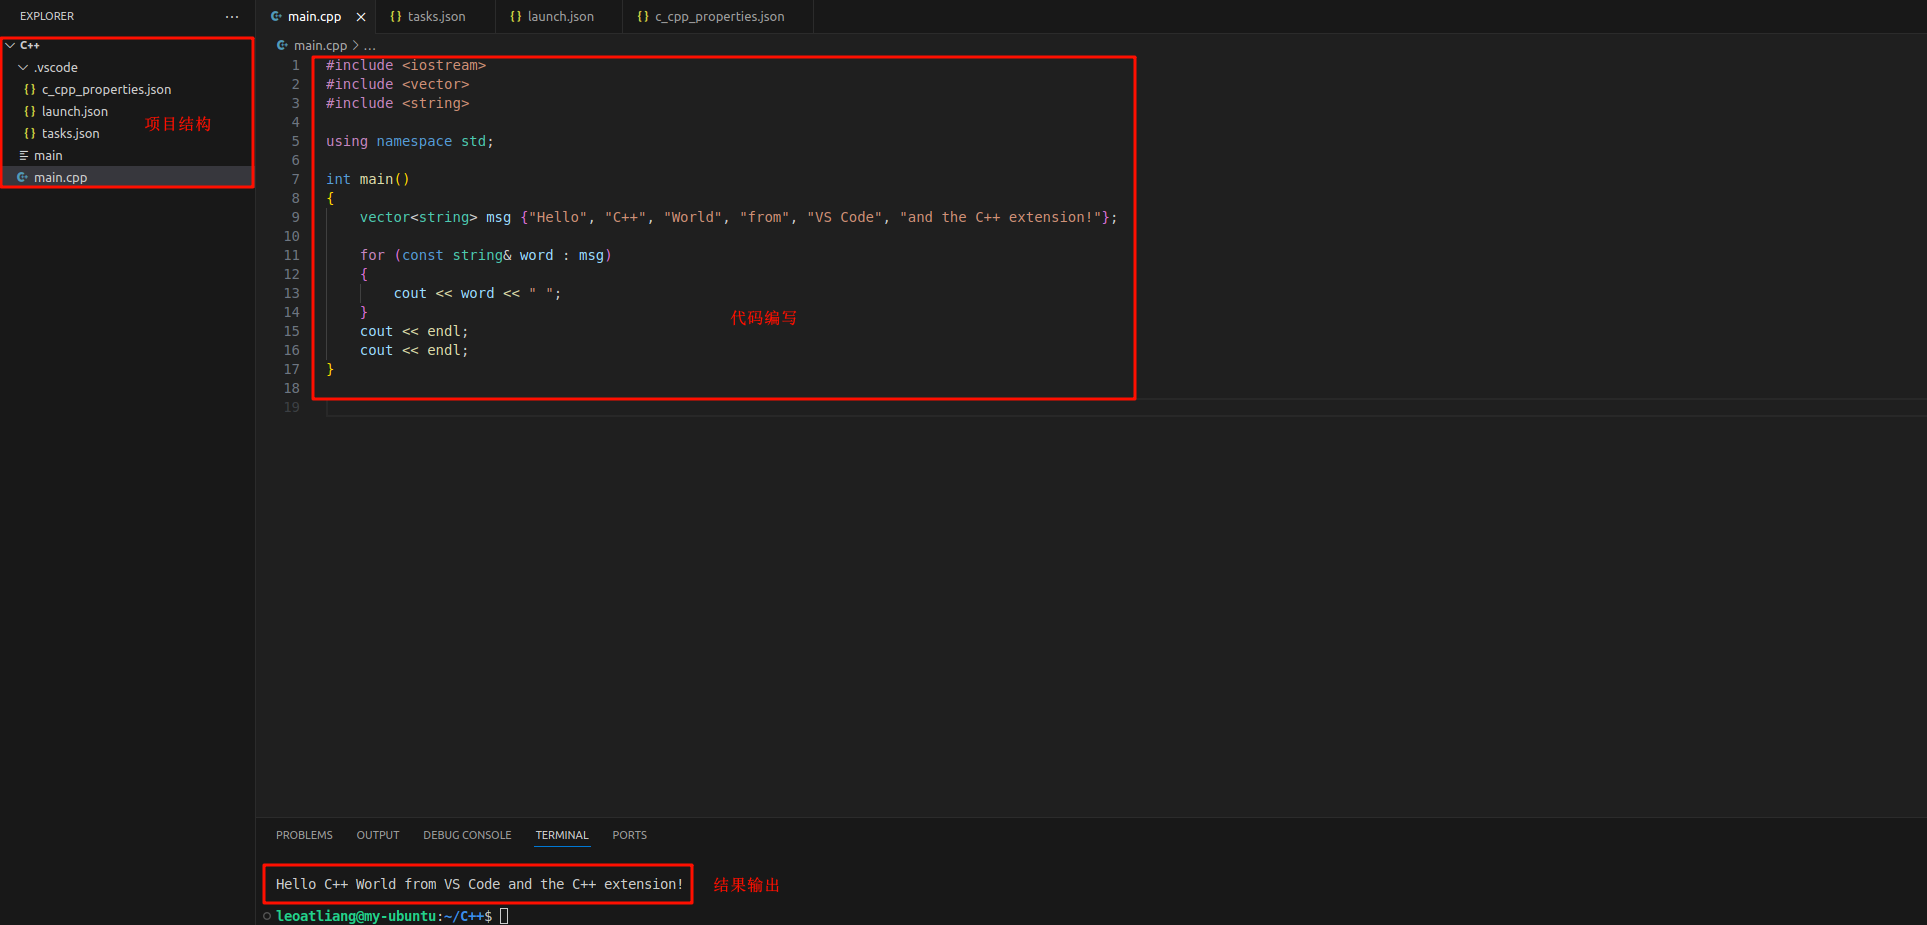
[Step 1]: 新建 main.cpp 文件,再编写如下内容
#include <iostream>#include <vector>#include <string>using namespace std;int main(){ vector<string> msg {"Hello", "C++", "World", "from", "VS Code", "and the C++ extension!"}; for (const string& word : msg) { cout << word << " "; } cout << endl; cout << endl;}[Step 2]: 点击菜单栏中的 Run 选择 Run Without Debugging(或快捷键 Ctrl + F5),再选择 g++ 生成并调试活动文件


[Step 3]: 此时,在项目左侧会自动生成 .vscode/tasks.json 文件,并输出编译结果


4. 修改
注意:
最后我还是按照了 VS Code 官方教程 Using C++ on Linux in VS Code 重新配置了一下;并参照 Ubuntu——VSCode运行C程序出现 [1] + Done “/usr/bin/gdb“ --interpreter=mi --tty=${DbgTerm} 去除了终端输出中的[1] + Done ... 1、tasks.json(编译器生成设置):
{ "version": "2.0.0", "tasks": [ { "type": "shell", "label": "C/C++: g++ build active file", "command": "/usr/bin/g++", "args": ["-g", "${file}", "-o", "${fileDirname}/${fileBasenameNoExtension}"], "options": { "cwd": "/usr/bin" }, "problemMatcher": ["$gcc"], "group": { "kind": "build", "isDefault": true }, "detail": "Task generated by Debugger." } ]}2、launch.json(调试器设置)
{ "version": "0.2.0", "configurations": [ { "name": "C/C++: g++ build and debug active file", "type": "cppdbg", "request": "launch", "program": "${fileDirname}/${fileBasenameNoExtension}", "args": [], "stopAtEntry": false, "cwd": "${workspaceFolder}", "environment": [], "externalConsole": false, "MIMode": "gdb", "miDebuggerPath": "/usr/bin/gdb", "setupCommands": [ { "description": "Enable pretty-printing for gdb", "text": "-enable-pretty-printing", "ignoreFailures": true } ], "preLaunchTask": "C/C++: g++ build active file" } ]}3、c_cpp_properties.json(编译器路径和IntelliSense设置)
{ "configurations": [ { "name": "Linux", "includePath": ["${workspaceFolder}/**"], "defines": [], "compilerPath": "/usr/bin/gcc", "cStandard": "c11", "cppStandard": "c++17", "intelliSenseMode": "clang-x64" } ], "version": 4}最后,效果图如下所示:
