2024最新Win系统下VSCode下载安装与配置C/C++教程
文章目录
2024最新Win系统下VSCode下载安装与配置C/C++教程1、下载安装VSCode2、安装运行时环境GC++GC++的环境配置 3、安装VSCode插件4、配置程序调试环境4.1确定文件存储路径4.2新建文件夹【.vscode】4.3在.vscode文件夹里新建四个配置文件c_cpp_properties.jsonlaunch.jsonsettings.jsontasks.json 5、编写测试案例运行程序调试程序解决乱码问题
1、下载安装VSCode
官网地址
https://code.visualstudio.com/赋值粘贴进入后,选择windows系统进行下载
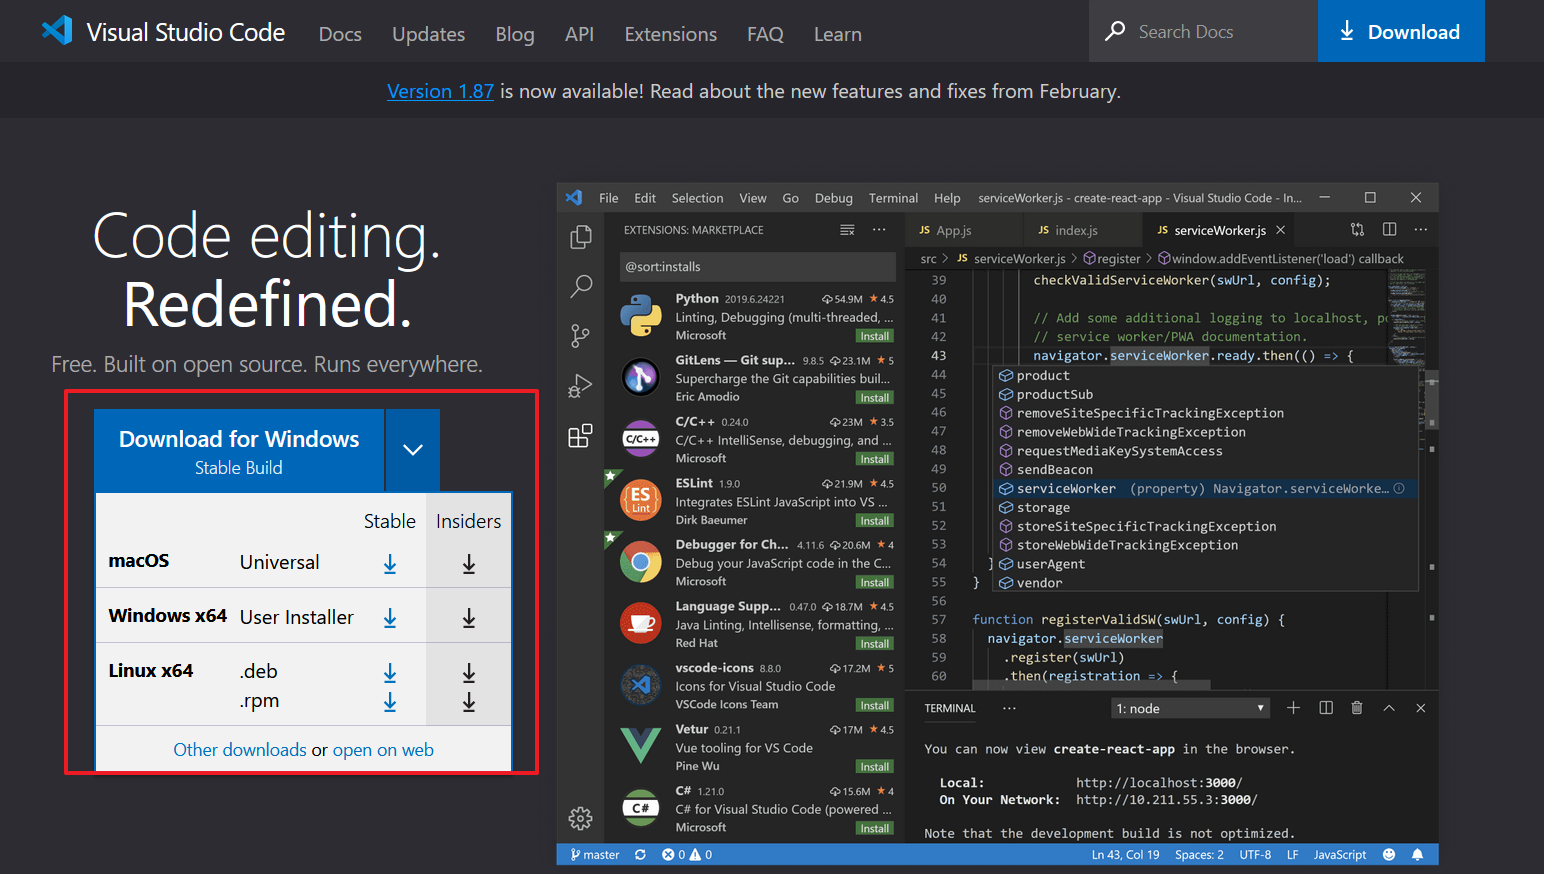
下载完毕后,点击exe文件开始进入安装环节

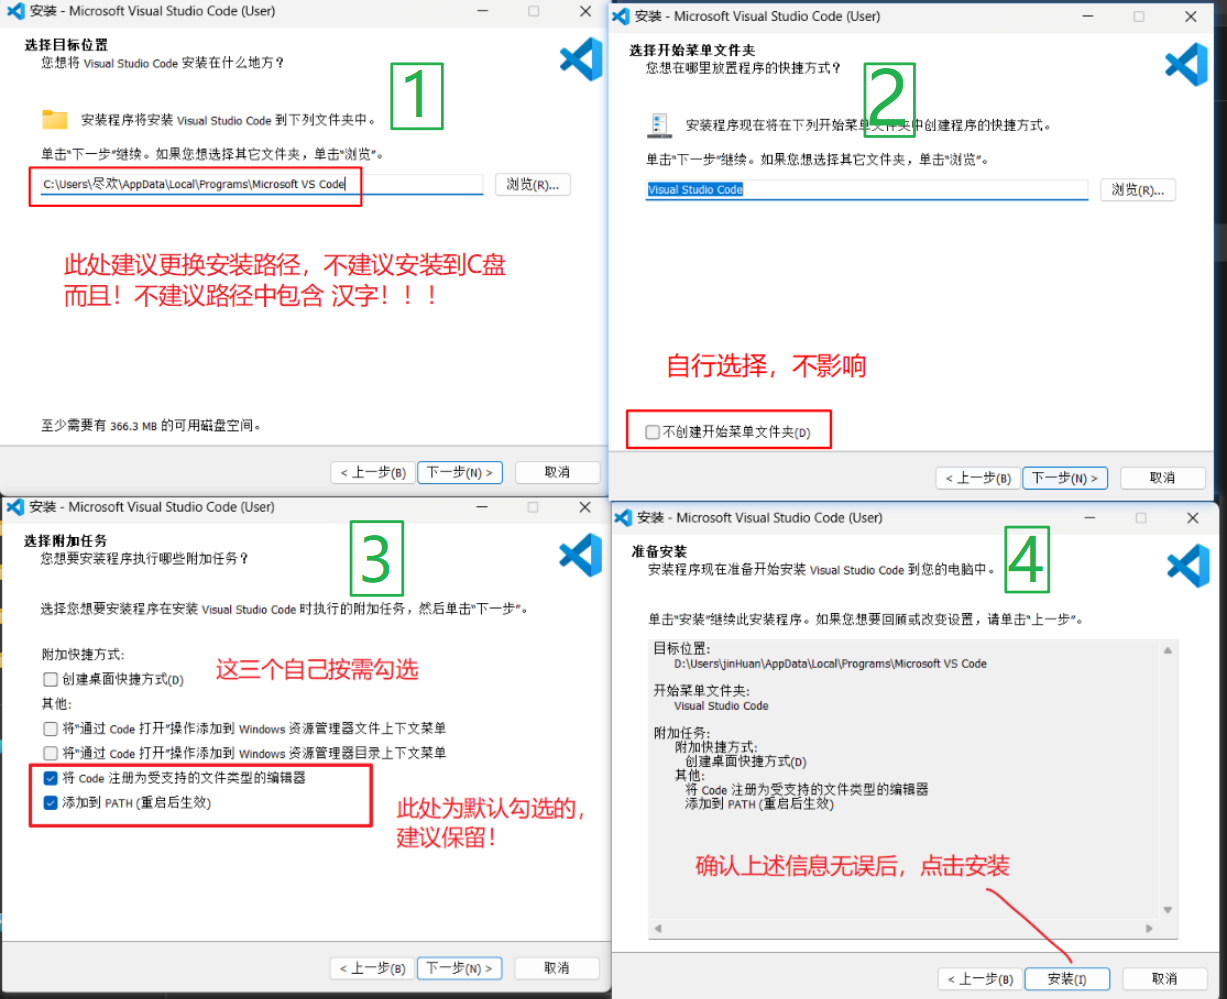
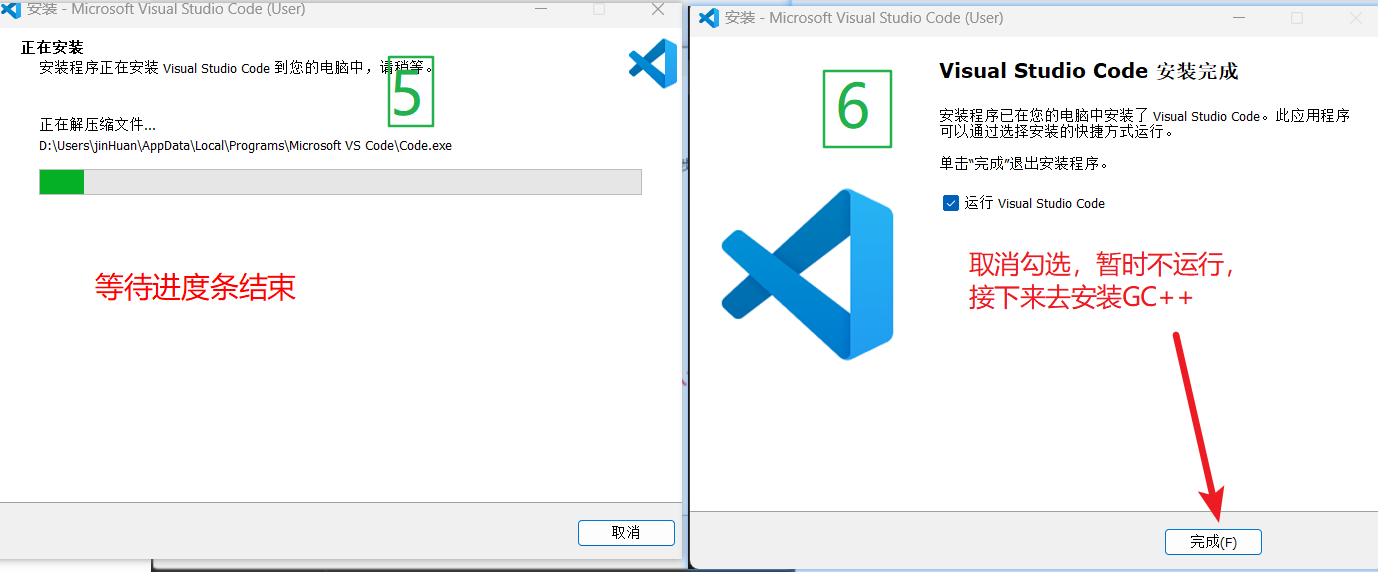
2、安装运行时环境GC++
进入官网
https://nuwen.net/mingw.html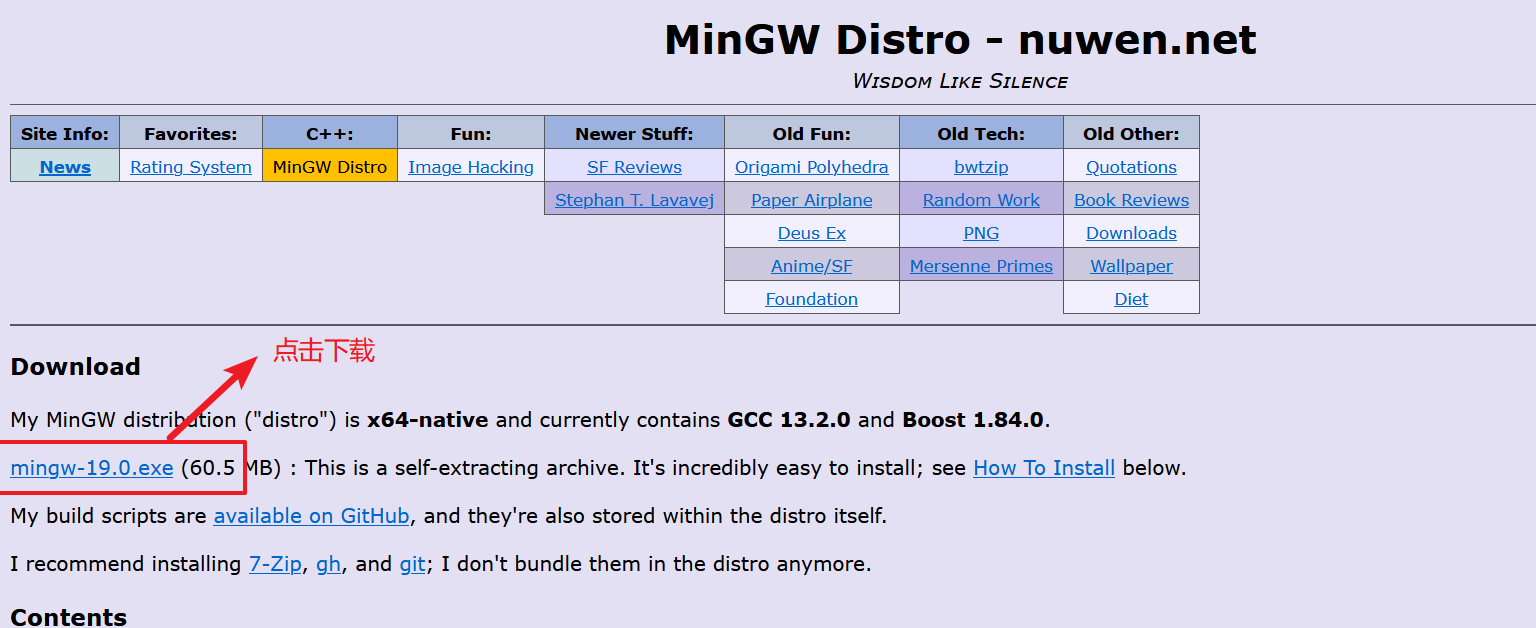
下载后双击运行开始安装

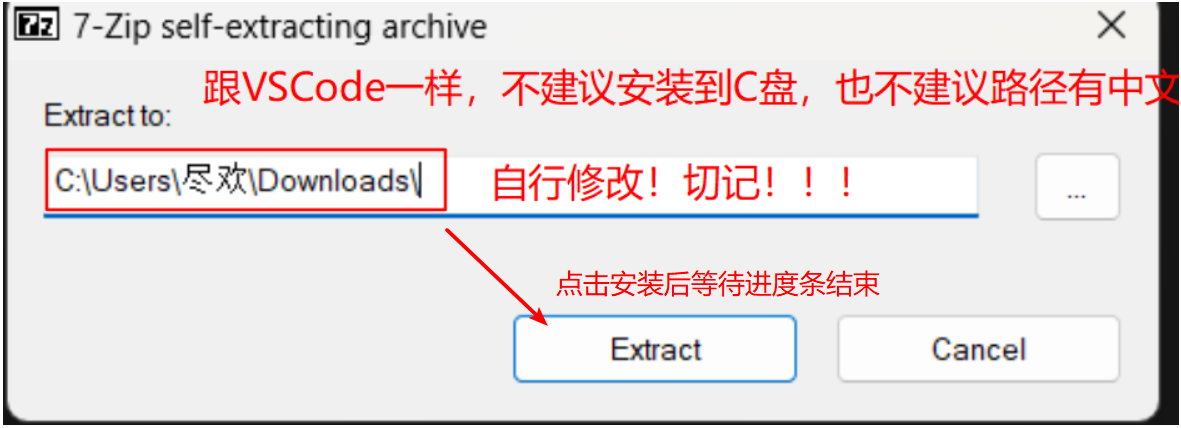
GC++的环境配置
上一步安装之后,进入到安装目录,进入bin文件夹,然后拷贝当前路径

进入系统环境变量的配置页面,可以按下win键->点击搜索框->输入环境->,或者进入设置->系统->系统信息->高级系统设置
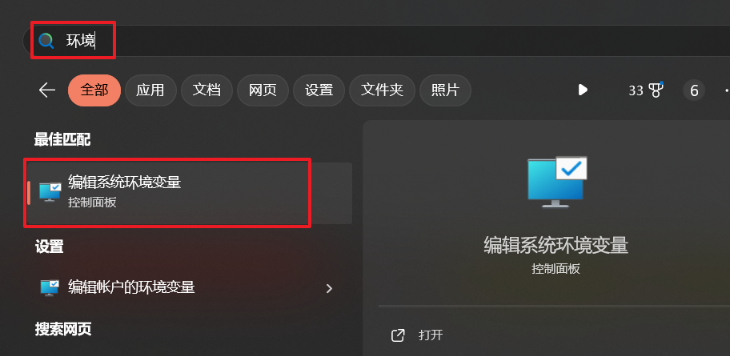
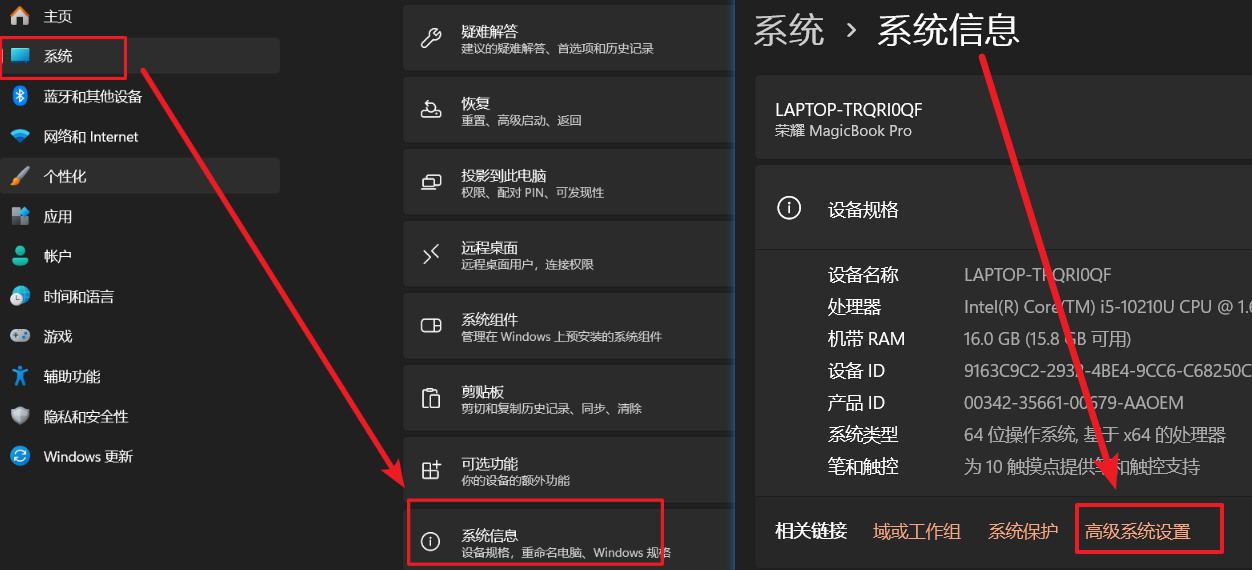
上述两种方法均可以进入当前界面,配置完毕后点击三次确定,进入下一步
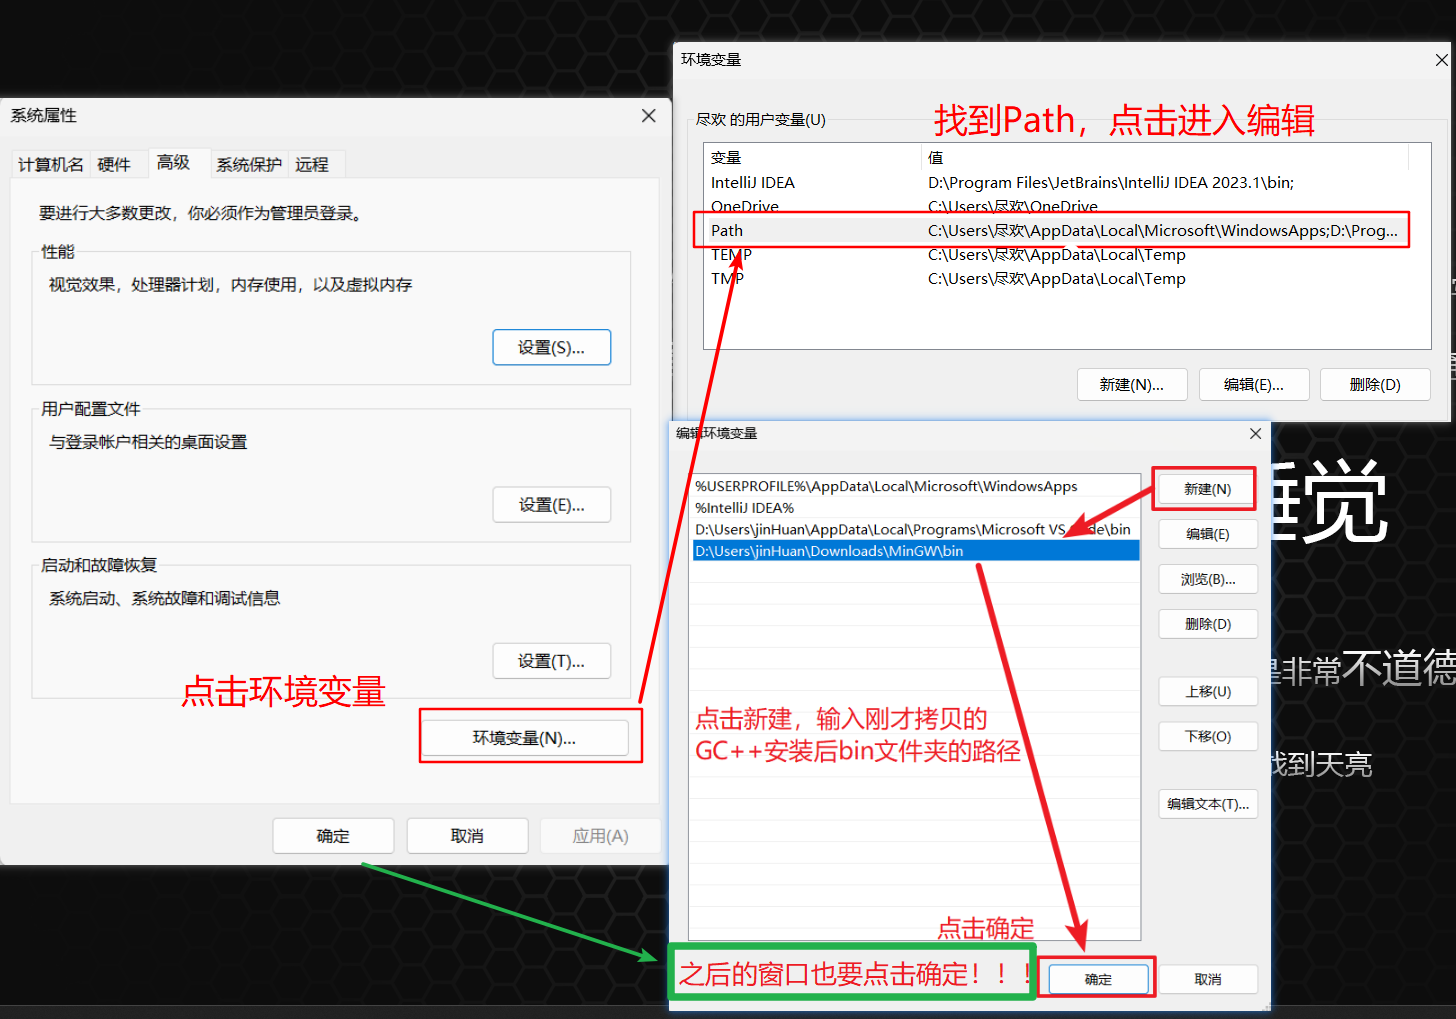
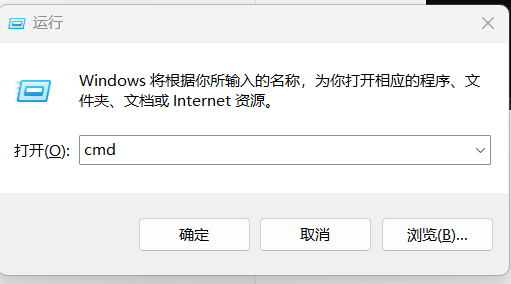
键盘按下win+R,输入cmd,点击回车,进入dos命令窗口,输入 g++ --version(++和–中间有一个空格),检验是否配置成功,如果显示当前版本号,就可以进入下一步了

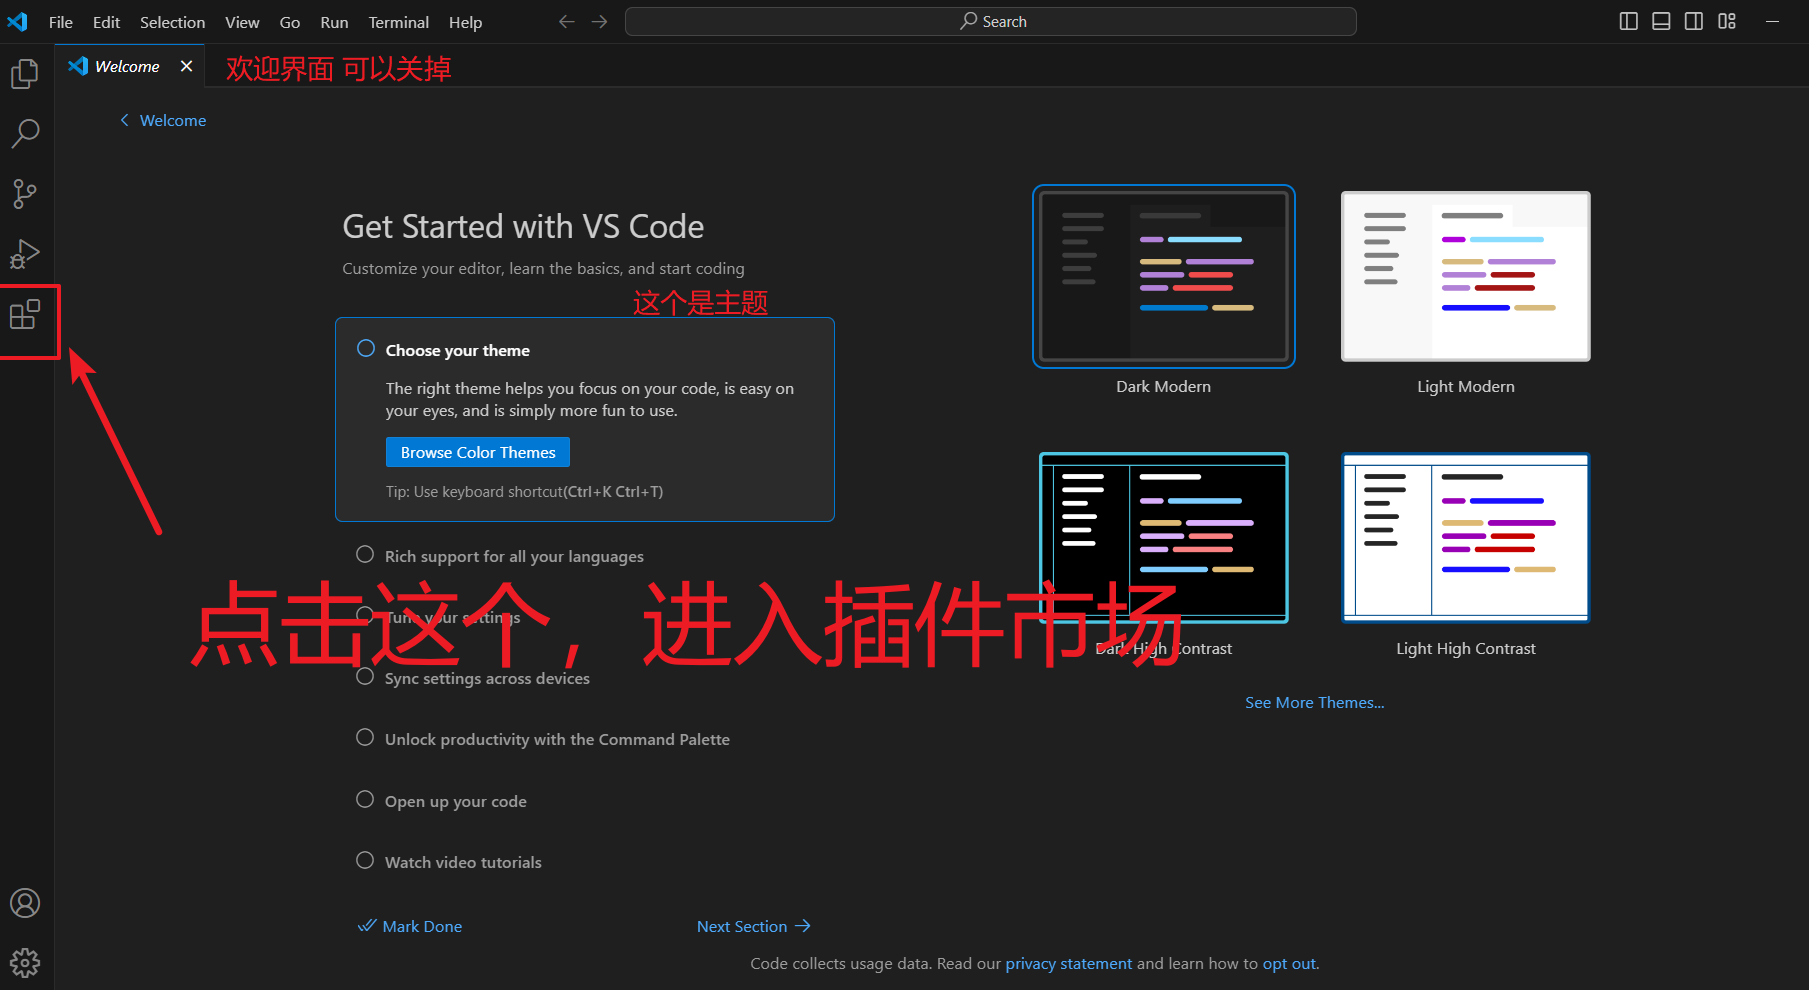
3、安装VSCode插件
打开安装好的VSCode,安装C/C++插件
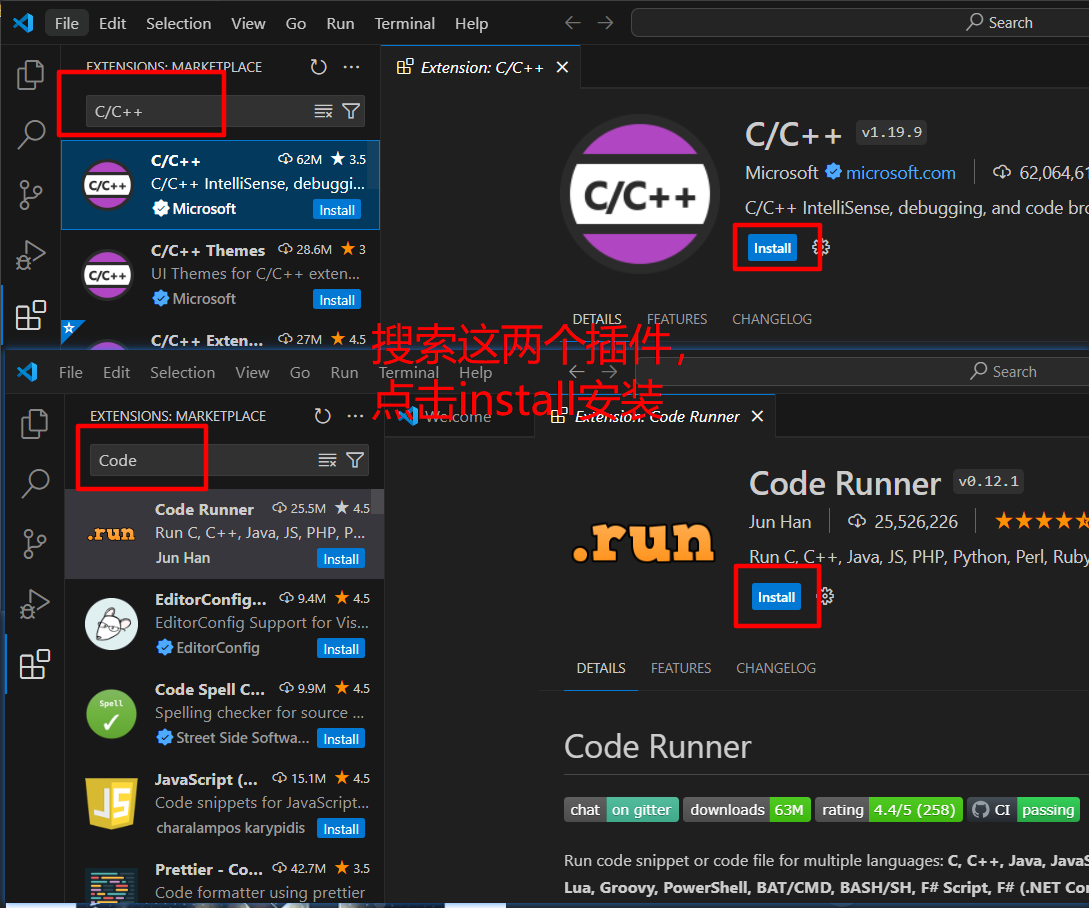
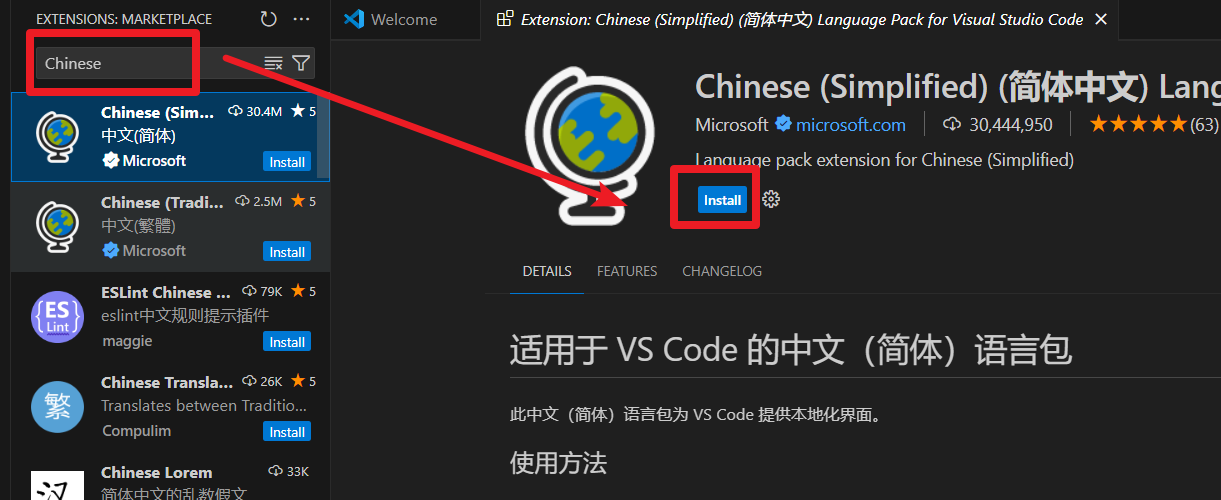
如果有需要汉化的,(不建议,新手也不建议,要敢于尝试,实在不行的选择是可以汉化),插件如下所示,点击install即可
4、配置程序调试环境
4.1确定文件存储路径
这里需要我们确定后续的程序文件存储路径,可以理解为是后续所有C/C++代码的工程根目录,即即将做的环境配置仅在此目录下生效!!!我的以下图为例。

然后在VSCode里面打开上述文件夹,点击File->Open Folder
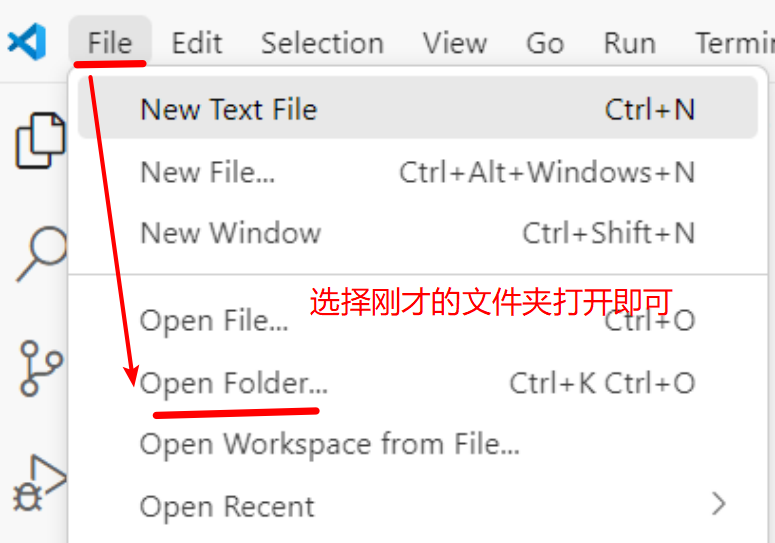
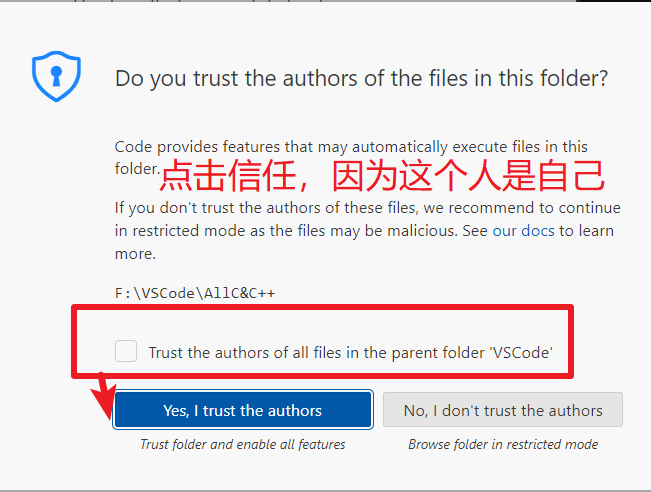
然后刚开始就长这样

4.2新建文件夹【.vscode】
此处的文件夹必须为【】括起来的这个名字

4.3在.vscode文件夹里新建四个配置文件
1、c_cpp_properties.json2、launch.json3、settings.json4、tasks.json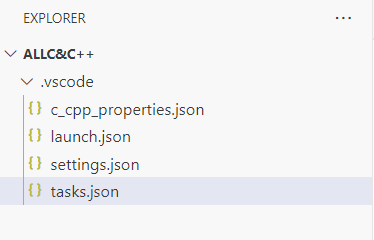
填写对应的文件信息
c_cpp_properties.json
{ "configurations": [ { "name": "Win64", "includePath": ["${workspaceFolder}/**"], "defines": ["_DEBUG", "UNICODE", "_UNICODE"], "windowsSdkVersion": "10.0.18362.0", "compilerPath": "C:/MinGW/bin/g++.exe", "cStandard": "c17", "cppStandard": "c++17", "intelliSenseMode": "gcc-x64" } ], "version": 4}launch.json
{ "version": "0.2.0", "configurations": [ { "name": "(gdb) Launch", "type": "cppdbg", "request": "launch", "program": "${fileDirname}\\${fileBasenameNoExtension}.exe", "args": [], "stopAtEntry": false, "cwd": "${workspaceRoot}", "environment": [], "externalConsole": true, "MIMode": "gdb", //这里仍然是要进行修改为自己安装的目录 "miDebuggerPath": "D:/Users/jinHuan/Downloads/MinGW/bin/gdb.exe", "preLaunchTask": "g++", "setupCommands": [ { "description": "Enable pretty-printing for gdb", "text": "-enable-pretty-printing", "ignoreFailures": true } ] } ] }settings.json
{ "files.associations": { "*.py": "python", "iostream": "cpp", "*.tcc": "cpp", "string": "cpp", "unordered_map": "cpp", "vector": "cpp", "ostream": "cpp", "new": "cpp", "typeinfo": "cpp", "deque": "cpp", "initializer_list": "cpp", "iosfwd": "cpp", "fstream": "cpp", "sstream": "cpp", "map": "c", "stdio.h": "c", "algorithm": "cpp", "atomic": "cpp", "bit": "cpp", "cctype": "cpp", "clocale": "cpp", "cmath": "cpp", "compare": "cpp", "concepts": "cpp", "cstddef": "cpp", "cstdint": "cpp", "cstdio": "cpp", "cstdlib": "cpp", "cstring": "cpp", "ctime": "cpp", "cwchar": "cpp", "exception": "cpp", "ios": "cpp", "istream": "cpp", "iterator": "cpp", "limits": "cpp", "memory": "cpp", "random": "cpp", "set": "cpp", "stack": "cpp", "stdexcept": "cpp", "streambuf": "cpp", "system_error": "cpp", "tuple": "cpp", "type_traits": "cpp", "utility": "cpp", "xfacet": "cpp", "xiosbase": "cpp", "xlocale": "cpp", "xlocinfo": "cpp", "xlocnum": "cpp", "xmemory": "cpp", "xstddef": "cpp", "xstring": "cpp", "xtr1common": "cpp", "xtree": "cpp", "xutility": "cpp", "stdlib.h": "c", "string.h": "c" }, "editor.suggest.snippetsPreventQuickSuggestions": false, "aiXcoder.showTrayIcon": true }tasks.json
{ "version": "2.0.0", "tasks": [ { "label": "g++", "command": "g++", "args": [ "-g", "${file}", "-o", "${fileDirname}/${fileBasenameNoExtension}.exe" ], "problemMatcher": { "owner": "cpp", "fileLocation": ["relative", "${workspaceRoot}"], "pattern": { "regexp": "^(.*):(\\d+):(\\d+):\\s+(warning|error):\\s+(.*)$", "file": 1, "line": 2, "column": 3, "severity": 4, "message": 5 } }, "group": { "kind": "build", "isDefault": true } } ] }分别把对应的文件拷贝修改后,切记保存Ctrl + S,后续的C/C++代码就都需要在含.vscode文件夹的【同级目录】内!!!我这新建两个同级目录C和C++,用于接下来的调试
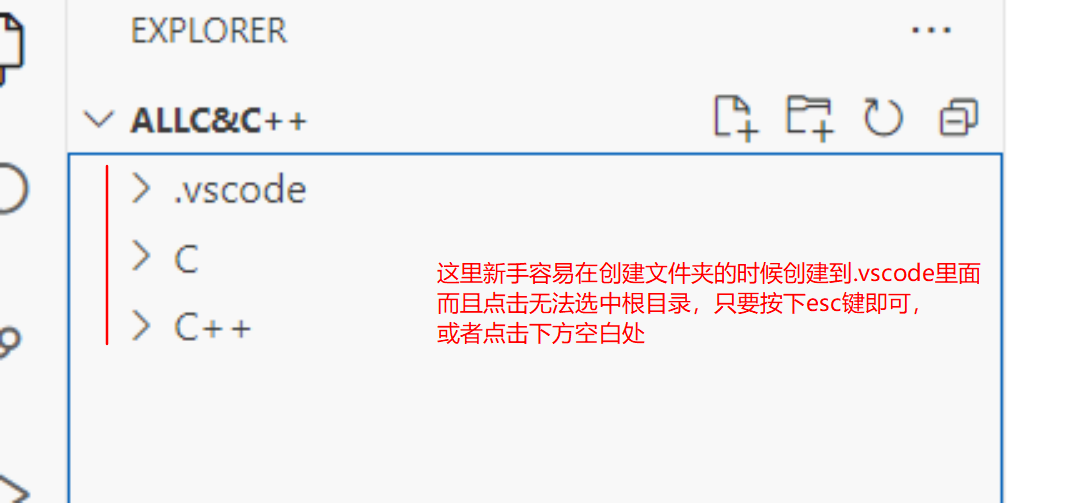
5、编写测试案例
#include <iostream>using namespace std;int main(){ int a = 100,b = 10; cout << a + b <<endl; cout << "hello" << endl; cout << "hello" << endl; cout << "hello" << endl; return 0;}运行程序

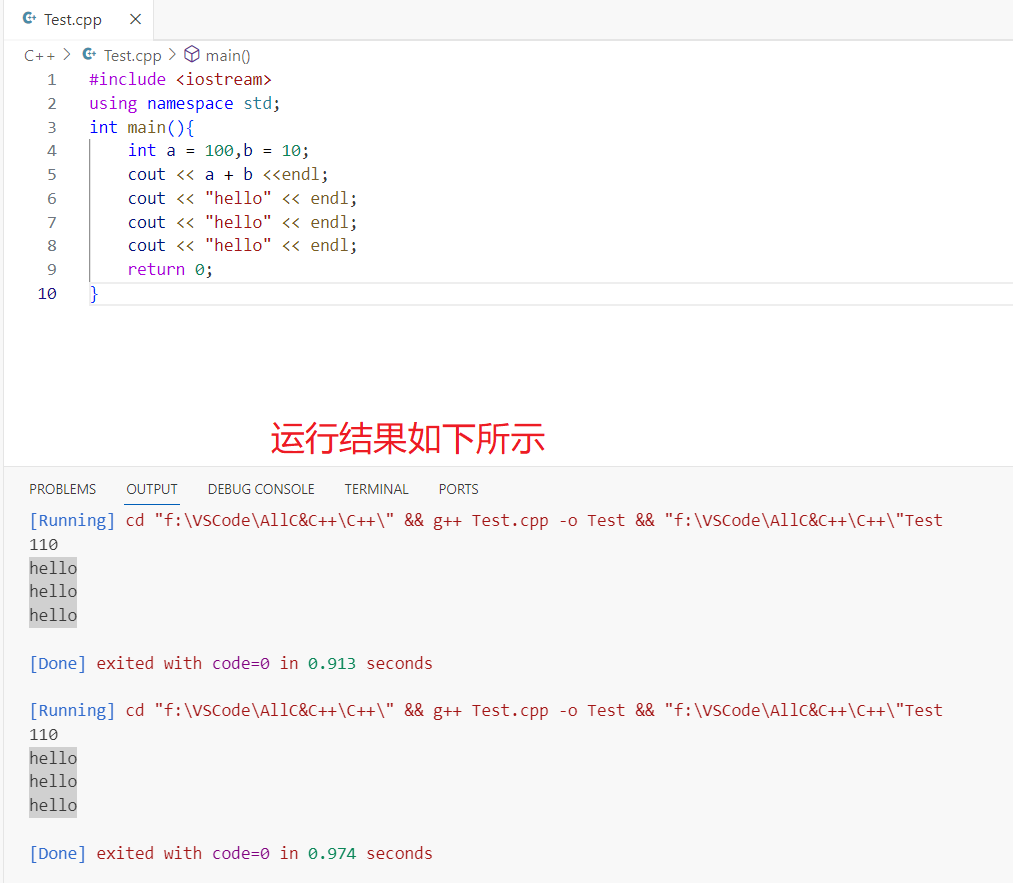
调试程序

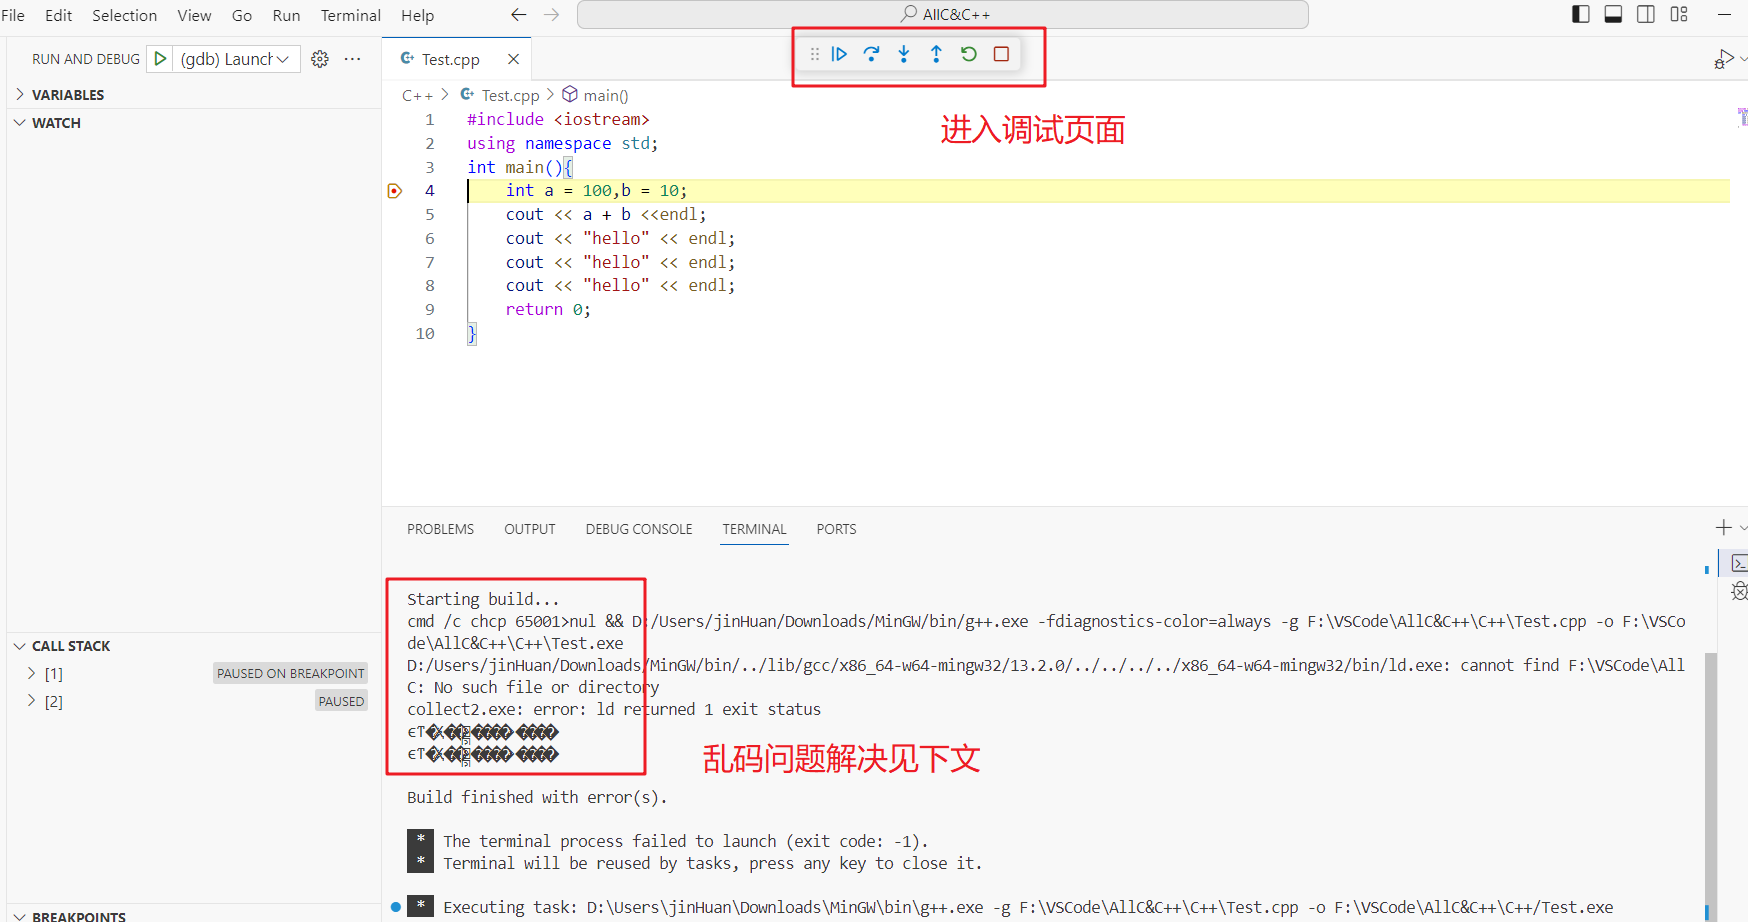
解决乱码问题
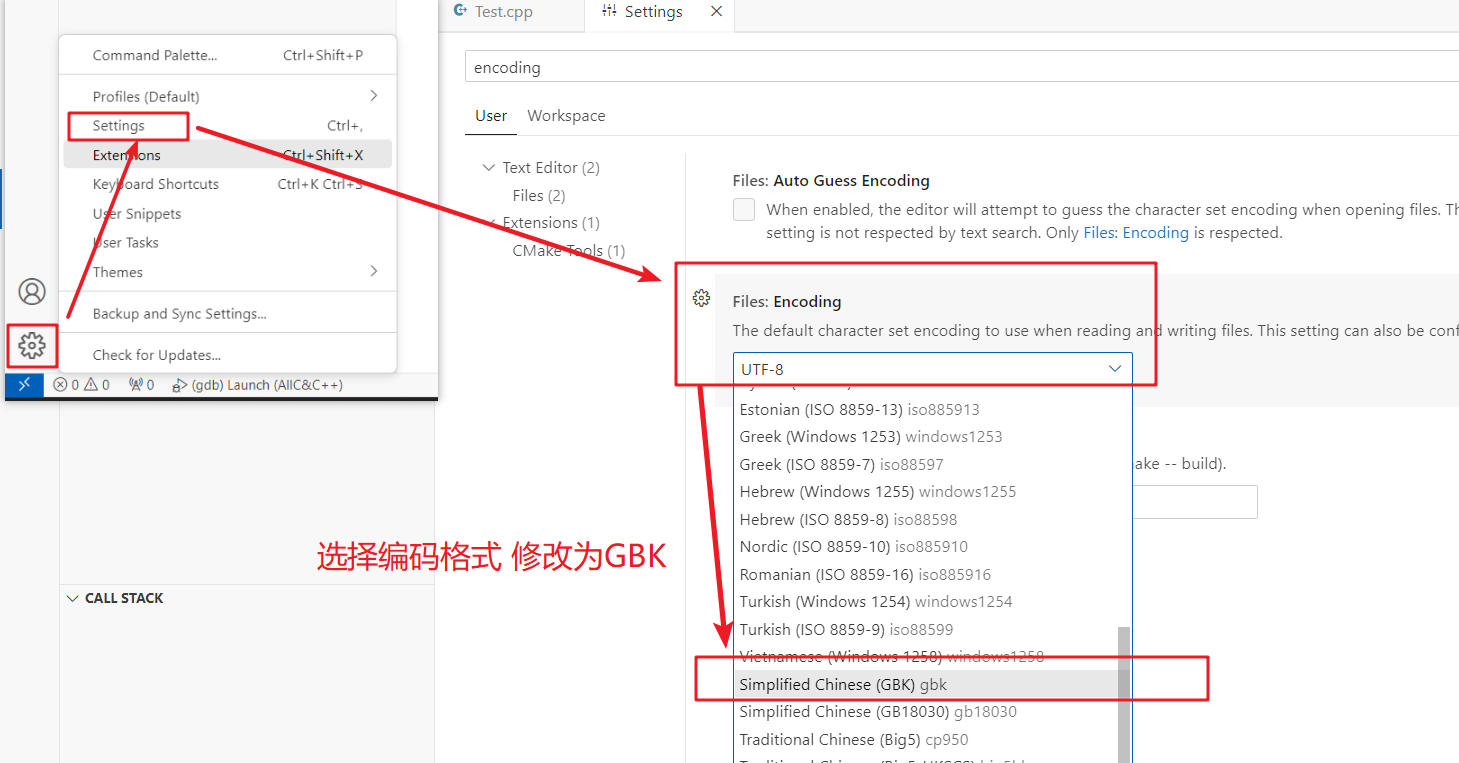
点击左下角小齿轮,进入Settings,输入encoding,将编码格式修改为GBK
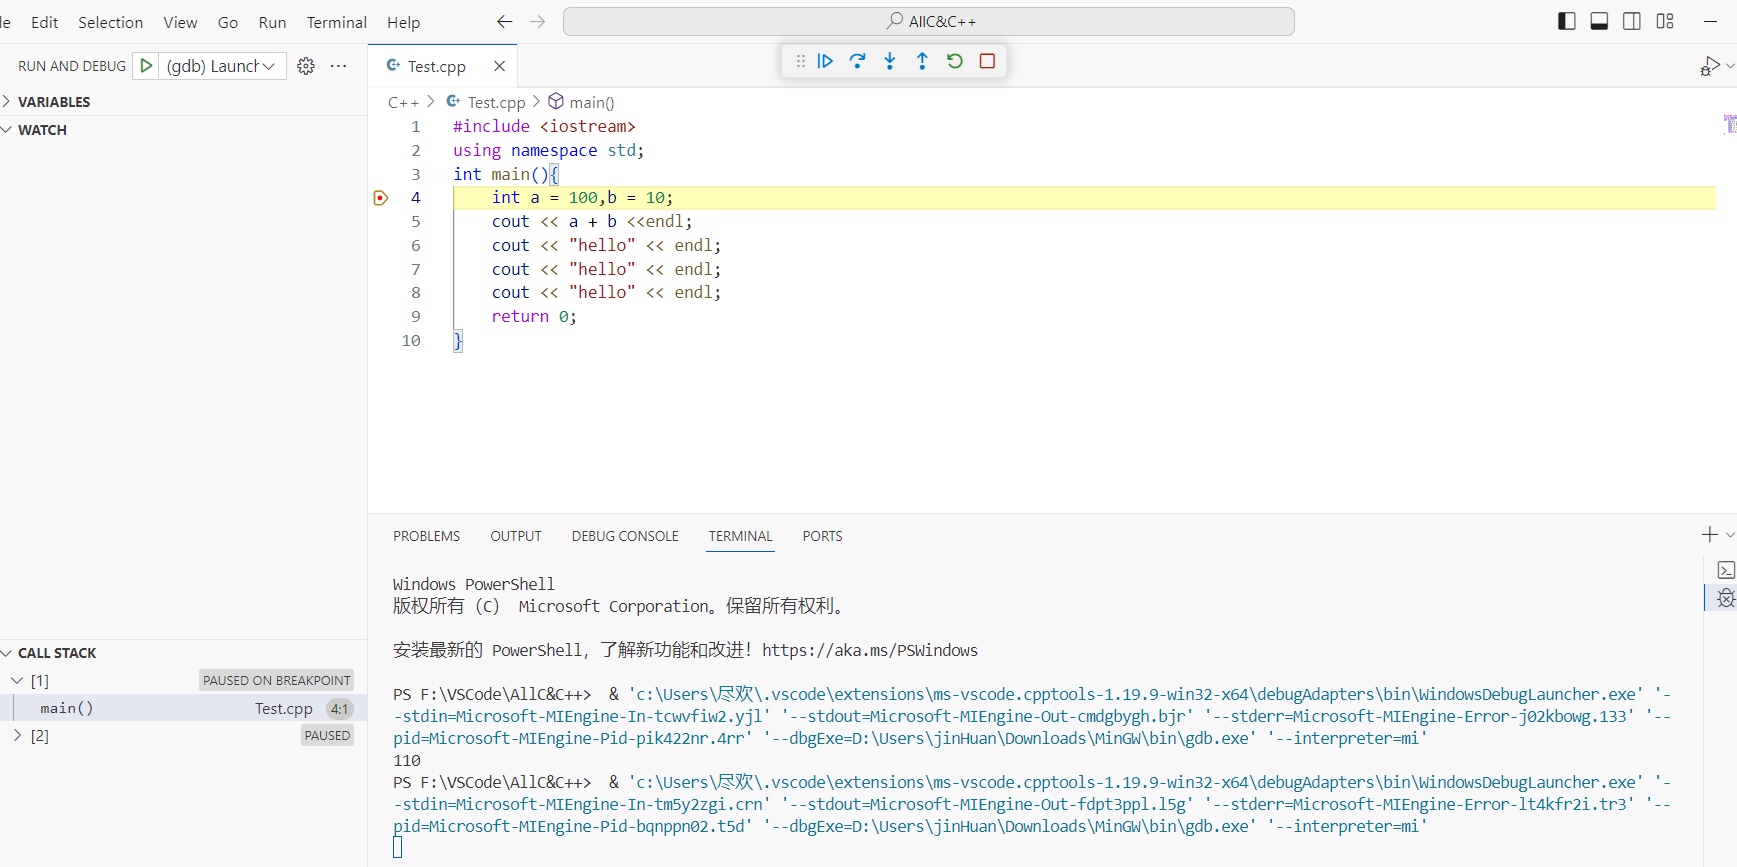
再次进入调试模式,乱码问题解决
至此结束,回顾强调本文重点:
1、安装路径坚决不能有中文2、配置GC++环境变量的时候,一定记得不要写错3、配置文件夹名字是 .vscode 千万别忘记.4、配置文件有两个要修改路径的,一定记清楚 分隔符 要不就是 \\ 要不就是/不是\5、新建不同的项目文件夹的时候,注意是和配置文件夹.vscode同级别好了,收工,遇到什么问题,欢迎私信,看到就回
开始很容易,坚持很牛皮,加油