一、实验拓扑图
二、实验过程
1、配置桥接真机的云(使用虚拟网卡的仅主机模式的网卡)

2、配置防火墙
1)配置管理接口,这里实现web界面登入
[USG6000V1]undo info-center enable
[USG6000V1]int g0/0/0
[USG6000V1-GigabitEthernet0/0/0]service-manage enable
[USG6000V1-GigabitEthernet0/0/0]service-manage http permit
[USG6000V1-GigabitEthernet0/0/0]service-manage https permit
[USG6000V1-GigabitEthernet0/0/0]dis th
2023-08-19 01:15:43.550
#
interface GigabitEthernet0/0/0
undo shutdown
ip binding vpn-instance default
ip address 192.168.0.1 255.255.255.0 //这一条是防火墙的管理接口的默认ip,我们改成和云桥接的ip同一网段的ip
alias GE0/METH
service-manage http permit
service-manage https permit
#
return
[USG6000V1-GigabitEthernet0/0/0]undo ip add 192.168.0.1 24//先删
[USG6000V1-GigabitEthernet0/0/0]ip add 192.168.1.2 24//再改
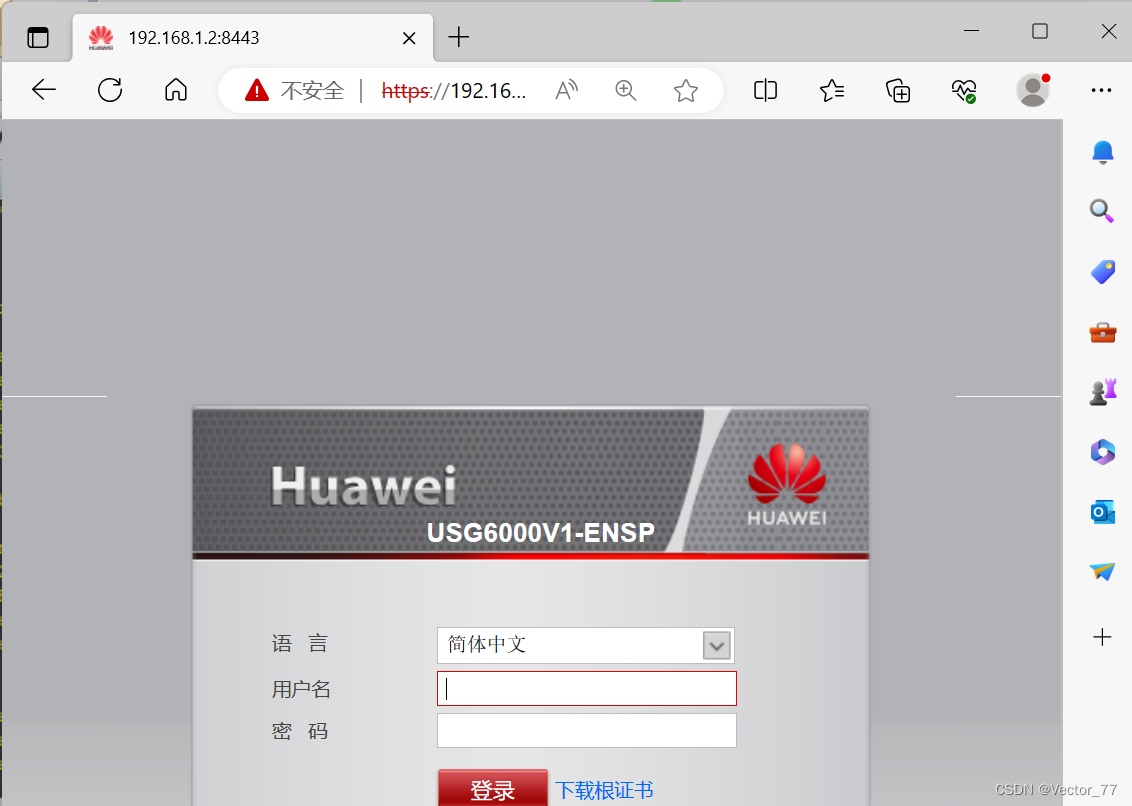
进入网址登入:
2)配置防火墙ip并加入相应区域
[USG6000V1]int g1/0/1
[USG6000V1-GigabitEthernet1/0/1]ip add 192.168.3.2 24
[USG6000V1-GigabitEthernet1/0/1]int g1/0/0
[USG6000V1-GigabitEthernet1/0/0]ip add 192.168.2.2 24
加入区域
[USG6000V1]firewall zone trust
[USG6000V1-zone-trust]add interface g1/0/1
[USG6000V1-zone-trust]firewall zone untrust
[USG6000V1-zone-untrust]add int g1/0/0
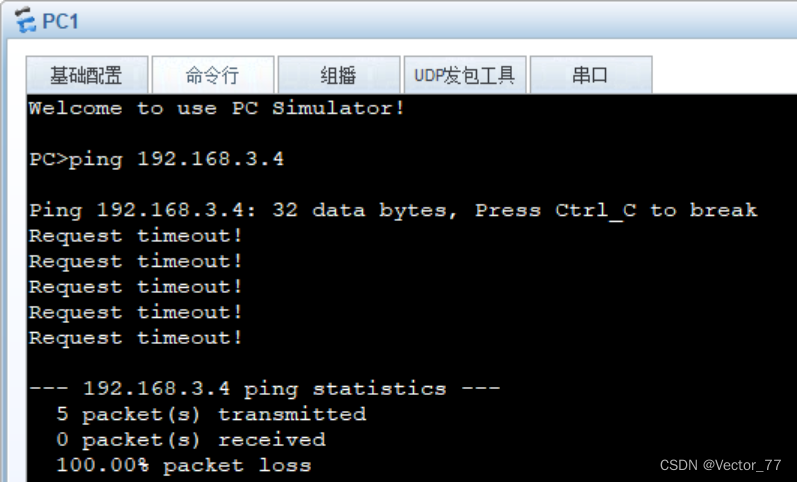
此时PC1去ping PC2失败
3)配置安全策略:很粗略的一个策略
[USG6000V1]security-policy
[USG6000V1-policy-security]rule name tru_to_untru
[USG6000V1-policy-security-rule-tru_to_untru]source-zone trust
[USG6000V1-policy-security-rule-tru_to_untru]des
[USG6000V1-policy-security-rule-tru_to_untru]destination-zone untrust
[USG6000V1-policy-security-rule-tru_to_untru]action permit
此时PC2去ping PC1
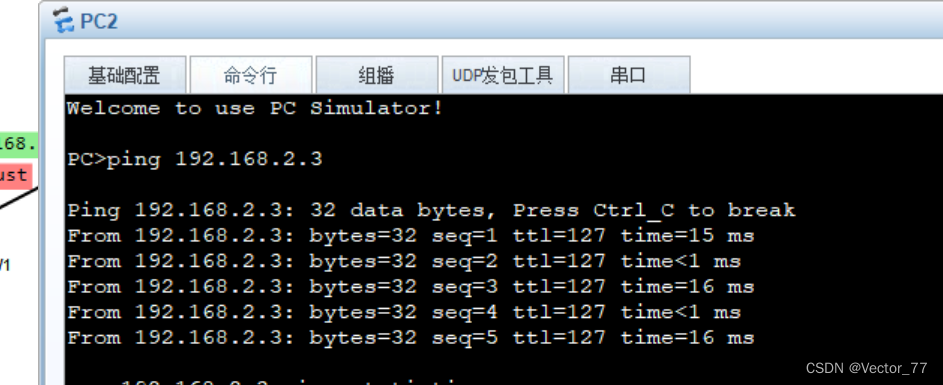
注:因为会话机制,所以192.168.2.3的流量可以回来
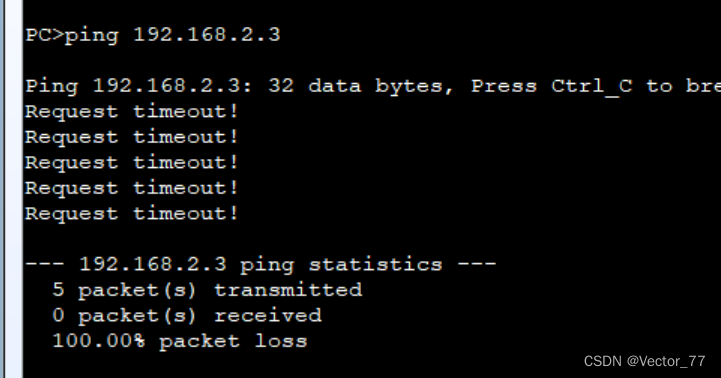
设置策略的目的网段为不存在的网段
[USG6000V1-policy-security-rule-tru_to_untru]source-address 192.168.3.0 24
[USG6000V1-policy-security-rule-tru_to_untru]des
[USG6000V1-policy-security-rule-tru_to_untru]destination-zone
[USG6000V1-policy-security-rule-tru_to_untru]destination-address 192.168.5.0 24
此时去ping,失败
4)更细致的安全策略配置:安全策略配置具体到某个ip:有一个参数是ip范围
Untrust区域目前只有一台192.168.2.3的主机,我们配置安全策略使得ip范围在2.4-2.5
[USG6000V1-policy-security-rule-tru_to_untru]destination-address range 192.168.2.4 192.168.2.5//表示从2.4-2.5这个网段允许
[USG6000V1-policy-security-rule-tru_to_untru]dis th
2023-08-19 02:41:39.280
#
rule name tru_to_untru
source-zone trust
destination-zone untrust
source-address 192.168.3.0 mask 255.255.255.0
destination-address range 192.168.2.4 192.168.2.5
action permit
此时去ping规则没有的ip地址192.168.2.3
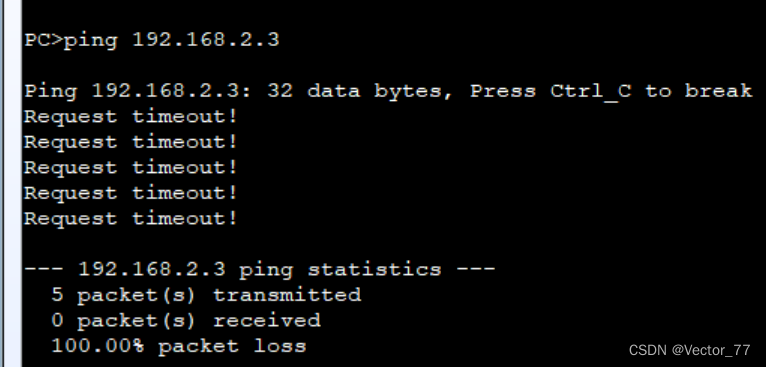
改变策略使得该ip可以通过,此时我们直接改网段的策略,使得2.0网段都可以通过
[USG6000V1-policy-security-rule-tru_to_untru]undo destination-address range 192.168.2.4 192.168.2.5
[USG6000V1-policy-security-rule-tru_to_untru]destination-address 192.168.2.0 24
此时去ping

5)查看会话表的命令:display firewall session table
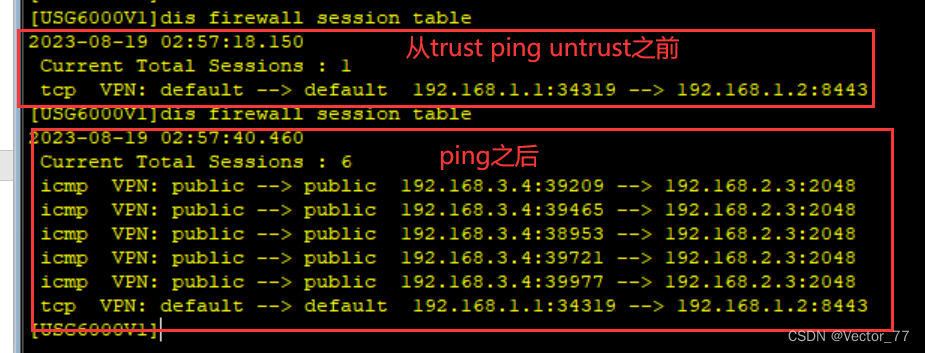
6)配置NAT:这里先配置NAPT
配置NAPT地址池
[USG6000V1]nat address-group nat1
[USG6000V1-address-group-nat1]section 0 1.1.1.1 1.1.1.1
[USG6000V1-address-group-nat1]mode pat//no-pat方法为:mode no-pat local
[USG6000V1-address-group-nat1]q
配置nat策略
[USG6000V1]nat-policy
[USG6000V1-policy-nat]rule name nn
[USG6000V1-policy-nat-rule-nn]source-address 192.168.3.0 24
[USG6000V1-policy-nat-rule-nn]source-zone trust
[USG6000V1-policy-nat-rule-nn]destination-zone untrust
[USG6000V1-policy-nat-rule-nn]action source-nat address-group nat1
此时让PC1去ping PC2可以看到转换后的地址
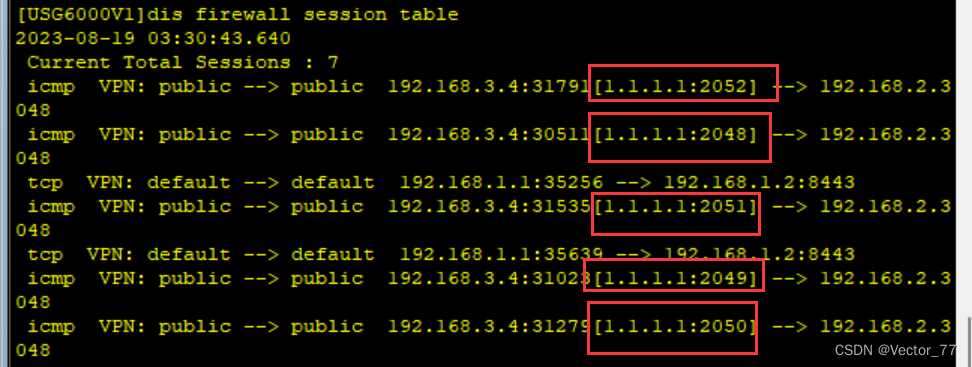
7)配置Easyip:要删除之前配的NAPT(undo命令)
[USG6000V1]nat-policy
[USG6000V1-policy-nat]rule name n2
[USG6000V1-policy-nat-rule-n2]source-zone trust
[USG6000V1-policy-nat-rule-n2]destination-zone untrust
[USG6000V1-policy-nat-rule-n2]source-address 192.168.3.0 24
[USG6000V1-policy-nat-rule-n2]action source-nat easy-ip
[USG6000V1-policy-nat-rule-n2]q
此时PC2去ping PC1,查看会话表
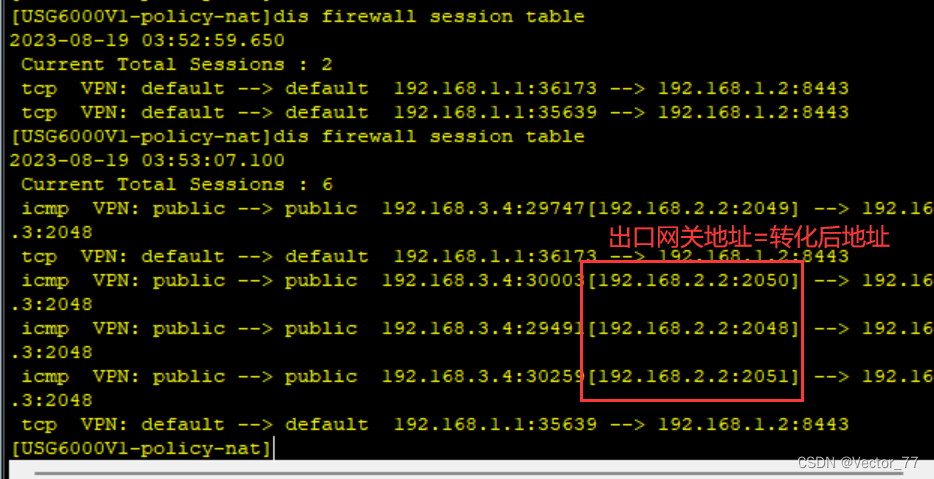
三、问题记录
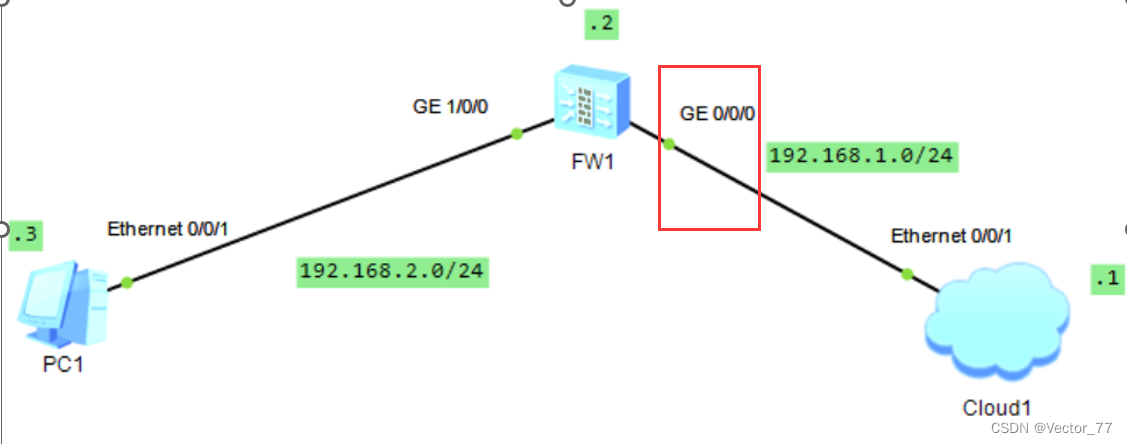
当使用eNSP的云去桥接真机时,读不到虚拟网卡,而真机上又存在虚拟机的适配器时->重启电脑就可以读到了如何连接到管理接口:桥接的真机云需要直连管理接口!!错误的拓扑图

配置0/0/0为管理接口,用cloud1去桥接真机,配置web应用口,但是又没有直连0/0/0口
正确的图
3.在设计拓扑图的时候,管理口思考了很久加入哪个区域,但是后来想可以不加入区域,任何人都访问不到这个区域来,没有安全策略默认拒绝
